Hey there! Are you ready to dive into the fascinating world of introductions? Whether it’s a first meeting with someone new, the opening lines of a movie, or the beginning of a blog post, introductions play a crucial role in grabbing our attention and setting the stage for what’s to come. In fact, they say you never get a second chance to make a first impression, and that applies to all aspects of life. Think about it – when you meet someone for the first time, the way they introduce themselves can shape your perception of them.
A warm and friendly greeting instantly puts you at ease, while a cold and distant one can leave you feeling uneasy. It’s all about creating that initial connection, establishing a rapport, and piquing curiosity. The same goes for blog introductions.
Just like the opening lines of a book, they need to captivate readers and make them want to continue reading. After all, with so much content available at our fingertips, why should someone spend their precious time on your blog? That’s where a well-crafted introduction comes in – it serves as a virtual handshake, inviting readers in and promising them a worthwhile journey. But how can you create an introduction that stands out from the crowd? Well, that’s where the art of storytelling comes into play.
Just like a master storyteller, you need to craft an engaging narrative that instantly grabs attention and leaves readers wanting more. Perhaps you can start with a compelling anecdote, a thought-provoking question, or a bold statement. Whatever approach you choose, remember to make it personal, relatable, and above all, interesting.
So, are you ready to master the art of introductions? Get ready to learn the secrets of crafting captivating opening lines that will keep your readers hooked from start to finish. Whether you’re new to blogging or a seasoned pro, there’s always room to level up your introduction game. So, grab a pen and paper, and let’s dive in!
Table of Contents
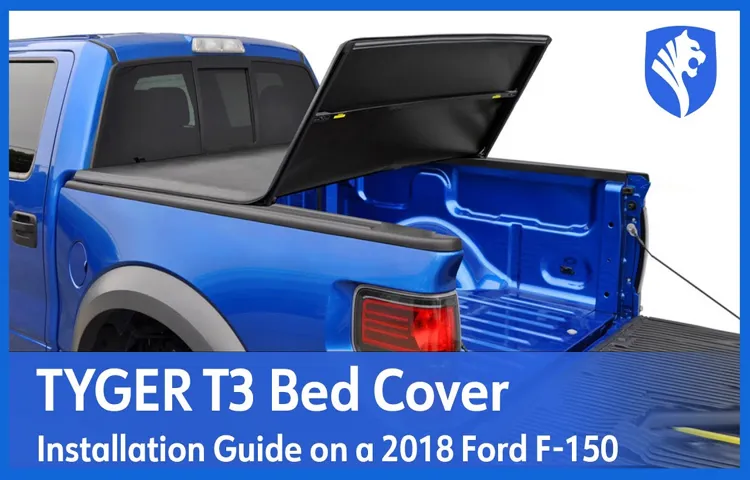
What is the Tyger T3 Tonneau Cover?
Installing the Tyger T3 tonneau cover is a relatively simple process that can be done in just a few steps. First, you will need to gather all of the necessary tools, which typically include a wrench, a socket set, and a drill. Once you have everything you need, you can begin the installation process.
Start by placing the tonneau cover onto the truck bed, making sure that it is aligned properly. Then, use the provided clamps to secure the cover to the bed rails. Next, attach the side rails to the cover using the included bolts and washers.
Finally, use the drill to attach the front and rear clamps to the cover and bed rails. Once everything is securely in place, you can adjust the tension of the cover using the provided tension adjusters. With the Tyger T3 tonneau cover properly installed, you can enjoy the benefits of added security and protection for your truck bed.
Tools and Materials Needed
If you’re looking to install the Tyger T3 tonneau cover on your truck bed, there are a few tools and materials you’ll need to have on hand before getting started. First and foremost, you’ll need the tonneau cover itself, along with any included mounting hardware and instructions. Depending on your specific truck model, you may also need a socket wrench set or a screwdriver to remove any existing bed rail caps or clamps.
Additionally, having a tape measure and a level can come in handy to ensure proper alignment and positioning of the cover. It’s also a good idea to have some cleaning supplies on hand, such as soap and water, as well as a soft cloth or sponge, to clean the truck bed before installation. By having all these tools and materials ready to go, you’ll be well-prepared to tackle the installation process and get your Tyger T3 tonneau cover properly installed.
Preparation
Installing a Tyger T3 tonneau cover is a simple task that can be done with just a few tools and a little bit of time. The first step in the installation process is to gather all the necessary tools, which include a wrench, a socket set, and a tape measure. Once you have everything you need, you can begin the installation by placing the cover on your truck bed and making sure it is centered.
Next, you will need to attach the mounting brackets to the cover using the provided screws. Make sure to tighten the screws securely so that the cover is held firmly in place. After the brackets are attached, you can move on to installing the side rails.
These rails will help to secure the cover and provide a clean, finished look. To install the side rails, simply slide them into the brackets and tighten the screws to secure them in place. Once the side rails are installed, you can then adjust the tension of the cover by using the provided tension knobs.
This will ensure that the cover fits snugly and provides optimal protection for your truck bed. Overall, installing a Tyger T3 tonneau cover is a straightforward process that can be completed by DIYers of all skill levels. So why wait? Take the necessary steps and protect your truck bed with a Tyger T3 tonneau cover today!
Gather the Parts
Preparation is key when it comes to gathering the parts for any project. Before diving into the task at hand, it’s important to make sure you have everything you need to successfully complete the project. This means taking inventory of the required parts and ensuring that you have them readily available.
By organizing and gathering all the necessary components beforehand, you can save time and avoid any delays that may arise from missing or misplaced parts. Think of it like preparing for a road trip – you wouldn’t set off without making sure you have your keys, wallet, and a full tank of gas, right? Similarly, before starting any project, gather all the parts you need and lay them out in an organized manner. This way, you can avoid any last-minute scrambling and focus on the task at hand.
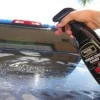
Clean the Truck Bed
cleaning the truck bed
Measure and Mark
When it comes to tackling a DIY project, preparation is key. One of the first steps in any project is measuring and marking. This may seem like a simple task, but it can make all the difference in the outcome of your project.
Taking accurate measurements ensures that everything fits together properly and eliminates the need for adjustments later on. Marking your measurements also helps to keep everything organized and prevents mistakes. It’s like creating a roadmap for your project.
Just as you would refer to a map to navigate unfamiliar territory, marking your measurements keeps you on track and prevents you from getting lost along the way. So before you dive into your DIY project, take the time to measure and mark. It may seem like a small step, but it sets the foundation for success.
Installation Steps
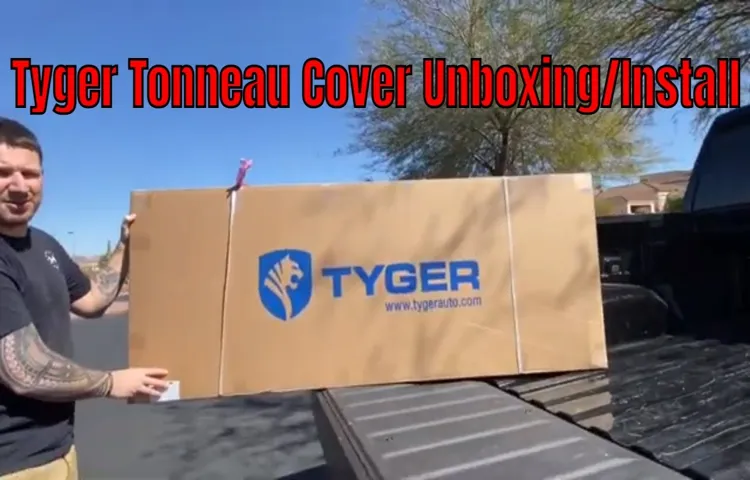
So you’ve just purchased a Tyger T3 Tonneau Cover and you’re ready to start enjoying its benefits – but you might be wondering, “How do I actually install this thing?” Well, fear not, because I’m here to guide you through the installation process step by step. First, start by unpacking the tonneau cover and lay it flat on a clean surface. Next, position the cover on top of your truck bed and make sure it aligns correctly.
Once you’re happy with the placement, attach the clamps to the side rails of the truck bed. Make sure to tighten them securely so that the cover stays in place. After that, attach the rear seal to the tailgate, ensuring a tight seal.
Finally, test the cover by opening and closing it a few times to make sure everything is working smoothly. And there you have it, you now know how to install your Tyger T3 Tonneau Cover!
Step 1: Attach the Front and Rear Rails
To start the installation of your DIY bed frame, the first step is to attach the front and rear rails. These rails serve as the foundation of the bed frame and provide stability and support. Begin by positioning the front rail in the desired location at the head of your bed, ensuring that it is aligned correctly.
Then, using the provided screws or bolts, secure the rail to the side panels or frame. Repeat this process with the rear rail at the foot of the bed, making sure it is parallel and evenly spaced from the front rail. Once both rails are securely attached, you can move on to the next step in building your bed frame.
Remember, taking the time to properly attach the front and rear rails will ensure a sturdy foundation for your bed and help prevent any wobbling or creaking in the future.
Step 2: Install the Side Rails and Buckles
side rails and buckles installation
Step 3: Position and Secure the Cover
Step 3: Position and Secure the Cover Once you have chosen the perfect cover for your vehicle, it’s time to install it. Positioning and securing the cover correctly is essential to ensure a snug fit and maximum protection. First, start by unfolding the cover and laying it out flat.
Take note of any tags or labels that indicate the front or rear of the cover. Place the cover on top of your vehicle, starting from the front. Make sure it is centered and aligned with the shape of your vehicle.
Next, carefully pull the cover over the front bumper, ensuring it is taut and covers the entire front end. Then, proceed to pull the cover over the roof, trunk, and rear bumper, making sure it fits snugly and evenly all around. Use any securing mechanisms or straps that come with the cover to secure it in place.
These straps are usually located under the vehicle or around the wheels. Attach them firmly, but not too tightly, to prevent the cover from blowing off in strong winds. The final step is to tuck in any excess fabric under the vehicle to create a neat and clean appearance.
This will prevent the cover from flapping in the wind and potentially scratching your car’s paint. Remember, it’s important to follow the manufacturer’s instructions for your specific type of cover, as installation methods may vary. By correctly positioning and securing the cover, you can ensure that your vehicle is well-protected against the elements and potential damage.
Step 4: Check for Proper Fit and Adjustments
When it comes to installing a car seat, the fourth step is to check for proper fit and make any necessary adjustments. This is a crucial step to ensure the safety and comfort of your child. First, you need to make sure that the car seat is securely installed in the vehicle.
Give it a good shake and see if there is any wiggle room. If it moves too much, you may need to tighten the seat belt or install the car seat with the LATCH system. Next, check the harness straps.
They should be snug but not too tight. You should be able to fit two fingers between your child’s chest and the straps. If the straps are too loose, tighten them up.
Also, make sure that the chest clip is at armpit level to ensure proper positioning. Finally, check the recline angle of the car seat. Most car seats have an adjustable recline feature.
Make sure that your child’s head is not flopping forward and that their body is at a comfortable angle. Remember, it’s important to regularly check for proper fit and adjustments as your child grows to ensure their safety on the road.
Additional Tips and Considerations
Installing the Tyger T3 tonneau cover on your truck is a relatively simple process that can be done by most truck owners with just a few basic tools. Before you begin, make sure you have the necessary tools on hand, such as a socket wrench, a tape measure, and a drill. It’s also a good idea to read through the installation instructions that come with the cover to ensure you understand the process and have all the necessary materials.
To start, position the side rails of the tonneau cover onto the truck bed and make sure they are aligned with the bed rails. Use a tape measure to ensure the rails are evenly spaced on both sides. Once the rails are properly aligned, secure them to the truck bed using the provided clamps or brackets.
Be sure to tighten the clamps or brackets securely to prevent any movement or shifting during use. Next, attach the crossbars to the side rails. The crossbars should slide into place and lock securely into the side rails.
Again, double-check that the crossbars are evenly spaced and tighten any screws or bolts that are needed to secure them in place. After the side rails and crossbars are securely in place, it’s time to install the cover itself. Lay the cover on top of the crossbars, making sure it is evenly aligned and centered.
The cover should have a tensioning system that allows you to adjust the tightness of the cover. Follow the manufacturer’s instructions to properly tension the cover and ensure a snug fit. Once the cover is tensioned correctly, check that it opens and closes smoothly without any obstructions or interference.
Adjust the tension as needed to achieve the desired fit and functionality. Finally, take a step back and admire your newly installed Tyger T3 tonneau cover. Not only does it provide added protection and security for your truck bed, but it also adds a sleek and stylish look to your vehicle.
Maintenance and Care
maintenance and care, additional tips and considerations, maintaining and caring for your belongings, maintaining the durability of your items, protecting your investment, extending the lifespan of your belongings
Troubleshooting
“troubleshooting tips” Additional Tips and Considerations: Troubleshooting technology issues can sometimes be a daunting task, but with the right approach, it can be made easier. Here are some additional tips and considerations to keep in mind when troubleshooting: Take a step back: When faced with a problem, it’s easy to jump straight into trying to fix it without fully understanding the issue at hand.
Before diving into troubleshooting, take a moment to gather all the relevant information, such as error messages, recent changes, or any patterns you’ve noticed. This will give you a better understanding of the problem and help you come up with more targeted solutions.
Check for updates: One common cause of technology issues is outdated software or firmware. Before troubleshooting, make sure to check for any available updates for the device or software in question. Updating to the latest version can often resolve compatibility issues or fix known bugs.
Restart or reset: It may sound cliché, but turning it off and on again can actually work wonders. Restarting a device can fix many common issues, as it clears out temporary files and resets system settings.
If a restart doesn’t solve the problem, you may need to perform a factory reset. Just make sure to back up any important data before doing so.
Consider external factors: Sometimes, the issue may not be with the device or software itself but with external factors. For example, a slow internet connection can cause webpages to load slowly or emails to fail to send. In such cases, troubleshooting the network or contacting your internet service provider may be necessary.
Warranty Information
In addition to understanding the warranty information for your products, there are some additional tips and considerations to keep in mind. First, it’s important to carefully read through the warranty documentation that comes with your product. This will outline what is covered under the warranty, as well as any limitations or exclusions.
It’s also a good idea to register your product with the manufacturer. This ensures that you are eligible for any warranty coverage and can make the process easier if you need to make a claim. Another tip is to keep all of your receipts and documentation related to the purchase of the product.
This includes the original receipt, any communication with customer service, and any repair invoices. This documentation can be invaluable if you need to make a warranty claim, as it provides proof of purchase and any history of repairs. If you encounter any issues with your product, it’s important to contact the manufacturer or retailer as soon as possible.
They will be able to guide you through the warranty process and provide any necessary assistance. It’s also worth noting that while warranty coverage is important, it’s not the only factor to consider when purchasing a product. Other factors, such as the reputation of the manufacturer and the customer reviews, should also be taken into account.
Overall, understanding the warranty information and following these additional tips can help ensure that you get the most out of your product and any warranty coverage. By being proactive and keeping good documentation, you can navigate the warranty process more smoothly if the need arises.
Conclusion
Congratulations! You are now a master of installing the Tyger T3 Tonneau Cover. With your newly acquired skills, you can impress friends and neighbors with your handyman expertise. But installing this cover is not just about functional benefits; it’s also about style.
The sleek and sophisticated design of the Tyger T3 will turn heads and make your truck the envy of the neighborhood. Not to mention, the Tyger T3 Tonneau Cover is built to last. It’s made from high-quality materials that are resistant to all weather conditions, ensuring that your precious cargo stays safe and dry.
So, whether you’re hauling groceries, gardening supplies, or even a secret stash of snacks, the Tyger T3 Tonneau Cover will provide the security and convenience you need. So go ahead, unleash your inner handyman and give your truck the upgrade it deserves. Install the Tyger T3 Tonneau Cover today and experience a whole new level of truck ownership.
Trust us, you’ll wonder how you ever lived without it!”
FAQs
How do I install the Tyger T3 tonneau cover on my truck bed?
To install the Tyger T3 tonneau cover on your truck bed, first ensure that your truck bed is clean and free of debris. Then, position the cover onto the bed and make sure it is centered and aligned properly. Secure the front clamps onto the front of the bed, near the cab. Next, attach the rear clamps onto the tailgate end of the bed. Finally, adjust the tension of the cover by using the provided tension control system, and make sure it is tight and secure.
What tools do I need to install the Tyger T3 tonneau cover?
The installation of the Tyger T3 tonneau cover requires minimal tools. You will need a socket wrench or an adjustable wrench to tighten and secure the clamps. A tape measure may also be helpful for ensuring proper alignment of the cover on your truck bed.
Can I install the Tyger T3 tonneau cover by myself, or do I need assistance?
The installation of the Tyger T3 tonneau cover can be done by a single person. However, having an extra pair of hands to hold and position the cover may make the installation process easier and more efficient.
How long does it take to install the Tyger T3 tonneau cover?
The installation of the Tyger T3 tonneau cover can typically be completed within 30 minutes to an hour, depending on your level of experience and familiarity with tonneau cover installations.
Is any drilling required during the installation of the Tyger T3 tonneau cover?
No, drilling is not required for the installation of the Tyger T3 tonneau cover. The cover is designed to attach securely to your truck bed using the provided clamps, eliminating the need for any drilling or permanent modifications.
Can I use the Tyger T3 tonneau cover with other truck accessories, such as bed liners or toolboxes?
Yes, the Tyger T3 tonneau cover is compatible with most truck accessories, including bed liners and toolboxes. The cover is designed to sit on top of the truck bed, allowing for easy installation and use with other accessories.
How do I maintain and clean the Tyger T3 tonneau cover?
To maintain and clean the Tyger T3 tonneau cover, simply wipe it down with a mild soap and water solution using a soft cloth or sponge. Avoid using any harsh chemicals or abrasive cleaners, as they may damage the cover’s material. It is also important to regularly inspect and tighten the clamps to ensure the cover remains secure on your truck bed.