
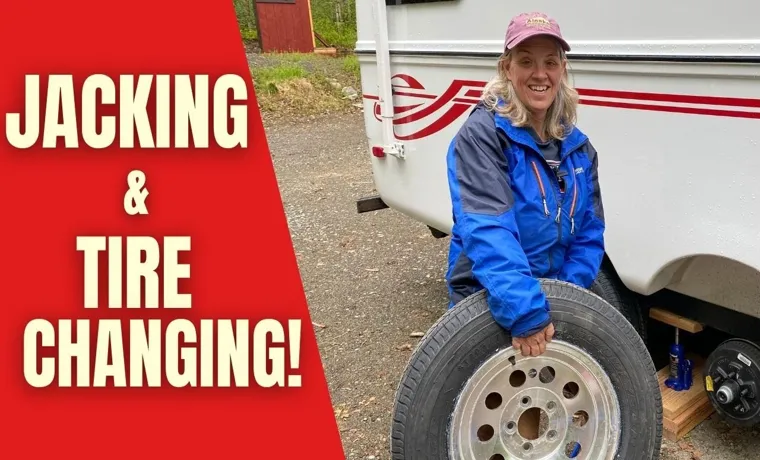
Jacking up a travel trailer to change a tire can be intimidating, especially for new RVers. You may not know where to begin or be unsure if you’re doing it correctly. After all, your entire home on wheels is sitting on that tire! But don’t worry, changing a tire is easier than you might think, and with a little practice, you’ll become a pro in no time.
In this article, we’ll guide you through the step-by-step process of jacking up your travel trailer and changing a tire, so you can hit the road with confidence. Let’s get started!
Table of Contents
Gather the necessary equipment
If you need to change a tire on your travel trailer, the first step is to gather the necessary equipment. This includes a high-quality jack, valcro-like chocks, lug wrench, and gloves to protect your hands. Without these essential tools, you won’t be able to lift the weight of the trailer safely or change the tire effectively.
You’ll also need to ensure that the ground is level and sturdy enough to support the weight of the trailer before proceeding. Once you have all the equipment and have ensured the safety of the environment, you can start following the steps to jack up the travel trailer and change the tire. Remember to always prioritize safety and never underestimate the power of preparation.
Check tire condition and confirm flat tire
When it comes to checking your tire condition and confirming a flat tire, the first step is to gather all the necessary equipment. You’ll need a tire pressure gauge, jack, lug wrench, spare tire, and a flashlight if you’re checking your tires in low light conditions. Once you have all the required gear, it’s time to get started.
First, do a visual inspection of all four tires, checking for any signs of wear and tear such as cracks, punctures, or bulges. If you notice anything out of the ordinary, you may need to replace your tires. Next, use the tire pressure gauge to check the air pressure in each tire, comparing it to the recommended pressure listed in your vehicle’s owner’s manual or on the tire itself.
If any of your tires are low on pressure, you may have a puncture or leak, causing a flat tire. With your equipment ready and your tires inspected, you’ll be ready to tackle any upcoming road trips or daily commutes with confidence.
Park on a level surface and engage the emergency brake
When it comes to performing maintenance on your vehicle, one of the most important steps is ensuring that it stays in place while you work on it. This means parking on a level surface and engaging the emergency brake before you begin any repairs or checks. But before you do that, you’ll need to gather the necessary equipment to complete the task at hand.
This might include your car’s owner’s manual, wheel chocks, a jack and jack stands, and any tools you’ll need to access the parts underneath your vehicle. Once you’ve gathered everything you need, find a level spot to park your car and put on the emergency brake to prevent it from moving while you work. By taking these steps and gathering all the equipment you need beforehand, you can ensure a safe and successful maintenance session for your vehicle.
Locate the jacking points on the travel trailer
Jacking up a travel trailer to change a tire can be a daunting task for first-timers. Before attempting to lift your trailer, it is essential to locate the jacking points. Most travel trailers come equipped with jacking points on their frame, which are usually located behind the wheels.
These points are designed to support the full weight of the trailer and make jacking up the vehicle much easier. It is important to note that jacking up a travel trailer can be dangerous, and if not done correctly, it can cause significant damage to your vehicle. Therefore, it is crucial to follow the manufacturer’s instructions and safety guidelines when locating the jacking points and lifting the trailer.
Once you find the jacking points, use a hydraulic jack to lift the trailer, ensuring that it is level and stable before changing the tire. Remember to never exceed the weight limit recommended by the manufacturer, and always use wheel chocks to prevent the trailer from rolling while you work. By knowing how to locate the jacking points, you can confidently jack up your travel trailer and change a tire in a safe and efficient manner.
Check the owner’s manual for specific jacking points
When it comes to jacking up your travel trailer, it’s crucial to know where the jacking points are to avoid damaging the frame or body of the trailer. The best way to locate these points is to check the owner’s manual, which should have a diagram or description of where they are. Depending on the type of travel trailer you have, the jacking points may be located along the frame rails or near the axles.
It’s important to note that using the wrong jacking points can cause serious damage, so always refer to the owner’s manual or consult with a professional if you are unsure. Additionally, make sure to use a quality jack and always take safety precautions when working underneath a jacked-up trailer. By following the manufacturer’s guidelines and using the proper jacking points, you can ensure a safer and more successful RVing experience.
Use a jack that can support the weight of the travel trailer
When it comes to jacking up a travel trailer, it’s crucial to use a jack that can support its weight. Choosing the wrong jack can lead to accidents, damage to the trailer, or even injuries. So, invest in a quality jack that can handle the load.
Additionally, it’s crucial to locate the jacking points on the travel trailer before attempting to lift it. These points may be marked on the frame or mentioned in the owner’s manual. Make sure to place the jack under the jacking point, as lifting the trailer from another spot can cause damage to the structure.
Remember, safety should always come first when dealing with heavy loads. By using the right jack and locating the jacking points, you can ensure a smooth and safe experience when lifting your travel trailer.
Raise the travel trailer with the jack
If you’re planning to hit the open road with your travel trailer, it’s crucial to know how to jack up the trailer properly in case of a flat tire. First and foremost, ensure that the trailer is parked on a level surface. Locate the jack point on the frame of the trailer, which is usually marked with a sticker or decal.
Position the jack under the jack point, ensuring that it’s stable and secure. Then, crank the jack handle to lift the trailer until the flat tire is slightly off the ground. It’s essential to use wheel chocks or stable blocks to prevent the trailer from rolling or shifting during the process.
Once the trailer is raised, remove the lug nuts on the flat tire and replace the tire with a new one. Finally, lower the trailer gently with the jack until it’s back on the ground, and tighten the lug nuts in a star pattern for optimum security. With these simple steps, changing a travel trailer tire doesn’t have to be a daunting task anymore!
Position the jack correctly under the jacking point
Raising a travel trailer can be quite a challenging task, but with the right tools and guidance, it can be done in a breeze. One important thing to remember when raising a travel trailer is to position the jack correctly under the jacking point. This area is where the frame of the travel trailer is the strongest, and it helps to distribute the weight evenly.
Before you begin, ensure that the ground beneath the jack is firm and level to prevent any accidents. To raise the travel trailer with the jack, simply pump the handle of the jack until the trailer starts to lift off the ground. It is essential to keep an eye on the trailer at all times to prevent any instability or tilt.
Once the trailer is at the desired height, lower the jack slowly and carefully to prevent any sudden drops or movements. Always remember to keep safety a top priority and double-check everything before proceeding. With these simple steps and precautions, you can raise your travel trailer with ease and confidence.
Pump the jack handle to raise the travel trailer
If you’re planning on taking your travel trailer for a spin, it’s essential to know how to raise it using a jack. The process is relatively simple if you follow the right steps. Firstly, ensure that the trailer is parked on a level surface to avoid any mishaps.
Next, locate the jack point on the frame of the trailer, which is typically at the front of the unit. Once you’ve found it, insert the handle into the jack and start pumping it up and down. You’ll notice that the trailer begins to rise slowly.
Repeat this process until the desired height is achieved. Remember to check the stability of the trailer by giving it a gentle shake once it’s up in the air. If it wobbles, adjust the jack until it’s stable.
It’s crucial to exercise caution when using the jack. Make sure you have good footing, keep your fingers out of the way, and never go beyond the manufacturer’s recommended weight limit. By following these simple steps, you can easily raise your travel trailer and enjoy a safe and hassle-free journey.
Stop jacking when the flat tire is lifted off the ground
When changing a flat tire on your travel trailer, it’s important to use a jack to lift the flat tire off the ground. However, once the flat tire is lifted, it’s important to stop jacking to avoid any damage or accidents. Instead, use the jack to raise the travel trailer to a safe and stable height.
This can be done by placing the jack under a strong and sturdy area of the trailer’s frame, such as the axle or leaf springs. Slowly raise the jack until the trailer is at the desired height, ensuring that it’s level and stable before removing the flat tire. By following these steps, you can safely and efficiently change a flat tire on your travel trailer without any mishaps or complications.
So, remember to stop jacking once the flat tire is lifted and use the jack to raise the travel trailer to a safe and stable height.
Remove the flat tire and install the spare tire
If you ever find yourself in the unfortunate situation of having a flat tire on your travel trailer, it’s important to know how to safely jack up the trailer and change the tire. First, make sure your trailer is on level ground and engaged in park or with wheel chocks in place. Locate the jacking points on your trailer and use an appropriately sized jack to lift the trailer until the flat tire is off the ground.
Remove the lug nuts and carefully remove the flat tire. Next, install the spare tire and tighten the lug nuts by hand before lowering the trailer back down. Use a torque wrench to tighten the lug nuts to the manufacturer’s recommended specifications.
It’s important to note that not all travel trailers have the same jacking points or requirements, so consult your owner’s manual for specific instructions. By following these steps, you can quickly and safely remove and replace a flat tire on your travel trailer.
Loosen and remove lug nuts with a lug wrench
Removing a flat tire and installing a spare can be a daunting task, but it’s a skill every driver should have. The first step to removing a tire is to use a lug wrench to loosen the lug nuts. This may take some effort, as the nuts are often tightened very snugly to ensure they don’t come loose while driving.
Once the nuts are loose, use a car jack to lift the car off the ground and remove the tire. Be sure to store the lug nuts in a safe place so you don’t lose them. Before installing the spare tire, make sure it’s properly inflated and matches the size and type of the flat tire.
Align the holes in the spare tire with the wheel studs and hand-tighten the lug nuts. Lower the car back down to the ground and use the lug wrench to tighten the nuts as much as possible. Remember to tighten them in a star pattern to ensure even tightening.
With the spare tire securely in place, you can continue on your journey, but be sure to have the flat tire repaired or replaced as soon as possible.
Carefully remove the flat tire
To begin the process of installing your spare tire, you first need to remove the flat tire carefully. Start by loosening the lug nuts of the tire you need to remove. You want to do this while the car is still on the ground to prevent it from moving.
Then, use the jack to lift the car up and place it on the jack stand. Now, you can remove the lug nuts completely and take the flat tire off. Make sure to keep the lug nuts in a secure place so you don’t lose them.
Before putting on the spare tire, inspect it to make sure it’s in good condition and has enough air pressure. Once you’re ready to install the spare, align it with the wheel studs and secure it with the lug nuts. Tighten the lug nuts as much as possible, but don’t over-tighten them.
And that’s it – you’re ready to hit the road again! Remember, safety is crucial when changing a tire, so take your time and be careful.
Install the spare tire and tighten lug nuts by hand
Installing a spare tire can be an intimidating task, but with a little know-how, anyone can do it. Begin by removing the flat tire and positioning the spare tire in its place. Before tightening the lug nuts, make sure the spare tire is securely in place on the wheel hub.
Then, begin tightening the lug nuts by hand, making sure to tighten them in a star pattern to ensure even pressure distribution. Once the lug nuts are snug, use a lug wrench to tighten them further. It’s important not to overtighten the lug nuts, as this can lead to further damage to the wheel hub.
Just remember to use common sense when tightening the lug nuts – you don’t want them so loose that the tire falls off, but you also don’t want to risk damaging the wheel hub by overtightening. With a little bit of patience and some basic knowledge, you’ll be back on the road in no time.
Lower the travel trailer back to the ground
So, you’ve successfully changed the tire on your travel trailer, but now it’s time to lower it back down to the ground. First, make sure the lug nuts are securely fastened and the tire is properly aligned. Then, using your jack, slowly lower the trailer back down until all four tires are back on the ground.
It’s important to take your time during this process to avoid any potential damage. Once the trailer is back on the ground, use your lug wrench to tighten the lug nuts to the manufacturer’s recommended torque specifications. This will ensure the tire is properly secured and ready to hit the road once again.
Remember, proper tire maintenance is crucial for the safety of you and your passengers, so always make sure to check your tires regularly for any signs of wear or damage. With these simple steps, you’ll be back on the road in no time!
Slowly lower the travel trailer with the jack
As you near the end of your trip, it’s important to safely and smoothly lower your travel trailer back to the ground. This process can be nerve-wracking, but with patience and attention to detail, you’ll have your trailer down in no time. Begin by slowly lowering the travel trailer with the jack, being mindful of any potential obstacles or uneven surfaces.
Take it one inch at a time, checking for stability and making any necessary adjustments. Once the trailer is back on solid ground, double-check that it’s securely attached to your vehicle and that all loose items have been stowed away. With these precautions taken care of, you’re ready to hit the road again.
Keyword: travel trailer
Remove the jack and tighten lug nuts with a lug wrench
After tightening the lug nuts with a lug wrench, the next step in lowering your travel trailer back to the ground is to remove the jack. Remember to take your time when doing this as you don’t want to put any unnecessary strain on the trailer’s suspension. Make sure you’re standing on level ground and that the trailer is not going to roll away.
Once the jack is removed, you can begin to slowly lower the trailer back to the ground. Keep an eye on each corner and make sure they are all coming down evenly. Once the trailer is fully back on the ground, you can double-check that all the lug nuts are tight and that the trailer is level before hitting the road.
Remember, safety is key when it comes to towing a travel trailer, so take your time, be patient and always double-check everything before hitting the road.
Check tire pressure and put away equipment
If you’re going on a long trip with your travel trailer, it’s essential to make sure your tires are in good condition before you hit the road. One important step is to check your tire pressure regularly, as over- or under-inflated tires can cause serious problems while you’re driving. Another key consideration is making sure you have the necessary equipment on hand, such as a lug wrench and jack, in case you need to change a tire on the go.
If you’re not sure how to jack up your travel trailer to change a tire, don’t worry: it’s a simple process that anyone can learn with a little practice. Start by ensuring that your trailer is parked on a level surface, then locate the jack points on your trailer and use a suitable jack to lift it up. Be careful not to damage the undercarriage or suspension while you work, and make sure your spare tire is inflated and ready to go in case you need to use it.
With the right preparation and a little know-how, changing a travel trailer tire is simple and stress-free – so don’t let a flat tire ruin your next adventure!
Check tire pressure on the newly installed spare tire
When faced with a flat tire on the road, changing to the spare tire can be a harrowing experience. Once you’ve successfully installed the spare tire, it’s important to immediately check the tire pressure to ensure it is safe and ready to use. It’s always a good idea to keep a tire pressure gauge in your car’s emergency kit so you can check the pressure of the newly installed tire.
Ideally, the pressure should match the manufacturer’s recommended level which can be found in your car’s owner manual or online. If the pressure falls below the recommended level, use an air compressor or return to a gas station to inflate the tire to the recommended level. Additionally, it’s important to remember to put away any tools or equipment used during the tire change, such as the lug wrench and jack, in their designated spot in the car.
By following these steps, you can ensure that your newly installed spare tire is roadworthy and that you’re ready to get back on the road to your destination safely.
Put away the equipment used for changing the tire
After successfully changing a tire, it’s important to check the tire pressure and put away all the equipment used. Doing this will ensure that you’re fully prepared for any future tire mishaps and that your car runs smoothly. Checking tire pressure is a simple process that can be done with a tire pressure gauge.
Start by unscrewing the valve cap on each tire and attaching the gauge firmly onto the valve stem. The gauge will give you a reading that should match the recommended pressure listed in your car’s manual. If the pressure is low, use an air compressor to inflate the tire to the recommended level.
Once you’ve checked the pressure, it’s important to put away all the equipment used for changing the tire. Keep everything organized and stored in your trunk in case it’s needed again. This will help prevent damage or misplacement of the equipment and ensure that you’re always ready for the unexpected.
By following these simple steps, you’ll have peace of mind on the road knowing that you’re fully prepared for any tire-related emergencies. So, take the time to check your tire pressure and put away all the equipment used, it’s a small step that can make a big difference in your safety and the safety of others on the road.
Conclusion
When it comes to changing a flat tire on your travel trailer, it’s important to remember one thing – safety first, wit second. Whether you’re an experienced RVer or a newbie on the road, taking the proper precautions to jack up your trailer is crucial to avoid any accidents or mishaps. So don’t be a flimsy fool, follow these simple steps and you’ll be back on the road faster than you can say “that was easy”!
FAQs
What is the best type of jack for jacking up a travel trailer?
A hydraulic bottle jack or scissor jack is typically the best type of jack to use for jacking up a travel trailer to change a tire.
How do I properly position the jack to lift my travel trailer?
Position the jack under the frame or axle near the tire you need to lift. Make sure the trailer is on a level surface and the wheels are chocked to prevent it from rolling.
Can I use the stabilizer jacks to lift my travel trailer for a tire change?
No, the stabilizer jacks are not designed to support the weight of the trailer and could cause damage or injury if used to lift the trailer.
How do I know when the trailer is high enough to change the tire?
Use a level or straight edge to check that the trailer is level before raising it and again after to ensure it’s still level. The tire should be off the ground by a few inches to safely change it.
Is it safe to change a tire on a travel trailer on the side of the road?
It’s safer to change a tire on a travel trailer in a designated area or off the road completely to avoid the risk of being hit by passing traffic.
What should I do if I don’t have the right jack or tools to change a tire on my travel trailer?
Call a roadside assistance service or a professional to assist with changing the tire if you don’t have the necessary tools or experience.
Can I change a travel trailer tire myself or should I hire a professional?
It’s possible to change a travel trailer tire yourself if you have the necessary tools and experience, but hiring a professional is always a safe option if you’re unsure or uncomfortable with the process.