Changing a flat tire can be a daunting task, especially if you are not familiar with the steps involved. One of the most important steps is lowering the spare tire, but it can be confusing for those who are not familiar with the process. Lowering a spare tire may seem like a simple task, but it requires the right tools and the correct technique.
Knowing how to lower a spare tire can save you a lot of time and frustration, especially if you ever find yourself in a situation where you need to change a tire on the side of the road. In this step-by-step guide, we will show you how to lower a spare tire safely and easily.
Table of Contents
Why Lowering a Spare Tire is Important
As a driver, it’s important to know how to lower a spare tire. Although we hope that we never have to use it, having a spare tire ready can be a lifesaver in emergencies. However, lowering a spare tire is not something that most people think about until they need it.
When changing a tire, lowering the spare tire incorrectly can lead to accidents and injuries. That’s why it’s crucial to know how to properly lower and remove a spare tire. Make sure to consult your car’s manual for specific instructions on how to do this, as different car models may have different ways of lowering a spare tire.
Remember, a properly lowered and secured spare tire can give you peace of mind and ensure a safer journey on the road.
Ensures Safety while Changing a Flat Tire
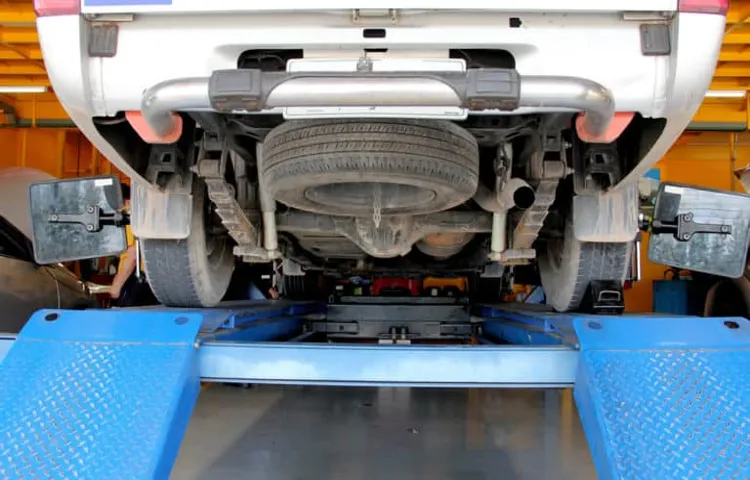
Lowering a spare tire is an important step to ensure your safety while changing a flat tire. Many drivers overlook this crucial step and risk injury or damage to their vehicle. Typically, spare tires are located under the vehicle and secured with a cable or bolt.
By lowering the spare tire before attempting to change a flat, you avoid having to lift and maneuver a heavy tire from underneath the vehicle. Additionally, you can inspect the spare tire for any damage or defects before mounting it onto the vehicle. Taking the time to lower your spare tire and thoroughly inspect it can save you time, money, and potential injury down the road.
So, before attempting to change a flat tire, remember to first lower and inspect your spare tire to ensure a safe and successful tire change.
Allows for Easy Removal and Installation of Spare Tire
Lowering a spare tire is an essential part of vehicle maintenance that is often overlooked. One of the primary reasons why it is important is because it allows for easy removal and installation of a spare tire. When a flat tire occurs, you want to be able to access your spare quickly and easily.
If your spare tire is stored in an inaccessible location, it can cause significant delays and frustration when trying to replace it. By lowering the spare tire, you can save yourself time and hassle in an emergency situation. It’s also vital for ensuring the safety of yourself and your passengers.
Imagine being stranded on the side of the road with a flat tire, and unable to access your spare. This experience can be avoided by routinely lowering and checking your spare tire’s accessibility. In summary, whether you change a flat tire yourself or seek the help of a professional, having easy access to your spare tire can provide peace of mind and help you avoid unnecessary delays.
Materials Needed
One of the most important things you need to know when driving is how to change a flat tire. If you’re ever caught with a flat, it’s essential to know how to lower your spare tire. It may seem intimidating at first, but it’s actually a straightforward process.
The first step is to make sure you have all the necessary materials, which include a lug wrench, a screwdriver, and a tire jack. Once you have these items, remove the hubcap from the wheel and use the lug wrench to loosen the lug nuts. Next, place the tire jack under the car frame, preferably near the flat tire, and crank it upward until the car is high enough to remove the tire.
Finally, remove the tire and replace it with the spare tire, tightening the lug nuts and lowering the car back to the ground. Knowing how to lower a spare tire is a valuable skill that can save you time and stress in a flat tire emergency.
Spare Tire Tools
Spare Tire Tools Are you planning on taking a road trip anytime soon? If so, it’s important to prepare yourself for any unexpected mishaps, such as a flat tire. One thing you should always have in your car is a spare tire, but it’s equally important to have the right tools to install it. There are a few necessary materials that you should keep in your vehicle at all times, including a jack, lug wrench, and wheel chocks.
The jack will lift your vehicle off the ground, allowing you to remove the flat tire and replace it with the spare. The lug wrench is used to remove the lug nuts that secure the wheel to the vehicle and to replace them after installing the new tire. Lastly, wheel chocks help prevent your vehicle from rolling as you work on it.
These tools may seem simple, but they can make all the difference in a stressful situation. It’s better to be prepared now than to be stranded on the side of the road without the necessary tools to get you back on your way.
Vehicle Owner’s Manual
“Vehicle Owner’s Manual” When it comes to maintaining and understanding your vehicle, the owner’s manual is your best friend. This comprehensive guide is filled with essential information about your car, including how to troubleshoot and perform routine maintenance tasks. To fully utilize your owner’s manual, you’ll need a few essential materials.
First and foremost, you need the manual itself. This book is typically provided by the manufacturer when you purchase the car. If you don’t have one, you can usually find a digital version on the manufacturer’s website.
It’s also helpful to have a notebook to jot down important information and keep track of maintenance schedules. Additionally, having a set of basic tools like a jack, tire gauge, and screwdriver is essential to perform simple tasks like changing a tire or checking fluid levels. By utilizing these materials and consulting your owner’s manual regularly, you can ensure your vehicle is operating smoothly and safely.
Gloves and Protective Gear (Optional)
When it comes to working on DIY projects, gloves and protective gear are optional but highly recommended. The right gear can keep you safe from harmful chemicals, flying debris, and potential injuries. Some materials you might need for protective gear include gloves, safety goggles, respirators, hard hats, and work boots.
Choosing the right gear means paying attention to the project you’re working on and assessing the potential risks. For example, if you’re working with power tools, you’ll want to wear eye protection and possibly earplugs or earmuffs as well. If you’re dealing with chemicals or other hazardous materials, a respirator and gloves may be necessary.
Investing in high-quality protective gear can make all the difference in your safety and comfort as you work on your DIY projects. So before you get started, take the time to evaluate what gear will best suit your needs and keep you safe on the job.
Step-by-Step Guide to Lowering a Spare Tire
If you ever find yourself in a situation where you need to replace your flat tire with the spare tire, the first thing you need to know is how to lower the spare tire. It might seem like a daunting task, but it’s actually quite simple if you follow these steps. Firstly, make sure your car is parked on a flat surface, engage your emergency brake, and turn off your vehicle’s engine.
Then, locate the spare tire and the tools to lower it – usually found in the trunk or a compartment near the tire. Once you’ve found the tools and the spare tire, insert the wrench into the hole provided and turn it counterclockwise to lower the spare tire. Keep rotating until the tire fully descends, then gently lift it out of the vehicle.
Congratulations, you’ve successfully lowered the spare tire and are now one step closer to being back on the road!
Locate the Spare Tire
If you ever find yourself with a flat tire, the first thing you need to do is locate your spare tire. Most cars come equipped with one, and it’s usually located in the trunk or under the vehicle. To access it, you will need to follow the manufacturer’s instructions, which can usually be found in your car’s owner’s manual.
Once you find the spare tire, you will need to lower it down using a jack that is also included with the car. Make sure to secure the vehicle before removing the flat tire and replacing it with the spare tire. Remember, safety always comes first, so if you are unsure about how to lower the spare tire, it’s best to call for professional assistance.
By following these simple steps, you’ll be back on the road in no time!
Insert the Spare Tire Tool and Rotate Counterclockwise
If you’ve ever found yourself with a flat tire and in need of a spare, you know how frustrating it can be to try and figure out the lug nut situation. However, once you’ve got the tire off, you need to know how to lower the spare tire to replace it. This is where the spare tire tool comes into play.
First, make sure the area around your tire is safe for you to work in. Then, insert the spare tire tool into the hoist shaft hole, which is typically located just above the spare tire. Once the tool is properly inserted, rotate it counterclockwise.
This should cause the tire to begin lowering. Keep turning until the tire has fully lowered and you’re able to remove it from its position under the vehicle. Remember to stay safe and consult your owner’s manual if you’re unsure of how to proceed.
With a little bit of elbow grease and a lot of patience, you’ll have that spare tire on in no time.
Lower the Spare Tire
If you’ve ever needed to change a tire, you may have found yourself in a situation where you need to access the spare tire, only to realize that you don’t know how to lower it from its storage position. Don’t worry, it’s actually a simple process. The first step is to locate the tools you need, which are typically found in the trunk or near the spare tire itself.
Next, locate the jack point under the vehicle and jack up the car until the flat tire is off the ground. Then, use the wrench to remove the lug nuts and slide the flat tire off the wheel. It’s important to keep the lug nuts and other pieces in a secure location, as you’ll need them when you reattach the tire.
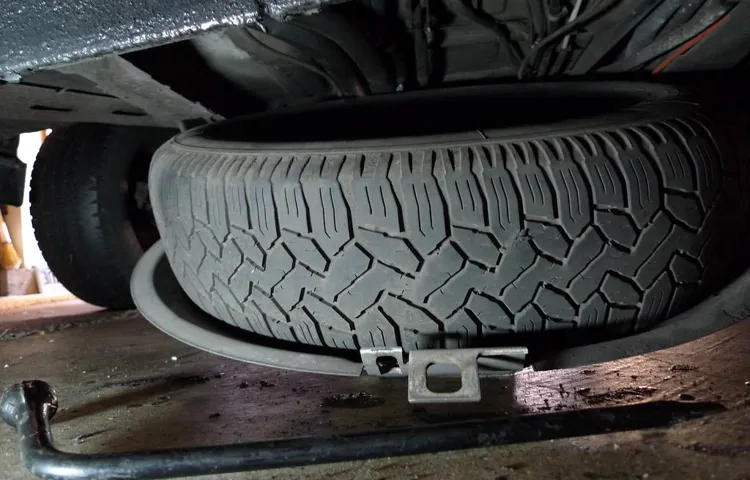
Finally, locate the spare tire winch mechanism, typically located under the rear of the vehicle, and use the winch handle or wrench to turn the mechanism and lower the tire. It’s important to note that spare tires are typically smaller than regular tires and are only meant to be used as a temporary solution. If you’re unsure of how to safely change a tire or lower the spare, don’t hesitate to seek the assistance of a professional.
Detach the Spare Tire from the Tools and Lower it Completely
When it comes to changing a flat tire, lowering the spare tire is an important step to get you on the road again. To do this, start by detaching the spare tire from the tools in your vehicle. Typically, the spare tire is located underneath the vehicle, so you may need to consult your owner’s manual to locate it.
Once you’ve found it, use the lug wrench to loosen the nuts on the tire while it’s still attached to the bracket. Then, use the jack to lift the vehicle until the flat tire is off the ground. Next, remove the nuts and pull the flat tire off.
Now, you can detach the spare tire from the bracket and lower it completely using the jack. Remember to use caution when lowering the spare tire, as it can be heavy. With the spare tire safely lowered, you can now install it on the vehicle and tighten the nuts.
Always remember to check the tire pressure before hitting the road. With these simple steps, you’ll be back on the road in no time.
Tips for Lowering and Replacing a Spare Tire
If you find yourself in a situation where you need to replace a flat tire with a spare, it’s important to know how to safely and effectively lower the spare tire. First, locate the spare tire, which is typically located underneath the vehicle. Depending on your vehicle, a crank or a lever may be needed to lower the tire.
If using a crank, insert it into the designated opening and turn it counter-clockwise to lower the tire. If using a lever, insert it into the designated slot and turn it counterclockwise until the tire is lowered. Once the tire is lowered, remove it from its mount and replace the flat tire.
To replace the spare tire, simply reverse the steps. Always use caution when lowering or lifting the spare tire and make sure the vehicle is on level ground to avoid any accidents. With these tips, you’ll be able to confidently replace a flat tire with a spare in no time!
Inspect the Spare Tire before Use
When it comes to changing a tire, it’s important to inspect the spare before use. You never know how long it’s been sitting there or what kind of condition it’s in. Make sure it’s properly inflated and doesn’t have any visible damage.
It’s also important to make sure you have all the necessary tools before attempting to replace the tire. As you lower the spare tire, keep in mind that it’s heavier than a regular tire and can be challenging to maneuver, so take your time and be careful. Once you have it in place, tighten the lug nuts in a star pattern to ensure even pressure.
Remember, the spare tire is just a temporary fix, so get to a mechanic as soon as possible to have the original tire repaired or replaced. By inspecting the spare before use and taking the proper safety precautions, you can ensure a smooth and safe tire change experience.
Hand-Tighten the Lug Nuts before Lowering the Vehicle
When dealing with a flat tire, it’s important to know how to properly replace it. One crucial step is to hand-tighten the lug nuts before lowering the vehicle. This will ensure that the wheel is firmly in place before fully tightening the lug nuts using a lug wrench.
But why hand-tighten them first? Well, if you lower the vehicle before tightening, there’s a chance that the wheel can still shift or wobble around, potentially damaging the brake rotor or causing vibrations while driving. By hand-tightening the lug nuts first, you can prevent this from happening and make sure the wheel is securely in place. Remember, once the vehicle is lowered, you should use a lug wrench to fully tighten the lug nuts in a crisscross pattern for equal distribution of pressure.
By following these steps, you can safely and confidently replace a spare tire in case of a flat, ensuring your safety on the road.
Schedule a Repair or Replacement for a Damaged or Worn Spare Tire
If you notice that the spare tire in your car is worn or damaged, it’s important to schedule a repair or replacement as soon as possible to ensure your safety on the road. Here are some tips for lowering and replacing a spare tire that will help you get the job done quickly and efficiently. First, make sure that your vehicle is parked on a level surface and that the emergency brake is engaged.
Next, locate the jack and the lug wrench in your car’s trunk. Use the lug wrench to loosen the lug nuts on the flat tire before positioning the jack under the vehicle. Raise the vehicle just enough to remove the flat tire and replace it with the spare.
Tighten the lug nuts by hand, then lower the vehicle and use the lug wrench to finish tightening the nuts in a star-shaped pattern. Finally, remember to have your damaged spare tire repaired or replaced as soon as possible to ensure that you always have a reliable spare in case of an emergency.
Conclusion: Ensure Roadside Safety with Proper Spare Tire Management
Lowering a spare tire is like taking a lopsided relationship to the next level – it requires patience, perseverance, and good old-fashioned elbow grease. So, next time you find yourself stuck on the side of the road with a flat tire, take a deep breath, channel your inner mechanic, and follow these steps to gracefully lower your spare and get back on the road to success. And remember, success is not just about thriving – it’s also about overcoming obstacles, including stubborn spare tires!”
FAQs
What is a spare tire and when should it be used?
A spare tire is an extra tire kept in a vehicle in case of a flat or punctured tire. It should be used when one of the regular tires loses air pressure or becomes damaged.
How do I lower a spare tire from underneath my vehicle?
Locate the tire-changing tools and spare tire under the rear of your vehicle, insert the jack handle into the hoist shaft and rotate it counterclockwise until the spare tire is on the ground.
Can I drive on a spare tire for an extended period of time?
Spare tires are designed for temporary use only and should not be driven on for an extended period of time. It is recommended that you replace the spare tire with a regular tire as soon as possible.
What is the recommended tire pressure for a spare tire?
The recommended tire pressure for a spare tire may vary depending on the make and model of your vehicle. It is important to consult your owner’s manual for the specific tire pressure information for your vehicle.
What should I do with my spare tire after I use it?
After using a spare tire, it is important to have the damaged or punctured tire repaired or replaced as soon as possible. The spare tire should be returned to its original storage location and secured properly.
Can I use a spare tire on any wheel of my vehicle?
Spare tires are typically designed to be used on any wheel of your vehicle, but it is recommended that you consult your owner’s manual for specific instructions and limitations.
How long can I drive on a spare tire before it needs to be replaced?
Spare tires are not meant for long-term use and should be replaced as soon as possible. It is recommended that you consult your owner’s manual for specific guidelines on when a spare tire should be replaced.