So, you’re planning a road trip in your trusty RV, ready to hit the open road and embrace the freedom that comes with it. As you prepare for your adventure, you may find yourself facing a common challenge – how to lower the awning on your RV. Don’t worry, you’re not alone! Many RVers have struggled with this task, but fear not, because we’re here to help.
Picture this: you’re parked at a stunning campsite, the sun is shining, and you want nothing more than to relax in the shade provided by your awning. But alas, it seems like a daunting task to figure out how to lower it. You may be wondering, “Where do I start?” or “Is it even possible for me to do it on my own?” Well, rest assured, lowering the awning on your RV is easier than you think.
Just imagine it as solving a puzzle or unraveling a mystery – you just need to find the right pieces and follow the steps. And with a little guidance, you’ll be basking in the shade of your awning in no time. In this blog post, we’ll break down the process of lowering your RV’s awning into manageable steps.
We’ll provide you with detailed instructions, tips, and tricks to ensure a smooth experience. Whether you’re a seasoned RVer or a newbie just starting out, we’ve got you covered. So, let’s dive right in and unravel the mystery of lowering the awning on your RV.
Get ready to feel the satisfaction of conquering this task and be prepared to relax in style on your next outdoor adventure.
Table of Contents
Introduction
Are you a proud RV owner looking for a quick and easy way to lower your awning? Well, look no further! Lowering the awning on your RV is a simple task that can provide you with much-needed shade and protection from the elements. To start, locate the awning control switch, typically located near the main entrance or on the side of your RV. Once you’ve found it, simply press the button to lower the awning.
Depending on the model and type of awning you have, it may unfold automatically or require a manual pull. Regardless, be sure to keep a firm grip on the awning as it lowers to ensure a smooth and controlled descent. And just like that, you’ll be able to relax and enjoy the shade provided by your RV’s awning.
So go ahead, lower that awning and make the most of your outdoor living space!
Understanding the Awning on Your RV
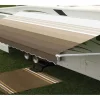
awnings on RVs
Importance of Lowering the Awning Properly
lowering the awning, awning, importance, properly. The awning is an essential component of any outdoor space, providing much-needed shade and protection from the elements. However, it’s not enough to simply have an awning – it’s equally important to know how to lower it properly.
Lowering the awning correctly ensures that it functions efficiently and extends its lifespan. But why is it so important? Imagine this: you’re enjoying a sunny day outside, and suddenly a gust of wind comes rushing in. Without properly lowering the awning, it might get damaged or, even worse, cause harm to you or others nearby.
Lowering the awning securely also prevents dust and dirt from accumulating on its surface, keeping it looking clean and well-maintained. Additionally, proper lowering ensures that the awning operates smoothly and can be easily adjusted to provide the desired amount of shade. So, before you head outside, make sure you know how to lower your awning properly – it’s a small but significant step in creating a safe and comfortable outdoor environment.
Preparation
Lowering the awning on your RV might seem like a daunting task, but with a little preparation, it can be a breeze. Before you begin, make sure you have all the necessary tools and equipment on hand. This might include a ladder, a screwdriver or wrench, and any other tools specific to your RV model.
Familiarize yourself with the awning’s manual or instructions for your specific RV, as each one may have different steps or requirements. If you’re unsure where to find this information, reach out to your RV manufacturer or consult an experienced RV owner in your community. Once you have everything you need and a good grasp of the instructions, find a safe and level area to work in.
This will help ensure that the awning is lowered smoothly and without any issues. Remember, taking the time to prepare beforehand will make the entire process much easier and give you peace of mind knowing that you’re doing it correctly.
Checking the Weather Conditions
Checking the weather conditions is an important step in preparing for any outdoor activity. Whether you’re planning a beach day, a hike, or even just a picnic in the park, knowing what the weather will be like can help ensure that you’re prepared for whatever Mother Nature throws your way. But how do you go about checking the weather? There are multiple sources you can turn to, from traditional methods like watching the local news or listening to the radio, to more modern options like checking a weather app on your phone.
Each option has its pros and cons, so it’s important to find one that works best for you. Some people may prefer the convenience of a weather app, while others may trust the accuracy of a meteorologist on TV. Ultimately, the key is to find a reliable source that you feel comfortable relying on.
So next time you’re planning an outdoor adventure, don’t forget to check the weather beforehand to ensure a safe and enjoyable experience.
Gathering the Necessary Tools and Equipment
Before tackling any project, it’s important to gather all the necessary tools and equipment to ensure a smooth and efficient process. This step in the preparation phase is essential for any task, whether it’s a simple DIY job or a more complex project. By having all your tools at hand, you can save time and effort, allowing you to focus on the task at hand.
Depending on the nature of the project, the tools required may vary. For example, if you’re planning to paint a room, you’ll need brushes, rollers, trays, and tape. On the other hand, if you’re working on a home improvement project, you might need power tools such as a saw, drill, or sander.
By identifying what tools are needed for your specific project, you can ensure you have everything ready before you begin. This will prevent unnecessary delays and frustration along the way. So, take the time to gather all the necessary tools and equipment before diving into your project, and you’ll be well-prepared for success.
Lowering the Awning
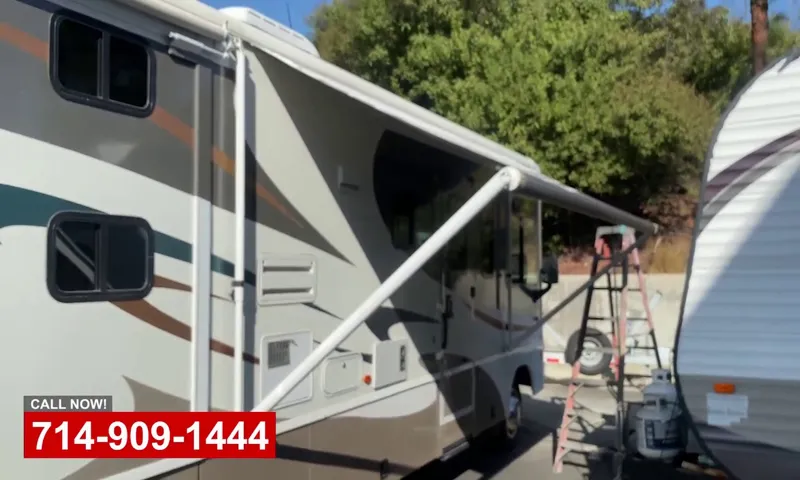
If you’re an RV owner, you know that having an awning can greatly enhance your outdoor living space. However, there may come a time when you need to lower your awning, whether it’s due to impending bad weather or simply to stow it away for travel. Lowering the awning is a simple process that can be done in just a few steps.
First, locate the control arms or knobs on the sides of the awning. These are usually found near the top of the RV. Next, loosen the knobs or release the arms by pulling the release lever.
This will allow the awning to start rolling up. Finally, use a gentle downward motion to guide the awning as it rolls up, ensuring that it is neatly and evenly rolled for safe storage. With these steps, you’ll be able to lower your awning quickly and easily whenever you need to.
So, the next time you’re ready to hit the road or prepare for inclement weather, you’ll know exactly how to lower your awning on your RV.
Locating the Awning Control Panel
awnings, control panel, lowering, locati
Pressing the Lower Button on the Control Panel
awning, control panel, lower button
Monitoring the Awning’s Movement
lowering the awning
Securing the Lowered Awning
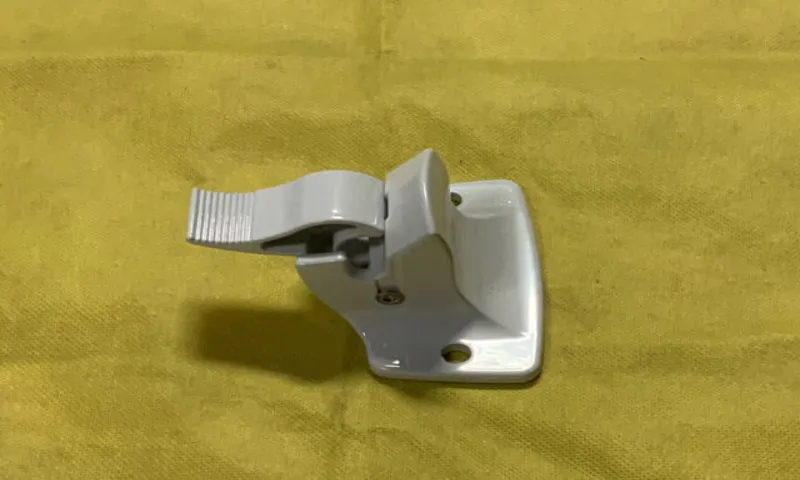
Are you ready to hit the road in your RV, but unsure how to lower the awning for travel? Don’t worry, it’s not as complicated as it may seem. First, check that there are no obstructions, such as tree branches or power lines, that could interfere with the awning coming down smoothly. Next, locate the awning lock lever, usually located on the side of the awning arm.
Pull down on the lever and it should release the awning, allowing you to lower it. As you lower the awning, be sure to support it with your other hand to prevent it from slamming down suddenly. Once the awning is fully lowered, you can secure it by locking the lever back into place.
It’s important to secure the awning to prevent any damage while you’re on the road. So, next time you’re ready to pack up and head out on your RV adventure, you’ll know exactly how to lower and secure the awning properly!
Using Awning Tie-Downs
awning tie-downs
Adjusting the Awning Support Arms
awning support arms, securing the lowered awning
Tips for Safe Awning Lowering
Lowering the awning on an RV can be a simple process if you follow a few tips for safety. First, ensure that the RV is parked on a level surface to avoid any imbalance when lowering the awning. Next, take note of the wind conditions before starting the process.
It’s important to lower the awning on a calm day to prevent it from getting damaged or causing any accidents. Once you have checked the surroundings, locate the awning rod and gently pull it down to release the awning’s tension. Slowly release the awning until it reaches the desired height.
Remember to keep your hands clear of any possible pinch points and be cautious of any obstructions that may be in the way. By taking these precautions, you can safely and easily lower the awning on your RV.
Avoid Lowering the Awning in Strong Winds
awning, strong winds, avoiding lowering, safety tips
Regularly Inspecting and Maintaining the Awning
Tips for Safe Awning Lowering
Conclusion
Lowering the awning on your RV is as easy as a cool breeze on a summer day. Just follow these simple steps, and you’ll be enjoying shady bliss in no time. First, locate the awning control panel, which is usually conveniently located near the entrance of your RV.
Next, channel your inner magician and press the button that says ‘Lower Awning.’ Like a well-trained assistant, the awning will gracefully descend, ready to shelter you from the sun’s relentless rays. As you bask in the shade, you’ll marvel at your newfound power to control the elements—Mother Nature’s got nothing on you! So go ahead, take control of your awning, and leave your worries behind.
Just remember, with great awning power comes great responsibility—use it wisely and enjoy the good life on the road.”
Ensuring Safety and Enjoyment with a Properly Lowered Awning
Awning safety is paramount when it comes to enjoying your outdoor space. Lowering your awning properly is essential to prevent accidents and ensure a seamless experience. Here are some tips to ensure the safety and enjoyment of your outdoor area.
First and foremost, always follow the manufacturer’s instructions when lowering your awning. Each awning is different, and the manufacturer’s guidelines will provide you with specific instructions on how to safely lower and secure your awning. Before lowering your awning, make sure the area underneath is clear of any furniture, people, or obstacles.
This will prevent any accidents or damage from occurring when the awning is being lowered. When lowering your awning, do it slowly and steadily to prevent any sudden movements or jerks. This will help to avoid any unexpected falls or damage to the awning.
Once your awning is fully lowered, make sure it is securely locked into position. This will prevent any loosening or movement of the awning, especially in windy conditions. Regularly inspect your awning for any signs of wear and tear, such as frayed fabric or damaged mechanisms.
If you notice any issues, it is important to address them immediately to prevent further damage or accidents. In conclusion, ensuring the safety and enjoyment of your outdoor space with a properly lowered awning is crucial. By following the manufacturer’s instructions, clearing the area before lowering, lowering slowly and steadily, securing the awning into position, and regularly inspecting for any damage, you can enjoy your outdoor area with peace of mind.
FAQs
How do I lower the awning on my RV?
To lower the awning on your RV, start by locating the awning control switch. This is typically found inside the RV near the entry door or on the side of the RV near the awning. Once you have located the switch, simply press the down button to lower the awning. Make sure to hold onto the strap or handle while lowering the awning to ensure it doesn’t unroll too quickly.
Can I manually lower my RV awning?
Yes, you can manually lower your RV awning if the electronic control switch is not working or if you prefer to do it manually. To do this, start by locating the awning strap or handle on one end of the awning. Pull down on the strap or handle while holding onto the awning roller tube, slowly unrolling the awning. Once the desired height is reached, secure the awning with the awning arms or brackets.
How do I know when the RV awning is fully lowered?
When lowering the RV awning, you will notice that it stops unrolling once it reaches its fully extended position. This is typically when the awning arms or brackets are fully extended and the fabric is taut. You may hear a clicking sound or feel resistance when the awning is fully lowered.
What should I do if my RV awning won’t lower?
If your RV awning won’t lower, first check if there is power to the awning control switch. If there is power and the switch is not working, it may need to be replaced. If there is no power, check the fuse or circuit breaker for the awning. If the fuse is blown or the circuit breaker is tripped, replace or reset it. If these troubleshooting steps don’t resolve the issue, it is recommended to consult a professional RV technician.
Is it safe to lower the RV awning during strong winds?
It is not recommended to lower the RV awning during strong winds. Heavy wind can cause damage to the awning or even flip the RV. If you are expecting strong winds, it is best to retract and secure the awning before they arrive. There are also wind sensors available that can automatically retract the awning when wind speeds exceed a certain threshold.
Can I lower the RV awning partially?
Yes, you can lower the RV awning partially to provide some shade or protection from the sun. Simply stop unrolling the awning at the desired height and secure it with the awning arms or brackets. This allows you to customize the amount of shade or coverage the awning provides.
How often should I lower and raise my RV awning?
It is recommended to lower and raise your RV awning as needed. If you are using the awning for extended periods, it is advisable to retract it during heavy rain, strong winds, or when leaving the RV unattended for a longer period. This helps to protect the awning fabric and prevents any potential damage. Regularly inspecting and maintaining the awning will also help prolong its lifespan.