Hey there! Are you ready to dive into the exciting world of “Introduction”? Well, get ready because this blog is going to take you on an incredible journey of discovery. We’ll explore everything from the importance of a strong introduction to tips on how to craft an engaging opening paragraph. So sit back, relax, and let’s get started! Imagine you’re meeting someone for the first time.
What’s the first thing you say? Your introduction, right? Well, the same goes for writing. Your introduction sets the tone for the rest of your piece and determines whether or not your readers will continue on. It’s like the opening act of a concert – it needs to grab your attention and make you want to stick around for the main event.
But what makes a good introduction? That’s a great question! A good introduction should be captivating, informative, and leave the reader wanting more. It should draw them in, like a magnet pulling them closer. It should make them curious, eager to explore further.
Now, you might be wondering how to achieve all of this. Well, fret not! Throughout this blog, we will provide you with practical tips and tricks that will take your introductions from good to great. We’ll discuss the power of a captivating hook, the importance of clear and concise language, and the art of setting the scene.
By the time we’re done, you’ll be a pro at crafting introductions that leave a lasting impact. So, whether you’re a seasoned writer looking to fine-tune your skills or a newbie trying to navigate the vast world of writing, this blog is for you. Get ready to master the art of introductions and captivate your readers from the very first sentence.
It’s going to be an incredible journey, and we can’t wait to embark on it with you. Let’s dive in, shall we?
Table of Contents
Understanding Voltage Conversion
Have you ever needed to convert the voltage of a electronic device from 12 volts DC to 5 volts DC? Well, you’re in luck! In this blog post, I’ll show you how to make a 12 volt DC to 5 volt DC converter.
To start, you’ll need a few components: a step-down voltage regulator, capacitors, resistors, and a diode. The step-down voltage regulator is the key component that will convert the 12 volt input to a 5 volt output.
First, connect the input pin of the voltage regulator to the positive terminal of your 12 volt power source. Then, connect the ground pin of the regulator to the negative terminal of the power source. Make sure to use appropriate size wires for the current that will be passing through them.
Next, connect a capacitor across the input and ground pins of the voltage regulator. This capacitor helps filter out any noise or fluctuations in the input voltage, ensuring a stable output. Now, connect another capacitor across the output and ground pins of the regulator.
This capacitor helps filter out any noise or fluctuations in the output voltage, ensuring a clean and steady 5 volts. To further stabilize the output voltage, you can add a resistor and a diode in parallel across the output and ground pins of the regulator.
The resistor helps regulate the current flow through the diode, preventing any damage to the regulator. And that’s it! You’ve successfully created a 12 volt DC to 5 volt DC converter.
What is a voltage converter?
voltage converter, voltage conversion, convert electrical voltage
Why do you need a voltage converter?
voltage converter, understanding voltage conversion. Are you planning to travel abroad but worried about your electronic devices? Well, you’re not alone! Many countries have different voltage standards and electric outlets, making it difficult to use your devices without a voltage converter. So, why do you need a voltage converter? Let’s dive into the world of voltage conversion and shed some light on this perplexing topic.
Voltage conversion is crucial when traveling to a country with a different electrical system. In simple terms, a voltage converter adjusts the electrical voltage coming from the wall outlet to match the voltage requirements of your device. Without this conversion, your electronic devices may not function properly or even get damaged.
Think of it this way: your electronic devices are like tourists visiting a foreign country. They speak a different language (voltage), and without a translator (voltage converter), they won’t be able to communicate effectively with the locals (the electrical system). Just like tourists need a translator to navigate in a foreign land, your devices need a voltage converter to navigate in a country with a different voltage standard.
Moreover, different countries also use different types of electrical outlets. For example, the United States uses Type A and Type B outlets, while Europe uses Type C and Type F outlets. These outlets have different shapes and pin configurations, making it impossible to directly plug your devices into them without an adapter.
A voltage converter often comes with a built-in adapter, providing a solution to this problem as well. In addition to travel, voltage converters are also handy for those who import electronic devices from abroad. If you’ve ever purchased a device from another country, you might have noticed that it doesn’t work when plugged into your domestic electrical outlet.
This is because the device is designed to operate at the voltage of its country of origin. By using a voltage converter, you can adjust the voltage to match your country’s standards and use the device without any issues. So, the next time you plan to travel or purchase a device from another country, don’t forget the importance of a voltage converter.
Components needed for the conversion
If you’re looking to create a 12 volt DC to 5 volt DC converter, you’ll need a few components to make it happen. First and foremost, you’ll need a step-down voltage regulator.
This device will take the 12 volt input and regulate it down to the desired 5 volts. There are many different voltage regulator options available, so you’ll want to choose one that can handle your specific power requirements.
Additionally, you’ll need capacitors to help smooth out the voltage and reduce any noise or fluctuations. These capacitors will act as a buffer to ensure a steady and stable output voltage. Lastly, you’ll need connectors and wires to connect everything together and create a working circuit.
It’s important to ensure that all the components are securely connected and properly insulated to avoid any electrical mishaps. By gathering these necessary components and following the proper wiring and assembly instructions, you’ll be on your way to creating your very own 12 volt DC to 5 volt DC converter.
12V DC power source
12V DC power source If you’re planning on setting up a 12V DC power source, there are a few components you will need to consider. The first and most important component is the power supply itself. You will need a power supply that can provide a stable and reliable 12V output.
There are many options available, including wall adapters, batteries, and even solar panels. Next, you will need a way to regulate the voltage. This is important because electronics are very sensitive to changes in voltage, and without proper regulation, you could end up damaging your devices.
You can use a voltage regulator or a voltage regulator IC to ensure that the voltage remains constant. Additionally, you will need some form of protection for your power source. This can be in the form of fuses or circuit breakers, which will help prevent any damage or accidents caused by electrical overload.
Finally, you will need some wires and connectors to connect everything together. It’s important to use wires and connectors that are rated for the current and voltage you will be working with, as using the wrong ones can lead to overheating and other safety hazards. With these components in place, you will have a reliable and safe 12V DC power source for your electrical projects.
7.5V DC load
To convert a 5V DC load, you will need a few essential components. The first component you’ll need is a power supply that can provide a steady
5V DC output. This can be achieved using a DC power supply or a battery. Next, you will need a voltage regulator or a voltage divider circuit to regulate or reduce the voltage to the desired
5V level. A voltage regulator ensures that the output voltage remains constant, even if the input voltage fluctuates. On the other hand, a voltage divider circuit divides the input voltage to achieve the desired output.
Another important component is a capacitor, used to smooth out any voltage spikes or fluctuations in the circuit. It acts as a buffer and helps maintain a constant voltage level. Additionally, you may need some resistors to limit the current flowing through the circuit and protect the components.
Finally, you will need some wires and soldering equipment to connect all the components together and create a complete circuit. These basic components are essential for converting a 5V DC load and ensuring a stable and reliable power source.
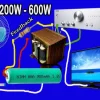
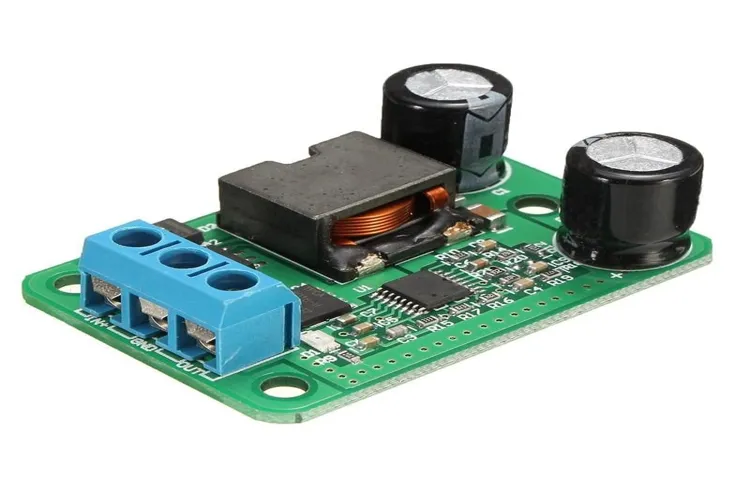
Step-down DC-DC converter module
In order to understand how a step-down DC-DC converter module works, it’s important to know the components that are involved in the conversion process. The first component is the input voltage, which is the voltage that is supplied to the module. This can vary depending on the specific application, but the module is designed to handle a wide range of input voltages.
The second component is the inductor, which is responsible for storing and releasing energy during the conversion process. This allows for the voltage to be stepped down to the desired level. The third component is the switch, which controls the flow of current through the inductor.
By rapidly opening and closing the switch, the inductor can be charged and discharged, resulting in the desired output voltage. Finally, there is the output capacitor, which helps to smooth out any fluctuations in the output voltage. By combining these components together in a well-designed module, it is possible to convert a higher input voltage to a lower output voltage with high efficiency.
So, the next time you see a step-down DC-DC converter module, you’ll have a better understanding of how it works and the components that are involved in the conversion process.
Building the circuit
If you’re looking to build a 12 volt DC to 5 volt DC converter, you’re in the right place! Converting voltage can be a tricky process, but with the right tools and a little bit of know-how, you can create your very own converter. To start, you’ll need a few essential components like an LM317 voltage regulator, a resistor, a diode, and a capacitor.
These components will help regulate the flow of electricity and ensure your output voltage is stable and accurate. Once you have your components, you can begin building the circuit. It’s important to follow a diagram or schematic to ensure you connect everything correctly.
Remember, safety first! Make sure to wear protective gear and work in a well-ventilated area. With some careful soldering and a little bit of patience, you’ll have your very own 12 volt DC to 5 volt DC converter in no time!
Connect the 12V DC power source to the input of the step-down converter
Are you ready to start building your circuit? Great! Once you have gathered all the necessary components, it’s time to connect the 12V DC power source to the input of the step-down converter. This step is crucial as it determines the power supply for your circuit. The 12V DC power source is capable of supplying a constant voltage, which is essential for the proper functioning of the step-down converter.
By connecting the power source to the input of the converter, you are ensuring that the converter receives a stable power supply, allowing it to convert the voltage to a lower level as needed. So go ahead and make the connection, ensuring that the positive terminal of the power source is connected to the input terminal of the converter, and the negative terminal is connected to the ground. This will set the foundation for the rest of your circuit and prepare you for the next steps in the building process.
Connect the output of the converter to the 7.5V DC load
To complete the circuit, you will need to connect the output of the converter to the 5V DC load. This step is crucial as it allows the current to flow from the converter to the load, powering whatever device or component you have connected.
Think of it as connecting the final piece of a puzzle. Once the converter and load are connected, the circuit is complete, and electricity can flow freely through the system. It’s like plugging in a lamp to a power socket – without that connection, the lamp won’t light up! Now, you might be wondering why we specifically mentioned the
5V DC load. Well, every electrical device or component has certain voltage requirements. In this case, the load you are using requires
5 volts of direct current (DC) to operate correctly. By connecting the output of the converter to the load, you are supplying it with the necessary voltage to function properly. So, make sure to double-check the voltage requirements of your load before connecting it to the converter.
Using the wrong voltage can potentially damage the load or lead to inefficient operation. Always match the voltage of your load with the output voltage of your converter to ensure a successful connection. Once you have made the connection, you can test your circuit to see if everything is working as intended.
If the load powers up and operates as expected, congratulations! You have successfully built and connected your circuit.
Ensure proper polarity and wiring connections
When building an electrical circuit, ensuring proper polarity and wiring connections is crucial. Polarity refers to the direction of the electric current flow, and it is essential to connect the positive and negative terminals correctly. One simple way to identify polarity is by using color-coded wires or markings on the components.
For example, red wires are typically used for the positive terminal, while black wires indicate the negative terminal. It is important to double-check the polarity before making any connections to avoid damaging the circuit or causing a short circuit. Additionally, proper wiring connections ensure that the components are connected in the correct sequence, allowing the circuit to function properly.
This involves connecting wires to the appropriate terminals or soldering connections securely. Taking the time to build the circuit correctly from the start will save you time and frustration in the long run. So, be diligent and pay attention to detail when connecting the wires to ensure proper polarity and wiring connections.
Double-check all connections for safety
When building a circuit, it is crucial to double-check all connections for safety. This step is often overlooked or rushed, but it is incredibly important to ensure that there are no loose or faulty connections that could lead to electrical mishaps. Taking the time to carefully inspect each connection can prevent potential hazards and accidents.
It is also essential to follow the proper wiring diagram or instructions to ensure that the connections are made correctly. By double-checking the connections, you can have peace of mind knowing that your circuit is wired safely and effectively. So, before powering up your circuit, take a few extra minutes to inspect each connection and make any necessary adjustments.
Trust me, the few minutes it takes to double-check can save you a lot of trouble and headaches in the long run.
Testing and troubleshooting
If you’re looking to create a 12-volt DC to 5-volt DC converter, you’ll need to understand the process of testing and troubleshooting to ensure it works properly. One important step is to use a multimeter to measure the output voltage of your converter.
This will help you determine if it is delivering the desired 5 volts. Additionally, you should check for any abnormal heat or burning smells, as this could indicate a problem with the converter.
Another common troubleshooting step is to check all the connections and make sure they are secure. Sometimes a loose connection can cause issues with the converter. Finally, it’s a good idea to double-check your circuit design and make sure it is correct.
This includes checking the values of your resistors, capacitors, and any other components you are using. By following these testing and troubleshooting steps, you can ensure your 12-volt DC to 5-volt DC converter is functioning properly.
Use a multimeter to measure the output voltage
multimeter, measure, output voltage, testing, troubleshooting Testing and troubleshooting are essential steps in electronics projects to ensure that everything is functioning correctly. One way to do this is by using a multimeter to measure the output voltage. This is particularly useful when dealing with power supplies, batteries, or any component that produces an electrical output.
The multimeter is a versatile tool that can measure voltage, current, and resistance, among other things. By measuring the output voltage, you can determine if it matches the expected value. If it doesn’t, it may indicate a problem with the circuit or the component itself.
This is where troubleshooting comes into play. You can use the multimeter to identify which part is causing the issue and take the necessary steps to fix it. By testing and troubleshooting with a multimeter, you can ensure that your electronics project is working as intended.
Check for any loose connections or short circuits
When it comes to troubleshooting electrical issues, it’s essential to check for any loose connections or short circuits. These problems can often be the culprit behind malfunctioning devices or even electrical fires. So, how can you identify and fix loose connections or short circuits? Firstly, start by inspecting the wiring and connections of the affected device.
Look for any signs of frayed or damaged wires, loose connections, or burnt insulation. If you spot any issues, tighten the connections, replace damaged wires, or use electrical tape to insulate any exposed areas. Additionally, check for any loose screws or bolts in electrical panels or junction boxes and tighten them if necessary.
For short circuits, carefully examine the wiring for any exposed parts that may be touching each other or metal surfaces. These can cause a short circuit and trip the circuit breaker. To fix short circuits, isolate the problem area and reroute the wiring if needed.
Remember, if you’re uncertain or uncomfortable handling electrical repairs yourself, it’s always best to seek the help of a professional electrician for safety reasons.
Make necessary adjustments to achieve desired output voltage
To achieve the desired output voltage in a circuit, it may be necessary to make some adjustments and perform testing and troubleshooting. Sometimes, the voltage produced by a circuit may not be at the desired level, which can affect the overall functioning of the system. Testing and troubleshooting is an important step to identify any issues and find the best solution.
This can involve using multimeters or other testing equipment to measure the actual voltage output and compare it to the desired voltage. By doing this, you can pinpoint any discrepancies and determine whether adjustments need to be made. There are several adjustments that can be made to achieve the desired output voltage.
One common adjustment is to change the resistance or impedance in the circuit. This can be done by adding or removing resistors, or by changing the values of existing resistors. By adjusting the resistance, you can control the flow of current in the circuit and subsequently adjust the output voltage.
Another adjustment that can be made is to change the input voltage. This can be done by adjusting the power supply or using voltage regulators. By changing the input voltage, you can effectively change the output voltage as well.
In some cases, troubleshooting may be required to identify any underlying issues that are affecting the output voltage. This can involve checking for loose connections, damaged components, or any other issues that may be causing a disruption in the circuit. By making the necessary adjustments and performing thorough testing and troubleshooting, it is possible to achieve the desired output voltage in a circuit.
This ensures that the circuit functions properly and meets the requirements of the system it is a part of.
Conclusion
So there you have it, a practical and cost-effective solution to your voltage conversion needs! With just a few simple steps and some readily available components, you can easily create a 12 volt DC to 5 volt DC converter. Why spend a fortune on expensive commercial converters when you can DIY your way to success? This clever little contraption will come in handy in a multitude of situations – powering up your electronic devices, charging your batteries, or even keeping your remote-controlled toys humming along without a hitch.
It’s like having a pocket-sized magician that transforms high voltage into just the right amount of power! Not only will you impress your friends and family with your technical prowess, but you’ll also save some serious money in the process. Plus, who doesn’t love a little DIY project to flex those creative muscles? So go ahead, grab those components, fire up that soldering iron, and get ready to bask in the glory of your very own 12 volt DC to 5 volt DC converter creation.
You’ll be the talk of the town – or at least the talk of your electronics-loving circle – and your devices will thank you for their new power source. Remember, with a little ingenuity and some handy instructions like these, the possibilities for voltage conversion are endless! So get ready to power up, my friend, and enjoy the sweet satisfaction of being a voltage conversion wizard!
Safety precautions
If you’re looking to create a 12-volt DC to 5-volt DC converter, it’s important to take some safety precautions. First and foremost, make sure to work in a well-ventilated area to prevent overheating.
Additionally, it’s important to use the correct tools and materials. Double-check the voltage ratings of all components to ensure they can handle the desired output. When soldering, be careful to avoid touching the hot tip of the soldering iron and use safety goggles to protect your eyes.
It’s also a good idea to use heat shrink tubing or electrical tape to insulate any exposed wires to prevent accidental shock or short circuits. Finally, always double-check your connections and make sure everything is properly wired before applying power. By taking these safety precautions, you can ensure a smooth and safe conversion process.
Additional resources
If you’re looking to convert 12 volts DC to 5 volts DC, you may be wondering how to do it. Luckily, there are several resources available to help you with this process.
One option is to search for online tutorials or guides that provide step-by-step instructions on building a 12V DC to 5V DC converter. These resources often include diagrams, component lists, and clear explanations to help you understand the process.
Another option is to join online forums or communities where you can ask for help or advice from experts in the field. These communities are a great place to connect with hobbyists or professionals who have experience with building converters and can offer guidance based on their own experiences. Additionally, there are many books and publications available that cover the topic of DC voltage conversions.
These resources often provide in-depth explanations and detailed circuits that you can replicate. By utilizing these resources, you can gain the knowledge and skills necessary to build your own 12V DC to 5V DC converter.
FAQs
What is a DC to DC converter?
A DC to DC converter is an electronic device that converts a direct current (DC) voltage from one level to another. It is used to step up or step down the voltage level depending on the application.
How does a DC to DC converter work?
A DC to DC converter works by using electronic components such as inductors, capacitors, and diodes to convert the input DC voltage to the desired output DC voltage. It typically uses pulse-width modulation (PWM) techniques to regulate the output voltage.
What are the different types of DC to DC converters?
There are several types of DC to DC converters, including buck converters (step-down), boost converters (step-up), buck-boost converters (step-up and step-down), and flyback converters. Each type has its own advantages and is used in different applications.
How can I make a 12V DC to 7.5V DC converter?
To make a 12V DC to 7.5V DC converter, you can use a buck converter circuit. This circuit allows you to step down the voltage from 12V to 7.5V. You will need to select the appropriate components such as inductors, capacitors, and a controller chip to build the circuit.
What are the considerations when designing a DC to DC converter?
When designing a DC to DC converter, some important considerations include the efficiency of the conversion, the ripple voltage and current, the load regulation, the input and output voltage ranges, and the maximum current rating. These factors will determine the performance and reliability of the converter.
Can I use a DC to DC converter in a car?
Yes, DC to DC converters are commonly used in cars to power devices that require a different voltage level than the car’s battery voltage. For example, you can use a DC to DC converter to power a 7.5V device from a 12V car battery.
Are there any safety precautions when using a DC to DC converter?
Yes, when using a DC to DC converter, it is important to follow proper safety precautions. Make sure to use appropriate insulation and grounding techniques to prevent any electrical hazards. Also, choose a converter that is designed for the specific voltage and current requirements of your application.
Can I use a DC to DC converter for solar power systems? A8. Yes, DC to DC converters are commonly used in solar power systems to convert the voltage from the solar panels to a usable voltage level. These converters can step up or step down the voltage depending on the needs of the system.
What is the efficiency of a DC to DC converter?
The efficiency of a DC to DC converter is a measure of how effectively it converts the input voltage to the desired output voltage. It is typically expressed as a percentage and can vary depending on the specific converter design and load conditions.
Can I use a DC to DC converter to power electronic devices?
Yes, DC to DC converters are commonly used to power electronic devices that require a specific voltage level. They are often used in computer systems, telecommunication equipment, and other electronics where the input voltage needs to be converted to a different level for proper operation.