
Are you tired of the plain and boring RV awning in your recreational vehicle? Do you want to add a bit of color and design to make it more appealing? One way to do so is by adding a one piece valance. However, you may wonder how you can install it in just two pieces. Well, you’ve come to the right place.
In this blog post, we will guide you through the process of making a one piece valance in two pieces for your RV awning. It may sound complicated, but it’s actually a simple and easy process that you can do yourself. So let’s get started and transform your RV’s awning into a stylish and eye-catching feature.
Introduction
If you’re looking to make a one-piece valance into two pieces on your RV awning, there are a few simple steps you can follow. First, measure the length of your awning and divide it into the desired lengths for the two valance pieces. Next, cut your fabric to size and attach a strip of hook-and-loop fastener to the back of each piece.
Then, separate the two pieces of the valance and attach the appropriate side of the hook-and-loop fastener to the awning rail. Once the fasteners are attached, you can easily attach and detach the valance pieces as needed. This can be a great solution if you need to regularly take down one side of your awning for easy access or if you simply prefer the look of a two-piece valance.
With just a few simple steps, you can easily customize your RV awning to fit your needs and style.
Explanation of the Request
In this blog section, we’ll be discussing the importance of providing a clear and concise explanation of requests. Whether you’re submitting a request for something or receiving one, it’s crucial to have a complete understanding of what’s being asked of you. This ensures that the requests are fulfilled correctly and in a timely manner, saving you time and frustration.
It’s also essential to communicate clearly and efficiently when making a request to minimize delays and confusion. By doing so, you increase the likelihood of a positive outcome. In short, providing an accurate explanation of a request improves communication and helps prevent misunderstandings.
Benefits of Making a Two-Piece Valance
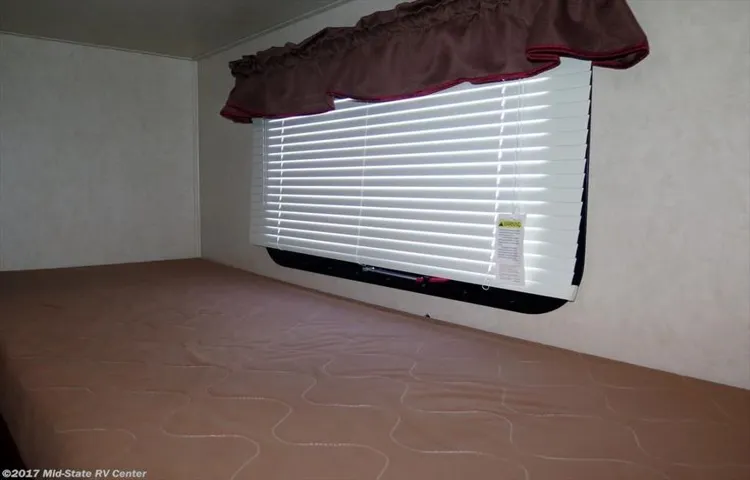
If you are looking to add a touch of elegance and sophistication to your window treatment, then making a two-piece valance might just be the solution you need. A two-piece valance is a decorative element that is comprised of two separate pieces – the top piece or the pelmet, and the bottom piece or the swag. One of the primary benefits of making a two-piece valance is that it is a versatile option that can be customized to suit your personal style and taste.
You can choose from a range of fabrics, textures, and patterns to create a unique valance that complements your home decor. Additionally, a two-piece valance can be used to frame a window or provide privacy while adding a touch of sophistication to your room. So, whether you’re looking to enhance the aesthetic appeal of your home or create a cozy atmosphere, a two-piece valance is a great way to achieve both.
Materials Needed
If you’re looking to make a one piece valance in two pieces for your RV awning, you’ll need a few materials to get started. Firstly, you’ll need a measuring tape to ensure you get the right dimensions for your awning. Next up, you’ll need a sturdy fabric that can withstand the elements, such as acrylic or vinyl-coated polyester.
A sewing machine will also come in handy to sew the fabric together, as well as thread and needles. Lastly, you’ll need a grommet kit to attach the valance to your awning. With these materials in hand, you’ll be ready to start creating your two-piece valance for your RV awning.
List of Materials and Tools
When it comes to making DIY projects, having the right materials and tools is essential. For this particular project, you will need a few things to get started. First, you will need a piece of wood that is about 12 inches long and 6 inches wide.
You will also need a drill, sandpaper, screws, and a saw. If you don’t already have these items, you can easily find them at your local hardware store. In addition to these basic items, you may also want to consider getting some wood stain or paint and a brush to give your project a polished finish.
Overall, having the right materials and tools will make the project much easier and help you achieve the desired results. So, take a trip to the hardware store and get started on your DIY project today!
Tips on Choosing the Right Materials
When it comes to choosing the right materials for your DIY projects, there are several factors to consider. One of the first things you need to think about is the type of project you’re working on. Are you building something that will be exposed to the elements, like a garden bench or outdoor furniture? Or are you creating something decorative that will be displayed indoors? The materials you choose will depend on the intended use and location of the finished product.
For outdoor projects, you’ll want to use materials that can withstand the weather, like treated lumber, cedar, or metal. For indoor projects, you can be more flexible with materials, choosing from a wider variety of options like wood, glass, and fabric. Ultimately, the right materials for your project will depend on your budget, skill level, and personal preferences.
Step-by-Step Guide
Making a one-piece valance for your RV awning may seem like an impossible task, especially if you only have a limited amount of fabric. However, with a few simple steps, you can easily create a beautiful two-piece valance that will perfectly frame your awning. To begin, measure the length and width of your RV awning, and add a few inches to each measurement to allow for hemming and a snug fit.
Next, cut your fabric into two equal pieces, making sure each piece is long enough to cover half of your awning. Once you have your two pieces of fabric, hem the top and bottom edges of each piece, leaving the sides raw. To create a nice clean look, fold the top and bottom edges over twice before sewing them in place.
Next, attach a strip of Velcro to the inner edge of each piece of fabric. Make sure to use a heavy-duty Velcro strip that will securely attach to your RV awning. Finally, position the two pieces of fabric on your awning, making sure the Velcro strips are aligned and firmly attached.
Adjust the fabric as necessary to ensure a tight, secure fit. Overall, making a two-piece valance for your RV awning is a simple, straightforward process. With a few basic sewing skills, a bit of fabric, and some Velcro, you can create a beautiful and functional accent that will enhance the appearance of your RV and provide much-needed shade during those hot summer months.
Installing the First Piece of the Valance
If you’re trying to install a valance and don’t know where to begin, fear not! We’re here to walk you through the installation process step-by-step. The first thing you’ll want to do is locate the bracket that came with your valance. Make sure it’s the right size for your window and fits snugly against it.
Once you’ve identified the correct bracket, take the screws that came with it and secure it to the top of your window frame. It’s important to make sure the bracket is centered above the frame and level with the ground. To do this, you can use a level and pencil to make markings on the wall before you screw it in.
Once you’ve screwed in the bracket, you’re ready to hang the valance!
Cutting and Attaching the Second Piece
Now that you have cut your first piece of the fabric to the correct size, it’s time to move on to the second piece. Place the fabric on a flat surface and measure the length and width required, adding an inch on all sides for seam allowance. Once you have the correct measurements, carefully cut the fabric using a fabric cutting tool or scissors.
Take care to ensure that the fabric is straight and even to avoid any puckering or folding later on. Next, place the second piece of fabric on top of the first, with the right sides facing each other. Pin the two pieces of fabric together, starting at the center and working your way to the edges.
Use a sewing machine or hand sew the pieces together, making sure to leave an inch-long gap to turn the fabric inside out. Once you have turned the fabric through the gap, you can sew up the gap and press the fabric flat. Your second piece is now joined together and ready to be added to your project.
Decorative Finishing Touches
Decorative finishing touches are the cherry on top when it comes to interior design. They add personality and character to any space and can take a boring room to the next level. However, it can be overwhelming figuring out how to add those finishing touches in a way that complements the overall aesthetic of your space.
Here’s a step-by-step guide to help you achieve that perfect final look. Firstly, take a step back and assess your space. Identify any areas that are lacking in personality or character.
Maybe your walls could use some artwork or a statement mirror to add some interest. Or, perhaps you need to incorporate some textiles, such as cushions or rugs, to add warmth and texture. Once you have identified these areas, it’s time to get creative.
Next, think about the style you want to achieve. Do you want a bohemian look with lots of patterns and textures, or a minimalist style with clean lines and muted colors? Use this as a guide to select your finishing touches. For example, if you want to add some bohemian flair, consider adding a macrame wall hanging or a statement rug.
If you prefer a more minimalistic look, consider adding a simple vase with fresh flowers or a sleek lamp. Finally, bring your vision to life. Don’t be afraid to experiment with different options until you find the right fit.
Remember, the finishing touches are supposed to be fun and showcase your unique style. As long as your decor choices make you happy, that’s all that matters. Incorporating decorative finishing touches can be overwhelming, but with these simple steps, you can create a space that you love and is uniquely yours.
Conclusion
Congratulations! You’ve just learned a nifty little trick for turning a one-piece valance into a two-piece masterpiece on your RV awning. With a bit of creativity and some smart sewing skills, you can easily transform a standard setup into a unique and personalized look that’s sure to turn heads at the campground. So go forth and create, fellow adventurer – and don’t forget to share your stylish awning makeovers with the world!”
Final Thoughts and Reminders
Now that we’ve covered the step-by-step guide to optimizing your blog for search engines, here are a few final thoughts and reminders to keep in mind. First and foremost, remember that SEO is an ongoing process, and it may take some time before you see significant improvements in your rankings. So don’t get discouraged if you don’t see results right away.
Secondly, make sure to keep your content fresh and up-to-date. This not only helps keep your readers engaged but also signals to search engines that your website is regularly updated and relevant. Finally, don’t forget the importance of social media.
By sharing your content on social platforms, you can increase your reach and attract more traffic to your website. In short, by following the steps outlined in this guide and staying committed to your SEO efforts, you can achieve long-term success and reach a wider audience online.
Advantages of Making a Two-Piece Valance
If you’re looking to add a touch of elegance to your home décor, making a two-piece valance can be an excellent choice. Not only does it add visual interest to your window treatment, but it also comes with several advantages. For one, a two-piece valance is much easier to hang and maintain as you only need to attach the top and bottom pieces together.
Plus, having the option to change the top piece means you can switch up the look of your window without having to replace the entire valance. To make a two-piece valance, start by measuring the length and width of your window and deciding on a fabric. Then, cut two pieces of fabric to the desired length, ensuring that the top piece is longer than the bottom one.
Hem each piece and sew a loop into the top of the bottom piece where the top piece will be attached. Finally, sew the two pieces together and attach the valance to your hardware. See how simple that was? By making a two-piece valance, you not only get an impressive window treatment, but also a versatile and practical one.
So, why not give it a try and elevate your home décor today?
FAQs
What materials do I need to make a one piece valance into two pieces on RV awning?
You will need scissors, measuring tape, fabric pins, and sewing machine.
How do I measure the fabric for the two pieces?
You need to measure the width of the awning and divide it by two. Then add an inch for the seam allowance.
What should I do after cutting the fabric?
You need to hem the edges of the fabric before sewing them together.
How can I attach the two pieces to the RV awning?
You can use Velcro strips or fabric snaps to attach the pieces to the awning.
Can I use a single piece of fabric for both sides of the valance?
Yes, you can use the same fabric for both pieces, or you can use contrasting fabrics to add more visual interest.
Is it easy to sew the valance pieces together?
Sewing the pieces together requires a bit of skill and practice, but it can be done with a sewing machine.
Can I still fold the awning with the two-piece valance attached?
Yes, the two-piece valance can be easily folded along with the RV awning for storage.