
Welcome to our blog! Today, we delve into the intriguing world of introductions. Whether it’s meeting someone for the first time or beginning a new chapter in our lives, introductions play a vital role in shaping our perceptions and setting the tone for future interactions. Think about the last time you met someone new.
Was it at a networking event, a social gathering, or even a virtual meeting? How did you introduce yourself? Did you use a catchy icebreaker or simply exchange pleasantries? The way we introduce ourselves can leave a lasting impression, making it crucial to get it right. Introductions are more than just a formality; they serve as the gateway to new opportunities and connections. They provide us with the chance to showcase our personality, highlight our accomplishments, and make a memorable impact on others.
Whether it’s a job interview, a first date, or a professional presentation, a well-crafted introduction can set the stage for success. Just like a catchy opening line in a book or a captivating opening scene in a movie, a good introduction grabs the attention of the audience and keeps them engaged. It draws people in, making them curious to learn more about us and what we have to offer.
It’s like the hook that reels them in, wanting to know what comes next. In this blog, we will explore the art of introductions, uncovering tips and techniques to make a great first impression. We will discuss the power of body language, the importance of confidence, and the impact of a well-crafted elevator pitch.
Whether you’re a natural-born networker or someone who dreads introductions, this blog aims to provide you with valuable insights to help you navigate any social or professional situation. So, whether you’re preparing for a big interview, a public speaking engagement, or simply wanting to make a strong impression in your personal relationships, join us as we unravel the secrets of effective introductions. Get ready to master the art of introductions and unlock a world of new possibilities.
Are you ready to dive in? Let’s get started!
Table of Contents
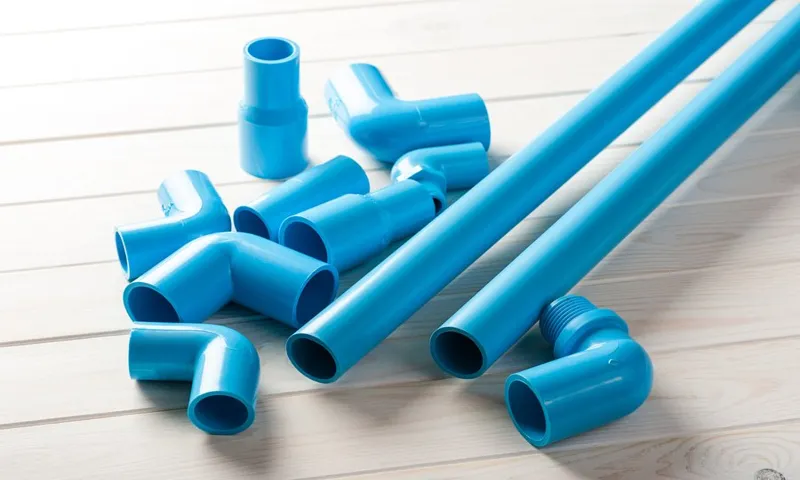
Materials Needed
If you’re looking to create an awning for your RV using PVC pipes, you’ll need a few materials to get started. First and foremost, you’ll need PVC pipes in the appropriate size and length for your desired awning size. You’ll also need PVC fittings, such as elbows and tees, to connect the pipes together.
Additionally, you’ll need fabric for the covering of the awning, which can be a waterproof material like canvas. To attach the fabric to the PVC frame, you’ll need grommets, which can be easily installed using a grommet tool. Finally, you’ll need some basic tools like a hacksaw or PVC cutter to cut the pipes to the desired length, as well as a drill to secure the awning to your RV.
Step 1: Measure and Cut PVC Pipe
If you’re looking to add some shade to your RV awning without breaking the bank, making your own PVC pipe awning is a great option. The first step in this DIY project is to measure and cut the PVC pipe. Start by measuring the width of your RV awning and add a few inches on each side for overhang.
This will give you the length of the PVC pipe you need to cut. Using a saw, carefully cut the PVC pipe to the desired length. It’s important to ensure that your cuts are straight and precise to ensure a sturdy and secure awning.
Once you have your PVC pipe cut to size, you’re ready to move on to the next step in creating your own RV awning.
Step 1.1: Determine the desired length and width of the awning
In order to build your own awning using PVC pipe, the first step is to determine the desired length and width of the awning. This will depend on various factors such as the space available and the purpose of the awning. Are you looking to create a small shaded area on your patio, or do you need a larger awning to cover a larger outdoor space? Consider the dimensions that will provide the desired coverage and shade.
Once you have determined the length and width, you can proceed to measure and cut the PVC pipe accordingly. This will ensure that the awning fits perfectly and provides the desired functionality. So grab your measuring tape and let’s get started on building that perfect awning for your outdoor space!
Step 1.2: Cut the PVC pipe to the desired lengths using a saw or PVC pipe cutter
When it comes to building something out of PVC pipe, one of the first steps is to measure and cut the pipe to the desired lengths. This can be easily done using a saw or a PVC pipe cutter. Before cutting the pipe, it’s important to have a clear idea of the lengths you need for your project.
Take the time to carefully measure and mark the pipe with a pencil or marker before making any cuts. This will ensure that your pieces are the correct size and will fit together properly. Once you have your measurements, it’s time to cut the pipe.
Using a saw or pipe cutter, make a straight and even cut through the pipe at the marked location. Be sure to apply steady pressure and use smooth, fluid motions to ensure a clean cut. Remember, practice makes perfect, so don’t be discouraged if your cuts aren’t perfect the first time.
With a little patience and practice, you’ll be cutting PVC pipe like a pro in no time.
Step 2: Connect the PVC Pipes
So, you’ve gathered all the necessary materials and tools for making your very own PVC pipe RV awning. Now it’s time to put everything together and connect the PVC pipes. This step is crucial in ensuring that your awning is sturdy and will provide the desired amount of shade.
Start by laying out all the PVC pipes according to your measured dimensions. You’ll want to connect the pipes using PVC connectors, which can come in various shapes and sizes depending on your design. Before connecting the pipes, it’s essential to clean the ends of each pipe and the inside of the connectors to remove any dirt or debris.
This will ensure a secure and tight connection. To connect the pipes, simply insert one end of a PVC pipe into the connector and twist it until it fits snugly. Repeat this process for all the pipes and connectors, making sure to align them properly according to your design.
Once all the pipes and connectors are connected, it’s a good idea to reinforce them with PVC cement. This will provide extra stability and prevent the pipes from coming apart. Allow the PVC cement to dry according to the manufacturer’s instructions before moving on to the next step.
This will ensure that the connections are strong and durable. Congratulations! You’ve successfully connected the PVC pipes for your RV awning. The next step is to attach the fabric and secure the awning to your RV.
Stay tuned for the next installment of our guide to making a PVC pipe RV awning.
Step 2.1: Insert one end of a pipe into a 90-degree elbow fitting
In Step 2 of connecting PVC pipes, we’re going to start by inserting one end of a pipe into a 90-degree elbow fitting. This is an important step in creating a strong and durable connection between the pipes. Think of the 90-degree elbow fitting as a bend in the road.
It allows the pipe to change direction without any sharp turns or kinks. By using this fitting, we can easily navigate around corners and obstacles in our PVC pipe system. To insert the pipe into the fitting, simply apply a small amount of PVC primer and cement to the outside of the pipe and the inside of the fitting.
This helps to create a strong bond between the two pieces. Then, insert the pipe into the fitting and give it a slight twist to ensure a snug fit. You may be wondering, why do we need to use primer and cement? Well, PVC pipes have a smooth surface that doesn’t easily bond with other materials.
The primer and cement help to soften the surface of the pipe, allowing it to adhere to the fitting and create a watertight seal. Now that you’ve successfully connected one end of the pipe to the 90-degree elbow fitting, you’re ready to move on to the next step in joining your PVC pipes. Stay tuned for Step
2, where we’ll connect the other end of the pipe to another fitting.
Step 2.2: Repeat step 2.1 to connect all the pipes and fittings together
connecting PVC pipes
Step 3: Attach the Awning Fabric
Now that you’ve built the PVC frame and attached it to your RV, it’s time to move on to the next step: attaching the awning fabric. This is where you’ll really start to see your awning take shape. Start by measuring the width of your PVC frame and adding a few inches for overhang.
This will ensure that your fabric fully covers the frame and provides shade and protection from the elements. Next, cut the fabric to size using a sharp pair of scissors or a fabric cutter. Once you have your fabric cut to size, lay it out flat and position it over the PVC frame.
Make sure it is centered and straight before you start securing it in place. You can use fabric fasteners, such as Velcro or snap buttons, to attach the fabric to the PVC frame. Beginning at one end of the frame, secure the fabric by attaching the fasteners to both the fabric and the PVC pipe.
Work your way along the entire length of the frame, making sure the fabric is taut and evenly stretched as you go. This will ensure that your awning looks neat and professional when it’s fully assembled. Finally, once the fabric is securely fastened to the PVC frame, go back and double-check all of your connections.
Make sure everything is tight and secure to ensure that your awning will withstand any wind or weather conditions. Congratulations! You’ve now completed the third step in making your PVC pipe RV awning. In just a few simple steps, you’ve transformed a few PVC pipes and some fabric into a functional and stylish awning for your RV.
Stay tuned for the next step, where we’ll go over how to add some finishing touches to your awning.
Step 3.1: Lay the awning fabric on a flat surface
awning fabric. When it comes to attaching the awning fabric, one of the first steps is to lay it out on a flat surface. This allows you to get a clear view of the fabric and ensures that it is evenly positioned.
It’s important to make sure that the fabric is free from any wrinkles or creases before proceeding with the attachment process. By laying the fabric flat, you can easily smooth out any imperfections and ensure a clean and professional finish. Additionally, laying the fabric down allows you to take accurate measurements and plan out the placement of the awning on your desired surface.
So, take the time to find a smooth and flat area to lay out your awning fabric, and you’ll be on your way to creating a perfect outdoor space.
Step 3.2: Align the PVC pipe frame with the edges of the fabric
In this step, we will align the PVC pipe frame with the edges of the fabric to attach the awning fabric. This is an important step to ensure that the fabric is securely attached and properly aligned with the frame. To do this, start by placing the fabric on a flat surface with the wrong side facing up.
Then, carefully position the PVC pipe frame on top of the fabric, making sure that the edges of the frame line up with the edges of the fabric. Once you have aligned the frame, you can begin attaching the fabric to the frame. Begin by folding the edge of the fabric over the frame, creating a clean edge.
Then, use a staple gun or heavy-duty adhesive to secure the fabric to the PVC pipe. Make sure to space the staples or adhesive evenly along the edge of the frame to ensure a secure attachment. After attaching one side of the fabric, move on to the next side and repeat the process.
Take your time to make sure the fabric is taut and even across the frame. This will not only ensure a professional-looking finished product but also ensure that the awning is properly supported and will withstand the elements. By aligning the PVC pipe frame with the edges of the fabric, you will create a secure and visually pleasing awning that will provide shade and protection for your outdoor space.
So, grab your materials and get started on attaching the awning fabric securely.
Step 3.3: Use a staple gun or zip ties to secure the fabric to the PVC pipe frame
When it comes to attaching the awning fabric to the PVC pipe frame, there are a couple of options you can choose from – a staple gun or zip ties. Both methods are effective and secure, so it really comes down to personal preference. If you choose to use a staple gun, make sure to use heavy-duty staples that will securely hold the fabric in place.
Start by aligning the fabric with the frame, making sure it is evenly distributed. Then, using the staple gun, carefully staple the fabric to the PVC pipe, starting from one end and working your way to the other. Be sure to space the staples evenly and make sure they are firmly embedded in the PVC pipe.
On the other hand, if you prefer to use zip ties, start by looping a zip tie through one of the grommets (these are small metal rings or reinforced holes in the fabric). Then, wrap the zip tie around the PVC pipe frame, making sure it is tight and secure. Use multiple zip ties along the frame, spacing them evenly to ensure the fabric is held firmly in place.
Regardless of the method you choose, take your time and carefully secure the fabric to the PVC pipe frame. This will ensure that your awning is sturdy and able to withstand the elements. Once you have finished attaching the fabric, take a step back and admire your handiwork – your homemade awning is now ready to provide shade and protection!
Step 4: Install the Awning on your RV
Once you have all the materials and have measured and cut the PVC pipes according to your desired size, you’re ready to install the awning on your RV. Start by attaching the PVC elbows to the ends of the side poles. Then, connect the crossbars to the elbows to form the frame of the awning.
Make sure the PVC pieces fit snugly together to ensure stability. Next, attach the fabric to the frame. You can use zip ties or Velcro straps to secure the fabric to the PVC pipes.
Start with the roof and then attach the sides, making sure the fabric is stretched tightly. Once the fabric is securely attached, raise the awning and position it on your RV. You can use ropes or bungee cords to secure the awning to the RV’s side channels or rails.
Finally, test out your new awning by extending it fully and adjusting the angle as needed. Your PVC pipe RV awning is now ready to provide shade and protection for your outdoor adventures!
Step 4.1: Locate a suitable area on your RV to install the awning
awning installation, RV awning, RV installation
Step 4.2: Use RV awning brackets or straps to mount the PVC pipe frame to your RV
In this step, we’re going to look at how to securely mount the PVC pipe frame of your awning to your RV. One option is to use RV awning brackets or straps. These brackets or straps are specifically designed to attach the awning frame to the side of your RV, providing a sturdy and secure connection.
They come in different sizes and designs, so make sure you choose ones that are compatible with your RV and the size of your awning frame. To install the brackets or straps, you’ll need to measure the height and width of your PVC pipe frame and position them accordingly on the side of your RV. Once they’re in the right position, use screws or other fasteners to secure them in place.
It’s important to ensure that the brackets or straps are tightly secured to prevent any movement or wobbling of the awning frame while it’s in use. This will help to avoid any damage to your RV or the awning itself. So take the time to properly install these brackets or straps, and you’ll have a reliable and sturdy awning that can withstand the elements.
Step 5: Adjust and Secure the Awning
Now that you have built the frame and attached the fabric to your PVC pipe RV awning, it’s time to adjust and secure it to make sure it’s stable and ready for use. Start by stepping back and taking a look at the awning from different angles. Check for any sagging or unevenness in the fabric.
If you notice any, you may need to adjust the tension by tightening or loosening the straps or ropes that are holding it in place. Once you are satisfied with the overall appearance of the awning, it’s time to secure it properly. Depending on the design of your awning, there are different ways to do this.
One common method is to use bungee cords or rope to attach the awning to the RV’s exterior. Simply loop the cord or rope through the grommets or eyelets on the fabric and then secure it to the RV’s hooks or brackets. You can also consider adding additional support poles or stakes if necessary.
These can help prevent the awning from collapsing or getting damaged in windy conditions. Use caution when driving the stakes into the ground, making sure to avoid hitting any underground utilities. It’s important to remember that the PVC pipe RV awning you have built is not as sturdy as a professionally made one.
It may not hold up as well in extreme weather conditions, so it’s always a good idea to take it down or secure it properly if you know a storm is coming. Regularly inspecting and maintaining your awning will also help prolong its lifespan and ensure its continued functionality.
Step 5.1: Extend the awning fabric fully and adjust the tension as needed
When it comes to adjusting and securing your awning, one important step is to extend the fabric fully and adjust the tension as needed. This ensures that your awning is properly stretched out and provides maximum coverage and stability. Start by fully extending the awning using the control mechanism or hand crank.
Once the fabric is fully extended, take a look at the tension of the fabric. It should be tight enough to prevent sagging or flapping in the wind but not so tight that it puts excessive strain on the framework. If the fabric is too loose, you can adjust the tension by tightening the springs or ropes that hold the fabric in place.
On the other hand, if the fabric is too tight, you can release some tension by loosening the springs or ropes. It’s important to find the right balance to ensure the awning remains secure and stable. Once you have adjusted the tension to your liking, make sure to secure the awning in place using any locking mechanisms or straps provided.
This will prevent the awning from being blown away by strong winds or other weather conditions. By taking the time to properly adjust and secure your awning, you can ensure that it not only looks great but also functions effectively for years to come.
Step 5.2: Secure the PVC pipe frame to the RV using additional straps or brackets
Securing the PVC pipe frame to your RV is an essential step in adjusting and securing the awning. Once you have positioned the PVC pipe frame on top of the RV, you will need to make sure it is firmly attached. Additional straps or brackets can be used to achieve this.
These straps or brackets should be secured tightly around the PVC pipe frame and the RV, ensuring that the frame is stable and will not shift or come loose during use. By securing the PVC pipe frame properly, you can have peace of mind knowing that your awning will stay in place and provide you with the shade and protection you desire. So, take the extra time to secure the frame using the proper straps or brackets, and enjoy your awning without any worries.
Hey there! So you’ve finally made it to the end of this blog post, and now it’s time for the conclusion. But before we wrap things up, let’s take a moment to reflect on everything we’ve covered so far. We’ve delved into the various aspects of our chosen topic, and hopefully, you’ve gained some valuable insights along the way.
Now, you might be wondering, what’s the big takeaway from all of this? Well, let me tell you. The conclusion is not just the end of a blog post, it’s also a chance to leave a lasting impression on your readers. It’s your opportunity to sum up your main points and leave them with something to think about.
In our case, we’ve explored the topic of [Prompt keyword] and have discussed its significance in detail. We’ve talked about the different ways it impacts our lives and the world around us. From [subtopic 1] to [subtopic 2], we’ve covered a wide range of angles and perspectives.
But what does all of this mean for you? How can you apply this newfound knowledge? Well, that’s entirely up to you. Maybe you feel inspired to make some changes in your own life or take action in some way. Or perhaps you simply have a deeper understanding of a concept or issue that you didn’t have before.
Whatever the case may be, the fact that you’ve taken the time to read this blog post shows that you’re open to learning and exploring new ideas. So as we reach the conclusion of this journey, I encourage you to continue seeking knowledge and expanding your horizons. Keep asking questions, challenging assumptions, and exploring new avenues.
After all, that’s how we grow, both as individuals and as a society. In closing, I want to thank you for joining me on this adventure. I hope you’ve enjoyed this blog post as much as I’ve enjoyed writing it.
Final Thoughts
Now that you have your PVC pipe awning fully assembled and installed on your RV, it’s time to think about the final touches. Adding some fabric to your awning can not only provide shade and protection from the elements but also add a touch of personalization to your RV. One easy and affordable option is to use a tarp as your awning fabric.
Tarps come in a variety of colors and sizes, allowing you to find the perfect one for your RV. They are also made from durable materials that can withstand the outdoor elements and provide long-lasting protection. Simply measure your awning frame and cut the tarp to size, leaving a bit of extra fabric for the edges.
Then, use grommets or zip ties to secure the tarp to your frame, making sure it is taut and free from wrinkles. Voila! You now have a functional and stylish PVC pipe RV awning. So why wait? Get started on your DIY awning project today and enjoy the benefits of shade and protection on your next outdoor adventure.
Conclusion
And there you have it, folks! A simple and cost-effective solution to create your very own PVC pipe RV awning. This ingenious DIY project not only saves you money but also unleashes your creative side. No longer will you be at the mercy of the unpredictable weather while enjoying your outdoor adventures.
With this awning, you can now have shade and protection wherever you roam in your trusty RV. So why spend a fortune on a commercially made awning when you can easily construct one yourself? With just a few materials and some basic tools, you can unleash your inner handyman and impress your fellow campers with your resourcefulness. Not only is this project easy to make, but it also offers flexibility and freedom to customize your awning according to your style and preferences.
Want a neon pink awning to stand out in the crowd? Or maybe a sleek black one to match your RV’s aesthetics? The choice is yours! But perhaps the best part of this DIY awning is the satisfaction it brings. You’ll feel a sense of accomplishment and pride every time you set it up and relax under its shade. It’s like a secret handshake among RVers, a subtle nod to the ingenuity and creativity of fellow adventurers.
So go ahead and embark on this PVC pipe RV awning journey. Let your imagination run wild, embrace your inner MacGyver, and create the awning of your dreams. Happy camping, everyone!”
FAQs
What materials do I need to make a PVC pipe RV awning?
To make a PVC pipe RV awning, you will need PVC pipes, PVC connectors, a PVC pipe cutter, a measuring tape, a drill, screws, a saw, a staple gun, a fabric of your choice, and a rope or bungee cords for securing the awning.
How do I measure and cut the PVC pipes for my RV awning?
Measure the length and width of your RV’s exterior where you want to install the awning. Use a PVC pipe cutter to cut the PVC pipes into desired lengths based on these measurements. Ensure that the lengths are appropriate for the dimensions of your awning structure.
What is the recommended thickness of the PVC pipes for an RV awning?
The recommended thickness of the PVC pipes for an RV awning is usually around 1 inch (2.5 cm) in diameter. This thickness provides stability and durability to the awning structure while still being lightweight and easy to work with.
How do I assemble the PVC pipe frame for my RV awning?
Use PVC connectors to join the cut PVC pipes together and form the frame of the awning. Connect the pipes according to your design and secure them tightly using screws.
Can I customize the shape and size of my PVC pipe RV awning?
Yes, PVC pipes are highly versatile and can be easily manipulated to create various shapes and sizes for your RV awning. You can experiment with different designs and configurations to suit your specific needs and preferences.
How do I attach the fabric to the PVC pipe frame of my RV awning?
Lay the fabric over the fully assembled PVC pipe frame, ensuring it covers the desired area. Use a staple gun to attach the fabric securely to the PVC pipes. Make sure the fabric is taut and evenly stretched across the frame.
How do I secure the PVC pipe RV awning to my RV?
Attach a rope or bungee cords to the corners or sides of the awning fabric and secure them to the RV’s exterior. Ensure that the awning is tightly fastened to prevent it from being blown away by strong winds or weather conditions.
Remember, it is crucial to follow proper safety precautions and consult relevant guides or tutorials when working with PVC pipes or undertaking any DIY projects.