
Are you a proud owner of an RV and looking to learn how to manually retract your RV awning? Well, you’ve come to the right place! RV awnings are an essential feature that provides shade and protection from the elements during your outdoor adventures. However, there may be times when you need to retract your awning manually for various reasons. Whether it’s due to strong winds or mechanical issues, knowing how to retract your awning manually is a valuable skill that every RV owner should possess.
In this blog post, we will guide you step-by-step on how to safely and effectively retract your RV awning with ease. So, let’s dive in and get started!
Table of Contents
- 1 Introduction
- 2 Tools and Materials Needed
- 3 Safety Precautions
- 4 Step-by-Step Guide
- 4.1 Step 1: Extend the step ladder and position it securely
- 4.2 Step 2: Locate the awning rod hole on the roller tube
- 4.3 Step 3: Insert the awning rod into the hole
- 4.4 Step 4: Apply steady pressure and turn the rod clockwise
- 4.5 Step 5: Continue turning until the awning fabric is fully retracted
- 4.6 Step 6: Secure the awning in the retracted position
- 5 Conclusion
- 6 FAQs
Introduction
Are you having trouble retracting your RV awning and not sure where to start? Don’t worry, we’re here to help! In this article, we will guide you through the process of manually retracting your RV awning step by step. Whether you’re dealing with a power outage or a malfunctioning motor, knowing how to manually retract your awning can come in handy. So let’s dive in and get started.
Why would you need to manually retract your RV awning?
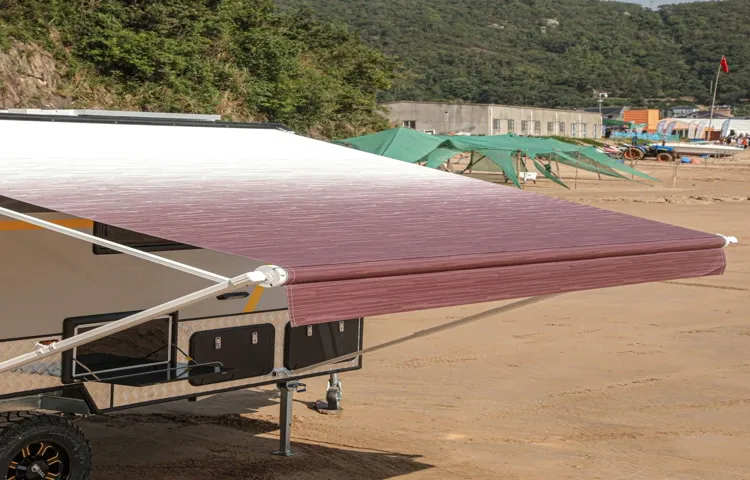
RV awnings are a fantastic addition to any recreational vehicle, providing shade and protection from the elements while you’re out camping or enjoying the great outdoors. However, there may be situations where you’ll need to manually retract your RV awning. This could be due to strong winds or stormy weather where leaving the awning out could cause damage to your RV or the awning itself.
Additionally, if you’re getting ready to hit the road and want to make sure everything is secure, retracting the awning is a necessary step. By manually retracting your RV awning, you can ensure its safety and prevent any potential harm that could occur. So, let’s dive into the reasons why you might need to manually retract your RV awning and how to do it properly.
When should you manually retract your RV awning?
RV awnings are a great addition to any recreational vehicle, providing shade and protection from the elements while also adding an outdoor living space. However, there may be times when it is necessary to manually retract your RV awning. This could be due to strong winds, heavy rain, or other inclement weather conditions that could potentially damage the awning if left exposed.
It’s important to know when it’s time to retract your awning to avoid any potential damage and ensure the longevity of your RV awning.
Tools and Materials Needed
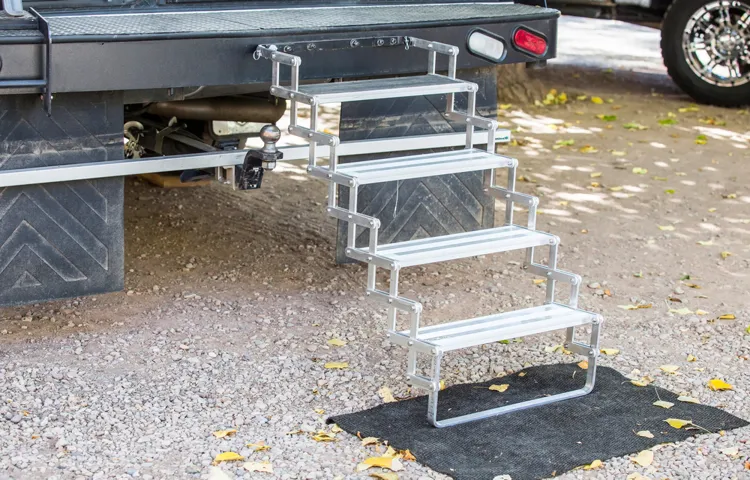
When it comes to retracting your RV awning manually, there are a few essential tools and materials that you will need. First and foremost, you will need a ladder or a step stool to reach the awning. This will ensure that you can safely and easily access the awning without any difficulty.
Additionally, you will need a long-handled awning rod or crank. This tool is specifically designed to fit into the awning mechanism and allow you to manually retract the awning. It is important to ensure that the awning rod or crank is the correct size for your specific awning model.
Finally, you may also want to have a helper to assist you with the process. This can make it easier to reach the awning and provide an extra set of hands to help with the retraction. With these tools and materials on hand, you will be well-equipped to manually retract your RV awning.
Awning rod
awning rod Tools and Materials Needed When it comes to installing an awning, having the right tools and materials is essential. One of the key items you’ll need is an awning rod. This handy tool is designed to help you easily extend and retract your awning.
It typically consists of a long, sturdy rod with a handle on one end and a hook on the other. The hook is used to grab the awning and pull it out or push it back in. To install an awning rod, you’ll also need a ladder, screws or brackets to secure the awning to the wall, and a power drill or screwdriver to tighten the screws.
Additionally, you’ll need a level to make sure the awning is properly aligned, and a measuring tape to ensure accurate placement. Having these tools and materials on hand will make the installation process much smoother and more efficient. So before you start installing your awning, make sure you have all the necessary tools and materials at your disposal.
Step ladder
tools and materials needed for a step ladder When it comes to DIY projects or simply tackling household tasks, a step ladder is an essential tool to have on hand. Whether you’re changing a lightbulb, reaching high shelves, or painting a wall, a step ladder provides the stability and support you need to get the job done safely. So, what tools and materials do you need to have before you can start using a step ladder? First and foremost, you’ll need a step ladder itself.
Step ladders come in various heights and sizes, so it’s important to choose one that fits your needs and the specific task at hand. Look for a ladder with anti-slip treads and sturdy construction to ensure your safety. Next, you’ll need a set of basic hand tools.
These tools will come in handy for assembling and maintaining your step ladder. A screwdriver, wrench, and pliers are a few examples of tools you may need. Additionally, depending on the type of ladder you have, you may need a hammer or a mallet to secure certain parts.
Another essential material is lubricant. Over time, the hinges and joints of a step ladder can become stiff and difficult to open or close. Applying lubricant to these areas will help to keep the ladder working smoothly and prevent unnecessary wear and tear.
Lastly, safety should always be a priority when working with a step ladder. Therefore, it’s crucial to have safety equipment such as gloves and safety glasses. These items will protect you from potential accidents and ensure that you can work confidently and comfortably.
In conclusion, having the right tools and materials is crucial when using a step ladder. From the ladder itself to basic hand tools, lubricant, and safety equipment, being prepared will make your tasks easier and ensure your safety. So, before you tackle any project that requires a step ladder, make sure you have everything you need to get the job done efficiently and securely.
Rubber mallet
rubber mallet, tools and materials When it comes to DIY projects or home repairs, having the right tools is essential. One tool that often comes in handy is a rubber mallet. This versatile tool is a must-have for any homeowner or DIY enthusiast.
The rubber mallet is a type of hammer that has a rubber head instead of a metal one. The rubber head provides a softer impact, making it ideal for tasks that require a gentler touch. To use a rubber mallet, you’ll need a few basic tools and materials.
First, you’ll need the rubber mallet itself. You can find these at most hardware stores or online. Look for one that has a comfortable grip and a sturdy rubber head.
It’s also a good idea to choose a mallet that comes in different sizes, as this will give you more flexibility for different projects. Next, you’ll need a protective surface to work on. Since the rubber mallet is designed to provide a softer impact, you’ll want to make sure you’re working on a surface that won’t be damaged by the mallet.
An old piece of wood or a rubber mat can work well for this purpose. Just make sure it’s stable and won’t slide around while you’re working. Finally, you’ll need a project or task that requires the use of a rubber mallet.
There are many different projects that can benefit from the use of a rubber mallet. For example, if you’re installing tile, you can use a rubber mallet to gently tap the tiles into place. If you’re building furniture, a rubber mallet can help you fit pieces together without causing damage.
Protective gloves
protective gloves
Safety Precautions
If you find yourself needing to manually retract your RV awning, it’s important to proceed with caution to ensure your safety. First, identify any potential risks or hazards in the area, such as overhanging branches or power lines, and clear these away if possible. Next, locate the manual retraction mechanism on your awning, which is usually a crank or lever.
Use gloves to protect your hands from any sharp edges or pinch points. Begin slowly cranking or levering the awning back in, being mindful of any resistance or obstacles. If you encounter any difficulties, stop and assess the situation before proceeding.
Remember, it’s always better to be safe than sorry when it comes to retracting an RV awning.
Turn off the power
power off, power outage, safety precautions
Secure the awning in place
awning safety precautions
Be aware of your surroundings
safety precautions, awareness, surroundings
Step-by-Step Guide
Have you ever found yourself in a situation where you need to manually retract your RV awning? Don’t worry, it’s not as complicated as it may seem. Here’s a step-by-step guide on how to manually retract your RV awning. First, locate the awning roller.
This is usually located on the side of your RV, near the roofline. Once you’ve found it, look for the utility slot. This is a small opening where you can insert a tool to manually retract the awning.
Next, find a long, flat tool that will fit into the utility slot. This can be a flathead screwdriver or even a sturdy knife. Insert the tool into the slot and locate the awning lock mechanism.
This is a small lever that you’ll need to push or pull to release the awning lock. Once the lock is released, begin turning the awning roller manually. This will require some strength, so be prepared to exert some effort.
As you turn the roller, the awning will begin to retract. Keep turning until the awning is fully rolled up. Finally, secure the awning in its retracted position.
Some RVs have a strap or belt that you can use to secure the awning, while others may have a latch or lock mechanism. Follow the manufacturer’s instructions to properly secure the awning in place. That’s it! By following these simple steps, you can manually retract your RV awning in no time.
Step 1: Extend the step ladder and position it securely
step ladder, extend, position securely, step-by-step guide. So, you’ve decided to tackle a project that requires a step ladder. Whether you’re changing a lightbulb, reaching something on a high shelf, or painting a wall, it’s important to take the proper safety precautions.
Step one in our step-by-step guide is to extend the step ladder and position it securely. This is a crucial first step as it sets the foundation for your entire project. Start by finding a level surface to place the ladder on.
Avoid uneven ground or slippery surfaces that could cause the ladder to wobble or slide. Once you’ve found a stable surface, ensure that the ladder is fully extended and locked in place. This will prevent any accidental collapsing while you’re working.
Finally, make sure to position the ladder at the correct angle, with the rungs facing away from the wall or object you’ll be working on. This will provide maximum stability and decrease the risk of the ladder slipping out from under you. Taking the time to extend and position your step ladder securely is an essential step in ensuring your safety while completing your project.
Step 2: Locate the awning rod hole on the roller tube
In the second step of installing an awning, you will need to locate the awning rod hole on the roller tube. This is an important step because it is where you will later insert the awning rod to extend and retract the awning. The awning rod hole is typically located on the roller tube, which is the tube that the awning fabric rolls up onto.
The exact location of the hole may vary depending on the type and brand of awning you have, so it’s important to consult the manufacturer’s instructions for guidance. Once you have located the awning rod hole, you can move on to the next step in the installation process.
Step 3: Insert the awning rod into the hole
Now that you have prepared the hole, it’s time to move on to the next step – inserting the awning rod. This step is crucial in ensuring that your awning is securely attached and won’t come loose in windy conditions. The awning rod is typically made of metal and is designed to fit snugly into the hole you have created.
To insert the awning rod, start by holding it upright and aligning it with the hole. Make sure that the rod is positioned straight and level to ensure an even fit. Slowly lower the rod into the hole, applying gentle pressure as you go.
You may need to wiggle the rod slightly to help it slide in smoothly. As you insert the rod, you may encounter some resistance, especially if the hole is tight. Don’t force it – instead, try twisting the rod slightly while continuing to apply gentle pressure.
This twisting motion can help the rod navigate any obstructions in the hole and find its proper place. Once the awning rod is fully inserted, give it a little tug to make sure it is securely in place. If it feels loose or wobbly, you may need to remove the rod and assess the hole for any irregularities or debris that could be causing the issue.
Remember, proper installation of the awning rod is essential for the stability and longevity of your awning. By following these step-by-step instructions, you can ensure that your awning is securely attached and ready to provide shade and protection for years to come. So why wait? Grab your tools and get started on this exciting DIY project today!
Step 4: Apply steady pressure and turn the rod clockwise
When it comes to using a rod to open a stubborn lock, it’s important to know the correct technique. Once you have inserted the rod into the lock, you need to apply steady pressure and turn the rod clockwise. Steady pressure is crucial because if you apply too much force, you could break the lock or damage the mechanism inside.
By applying a consistent amount of pressure, you can slowly manipulate the pins inside the lock to line up correctly and allow the lock to turn. Turning the rod clockwise is the next step because most locks are designed to unlock in this direction. By using this step-by-step guide, you can increase your chances of successfully opening a lock without damaging it.
Step 5: Continue turning until the awning fabric is fully retracted
Step 5: Continue turning until the awning fabric is fully retracted Now that we’ve followed the previous steps and successfully retracted one arm of the awning, it’s time to retract the other arm. To do this, we need to continue turning the crank handle in the same direction as before. Keep in mind that it may take a few more turns to fully retract the awning fabric, depending on its size and tension.
As you turn the handle, you will notice the fabric starting to roll up neatly on the roller tube. This is a good sign, as it means you are making progress. Keep turning until the awning fabric is fully retracted and securely rolled up.
Once this is done, you can release the crank handle and proceed to lock the awning in place. At this point, you can sit back and enjoy the shade and protection provided by your retracted awning!
Step 6: Secure the awning in the retracted position
Retracting an awning may seem like a simple task, but it’s important to do it properly to ensure that your awning stays secure and protected. Step 6 in our step-by-step guide is to secure the awning in the retracted position. This is crucial because strong winds or other weather conditions could cause the awning to come loose and potentially cause damage to your property or surrounding area.
To secure the awning, you can use awning straps or bungee cords to fasten it tightly against the exterior of your home or RV. Make sure to secure it at several points along the length of the awning to distribute the tension evenly. Additionally, double-check that all the latches and locks are engaged and functioning properly.
By taking these extra precautions, you can have peace of mind knowing that your awning is secure and protected when not in use.
Conclusion
And there you have it folks, the simple yet effective way to manually retract your RV awning. Remember, it may seem daunting at first, but with a little patience and determination, you’ll be able to conquer any awning malfunction that comes your way. And who knows, maybe after mastering this skill, you’ll impress your fellow campers with your unrivaled knowledge of the inner workings of awnings.
So the next time someone asks you how to manually retract an RV awning, just smile and confidently say, “Oh, it’s a breeze. Let me show you.” Happy adventures and may your awning always retract smoothly!”
Manually retracting your RV awning is a simple process that can be done with the right tools and safety precautions. By following this step-by-step guide, you can ensure that your awning is properly retracted and protected during times of inclement weather or when not in use.
RV awnings provide shade and protection from the elements while you are camping or traveling. However, there may be times when you need to manually retract your awning, such as during a storm or when you are packing up to leave. With the right tools and safety precautions, retracting your RV awning is a simple process that can be done by anyone.
The first step in manually retracting your RV awning is to gather the necessary tools. You will need a ladder, a long pole or hook, and a friend to assist you. Safety should always be your top priority, so make sure to wear appropriate gear, such as gloves and safety goggles.
Next, locate the manual override crank on your awning. This is typically located on the opposite side of the awning roller. Insert the long pole or hook into the override crank and turn it clockwise to retract the awning.
Your friend can help by holding the awning fabric in place while you turn the crank. As you crank the awning in, make sure to keep an eye on the fabric to ensure it is retracting smoothly and evenly. If you encounter any resistance or the fabric becomes misaligned, stop cranking and assess the situation.
It may be necessary to adjust the fabric or seek professional assistance if there is a mechanical issue with your awning. Once the awning is fully retracted, secure it in place using the awning straps or arms provided with your RV. This will help prevent the awning from unfurling while you are traveling.
Double-check that the awning is secured tightly before you continue with your journey. In conclusion, retracting your RV awning manually is a simple process that can be done with the right tools and safety precautions. By following this step-by-step guide, you can ensure that your awning is properly retracted and protected during times of inclement weather or when not in use.
FAQs
How do I manually retract my RV awning?
To manually retract your RV awning, locate the awning’s manual override mechanism, typically a crank or a lever. Insert the crank or operate the lever to turn it clockwise, which will roll the awning back into its closed position.
What should I do if my RV awning won’t retract automatically?
If your RV awning won’t retract automatically, try the manual override method mentioned in the previous answer. If that doesn’t work, check if there is any debris or obstructions preventing the awning from retracting. Clear out any debris and try again. If the issue persists, it might be a mechanical problem, and it’s recommended to seek professional assistance.
Can I manually retract my RV awning without power?
Yes, you can manually retract your RV awning without power. Look for the manual override mechanism, usually a crank or a lever, and use it to roll the awning back into its closed position. This manual operation does not require any power source.
How do I locate the manual override mechanism for my RV awning?
The manual override mechanism for an RV awning is typically located near the awning’s roller tube. It might be on the front or back end of the awning, depending on the awning model. Refer to your RV awning’s instruction manual for specific guidance on locating the manual override mechanism.
What precautions should I take when manually retracting my RV awning?
When manually retracting your RV awning, be cautious of your surroundings. Ensure there are no obstructions or people near the awning. Take care not to damage the awning or strain yourself while operating the manual override mechanism. It’s always advisable to read the manufacturer’s instructions before attempting any manual retraction.
Can I manually retract a motorized RV awning?
Yes, you can manually retract a motorized RV awning. Most motorized awnings have a manual override mechanism, usually a crank or a lever, to allow manual operation. Refer to your RV awning’s instruction manual to find out the specific method for manually retracting a motorized awning.
How often should I manually retract my RV awning?
It’s recommended to manually retract your RV awning whenever there are strong winds, storms, or when you leave your RV unattended for an extended period. Manual retraction is also advised during winter storage to protect the awning from harsh weather conditions. Regular maintenance checks and inspections can help determine if manual retraction is necessary for any other reasons.