
Are you looking to measure your RV slide-out awning but not sure where to start? Don’t worry, we’ve got you covered! Measuring your RV slide-out awning is an important step in ensuring that you get the right fit for your RV. Whether you’re looking to replace an old awning or install a new one, taking accurate measurements is crucial for a seamless installation. Think of measuring your RV slide-out awning as getting a tailored suit.
Just like a suit needs to be measured properly to fit perfectly, your awning also needs to be measured to fit snugly onto your RV. Taking accurate measurements will not only ensure that your awning looks great but also that it functions properly and provides you with the desired shade and protection. In order to measure your RV slide-out awning, you will need a few tools such as a tape measure and a ladder.
Before you start, make sure that your slide-out is fully extended. This will give you an accurate measurement of the awning’s size when it’s in use. Begin by measuring the length of the awning rail, which is the metal or aluminum strip that your awning attaches to.
Measure from end to end to get the exact length. Next, you’ll want to measure the width of your slide-out room. This is the distance from one side of the slide-out to the other.
Measure from the outside edge of the slide-out room, not the interior space. You want to ensure that your awning completely covers the slide-out when it’s extended, so it’s important to measure the entire width accurately. Lastly, measure the projection of your slide-out awning.
The projection is the distance that the awning extends out from the RV when fully extended. This measurement is crucial to ensure that your awning provides adequate shade and coverage. Measure from the edge of the RV where the awning attaches to the edge of the awning fabric when fully extended.
Table of Contents
Introduction
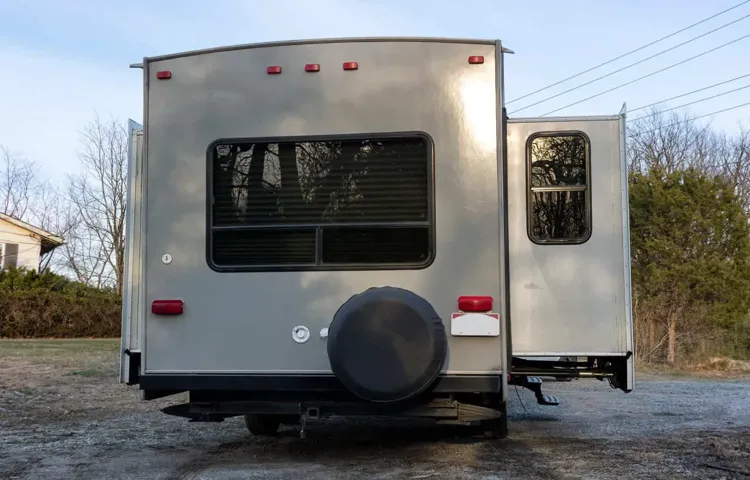
If you’re an RV owner, you know that slide-out awnings are a great way to protect your slide-outs from rain, debris, and excessive sunlight. But how do you know if your awning is the right size for your RV’s slides? Measuring your RV slide-out awning is fairly straightforward and can be done with just a few simple steps. First, extend your slide-outs fully, allowing you to get an accurate measurement.
Next, use a tape measure to measure the length of the awning fabric, from one end to the other. Be sure to measure from the inside edge of the track on one side to the inside edge of the track on the other side. This will give you the width of your awning fabric.
Finally, measure the depth of your slide-out, from the outermost edge to the innermost edge. Keep in mind that it’s always a good idea to double-check your measurements before purchasing a new awning to ensure a proper fit.
Explanation of RV slide out awnings
RV slide out awnings are an essential feature of any RV, providing protection and shade to the slide out section of the vehicle. These awnings are typically made of durable and weather-resistant materials like vinyl or acrylic, and they are designed to extend and retract automatically as the slide out moves in and out of the RV. The purpose of these awnings is to prevent debris, leaves, and water from accumulating on top of the slide out when it is extended, ensuring that the slide out remains clean and dry.
Additionally, these awnings also provide shade and protection from the sun’s rays, keeping the interior of the RV cool and comfortable. Overall, RV slide out awnings are a worthwhile investment for any RV owner, as they enhance the functionality and lifespan of the slide out, while also improving the overall camping experience.
Importance of measuring correctly
Accuracy in measurement is crucial in a variety of industries and fields of study. Whether it is in construction, manufacturing, or scientific research, the ability to measure correctly is essential for achieving accurate results and making informed decisions. Inaccurate measurements can lead to costly errors, rework, and even safety hazards.
That is why it is important to understand the significance of measuring correctly and to ensure that the right tools and techniques are used for accurate measurements. Without proper measurement, it is like navigating in the dark without a compass or a map. Your decisions and actions will lack direction and precision, making it difficult to achieve desired outcomes.
So, let’s delve deeper into the importance of measuring correctly, and how it can impact various aspects of our lives.
Tools and Materials
To measure an RV slide-out awning, you will need a few tools and materials. First, you will need a tape measure to accurately measure the length and width of the awning. Make sure to measure from end to end, including any overhang or excess fabric.
Additionally, you may need a ladder to reach the awning if it is located high up on your RV. If necessary, have someone hold the ladder steady while you take the measurements. Lastly, you may also need a pen and paper to write down the measurements for reference.
By having the right tools and materials on hand, you can easily measure your RV slide-out awning and ensure that you get the correct size when it comes time to replace or repair it.
List of necessary tools
Tools and Materials When it comes to tackling any DIY project, having the right tools and materials on hand is crucial. Whether you’re a seasoned professional or a beginner DIY enthusiast, having a well-stocked toolbox will make all the difference in the success of your project. Here is a list of essential tools and materials that every DIYer should have:
Hammer: A classic tool that is useful for a wide variety of tasks, from hanging pictures to construction projects. Screwdriver Set: Having a set of different-sized screwdrivers will ensure you have the right tool for any screw-related task.
Tape Measure: Accurate measurements are essential for any DIY project, so make sure you have a reliable tape measure on hand.
Level: A level will help you ensure that whatever you’re building or hanging is perfectly straight. Pliers: Pliers are versatile tools that are great for gripping, bending, and cutting wires.
Utility Knife: A sharp utility knife will come in handy for a variety of tasks such as cutting through packaging or trimming materials.
Power Drill: If you’re planning to do any drilling or screwing, a power drill is a must-have tool. Safety Equipment: Safety should always be a priority.
Recommended materials for measuring
measuring tools, measuring materials, recommended materials for measuring In order to accurately measure and take precise measurements, it is important to have the right tools and materials at your disposal. There are a variety of measuring tools available on the market, each designed for specific tasks and measurements. One of the most common tools is a measuring tape, which is perfect for measuring lengths, heights, and widths.
Another essential tool is a measuring ruler, which is helpful for smaller, more intricate measurements. For more complex measurements, such as angles and circles, a protractor and compass are recommended. Additionally, a level is a handy tool for ensuring objects are straight and level.
When it comes to materials, it is important to have a variety of options on hand. A sturdy construction paper or cardboard is useful for creating templates and outlines. A flexible measuring tape made of fabric or vinyl is ideal for measuring curves and non-linear objects.
Lastly, a high-quality pencil or pen is essential for marking measurements and points accurately. By having a range of tools and materials available, you can ensure that your measurements are accurate and precise, no matter the task at hand.
Step-by-Step Guide
Knowing how to measure your RV slide out awning is essential to ensure a proper fit when replacing it. Follow these simple steps to get accurate measurements. First, extend your slide out awning fully to its maximum length.
Next, measure the fabric starting from the edge where it attaches to the RV and extending it all the way to the other edge. Be sure to measure the width of the fabric as well. Take note of these measurements and add a few extra inches for allowance.
This will ensure that your new awning will fit snugly and provide ample coverage. Remember, it’s always better to have a slightly larger awning than a smaller one. So take your time and measure carefully to ensure a hassle-free installation.
Step 1: Extend the slide out awning
“extend the slide out awning” The first step in setting up your slide out awning is to extend it. This is a crucial step to ensure the proper setup and functionality of your awning. To begin, locate the awning on your RV or camper and make sure it is securely fastened.
Then, grab hold of the awning fabric and gently pull it outwards. This will cause the arms of the awning to extend and provide support for the fabric. Keep pulling until the awning is fully extended, making sure to do so slowly and carefully to avoid any damage or accidents.
Once the awning is fully extended, you can move on to the next step in setting up your outdoor living space.
Step 2: Measure the length of the awning fabric
The second step in measuring the length of your awning fabric is crucial in ensuring a perfect fit for your outdoor space. To get started, grab a measuring tape and extend it across the area where your awning will hang. Make sure to take into account any obstructions or corners that may affect the length needed.
It’s important to measure from the point where the awning will be attached to the wall to the furthest point where you want the fabric to extend. This will ensure that you have enough fabric to cover the desired area and provide ample shade and protection. Taking accurate measurements is key to ensuring a proper fit and a seamless installation of your awning.
So grab your measuring tape and get ready to measure the length of your awning fabric!
Step 3: Measure the width of the awning fabric
awning fabric, measure, width, step-by-step guide Once you have determined the length of awning fabric you need, the next step is to measure the width. This is an important step, as it will ensure that you have enough fabric to cover the entire width of your awning. To measure the width, start by extending the fabric fully and laying it flat on a clean, flat surface.
Take a tape measure and place it at one end of the fabric. Carefully measure across the width, making sure to keep the tape measure straight and level. This will give you the accurate width measurement.
It’s important to be precise in your measurements to ensure a proper fit for your awning fabric. Once you have the width measurement, you can move on to the next step in the process.
Step 4: Measure the height of the awning fabric
When measuring the height of the awning fabric, it’s important to follow the steps carefully to ensure accurate measurements. First, make sure the awning is fully extended and in its proper position. Use a tape measure to measure the distance from the bottom of the awning to the top, making sure to measure in a straight line.
Take note of the measurement in inches or centimeters, depending on your preference. This measurement will determine the height of the fabric you’ll need when it comes time to replace or repair your awning. It’s important to be precise in your measurements to ensure the new fabric fits properly and looks aesthetically pleasing on your awning structure.
So take your time, double-check your measurements, and don’t be afraid to ask for help if needed.
Step 5: Record the measurements
In this step-by-step guide, recording the measurements is an essential part of the process. Once all the necessary measurements are taken, it’s crucial to record them accurately and clearly. This step ensures that all the data collected can be properly analyzed and used for future reference.
When recording the measurements, it’s important to be detailed and thorough. Include all relevant information, such as the date and time of the measurement, the location of the measurement, and any additional factors that may have influenced the results. By recording the measurements meticulously, you can ensure that the data is reliable and accessible for further analysis and decision-making.
So, grab a notebook or use a digital tool to keep track of the measurements and make sure they’re organized and easily accessible. Happy recording!
Additional Tips
If you’re looking to measure your RV’s slide out awning, here are some additional tips to help you get accurate measurements. First, make sure you have a measuring tape that is long enough to reach the full length of the awning. Start by fully extending the slide out awning and ensuring it is securely in place.
Next, measure the width of the awning fabric by starting at one end and measuring across to the other. Be sure to measure from one edge of the fabric to the other, not including any metal frame or hardware. Then, measure the length of the fabric by starting at the top of the awning and measuring down to the bottom.
Again, only measure the fabric itself and not any additional material such as the roller tube. It’s also a good idea to measure the projection of the awning, which is the distance it extends out from the side of the RV. This will help you determine if the awning will provide enough coverage for your needs.
By following these tips, you can ensure you get the right measurements for your RV’s slide out awning.
Considerations when measuring awning fabric
When measuring awning fabric, there are a few additional tips to consider. First, it’s important to account for any obstructions or obstacles that may impact the measurement. For example, if there is a gutter or downspout in the way, you’ll need to measure around it to ensure an accurate measurement.
Additionally, you’ll want to consider the type of fabric you’re using. Different fabrics may have different levels of stretch or shrinkage, so be sure to account for this when measuring. Lastly, consider how you will be attaching the fabric to the awning frame.
If you’ll be using snaps or hooks, you may need to account for additional fabric length to ensure a snug fit. By taking these additional tips into consideration, you can ensure that you get an accurate measurement for your awning fabric.
Measuring for replacement awnings
When it comes to measuring for replacement awnings, there are a few additional tips that can help ensure a perfect fit. First, it’s important to make sure you measure the space accurately. Use a tape measure and take measurements of both the width and the projection of the awning.
Don’t forget to include any additional space needed for mounting brackets or other hardware. Second, consider the fabric. Different types of fabric can have different stretching properties, so it’s important to choose one that will fit well in your space.
Finally, consider the height of your awning. Make sure to measure from the bottom of the mounting bracket to the ground to ensure that the awning will provide sufficient shade and clearance. By following these additional tips, you can be confident that your replacement awning will fit perfectly and provide the shade and protection you desire.
Conclusion
In conclusion, measuring an RV slide out awning requires a combination of precision, patience, and a good sense of humor. It’s like trying to wrangle a mischievous octopus that just won’t stay put. But fear not, fellow RV enthusiasts, for I have bestowed upon you the wisdom of my awning-measuring adventures.
First, gather your tools – a measuring tape, a notepad, and a big cup of coffee (you’ll need it). Approach the slide out awning with confidence, knowing that you are about to conquer this seemingly impossible task. Step one: Extend the slide out.
This is where the patience part comes in. It may feel like trying to coax a stubborn sloth out of bed, but with some gentle persuasion (and maybe a few choice words) you’ll get that awning to cooperate. Step two: Measure the length.
Like pretending to be a circus contortionist, you’ll need to contort yourself into odd positions to measure the length of the awning. Stretch out your measuring tape and carefully run it along the bottom edge of the fabric. Take note of the measurement and try not to trip over your own feet as you retreat from under the awning.
Step three: Measure the width. This step requires a keen eye and a steady hand. Stand at one end of the awning and hold the measuring tape against the side edge, making sure it’s straight and level.
Walk to the other end, keeping the tape taut, and again take note of the measurement. Bonus points if you manage to do this without knocking over any lawn flamingos. Step four: Jot down the measurements.
Summary of the measurement process
measurement process, additional tips
Importance of accurate measurements for a proper fit
One of the most important factors in achieving a proper fit for clothing is accurate measurements. It’s crucial to take precise measurements of your body in order to ensure that the garment will fit correctly. When it comes to buying clothes online, this becomes even more important, as you cannot try the item on before making a purchase.
Taking the time to measure your body accurately can save you time, money, and frustration in the long run. Here are some additional tips to keep in mind when measuring for a proper fit: Use a cloth measuring tape: When measuring your body, it’s best to use a cloth measuring tape rather than a metal one.
This will ensure that the measurements are more accurate and won’t cause any discomfort or injury. Measure in your undergarments: To get the most accurate measurements, it’s important to measure your body in the undergarments that you will be wearing with the garment.
This will ensure that you account for any extra padding or support that the undergarments may provide. Take multiple measurements: To ensure accuracy, it’s a good idea to take multiple measurements of each area.
This will help to account for any variations in body shape or posture. Don’t pull too tight or too loose: When measuring, be sure to pull the measuring tape snugly against the body, but not too tight.
Pulling too tight can result in measurements that are too small, while pulling too loose can result in measurements that are too big. Follow the size chart: Once you have taken your measurements, compare them to the size chart provided by the retailer.
FAQs
How do I measure the size of my RV slide out awning?
To measure the size of your RV slide out awning, extend the awning fully and measure the distance from one end to the other. This will give you the width of the awning. To measure the length, measure from the top of the awning fabric to the bottom.
What tools do I need to measure my RV slide out awning?
To measure your RV slide out awning, you will need a measuring tape or ruler to accurately measure the width and length of the awning.
Can I install a slide out awning on my RV myself?
Yes, installing a slide out awning on your RV is a relatively simple process that can be done by most RV owners. However, if you are not comfortable with DIY projects or don’t have the necessary tools, it is recommended to hire a professional for installation.
How often should I replace my RV slide out awning?
The lifespan of an RV slide out awning can vary depending on factors such as usage, weather conditions, and maintenance. However, on average, it is recommended to replace the awning fabric every 3-5 years to ensure optimal performance and protection.
What is the purpose of a slide out awning on an RV?
The main purpose of a slide out awning on an RV is to provide protection for the slide out room by preventing debris, leaves, and water from collecting on the roof when the slide out is extended. It also helps to keep the slide out cooler during hot weather and prevents premature wear and tear.
Are there different types of RV slide out awnings?
Yes, there are different types of RV slide out awnings available. The most common types include manual awnings, which are operated with a crank, and electric awnings, which have a motor for easy operation. There are also different styles and designs to choose from, such as slide toppers and full enclosures.
How do I clean and maintain my RV slide out awning?
To clean and maintain your RV slide out awning, start by removing any loose debris such as leaves and dirt. Use a mild soap or RV awning cleaner and a soft brush to gently scrub the awning fabric. Rinse thoroughly with clean water and allow the awning to dry completely before retracting it. It is also important to regularly inspect the awning for any signs of damage or wear and replace any worn-out parts as needed.