
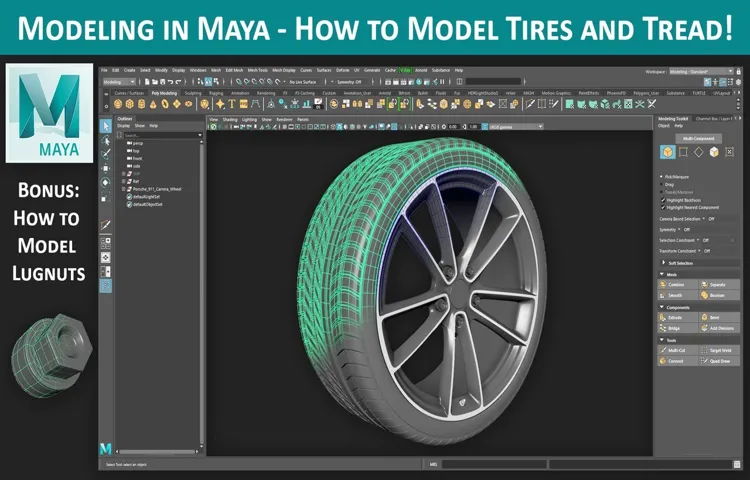
Have you ever wondered how video game cars or animated movies have such realistic-looking tires? It’s all thanks to the magic of 3D modeling software like Maya. In this blog post, we’ll explore the process of modeling a tire in Maya and all the intricate details that make it look like the real deal. From the tire’s shape to its tread and sidewall, we’ll cover every step of the process and provide tips and tricks for creating a tire that looks like it just rolled off the assembly line.
So buckle up and get ready to learn how to create a tire that will have your audience doing a double-take.
Table of Contents
Introduction
If you’re looking to model a tire in Maya, there are a few things you should keep in mind to ensure that your end product looks realistic and meets your expectations. One important thing to consider is the tread pattern of the tire, which can greatly affect its appearance and functionality. Another important aspect to keep in mind is the size and proportions of the tire, as well as any deformations or bulges that may be present.
To model a tire in Maya, you can start by creating a basic shape using a polygon cube or cylinder and then using deformations and other tools to add detail and texture to the surface. You can also use reference images and real-world calculations to ensure that your tire model is as accurate as possible. Whether you’re a seasoned Maya user or new to 3D modeling, with a bit of practice and patience, you can create a highly detailed and realistic tire model that will impress even the most discerning audiences.
Explanation of the Tire Model
Tire Model Tire modeling plays a vital role in racing simulations and vehicle dynamics. It is the fundamental component that determines the quality of a simulation experience as well as real-world vehicle performance. In the realm of racing, the tire model simulates the physics and mechanics of the contact patch between the tire and the road surface.
It attempts to account for every factor that comes into play, such as slip, camber, load, and temperature. Moreover, the tire model aims to provide an accurate representation of the tire’s behavior, i.e.
, how it responds to various inputs and conditions. This is accomplished through the use of mathematical equations and computer algorithms that analyze tire data, such as slip ratio, slip angle, and cornering stiffness. Overall, a good tire model is critical in achieving a realistic and challenging racing experience, and improving our understanding of vehicle dynamics.

Gathering Reference Images
If you want to model a tire in Maya, the first step is gathering reference images. These images will serve as a guide to ensure that your model accurately replicates a real-life tire. You can find reference images by searching the internet or taking photos of your own tires.
It’s important to gather images from different angles so that you can get a complete understanding of how the tire looks. This will help you create a 3D model that is true to life and realistic. As you search for images, keep in mind the specific type of tire you want to model.
There are various types of tires, such as radial and bias-ply, so it’s important to find images that accurately represent the type of tire you want to model. Once you have your reference images, you can begin the process of modeling your tire in Maya.
Finding Useful Tire References
When it comes to finding useful tire references, one of the most important things you can do is gather reference images. These images can provide you with a visual understanding of the different types of tires available, what they look like, and how they work. This can be especially useful if you’re new to the world of tires, as it can be overwhelming to try and navigate all the different brands, types, and sizes that are available on the market.
Reference images can help you compare and contrast different options, so you can make an informed decision about what will work best for your specific needs. Whether you’re looking for off-road tires, racing tires, or something in between, gathering reference images can be a great way to get started.
Preparing the Reference Images
When preparing to create a 3D model, one of the most important steps is to gather reference images. These images serve as a visual guide for the model, allowing you to accurately recreate the object or scene in 3D space. There are a variety of sources where you can find these images, such as online image databases, Google image search, and even taking your own photographs.
It’s important to gather multiple images from different angles and lighting conditions to ensure accuracy in your final model. By utilizing reference images, you can ensure that your 3D model is as true-to-life as possible, creating a more immersive and satisfying experience for your audience.
Creating the Tire Profile
Creating a tire profile in Maya might seem like a daunting task, but it is actually pretty straightforward once you know the ins and outs of the software. To begin with, you will need to create a circle using the ‘Create’ or ‘NURBS’ tool. This shape forms the basis of your tire model and acts as the cross-sectional shape of the tire.
Once you have the circle drawn out, you can add depth to it using the ‘Extrude’ tool. This allows you to pull the circle out and create the sidewalls of the tire. The next step involves creating the tread pattern, which is perhaps the most crucial aspect of the model.
You can do this by using a combination of basic shapes and Boolean operations. It is important to ensure that the pattern is repeated uniformly across the tire and contours to the shape of the sidewalls. Once the profile is complete, you can move on to adding more details, such as texturing and lighting, to create a more realistic and visually appealing model.
Overall, modeling a tire in Maya requires a combination of creativity, attention to detail, and technical know-how to achieve a seamless and high-quality output.
Drawing the Profile with Curves
Creating the tire profile requires an understanding of curves and how to draw them. The profile of the tire is important for ensuring stability, grip, and overall performance. To create the profile, curves are used to shape the rubber of the tire.
These curves can be tricky to draw, but with practice, they can be mastered. It’s important to consider the size of the tire, as well as the intended use, when drawing the profile. The curves can vary depending on the type of tire, such as a racing tire or a tire for everyday use.
By carefully considering the curves of the profile, the tire can be designed for maximum performance. Remember, the profile of the tire can make all the difference in how it performs on the road.
Adjusting the Profile to Fit References
Creating the tire profile is an important step in adjusting the profile to fit references. This involves documenting the tire’s size, shape, and structure, as these factors play a crucial role in performance. The tire profile typically includes details such as the width, aspect ratio, and diameter to determine how it fits on the wheel.
It also indicates the type of tire, which determines its intended use and performance capabilities. Different types include all-season, summer, winter, and off-road tires, each with unique features and benefits. Once the profile is created, it can be used to compare different tire references and select the best option for a particular vehicle.
By creating a detailed profile, mechanics and vehicle owners can avoid potential problems and improve overall vehicle performance and safety. So, ensure that the tire profile is accurately documented and updated regularly to keep up with any changes.
Modeling the Basic Tire Shape
If you’re wondering how to model a tire in Maya, the first step is to create the basic shape of the tire. Start by creating a cylinder and scaling it to the desired size. Then, use the “edit mesh” tool to add horizontal loops to the cylinder.
This will allow for the creation of the tire sidewall and tread. Once you have the loops in place, use the “sculpt geometry” tool to shape the tire into its rounded form. It’s important to pay attention to the reference image you’re using as you work, as tires can have variations in their shape and tread patterns.
Don’t forget to add weight to the bottom of the tire, to give it a realistic sense of gravity when placed in a scene. With a little patience and attention to detail, you can create a convincing tire model in Maya that will add realism to your 3D projects.
Using the Profile to Create the Tire Shape
To create the basic tire shape, we will use the Profile tool in our modeling software. This tool allows us to shape a 2D curve and then extrude it into a 3D form. We will use this tool to create the cross-section of the tire, which can then be rotated around an axis to create the tire’s shape.
First, we will draw a half cross-section of the tire’s profile, including the sidewall and tread. We can use measurements and reference images to ensure that the curve is accurate and realistic. Once we have our profile curve, we can use the Revolve tool to create a 3D shape by sweeping the curve around an axis.
It’s essential to consider how the tire’s shape will affect its performance, such as the contact patch with the road, traction, and stability. By using the Profile tool carefully, we can create a tire shape that is both aesthetically pleasing and functional.
Adding Details to the Tire Body
To create a realistic 3D tire model, it’s important to pay attention to the details of the tire itself. Modeling the basic tire shape is the first step in achieving this, starting with the overall outline of the tire. But it doesn’t stop there.
Adding the necessary details to the tire body is crucial in creating an accurate model. This includes adding the individual grooves and treads that make up the texture of the tire. These are the parts of the tire that come into contact with the road, and they play a big role in the overall appearance and functionality of the tire.
By carefully adding these details, you can bring your 3D tire model to life, making it look and feel almost as real as the actual tired does. So take your time when modeling, and make sure to include all the necessary details in order to achieve an impressive final result.
Creating the Tread Pattern
When it comes to modeling a tire in Maya, one of the most essential features to nail down is the tread pattern. Creating a visually appealing and accurate pattern can add texture and detail to your final model. To start, you’ll want to gather reference images of the type of tire you’re aiming to model.
Then, using a combination of basic shapes, extrusions, and deformers, begin shaping the grooves and ridges into your tire’s surface. By paying attention to the depth and width of the grooves, as well as the overall shape of the pattern, you can create a dynamic and realistic effect. It may take some trial and error to get the exact look you’re going for, but with some patience and persistence, you can create a stunning tire that looks just like the real thing.
Creating the Tread Grooves with Curves
Creating a Tread Pattern for tires is an involved process that takes into account various factors, such as vehicle type, terrain, and usage. One critical aspect of the Tread pattern is the grooves, which provide traction and enhance the performance of the tire. Creating Tread grooves using curves is a common technique that many manufacturers use to achieve a specific design.
It involves shaping the grooves in a curved manner, which allows for a more acute angle between the groove and the tire’s surface. This results in an increased grip and better handling during turns and in wet conditions. The curves also aid in reducing the noise level generated by the tire, making for a more comfortable and quieter ride.
While creating Tread Grooves with Curves is a complex process, it is essential for optimizing the performance and safety of tires across diverse applications.
Extruding the Grooves to Create the Tread
Now that the tire designs have been finalized, it’s time to create the tread pattern. This involves extruding the grooves to add depth and texture to the surface of the tire. The goal is to create a pattern that will maximize traction, durability, and overall performance.
Depending on the type of tire being made, there may be different grooves and patters to consider. For example, all-season tires might have a pattern that is optimized for wet and dry conditions, while off-road tires might have a more aggressive pattern for tackling rough terrain. By carefully extruding the grooves and designing the tread pattern, manufacturers can create tires that are perfect for a variety of conditions and applications.
So, the extruding process is vital to make tires that are responsive to the needs of drivers.
Adding Materials and Textures
If you’re wondering how to model a tire in Maya, it’s time to take the next steps in the process by adding materials and textures. Depending on the type of tire you’re modeling, you’ll need to choose textures that are reflective, rough, or even bumpy. Your texture choices will affect the final look of the tire and how it interacts with light, so it’s important to experiment with different options.
To add materials, you can use the Hypershade editor in Maya. This allows you to create and edit materials and apply them to your tire model. Additionally, you can use the UV Editor to assign textures to specific areas of your tire, creating a more realistic appearance.
By taking the time to add materials and textures to your tire model, you can create a finished product that looks just like the real thing.
Applying Shaders and UV Mapping
Shaders and UV Mapping are crucial tools when it comes to applying materials and textures to your 3D models. Shaders help to create believable lighting effects, such as reflections and shadows, while UV Mapping ensures that textures are applied to the correct parts of the model. To add materials and textures, you’ll first need to apply a surface shader to your model.
This shader tells the computer how light should interact with the model’s surface. Once the shader is in place, you can begin mapping your textures onto the model. This involves creating a 2D image that corresponds to the 3D shape of the model and then projecting that image onto the model’s surface.
The result is a realistic-looking model with detailed textures that enhance its appearance. By using shaders and UV Mapping together, you can bring your 3D models to life and create breathtaking visuals for your projects.
Creating a Realistic Texture for the Tread
To create a realistic texture for the tread, you need to add materials and textures to your design. This is where you can really elevate your 3D model and make it stand out. When it comes to materials, you want to choose something that is going to mimic the look and feel of the real thing.
For example, if you’re designing a tire tread, you might want to use a rubber material. Textures are also important because they add detail to your design that can make it more convincing. You might want to add textures that show the wear and tear on the tread or the imprints of the road.
By utilizing both materials and textures, you can create a 3D model that is both visually appealing and true to life.
Conclusion
In conclusion, modeling a tire in Maya is no small feat! It requires a range of skills, from expertly shaping geometry to creating realistic textures and materials. But fear not – with a little patience and practice, you too can create a tire that’s ready to hit the road. Just remember: when it comes to modeling, the rubber meets the road in Maya!”
Final Touches and Tips for Improving the Tire Model
When it comes to creating a realistic tire model, adding materials and textures is crucial. By incorporating appropriate textures and materials to your tire model, you can increase the level of realism and make it more visually appealing. For example, you can add a rubber texture to the tire’s surface or a glossy finish to its rims to better reflect light and add depth to the design.
You will need to choose textures that align with the context in which the tire will be used, such as whether it’s for a car, a bicycle, or a heavy-duty truck. Additionally, adding appropriate materials can make the tire appear more realistic. For instance, adding metallic material to the tire’s threading can help to reflect more light than plain rubber would.
By selecting the right materials and textures, you can make your tire model feel more authentic, improving the overall look and feel of your design.
FAQs
What tools can I use to model a tire in Maya?
You can use the polygonal modeling tools such as extrude, bevel, and create a series of circles to form the basic tire shape.
Can I use a reference image to model a tire in Maya?
Yes, using reference images is a great way to accurately model a tire and ensure it matches the real-life tire.
What is the best way to create the treads on a tire in Maya?
One way is to use the Boolean tool to combine a tire-shaped object with a tread-shaped object. Then, use the sculpting tools to refine the details.
How can I add realistic textures to my tire model in Maya?
You can use a variety of texture maps such as bump maps and displacement maps, as well as create your own custom textures using procedural textures.
Can I animate my tire model in Maya?
Yes, you can animate your tire by adding a rotation animation to it and adjusting the rotation rate to simulate movement.
How do I optimize my tire model for game engines in Maya?
You can optimize your tire model by reducing the polygon count and creating LOD versions to improve performance in real-time applications.
Is it possible to create a realistic tire deformation effect in Maya?
Yes, using soft body dynamics, you can simulate the deformation of the tire under varying levels of pressure and weight.