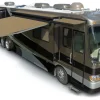
So you’re ready to hit the road in your trusty RV, but there’s just one problem – the strap to your awning is missing. Don’t worry, because opening an RV awning without a strap is easier than you might think. In this blog, we’ll show you a few simple methods to get your awning up and provide some helpful tips along the way.
Imagine you’re trying to open a tightly sealed jar, but you can’t find a grip. You start by tapping the sides, trying to loosen it up. Just like with the jar, your RV awning needs a little nudge to get it going.
One method to try is using a soft rubber mallet or a similar tool to gently tap the awning roller. This can help free up any stuck sections and allow the awning to start extending. Another option is to use your RV’s awning rod.
Similar to using a lever to lift a heavy object, you can insert the rod into the awning tube and use it to apply upward pressure. This can help release any tension that might be holding the awning in place, allowing it to extend smoothly. If these methods still aren’t working, don’t panic.
You can also try giving the awning a bit of a shake. Think of it like giving a stubborn vending machine a little kick – sometimes a little jolt is all it needs to start working. Gently grabbing the edge of the awning and giving it a few gentle tugs might be enough to get it going.
Remember, safety should always be your priority. Before attempting any of these methods, make sure you have a steady footing and take caution when using tools or applying pressure. If you’re unsure or uncomfortable, it’s always best to seek help from a professional.
Table of Contents
Introduction
If you’re out camping and discover that your RV awning strap is missing or broken, don’t worry! There are still ways to open your RV awning without a strap. One method is to use a hook or a piece of sturdy rope to grab onto the awning’s roller and manually roll it out. Another option is to use a long pole or broom handle to push up on the awning arm, releasing the tension and allowing you to extend the awning.
If you have a power awning, you can also try using the manual override feature to manually roll out the awning. With a little bit of creativity and resourcefulness, you can easily open your RV awning even without a strap.
Why You Might Need to Open an RV Awning with No Strap
If you own an RV, you probably know the convenience of having an awning. It provides shade and protection from the elements, allowing you to enjoy your outdoor space even more. However, there may be times when you find yourself needing to open the RV awning without a strap.
Whether the strap is missing or damaged, or you simply forgot to bring it along, don’t worry – there are still ways to open the awning and make the most of your outdoor experience. In this blog post, we’ll explore some alternative methods and tricks for opening an RV awning with no strap.
Safety Precautions
safety precautions, safety measures, ensure safety, stay safe, prevent accidents, protect yourself, avoid injuries, safety procedures, minimize risk
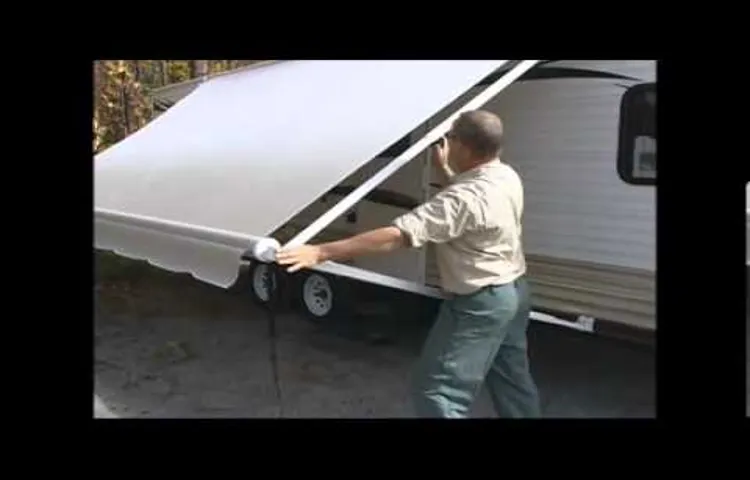
Method 1: Using a Pole or Broom Handle
If you find yourself in a situation where you need to open your RV awning but don’t have a strap, don’t worry! There is a simple method that you can use using a pole or broom handle. First, locate the end of the awning roller where the strap would normally attach. Then, take your pole or broom handle and slide it through the hole in the end of the roller.
Make sure it is secure and won’t slip out. Once the pole is in place, you can use it to manually turn the roller and extend the awning. Just be sure to turn it slowly and steadily to avoid any sudden movements or potential accidents.
With this method, you can easily open your RV awning even without a strap.
Step 1: Locate the Awning Roller and Arm
awning roller, pole or broom handle, locate, step 1 If you’re looking to locate the awning roller and arm, there’s a simple method you can use that involves a pole or a broom handle. This method is great because it doesn’t require any special tools or equipment. First, you’ll want to start by finding a pole or a broom handle that is long enough to reach the awning roller.
Once you have your pole or broom handle ready, you’ll need to look for a small hole or slot on the side of the awning roller. This is where you will be inserting the pole or broom handle to control the movement of the awning. It’s important to make sure that you locate the correct hole or slot, as there may be multiple ones on the awning.
Once you’ve located the hole or slot, you can gently insert the pole or broom handle and start controlling the movement of the awning. By using this method, you can easily locate the awning roller and arm without any hassle.
Step 2: Attach the Pole or Broom Handle
“Pole or Broom Handle” Now that you have gathered all the necessary materials, it’s time to move on to the second step: attaching the pole or broom handle to your birdhouse. This step is crucial as it will provide the necessary support and stability for your birdhouse. There are a few different methods you can use to attach the pole or broom handle, but we will focus on one method in particular.
Method 1 involves using a pole or broom handle that has a threaded end. If your pole or handle doesn’t already have a threaded end, you can easily create one by using a drill and a corresponding threaded screw. Start by determining the desired height at which you want your birdhouse to be placed.
Once you have decided on the height, mark the spot on the pole or handle where you will be attaching the birdhouse. Next, take your drill and create a small pilot hole at the marked spot. Make sure the hole is slightly smaller than the diameter of the threaded screw.
This will ensure a tight and secure fit. Once the pilot hole is created, gently screw in the threaded screw into the pole or handle, making sure it is tightly secured. Now, you can simply slide the bottom of your birdhouse onto the threaded end of the pole or handle.
You may need to use a little bit of force to push it down all the way. Once the birdhouse is securely attached, you can use a wrench or pliers to tighten the screw even further, providing additional stability. By attaching the pole or broom handle using this method, you can easily adjust the height of your birdhouse if needed.
Plus, it provides a secure and stable foundation for your feathered friends to enjoy their new home. So go ahead, grab that pole or broom handle, and get ready to complete this important step in the construction of your birdhouse!
Step 3: Extend the Awning
When it’s time to extend the awning on your RV, there are a few different methods you can use. One simple method is to use a pole or broom handle to help you reach and extend the awning. This can be useful if you don’t have anyone else to assist you or if you want to avoid stepping on any furniture or other items that may be in the way.
Simply attach the pole or broom handle to the awning mechanism and use it to extend the awning outward. This can give you better control and help to prevent any accidents or damage to your RV. Plus, it makes the whole process a lot easier and more manageable.
So, the next time you need to extend your awning, grab a pole or broom handle and give this method a try!
Step 4: Secure the Awning
One of the most effective ways to secure an awning is by using a pole or broom handle. This method is simple, affordable, and requires minimal effort. To begin, you will need to locate the point where the awning attaches to the side of your RV or camper.
Once you have found this point, insert the pole or broom handle into the small opening or loop at the end of the awning. This will provide extra stability and prevent the awning from flapping in the wind or collapsing under its weight. Make sure the pole or broom handle is securely in place, and double-check for any signs of movement or looseness.
By using this method, you can rest assured that your awning will remain securely fastened and provide you with a shady and comfortable outdoor space.
Method 2: Using a Long Piece of Rope
If you find yourself in the situation of needing to open an RV awning but don’t have a strap on hand, don’t worry! There is a simple method using a long piece of rope that can save the day. First, locate the roller tube that the awning fabric is attached to. Next, find the hole on the roller tube that the strap would normally go through.
Take your long piece of rope and tie one end securely to the hole on the roller tube. Then, extend the rope out towards the side of the RV where the awning is located. Find a sturdy object, such as a tree or a pole, and wrap the rope around it a few times to create tension.
Now here comes the tricky part. Hold onto the loose end of the rope and walk away from the awning, pulling the rope with you. As you move further away, the tension will cause the awning to roll out.
Keep pulling until the desired amount of awning is fully extended. Voila! You have successfully opened your RV awning without a strap. Remember to always be cautious and ensure that the rope is securely tied and the object you are using for tension is stable.
Step 1: Locate the Awning Roller and Arm
In this blog section, we will discuss the second method to locate the awning roller and arm using a long piece of rope. This method is especially useful if you don’t have a ladder or if your awning is positioned high. To start, you will need a long piece of rope, preferably one that is at least three to four times the height of your awning.
Begin by attaching one end of the rope securely to the awning roller. You can do this by tying a knot or using a carabiner clip. Then, take the other end of the rope and find a stable anchor point on the ground, such as a sturdy tree or a heavy object.
You want to make sure the anchor point is secure enough to support the weight of the awning when it is fully extended. Once you have found your anchor point, attach the other end of the rope to it. Now, gently pull on the rope while keeping an eye on the awning roller.
As you pull, the awning should start to retract, allowing you to see where the roller and arm are located. This method gives you the advantage of a longer reach and makes it easier to locate the components of your awning without the need for a ladder.
Step 2: Tie the Rope to the Arm
In this blog section, we will discuss the second method of tying a rope to the arm, which involves using a long piece of rope. This method can be helpful if you need to reach something at a distance or if you don’t have a ladder or step stool available. To begin, you will need a long piece of rope that is strong enough to support your weight.
Start by forming a loop at one end of the rope and making sure it is secure. Then, throw the loop over the arm or branch that you are trying to reach. Once the loop is securely in place, pull the rest of the rope through the loop to create a slip knot.
This slip knot will allow you to adjust the length of the rope as needed. Finally, make sure the rope is securely tied to the arm or branch by testing it before putting your weight on it. This method is a simple yet effective way to extend your reach and accomplish tasks that would otherwise be difficult to do.
Step 3: Extend the Awning
awning, extend, long piece of rope, outdoor space, shade, secure, tie down, method, convenient, flexible. If you’re looking to extend the awning of your outdoor space, using a long piece of rope can be a convenient and flexible method. It allows you to secure the awning and provide shade in the desired area.
First, make sure you have a long enough piece of strong rope that can handle the weight of the awning. Then, find a sturdy anchor point, such as a tree or a pole, where you can tie down one end of the rope. Next, take the other end of the rope and attach it to the awning, making sure it is secure.
Finally, adjust the tension of the rope to extend the awning to the desired length. This method not only provides a simple solution for extending your awning, but it also gives you the flexibility to adjust the position and length of the shade as needed. So go ahead and give it a try, and enjoy your outdoor space with the added comfort and shade of an extended awning.
Step 4: Secure the Awning
secure the awning
Method 3: Using a Hook
If you find yourself in a situation where your RV awning has no strap, don’t worry! There is still a way to open it. One method you can try is using a hook. First, you’ll need to locate the hole in the awning roller.
This hole is where the strap would normally be attached. Once you’ve found the hole, take a long, sturdy object, such as a broom handle or a fishing rod, and insert it into the hole. Use the hook-like end of the object to catch onto the roller mechanism inside the awning.
With a firm grip on the object, start turning it in a clockwise motion. This will gradually open up the awning. Keep in mind that it may take some time and effort to fully extend the awning using this method.
But with a little patience, you’ll be able to enjoy the shade and protection provided by your RV awning even without a strap.
Step 1: Locate the Awning Roller and Arm
When it comes to retracting your awning, finding the roller and arm is the first step. One method you can use to locate the awning roller and arm is by using a hook. This method is simple and effective.
All you need is a long hook-like tool, such as a coat hanger or a broom handle. Start by standing directly underneath the awning and extend the hook upwards. Slowly move the hook back and forth until you feel it catch onto the arm or roller.
Once you have located the roller and arm, you can proceed with retracting the awning. Using a hook is a handy trick that allows you to reach those hard-to-reach areas and make the retracting process much easier. So go grab a hook and give it a try!
Step 2: Attach the Hook to the Arm
attaching a hook to a prosthetic arm. One method of attaching a hook to a prosthetic arm is by using a hook itself. This method provides a secure and reliable way to ensure the hook stays in place during use.
To begin, you will need a prosthetic arm that has a compatible attachment point for the hook. The hook should have a small hole or loop at the base that can be used to connect it to the arm. Start by inserting the hook into the attachment point, making sure it is securely fastened.
Next, use a small screw or bolt to tighten the hook in place, ensuring that it will not come loose during use. It is important to make sure the hook is aligned properly with the arm so that it functions correctly. Once the hook is securely attached, you can then use it for a variety of tasks and activities, providing you with increased functionality and independence.
Step 3: Extend the Awning
extending the awning, awning hook
Step 4: Secure the Awning
Using a hook can be a convenient and effective method for securing an awning. This method involves attaching a hook to the side of your house or another sturdy structure, and then using it to hold the awning in place. To do this, you will need to install the hook securely, making sure it can support the weight of the awning and withstand any strong winds or other weather conditions.
Once the hook is in place, you can simply hang the awning from it, making sure it is securely fastened. This method is relatively easy to set up and can provide a strong and reliable way to keep your awning in place.
Conclusion
So there you have it, folks! The foolproof method for opening an RV awning with no strap. Remember, necessity is the mother of invention, and in this case, it has birthed a genius solution. By harnessing the power of gravity, channeling your inner MacGyver, and enlisting the help of your trusty ladder, you’ll be able to conquer any awning opening challenge that comes your way.
So grab your tools, grab your ladder, and get ready to show that stubborn awning who’s boss. Because let’s face it, nothing is more satisfying than outsmarting a piece of fabric and proving that ingenuity always prevails. Happy adventuring!
Final Thoughts
hook writing technique In writing, a hook is a powerful tool used to grab the reader’s attention right from the start. It is a technique that writers employ to make their audience curious, engaged, and interested in reading further. There are many ways to create a strong hook, such as starting with a captivating anecdote, asking a thought-provoking question, or using a surprising statistic.
This method is especially effective in blog writing as it helps to captivate the reader and encourage them to continue reading the article. By using a hook, writers can create an immediate connection with their readers and make their content more memorable and impactful. So next time you sit down to write a blog post, consider using a hook to make your introduction truly captivating.
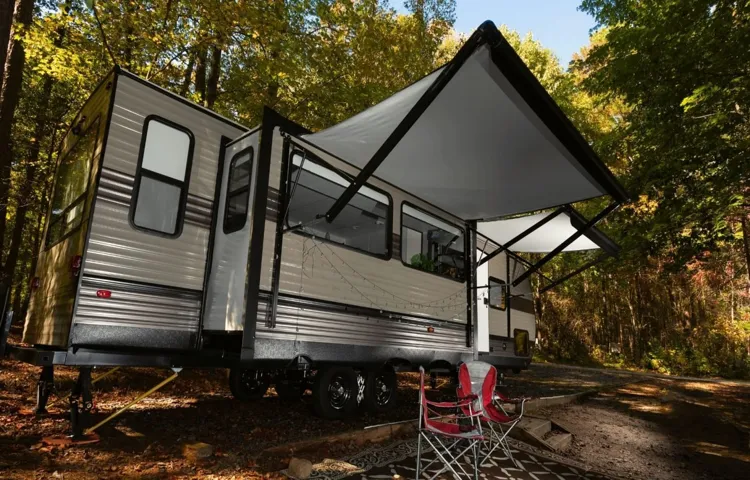
Enjoy Your RV Awning
Using a hook to enjoy your RV awning is a great alternative to traditional methods. It allows for easy setup and takedown, making it a convenient option for those on the go. To use a hook, simply attach it to the end of your awning and then hang it from a sturdy object, such as a tree branch or pole.
This will hold the awning securely in place, allowing you to enjoy the shade and protection it provides. Whether you’re camping in the mountains or spending a day at the beach, using a hook to secure your awning is a simple and effective way to enhance your outdoor experience. So next time you’re planning a trip in your RV, don’t forget to pack a hook for your awning.
You’ll be glad you did!
FAQs
Can an RV awning be opened without a strap?
Yes, it is possible to open an RV awning without a strap. There are alternative methods available, such as using a long rod or broom handle to reach the awning mechanism and manually open it.
What should I do if my RV awning doesn’t have a strap?
If your RV awning doesn’t have a strap, you can try using a long rod or broom handle to manually open it. Alternatively, you can consider purchasing a replacement strap or finding a universal strap that fits your awning.
Are there any safety precautions I should take when opening an RV awning without a strap?
Yes, it is important to take some safety precautions when opening an RV awning without a strap. Make sure to have a firm grip on the rod or broom handle to avoid injury. Be cautious of any potential obstructions or obstacles around the awning area as you open it.
Can I use a rope instead of a strap to open my RV awning?
Yes, if you don’t have a strap, you can try using a strong rope to open your RV awning. Just make sure the rope is securely attached to the awning mechanism and that you have a firm grip on it when opening.
Is it necessary to have a strap to open an RV awning?
While a strap is the standard method for opening an RV awning, it is not absolutely necessary. With some improvisation and careful handling, you can manually open the awning without a strap using alternative tools or materials.
Where can I buy a replacement strap for my RV awning?
You can buy a replacement strap for your RV awning from RV supply stores, online retailers, or directly from the manufacturer. Make sure to check the specifications and compatibility with your specific awning model.
Can I make my own strap for opening my RV awning?
Yes, if you are handy with sewing or have access to suitable materials, you can make your own strap for opening your RV awning. There are also tutorials and DIY guides available online that can assist you in making a custom strap.
How much does it cost to replace an RV awning strap? A8. The cost of replacing an RV awning strap can vary depending on the brand, size, and material. On average, a replacement strap can range from $15 to $50, but prices may fluctuate.
Are there any alternative methods for opening an RV awning without a strap?
Yes, besides using a rod or broom handle, some RV owners have found success using a long stick or a telescopic pole to reach and open the awning mechanism. You may need to experiment with different tools to find what works best for your specific awning setup.
Can I hire a professional to open my RV awning if I don’t have a strap?
Yes, if you are not comfortable or confident in opening your RV awning without a strap, you can hire a professional to do it for you. RV service centers or technicians with experience in awning repairs can assist you in safely opening your awning.