Have you ever had the misfortune of a flat tire, but didn’t have the tools to change it? Or worse, you managed to detach the tire from the rim and have no idea how to pop it back on? It can be a frustrating experience, but fear not, because we’ve got you covered. In this blog post, we’ll explain how to pop a tire back on the rim without the use of fancy equipment. Firstly, you need to know that popping a tire back on the rim requires a bit of elbow grease and patience.
But with a little effort, it can be done. Begin by placing the tire flat on the ground and positioning the rim so that it lines up with the tire. Next, start working on one side of the tire, pushing the rubber edges of the tire onto the rim.
It’s vital to keep as much of the tire in the rim’s center as possible as you work on it. As you push, you will hear a satisfying “pop” sound as the tire slides back into place on the rim — the air pressure inside helps the tire to mold properly into the rim’s grooves. With the first section of the tire in place, work on the other side of the tire, repeating the same process.
Once you have both sides pushed into position, make sure to inflate the tire with the ideal amount of air pressure recommended by the manufacturer. In conclusion, while popping a tire back on the rim can seem daunting, it’s not impossible. It’s essential to keep in mind that the process takes patience and a bit of muscle power.
It’s also vital to note that a tire with a puncture or signs of damage should be replaced, but if your tire is still in good working condition, then following the steps we’ve detailed here should get you back on the road in no time!
Table of Contents
What You Will Need
If you’re in a situation where you need to pop a tire back on the rim, there are a few things you’ll need. First, you’ll want to make sure you have a tire lever or two. These tools are essential for getting the tire off the rim, and for getting it back on once you’ve made your repairs.
You’ll also need a pump to inflate the tire, and some tire sealant to fill any holes or punctures in the rubber. It’s a good idea to have a clean rag or two on hand as well, to wipe down the tire and rim and keep everything as clean as possible. And don’t forget to have a bit of patience – popping a tire back on the rim can take some effort, but with the right tools and a little persistence, you’ll be back on the road in no time.
Tire irons
When it comes to changing a tire, having the right tools is key. One of the most essential tools you will need is a tire iron. Typically, a tire iron is a long, slender piece of metal with a curved end and a flat end.
The curved end is used to remove the lug nuts that hold the wheel in place, while the flat end is used to pry the tire off the rim. In addition to a tire iron, you may also want to have a jack and a spare tire on hand. These tools will enable you to remove the old flat tire and replace it with a new one quickly and easily.
Whether you’re an experienced mechanic or a novice car owner, having a tire iron in your car’s toolkit is a must. Not having one on hand can cause a simple tire change to become a daunting task. So, make sure you have the right tools, including a tire iron, to stay safe on the road.
Pump or air compressor
When it comes to inflating objects such as bike tires, footballs or air mattresses, you will need a pump or an air compressor. Pumps are generally more affordable and portable, making them a great option for people who need to inflate objects on-the-go. However, they require manual effort and can be strenuous to use for extended periods of time.
On the other hand, air compressors are more powerful and can inflate objects quickly and efficiently. They are ideal for people who need to inflate multiple objects or larger items. However, they tend to be larger and less portable than pumps.
Ultimately, your choice between a pump or air compressor will depend on your specific needs and preferences. Regardless of which option you choose, make sure to read the instructions carefully and take all necessary safety precautions. By using the proper equipment, you can ensure that your inflatables are inflated to the correct pressure and ready for all your upcoming adventures.
Soap and water solution
When it comes to cleaning your home, sometimes the simplest solutions are the most effective ones. If you are looking for a natural, eco-friendly, and affordable way to clean your home, a soap and water solution may be just what you need. To create this solution, you will need a few basic ingredients: soap, water, a spray bottle, and a cloth for wiping.
Any mild soap such as castile soap or dish soap will do. Mix a few teaspoons of soap with warm water in a spray bottle, and shake well. This solution can be used to clean various surfaces such as countertops, floors, bathrooms, and even windows.
Not only is this an effective cleaning method, but it’s also gentle on your home and the environment. Give it a try next time you need to tackle some cleaning tasks around the house, and see for yourself the benefits of this simple yet effective cleaning solution.
Preparing the Tire
If you find yourself with a flat tire, there’s no need to panic! With the right tools and some patience, you can pop that tire back onto the rim in no time. Before you begin the process, make sure you have a tire lever, a pump, and some soapy water on hand. First, remove the tire from the bike and make sure the tube is completely deflated.
Next, use the tire lever to pry the tire away from the rim. Once you have enough space, sprinkle some soapy water onto the rim, and push the tire back onto it. Be sure to work slowly and carefully, making sure the tire is properly aligned on the rim.
Finally, pump up the tire and give it a good spin to make sure it rolls smoothly. And just like that, you’re back on the road!
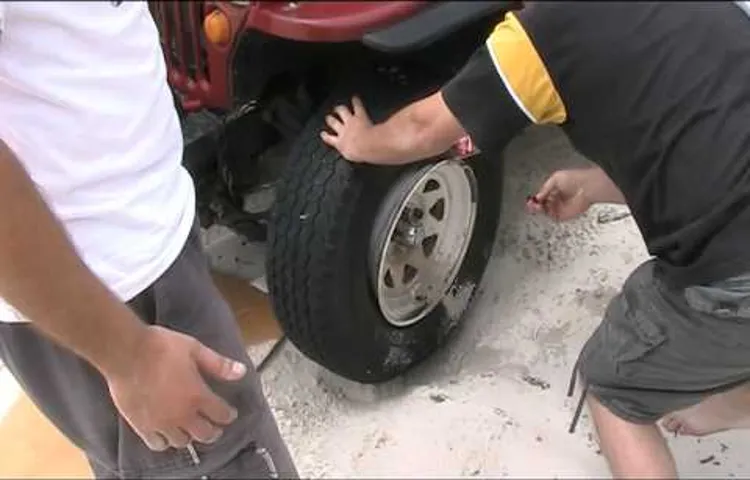
Remove the tire from the wheel assembly
Removing the tire from a wheel assembly is an important part of preparing the tire for either repair or replacement. It may seem like a daunting task, but with the right tools and a little patience, anyone can do it. Start by removing the wheel assembly from the vehicle and let it cool down if it’s hot.
Then, locate the valve stem on the tire and remove the valve core with a valve core tool. This will release the air pressure from the tire. Once the air pressure has been released, use a tire spoon or a set of tire irons to pry the tire off the wheel.
Start at one end and work your way around the tire, being careful not to damage the wheel or the tire itself. Once the tire has been removed, inspect the wheel thoroughly for any damage or cracks. A damaged wheel can cause further issues down the line, so it’s important to address any problems right away.
With the tire removed, you can now prep it for repair or replacement, depending on your needs. By following these steps, you can safely and easily remove a tire from the wheel assembly and move on to the next step in the process.
Clean the tire bead area
When it comes to changing a tire, preparing the tire properly is crucial to ensure a safe and successful tire replacement. One important step in preparing the tire is cleaning the tire bead area. The tire bead is the part of the tire that sits on the rim of the wheel, and any dirt or debris in this area can prevent a proper seal between the tire and the rim.
To clean the tire bead area, start by removing any loose dirt or debris with a brush or rag. Next, use a mild detergent and water to clean the area thoroughly. Be sure to dry the area completely before installing the new tire.
By properly cleaning the tire bead area, you can ensure a secure and lasting seal that will keep your vehicle safe on the road.
Popping the Tire back on the Rim
When dealing with a flat tire, one of the most frustrating things is trying to pop it back onto the rim. While it may seem like an impossible task, there are actually a few easy steps you can take to get your tire back on track. First, try deflating the tire completely and then using your hands to push the tire bead back onto the rim.
If that doesn’t work, grab a tire lever and use it to pry the tire over the edge of the rim, making sure to work your way around the tire carefully. It may take a little bit of elbow grease, but with some patience and persistence, you should be able to get your tire back onto the rim in no time. And once you do, be sure to reinflate the tire before hitting the road again.
So if you’re struggling with a popped tire, don’t fret – just follow these simple steps and you’ll be back on the road in no time.
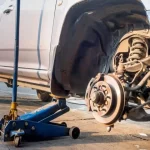
Place the wheel assembly on a flat surface
If you’re faced with a popped tire, fear not! With a little bit of patience and some elbow grease, you can easily pop that tire right back on the rim. The first step in this process is to place the wheel assembly on a flat surface. This will give you a stable base to work from and make the job much easier.
From there, you’ll need to use a set of tire levers to remove the damaged tire completely from the rim. This can be a bit tricky, so take your time and be careful not to damage the rim in the process. Once the tire is off, you can start working on popping it back into place on the rim.
This may take some effort, but keep at it and it will eventually pop back into place. Once it’s secure, inflate the tire to the recommended pressure and check for any leaks. With a little bit of work, you’ll have your tire back in tip-top shape in no time!
Apply soap and water solution to the tire bead
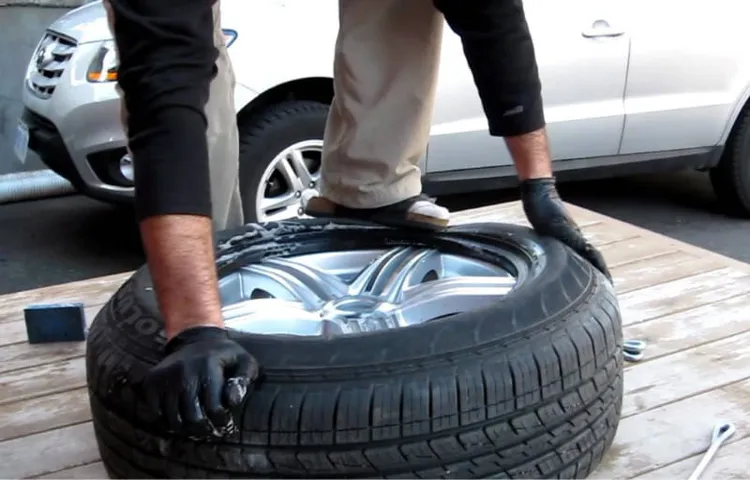
When it comes to fixing a flat tire, one of the most challenging tasks is popping the tire back on the rim. A soap and water solution can make this task much easier. First, apply the solution to the tire bead to lubricate it.
Then, push the tire onto the rim, starting at the valve stem. Use your thumbs to push the tire onto the rim while rotating the wheel. Using a tire lever, you can work your way around the tire, gradually pushing it onto the rim until it is completely seated.
Think of it like trying to get a tight pair of jeans on. You need to wiggle and move them around to get them on comfortably. The soap and water solution acts as the lubricant that allows the tire to slide on more easily.
It’s important to work slowly and carefully, taking your time to ensure that the tire is properly seated on the rim. If you rush the process, you could damage the tire or even end up with a flat again shortly after putting the tire back on. With a bit of patience, practice, and the right technique, popping a tire back on the rim can be an easy task that you can accomplish with confidence.
Insert tire irons between tire bead and rim
Inserting tire irons between the tire bead and rim is an essential step in popping the tire back onto the rim. To do this, you need to position the tire iron between the bead of the tire and the rim. Then, you need to use leverage to push the tire away from the rim and into position with the tire iron.
This can be a bit tricky because the tire bead is tight against the rim, but with some patience and persistence, you’ll be able to get the tire back into place. Once you’ve inserted the tire irons, it’s important to work your way around the tire, making sure that the bead is properly seated on the rim all the way around. This will help to ensure that the tire is securely in place and won’t come off while you’re riding.
Overall, popping the tire back onto the rim is a key skill that every cyclist should know, especially in case of emergency situations on the road.
Use tire irons to pry the tire bead onto the rim
When it comes to fixing a flat tire, one of the trickiest parts is getting the tire bead back onto the rim. This can be quite a challenge, but with a little patience and the right tools, it’s definitely doable. One tool you’re going to need is a set of tire irons, which you’ll use to pry the tire bead onto the rim.
Start by lubricating the beads with some soapy water, which will help the tire slide onto the rim more easily. Then, insert the tire iron between the rim and the tire and pry upwards to pop the bead onto the rim. You’ll need to use a combination of force and finesse to get the job done, so take your time and be careful not to damage the tire or the rim.
Once you’ve done one side, repeat the process on the other side until the tire is securely mounted on the rim. With a little practice, you’ll be a tire-changing pro in no time!
Inflation and Finishing Touches
Once you have successfully popped your tire back onto the rim, the next step is to inflate it to the appropriate pressure. Before doing this, check your tire for any leaks or damage. If there are any visible punctures or tears, don’t attempt to inflate the tire, as it could cause further damage.
Assuming there are no obvious issues, use a tire gauge to check the recommended pressure for your specific tire and inflate accordingly. Be sure not to overinflate, as this can lead to a blowout. It’s also a good idea to give your tire a quick spin to ensure proper placement and balance.
With these finishing touches, you’ll be back on the road in no time, equipped with the knowledge of how to pop a tire back on the rim like a pro.
Inflate the tire to the manufacturer’s recommended PSI
When it comes to inflating your tire, it’s important to stick to the manufacturer’s recommended PSI. This ensures optimal performance, handling, and safety while driving. Underinflated tires can cause poor fuel efficiency, increased wear and tear, and a less stable ride.
On the other hand, overinflated tires can lead to a harsh ride, reduced traction, and an increased risk of a blowout. That’s why it’s crucial to check your tire pressure regularly and inflate them to the recommended PSI. Doing so is a simple yet crucial step in maintaining the overall health and longevity of your tires.
Remember, a properly inflated tire not only improves performance, but it can also save you money on fuel costs and prevent unnecessary wear and tear. So, whenever you’re checking your tire pressure, be sure to inflate them to the manufacturer’s recommendation for optimal safety and performance on the road.
Check tire pressure and adjust if necessary
One of the most important tasks in maintaining your vehicle is checking the tire pressure regularly. Properly inflated tires not only improve vehicle safety, but also help with fuel efficiency. To check the tire pressure, you’ll need a tire pressure gauge and access to an air compressor.
First, remove the valve stem cap and attach the gauge to the valve stem. The gauge will give you a reading in PSI (pounds per square inch), which you can compare to the recommended pressure listed on the tire sticker found in the driver’s side door jamb or owner’s manual. If the pressure is too low, add air until it reaches the recommended level.
On the other hand, if the pressure is too high, release air until it’s back to the correct level. Don’t forget to also check the spare tire and adjust its pressure if necessary. By keeping your tire pressure at the proper level, you’ll not only ensure greater safety on the roads but also save on fuel costs over time.
Reinstall wheel assembly onto vehicle
After successfully removing the wheel assembly from your vehicle, the next step is to reinstall it. But before doing so, you need to ensure that the tire is properly inflated. Check the recommended pressure levels in the owner’s manual or on the tire itself and use a tire pressure gauge to fill it up.
Once it’s fully inflated, you can begin the reassembly process by lining up the wheel studs with the holes in your vehicle’s hub. Tighten the lug nuts by hand as much as you can before lowering the vehicle back down to the ground. Then, use a torque wrench to tighten the lug nuts to the manufacturer’s recommended torque specifications.
Finally, give the tire a spin to make sure it’s rotating smoothly and check for leaks around the valve stem. With these finishing touches, your wheel assembly is now reinstalled and ready for the road. Remember, proper maintenance of your wheels and tires is crucial for your safety and the longevity of your vehicle.
Conclusion
In conclusion, popping a tire back onto the rim is no small feat. It requires a steady hand, a bit of elbow grease, and perhaps a sprinkle of good luck. Just like life, sometimes things slip out of place and we have to work hard to put them back together.
So next time you find yourself with a flat tire, don’t panic. Remember these simple steps to pop it back onto the rim and take pride in knowing you’ve conquered a challenge that would deflate most! “
FAQs
What tools do I need to pop a tire back on the rim?
To pop a tire back on the rim, you will need a tire lever, a bike pump, and possibly a pair of pliers or a wrench.
Can I pop a tire back on the rim without tools?
It is not recommended to try to pop a tire back on the rim without tools, as it can be difficult and potentially dangerous.
What is the easiest way to pop a tire back on the rim?
The easiest way to pop a tire back on the rim is to use a tire lever and work your way around the rim, gradually pulling the tire back onto the rim.
Is it safe to attempt to pop a tire back on the rim while the tire is still on the bike?
It is not safe to attempt to pop a tire back on the rim while it is still on the bike, as it can cause damage to the bike and potentially harm the user.
How do I know if I have successfully popped the tire back on the rim?
The tire should be seated evenly on both sides of the rim, with no bulges or gaps. It should also spin smoothly and without wobbling.
Should I inflate the tire before or after popping it back on the rim?
It is recommended to inflate the tire after popping it back on the rim, as it will be easier to work with and ensure proper seating.
Can I use any type of tire lever to pop the tire back on the rim?
While most tire levers will work, it is recommended to use a quality tire lever specifically designed for bike tires to prevent damage to the tire or rim.