
Hey there! Are you struggling with a coolant system that is constantly losing pressure? Don’t worry, we’ve got you covered. In this step-by-step guide, we will show you exactly how to pressurize your coolant system like a pro. By following these simple instructions, you’ll be able to keep your engine running smoothly and avoid any major headaches down the road.
So, grab your tools and let’s get started on this DIY adventure!
Table of Contents
Introduction
Have you been experiencing issues with your coolant system? One common problem that car owners encounter is a coolant system that lacks proper pressure. When your coolant system is not pressurized correctly, it can lead to engine overheating, coolant leaks, and potential damage to your vehicle. But don’t worry, I’m here to help! In this blog post, I’ll walk you through the steps on how to pressurize your coolant system effectively.
By following these instructions, you can ensure that your coolant system functions optimally, keeping your engine cool and your car running smoothly. So, let’s dive in and get your coolant system pressurized!
Why Pressurize Your Coolant System?
Pressurizing your coolant system is an important aspect of maintaining the efficiency and longevity of your vehicle. The coolant system plays a crucial role in keeping your engine operating at a safe temperature, preventing overheating and potential damage. When the coolant system is pressurized, it increases the boiling point of the coolant, allowing it to withstand higher temperatures without evaporating.
This is essential, especially for high-performance engines or engines under heavy load. In this blog section, we will discuss the benefits of pressurizing your coolant system and why it should be an integral part of your vehicle maintenance routine.
Importance of Proper Coolant Pressure
coolant pressure, engine cooling system, overheating, proper function, radiator, heat transfer, vehicle maintenance, coolant level, coolant reservoir, coolant circulation, temperature regulation, engine performance Introduction: Proper coolant pressure is essential for the overall health and performance of your engine’s cooling system. The cooling system’s primary role is to prevent overheating, which can cause significant damage to your engine. It achieves this through the circulation of coolant, which absorbs heat from the engine and dissipates it through the radiator.
However, for this process to work effectively, the coolant needs to be under the correct pressure. In this blog post, we will explore the importance of proper coolant pressure, how it affects your engine’s performance, and why it is vital to include coolant pressure checks in your regular vehicle maintenance routine.
Step 1: Gather Your Materials
When it comes to pressurizing a coolant system, the first step is to gather your materials. This may seem like a simple step, but having everything you need on hand can save you time and frustration later on. So, what exactly do you need? Well, for starters, you’ll need a pressure tester kit.
This kit typically includes a hand pump or gauge that allows you to pressurize the coolant system. Additionally, you’ll need a coolant recovery tank, which will help catch any coolant that may be expelled during the pressurization process. Lastly, don’t forget to have some extra coolant on hand, as you may need to top off the system after pressurizing it.
By taking the time to gather your materials beforehand, you’ll be better prepared to tackle the task at hand and ensure a successful pressurization of your coolant system.
List of Tools and Equipment Needed
For any DIY project, it’s important to gather all the necessary tools and equipment before you begin. This will save you time and frustration down the line. When it comes to building your own kitchen island, there are a few essential tools and materials you’ll need.
First and foremost, you’ll need a measuring tape to ensure you have accurate measurements for your island. Next, you’ll need a saw to cut the lumber for the frame and countertop. A drill will come in handy for securing the pieces together, and a level will help you make sure everything is straight and balanced.
Additionally, a hammer, nails, and screws will be needed for various tasks throughout the project. Lastly, don’t forget to grab a paintbrush or roller and some paint or stain to finish off your island. With these tools and materials in hand, you’ll be well-equipped to tackle your kitchen island project!
Importance of Using High-Quality Coolant
coolant, high-quality coolant
Step 2: Prepare Your Vehicle
Once you’ve gathered all the necessary tools and materials, it’s time to prepare your vehicle for pressurizing the coolant system. First, make sure the engine is cool before starting any work. This is important to avoid any potential burns or injuries.
Next, locate the radiator and remove the radiator cap. You may need a towel to protect your hands from any hot steam that may escape during this process. Once the cap is off, inspect it for any signs of damage or wear.
If necessary, replace it with a new one. It’s always a good idea to have a spare radiator cap on hand, just in case. After checking the radiator cap, locate the coolant reservoir and check the coolant level.
If it’s low, add the appropriate coolant mixture to bring it up to the recommended level. Be sure to follow your vehicle’s specific instructions for adding coolant. Finally, it’s time to pressurize the coolant system.
This can be done using a coolant pressure tester tool. Attach the tester to the radiator cap opening and pump it until the desired pressure is reached. This will help you identify any leaks in the system.
If you notice a decrease in pressure, it could indicate a problem such as a leak or a faulty radiator cap. Once you’ve completed the pressurization process, be sure to carefully remove the tester from the radiator cap opening and replace the cap securely. With these steps completed, your vehicle’s coolant system should be ready to go.
Park Your Vehicle on a Level Surface
park your vehicle on a level surface
Allow the Engine to Cool Down
“Allow the Engine to Cool Down” One important step in preparing your vehicle for a long road trip is to allow the engine to cool down. Just like our bodies need time to rest and recuperate after physical activity, the engine of your car also needs a break. Giving it some time to cool down before hitting the road can help prevent overheating and ensure a smoother journey.
Think of it as giving your engine a chance to catch its breath before embarking on a long and demanding adventure. So, before you rev up that engine and set off on your road trip, sit back, relax, and let your car’s engine cool down for a bit. Trust me, it will thank you later!
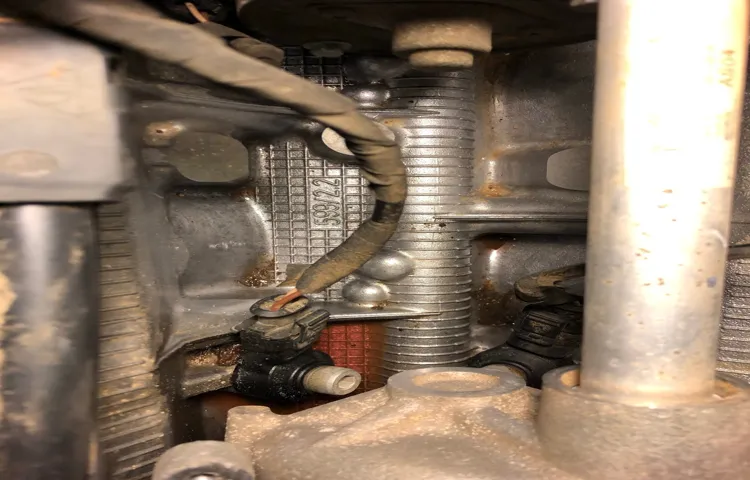
Step 3: Locate the Coolant Pressure Cap
Now that you have performed a visual inspection of your coolant system and filled it up with coolant, it’s time to pressurize the system. Pressurizing the coolant system helps to ensure that there are no leaks or weaknesses in the system. To do this, you will need to locate the coolant pressure cap.
This cap is usually located on the radiator or on the coolant expansion tank. It is important to note that the location of the cap may vary depending on your vehicle’s make and model, so it’s a good idea to consult your owner’s manual for guidance. Once you have located the cap, make sure the engine is cool before removing it.
This will help to prevent any potential burns or injuries. And always remember, safety first!
Common Locations for Coolant Pressure Cap
coolant pressure cap, location, find, engine, radiator, car When it comes to maintaining your car’s cooling system, one important component you need to know about is the coolant pressure cap. This little cap plays a big role in keeping your engine cool and preventing overheating. So, how do you find it? Well, the coolant pressure cap is typically located on top of the radiator.
However, this can vary depending on the make and model of your car. In some vehicles, the cap may also be located on the coolant reservoir tank. To locate the coolant pressure cap, start by opening the hood of your car and looking for a small cap on top of the radiator.
It may have a warning label or a symbol indicating that it is the coolant pressure cap. If you don’t see it there, check the coolant reservoir tank, which is usually located near the radiator. Once you find the cap, make sure the engine is cool before removing it to avoid any injury from hot steam or coolant.
Step 4: Pressurize the Coolant System
Pressurizing the coolant system is an important step in maintaining the proper functioning of your vehicle’s engine. When the coolant system is pressurized, it helps to ensure that the coolant flows through the engine effectively, preventing overheating and potential damage. To pressurize the coolant system, start by making sure the engine is cool.
Then, locate the radiator cap and carefully remove it. Attach a coolant pressure tester to the radiator filler neck and pump the tester to increase the pressure in the system. Keep an eye on the pressure gauge and make sure it reaches the recommended pressure level for your vehicle.
If the pressure doesn’t hold or drops, it may indicate a leak in the coolant system that needs to be addressed. Once the system is pressurized and the pressure holds steady, carefully remove the pressure tester and reinstall the radiator cap. Pressurizing the coolant system is a relatively simple task that can help ensure the proper functioning and longevity of your engine.
Using a Coolant Pressure Tester
coolant pressure tester Now it’s time to put that coolant pressure tester to work! Step 4 is all about pressurizing the coolant system, and it’s a crucial step in diagnosing any issues. So let’s dive in. Once you have properly connected the tester to your radiator, you will need to pump the pressure up to the manufacturer’s specifications.
This is typically done by attaching a hand pump to the tester and giving it a few good pumps. Think of it like inflating a balloon – you want to add enough pressure to mimic the conditions when the engine is running. As you pump up the pressure, keep an eye on the gauge attached to the tester.
This will give you a reading of how much pressure is in the system. It’s important to note that every vehicle has different specifications, so be sure to consult your owner’s manual or a reliable source to determine the correct pressure for your particular make and model. Once you have reached the desired pressure, it’s time to sit back and observe.
Watch for any signs of coolant leakage, such as dripping or spraying. If you notice any leaks, it’s a clear indication that there is a problem with your coolant system. This could be a faulty hose, a cracked radiator, or even a blown head gasket.
Whatever the case, you’ll know that it’s time to make some repairs. But what if you don’t see any leaks? Don’t celebrate just yet. It’s possible that the leak is internal, meaning the coolant is being burned off within the engine.
In this case, you might notice white smoke coming from the tailpipe or a sweet smell in the exhaust. If you suspect an internal leak, it’s best to consult a professional mechanic for further diagnosis and repair. Pressurizing the coolant system is a simple yet effective way to identify any issues with your vehicle’s cooling system.
Step-By-Step Instructions for Using the Tester
Once you have properly connected the radiator adapter and the coolant tester, it’s time to pressurize the coolant system. This step is crucial because it allows you to check for any leaks or weaknesses in the system. By applying pressure, you can observe if the pressure holds steady or drops, indicating a problem.
To pressurize the coolant system, locate the hand pump on the tester and start pumping. This will increase the pressure in the system. Keep an eye on the pressure gauge to ensure that it reaches the desired level.
Once the pressure is stable, take note of the reading on the gauge and compare it to the manufacturer’s specifications. If the pressure drops or fluctuates significantly, it may indicate a leak or a faulty component in the coolant system that needs to be addressed. Pressurizing the coolant system is an important step in diagnosing any potential issues and ensuring the proper functioning of your vehicle.
Step 5: Check for Leaks
Now that you’ve successfully filled your coolant system and pressurized it, it’s time to check for any possible leaks. This step is crucial in ensuring the proper functioning of your coolant system and preventing any potential issues down the line. Start by inspecting all the connections and hoses for any signs of leakage.
Look out for any wet spots, drips, or puddles around these areas. If you notice any leaks, you will need to address them immediately. Tighten any loose connections and replace any damaged hoses or fittings.
Additionally, it’s a good idea to use a flashlight and inspect the radiator, water pump, and heater core for any leaks. Check for any signs of coolant stains or wetness. Lastly, make sure to inspect the radiator cap for any signs of leakage.
This step is essential as a faulty radiator cap can lead to coolant loss and improper pressurization of the system. By thoroughly checking for leaks, you can ensure the efficiency and longevity of your coolant system.
Importance of Checking for Leaks
“importance of checking for leaks”
— Checking for leaks is a crucial step in maintaining the integrity of your system or equipment.
Areas to Inspect for Potential Leaks
One of the crucial steps in detecting potential leaks in your home is to thoroughly inspect specific areas that are prone to leaks. By doing so, you can identify and address any issues before they become major problems. One area to check is the bathroom, where leaks commonly occur in the shower, bathtub, or toilet.
Look for any signs of water damage, such as discoloration or soft spots on the walls or floor. Another area to inspect is the kitchen, particularly around the sink and dishwasher. Check for any drips or puddles of water that may indicate a leak.
Additionally, be sure to inspect the basement, as leaks can occur from cracks in the foundation or around basement windows. Look for any signs of moisture or water stains on the walls or floors. By thoroughly inspecting these areas, you can catch any potential leaks early on and prevent further damage to your home.
Step 6: Release the Pressure and Add More Coolant
One crucial step in the process of pressurizing a coolant system is releasing the pressure and adding more coolant. This step is necessary to ensure that the system is functioning properly and that it has enough coolant to regulate the engine temperature effectively. To begin this step, you will need to locate the pressure release valve on your coolant system.
This valve is usually found on the radiator or the coolant reservoir. Once you have located the valve, use a wrench or pliers to slowly open it and release the pressure built up in the system. Be cautious while doing this, as the coolant may still be hot.
After releasing the pressure, it is essential to add more coolant to the system to replenish any that may have been lost during the release process. Open the coolant reservoir cap and pour in the recommended coolant mixture until it reaches the indicated “full” line. Make sure to use the appropriate coolant for your vehicle’s make and model.
Once you have added the coolant, securely fasten the cap back onto the reservoir. This step will help maintain the proper pressure and coolant levels in your system, ensuring that your engine stays cool and runs smoothly.
Safely Releasing the Pressure
When it comes to the cooling system of your car, it’s important to know how to safely release the pressure. Step 6 of this process involves releasing the pressure and adding more coolant to the system. Releasing the pressure is crucial because the cooling system operates at high temperatures, and the pressure can build up as a result.
If the pressure isn’t released properly, it can lead to dangerous situations, such as coolant spraying out. To release the pressure, you can use a pressure relief cap or a pressure relief valve. Simply turn the cap counterclockwise to release the pressure slowly.
Once the pressure is released, you can add more coolant to the system. This is important because coolant helps to regulate the temperature of the engine and prevent overheating. Adding more coolant is a relatively simple process.
Start by locating the coolant reservoir, which is usually labeled with a “coolant” or “engine coolant” sign. Open the reservoir cap and pour in the coolant until it reaches the recommended level. Be sure to use the coolant recommended by your car’s manufacturer, as different types of coolant have different properties and may not work effectively in your specific engine.
Remember to never open the reservoir cap when the engine is hot, as this can lead to burns or other injuries. Additionally, always dispose of used coolant properly, as it is harmful to the environment. By following these steps, you can safely release the pressure and add more coolant to your car’s cooling system, ensuring that it operates properly and keeps your engine cool.
Adding Coolant to Bring the System to the Correct Level
coolant level, add coolant, release pressure, fill coolant, radiator, coolant reservoir Once you have identified the correct level of coolant for your vehicle, it’s time to add more coolant to the system. But before you do that, you need to release the pressure in the radiator to avoid any potential accidents. To do this, locate the pressure release valve on the radiator cap and carefully turn it counterclockwise.
Be cautious as you do this, as hot coolant may be released and could cause burns. Once the pressure has been released, you can safely remove the radiator cap. With the radiator cap off, it’s time to add more coolant to the system.
To do this, you have two options. First, you can pour the coolant directly into the radiator until it reaches the desired level. Alternatively, you can pour the coolant into the coolant reservoir, which is a separate container usually located near the radiator.
This reservoir is designed to hold excess coolant and will automatically distribute it to the radiator as needed. When filling the coolant, it’s important to pour slowly and steadily to avoid spills or overfilling. Overfilling the system can lead to overheating and damage to the engine.
It’s also important to use the correct type of coolant for your vehicle. Check your vehicle’s owner’s manual or consult with a mechanic to ensure you are using the right coolant for your specific make and model. Once you have added the coolant, replace the radiator cap securely, making sure it is tightened properly.
It’s also a good idea to wipe away any spilled coolant from the engine compartment to prevent it from causing any damage. In conclusion, adding coolant to bring the system to the correct level can be done by releasing the pressure in the radiator and then pouring the coolant either directly into the radiator or into the coolant reservoir. It’s important to do this carefully and using the correct coolant for your vehicle.
Conclusion
And there you have it, a foolproof guide on how to pressurize your coolant system. With these steps, not only will you be able to keep your engine running smoothly, but you’ll also impress your friends with your newfound knowledge of automotive wizardry. So go forth, confident in the fact that you have the power to pressurize your coolant system like a pro.
And remember, just like a good joke, a properly pressurized coolant system is all about finding that perfect balance between wit and intelligence. Happy tinkering!”
Importance of Regular Coolant System Maintenance
coolant system maintenance, release the pressure and add more coolant
Tips and Tricks for Maintaining Proper Coolant Pressure
When it comes to maintaining proper coolant pressure in your vehicle, it’s essential to know how to release any built-up pressure before adding more coolant. This is an important step in the process to ensure that you don’t create any additional issues or damage to your cooling system. To release the pressure, you will need to locate the pressure release valve on your radiator or coolant reservoir.
Depending on your vehicle make and model, this valve can be anywhere from the top of the radiator to the side of the reservoir. Once you have located the valve, use caution when opening it, as hot coolant and steam may be released. Always wear protective gloves and eyewear to prevent any injuries.
After releasing the pressure, you can then add more coolant to the system as needed. This step ensures that your cooling system is operating at the proper pressure and helps to prevent any overheating issues that could lead to engine damage. So be sure to follow this step when maintaining coolant pressure in your vehicle.
FAQs
How do I pressurize my coolant system?
To pressurize the coolant system, start by ensuring the engine is cool. Then, locate the radiator cap and twist it counterclockwise to open it. Next, attach a pressure tester to the radiator fill neck and pump it up to the recommended pressure level. Finally, inspect the system for any leaks and make necessary repairs if needed.
What is the purpose of pressurizing the coolant system?
Pressurizing the coolant system helps to raise the boiling point of the coolant, allowing it to absorb and dissipate more heat from the engine. This helps prevent overheating and maintains the engine at an optimal operating temperature.
How often should I pressurize my coolant system?
Pressurizing the coolant system is typically done when performing maintenance tasks like flushing the coolant or checking for leaks. It is recommended to do this at least once a year or as per the manufacturer’s guidelines.
What pressure should I use to pressurize my coolant system?
The recommended pressure for pressurizing the coolant system can vary depending on the vehicle make and model. It is crucial to refer to the owner’s manual or the manufacturer’s specifications to ensure the correct pressure is used.
Can I pressurize the coolant system on my own?
Yes, pressurizing the coolant system can be done on your own using a pressure tester, readily available at automotive supply stores. However, it is essential to follow proper safety precautions and refer to the vehicle’s specific instructions to avoid damaging the system.
How can I tell if my coolant system is properly pressurized?
After pressurizing the coolant system, visually inspect for any signs of leaks around hoses, connections, or the radiator. Additionally, monitor the pressure gauge on the pressure tester to ensure it remains steady within the recommended range.
Are there any risks or precautions when pressurizing the coolant system?
Yes, when pressurizing the coolant system, it is crucial to ensure the engine is cool to avoid burns. Additionally, follow all safety precautions provided by the manufacturer and be cautious of hot coolant or steam when removing radiator caps or connecting/disconnecting the pressure tester.