
Have you ever found yourself in a bind where you needed to replace a tire on your vehicle, but were unsure of how to get it on the rim? If so, you are not alone. Putting a tire on a rim can be a daunting task, especially if you do not have access to the proper equipment. Fortunately, by using a machine, this process can be much simpler and efficient.
In this blog post, we will walk you through the steps necessary to put a tire on a rim with a machine, so you can get back on the road with confidence. Whether you are a seasoned mechanic or just beginning to learn about car maintenance, the following tips will help you successfully mount a tire onto a rim with ease. So, grab a cup of coffee, sit back, and let’s get started!
Table of Contents
Prepare Your Equipment
If you’re wondering how to put a tire on a rim with a machine, the first step is to prepare your equipment. Make sure your tire machine is clean and in good condition. Then, gather all the necessary tools, including a tire iron, valve stem tool, lubricant, and safety glasses.
It’s important to wear gloves and long sleeves to protect your skin from the machine and any sharp edges on the tire. Next, inspect the tire for any damage or wear and consider the type of tire you’re mounting. Different tires require different techniques.
Once you’re ready, follow the instructions for your specific machine to mount the tire onto the rim. Take your time and be patient as it can be challenging, but with the right preparation and tools, you’ll successfully mount a tire on a rim with a machine.
Inspect Your Rim and Tire
“bicycle tire inspection” Before heading out for a ride on your bicycle, it’s crucial to inspect your rim and tire to ensure that they are in proper working condition. Start by giving them a visual check for any signs of wear and tear, cracks, or other damage. Then, use your fingers to feel the tire for any bulges or uneven patches, which could indicate a potential blowout.
If you notice any problems, it’s best to replace your tire before hitting the road. However, if everything looks good, you should check your tire pressure to make sure that it’s at the correct level for your bike and the conditions you’ll be riding in. Correct tire pressure will help to provide a comfortable ride, better handling, and reduce the risk of a flat tire.
A quick inspection of your rim and tire can save you from a frustrating and potentially dangerous situation on your ride. Remember, safety always comes first!
Calibrate the Machine
Before you begin your project with your machine, it is essential to calibrate it first to ensure accuracy and optimal performance. The process of calibration involves adjusting and fine-tuning the machine settings to match the desired output. This step is vital to avoid issues such as misalignment, measurement errors, and overall machine inefficiencies.
To prepare your equipment for calibration, make sure you have the necessary tools, including a calibration standard, a checklist, and a logbook to document the results. As a user, you should also have a good understanding of the machine’s functionality to avoid any errors or confusion during calibration. Overall, preparing your equipment before calibration is the key to achieving accurate and precise results from your machine.
Remove Existing Tire and Clean Rim
If you’re wondering how to put a tire on a rim with a machine, the first step is to remove the existing tire and clean the rim. Start by placing the wheel on the machine’s turntable and securing it with the clamps. Then, use the machine’s bead loosener to detach the tire from the rim.
Be careful not to damage the rim while performing this step. Once the tire is removed, use a wire brush to clean the rim thoroughly. Make sure you remove any dirt, debris, or rust so that the new tire can attach securely.
Cleaning the rim also ensures that the wheel will balance correctly when the new tire gets installed. When you finish cleaning the rim, you’re ready to move on to mounting the new tire.
Use Proper Safety Gear
When it comes to changing tires, the first step is to make sure you’re properly equipped with safety gear. Safety should always come first, so put on a pair of sturdy work gloves and safety goggles before you begin. Before removing the old tire, it’s important to clean the rim to ensure that your new tire will have a secure fit.
Use a wire brush or sandpaper to remove any debris or rust that may be present on the rim. After cleaning, inspect the rim for any bumps or damage that could interfere with the installation process. Once the rim is clean and clear, use a tire iron to remove the lug nuts from the old tire.
Carefully pull the old tire off the rim, making sure to avoid any sharp edges that could cause injury. By taking these safety precautions and properly preparing the rim, you can ensure a smooth and safe tire-changing experience.
Loosen the Lug Nuts and Remove the Tire
Removing the existing tire from your vehicle is the first step in replacing it with a new one. Start by loosening the lug nuts that secure the tire in place. Use a lug wrench to turn each one counterclockwise until they are loose.
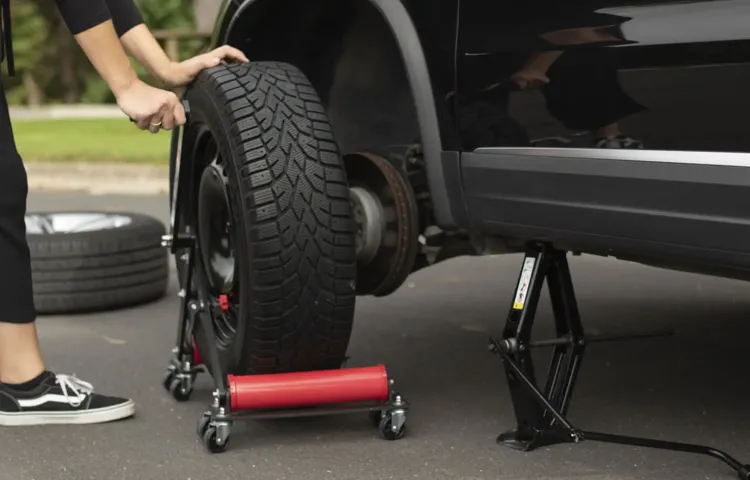
Do not remove them completely yet, as this can be done once the tire is lifted off the ground. Once the lug nuts are loose, use a jack to lift the vehicle off the ground, supporting it with jack stands for safety. Once the tire is off the ground, it can be removed by pulling it straight off the hub.
Before installing the new tire, take the time to clean the rim thoroughly to ensure a proper seal with the new tire. This step will help prevent leaks and maintain the vehicle’s handling and performance. Remember to tighten the lug nuts once the new tire is installed and the vehicle is lowered to the ground to ensure a safe and secure fit.
By following these simple steps, you can ensure that your new tire will perform at its best and keep you safe on the road.
Clean the Rim Surface
When it comes to changing a tire, the first step is removing the existing one. But before that, it’s essential to clean the rim surface thoroughly. Dirt, dust, and debris can accumulate on the rim, making it challenging to fit the new tire properly.
It’s always best to use a tire-cleaning solution, a rag, and a brush to remove the build-up efficiently. Once the rim is clean, you can then proceed to remove the tire. It’s essential to ensure that everything is ready before starting the process, as it can be dangerous to leave some parts hanging mid-process.
The benefits of cleaning the rim surface before changing a tire are immense, as it makes the process more comfortable and ensures the tire fits correctly and securely. Plus, it helps to keep the tire and rim in good condition, extending their lifespan and preventing accidents due to poorly fitted tires.
Mount the New Tire on the Rim
If you’re wondering how to put a tire on a rim with a machine, we’ve got you covered. First, you’ll need to mount the tire onto the machine by lining up the rim with the tire’s tread grooves. Then, use the tire machine’s bead lever to push the tire onto the rim.
Make sure the tire is completely seated on the rim by checking the beads on both sides and adjusting as needed. Next, use the tire machine’s tire tool to inflate the tire and check for any leaks or uneven spots. It’s important to follow manufacturer instructions and safety precautions when using a tire machine, as it can be a dangerous piece of equipment.
By taking your time and using caution, you can effectively mount a new tire onto a rim with a machine.
Apply Lubricant to the Tire Bead and Rim Edge
When it’s time to mount a new tire on your vehicle, it’s important to apply lubricant to the tire bead and rim edge. This simple step can make all the difference in ensuring a smooth and successful installation process. Lubricant helps the tire bead slide easily onto the rim and creates a seal that prevents air leaks.
Before applying the lubricant, make sure the rim is clean and free of any debris. Apply an even layer of lubricant to the edge of the rim and inside the tire bead. Be sure to use a lubricant that is specifically designed for tire installation.
Once the lubricant is applied, you can begin to mount the tire on the rim. This process may require some physical effort and finesse, but with proper lubrication, the tire should slide easily into place. Taking the time to lubricate the tire bead and rim edge can save you time and frustration in the long run, and ensure your vehicle is running smoothly with a properly-mounted tire.
Secure the Tire on the Rim
When mounting a new tire on a rim, it is crucial to secure the tire properly to prevent any accidents while driving. Once the tire is properly aligned with the rim, start tightening the lug nuts in a star pattern to ensure an even and tight fit. Then, use a torque wrench to tighten the lug nuts to the manufacturer’s recommended torque specification.
Be sure to avoid over-tightening the nuts, as this can cause damage to the tire or rim. Once all the lug nuts are tightened, give the tire a final check and double-check that it is properly secured. Taking care during the tire mounting process can prevent any mishaps on the road and keep you and your passengers safe.
Inflate and Balance the Tire
If you’re wondering how to put a tire on a rim with a machine, the first step is to inflate and balance the tire. This process involves placing the tire onto a machine that will inflate it to the proper pressure and balance it to ensure a smooth ride. First, remove the old tire from the rim and clean the rim thoroughly.
Then, using a tire machine, place the tire onto the rim and inflate it to the manufacturer’s recommended pressure level. Once the tire is inflated, the machine will then balance it by spinning it and adding weights to the rim as needed. This step is crucial to prevent any vibration or shaking while driving.
Once the tire is properly inflated and balanced, it can be installed onto the vehicle and driven with confidence. With the help of a tire machine, the process of installing a tire onto a rim becomes a quick and easy task.
Refit the Tire on the Rim and Fully Inflate
Once you have successfully removed the old tire from the rim and made any necessary repairs, it’s time to refit the tire and fully inflate it. Begin by lining up the tire with the rim’s valve stem and pressing the tire edges onto the rim manually. You may need to use tire irons to get the job done, but be careful not to damage the tire or rim during the process.
Once the tire is in place, make sure it is balanced properly and add any necessary weights to ensure it doesn’t wobble while rotating. Finally, inflate the tire to the recommended air pressure specified by the manufacturer, using a tire gauge to ensure accuracy. Overinflated or underinflated tires can lead to uneven or premature wear, decreased handling, and potential safety hazards on the road.
Regularly checking and maintaining proper tire pressure is crucial for optimal performance and longevity.
Check for Any Irregularities and Balance the Tire
When it comes to maintaining your vehicle, ensuring proper tire inflation and balance is crucial. Not only can it affect your car’s handling and performance, but it can also lead to uneven tire wear and decreased fuel efficiency. In order to check for any irregularities or imbalances, begin by inflating all of your tires to the recommended pressure level.
This information can typically be found in your vehicle’s owner manual or on a sticker located on the inside of the driver’s side door. Once your tires are properly inflated, it’s time to balance them. Balancing involves ensuring that the weight of the tire and wheel assembly is evenly distributed, which can be achieved by adding small weights to the wheel.
Neglecting to balance your tires can result in vibrations when driving, which can be both uncomfortable and potentially damaging to your vehicle over time. By regularly checking your tire inflation and balancing, you can help prolong the life of your tires and keep your ride running smoothly.
Conclusion
Putting a tire on a rim with a machine may seem like a daunting task, but with a few simple steps, you’ll have it rolling in no time. Remember to carefully inspect the rim and tire for any damage or defects before beginning. Then, using the machine, fit the tire over the rim and inflate it to the recommended pressure.
Finally, give yourself a pat on the back and admire your handy work. Just be sure not to get too carried away, or you might end up with a tire on your head instead!”
FAQs
What is the basic process for putting a tire onto a rim with a machine?
The basic process involves positioning the rim on the machine, applying lubricant, mounting the tire onto the rim, and inflating it to the desired pressure.
Is it possible to mount a tire onto a rim without a machine?
While it is possible to mount a tire onto a rim without a machine, it is not recommended. This is because without a machine, it can be difficult to achieve the proper balance and alignment for safe and effective tire performance.
Can all types of tires be mounted onto any type of rim with a machine?
No, not all types of tires can be mounted onto any type of rim. It is important to use the appropriate size and type of tire for the specific rim, as well as to ensure compatibility with the machine being used.
What are some common mistakes to avoid when using a tire mounting machine?
Common mistakes to avoid when using a tire mounting machine include over-tightening the mounting bolts, using improper lubricants, and failing to properly balance the tire afterwards.
How often should tires be mounted onto new rims or replaced altogether?
Tires should be mounted onto new rims or replaced altogether when they are worn down to a tread depth of 2/32 of an inch or when they have visible signs of damage or wear, such as cracking or bulging.
What are some safety precautions to take when using a tire mounting machine?
Safety precautions when using a tire mounting machine include wearing appropriate personal protective equipment, avoiding loose clothing and jewelry, ensuring the machine is properly maintained and calibrated, and following all manufacturer’s instructions.
Can a tire mounting machine be used to remove tires from rims as well?
Yes, many tire mounting machines are capable of removing tires from rims as well as mounting them. However, it is important to follow proper safety procedures and manufacturer’s instructions when doing so.