
Looking to put tractor tires onto rims but not sure where to start? Fear not, as we have a step-by-step guide to help you through the process. Whether you’re replacing old tires or switching to a different type, putting tractor tires onto rims can seem daunting at first, but with the right tools and some patience, it can be done easily and efficiently. First, gather all the necessary tools, including a tire iron, jack, rim clamp, and lubricant.
It’s also important to have a safe and stable workspace, such as a level surface with plenty of room to maneuver. Once you have everything in place, you can begin the process of removing the old tires and prepping the rims for the new ones. By following this step-by-step guide, you’ll be able to fit your tractor with new tires in no time.
But don’t rush the process; taking your time and paying attention to each step will ensure a successful outcome. So, take a deep breath, grab your tools, and let’s get started!
Safety First
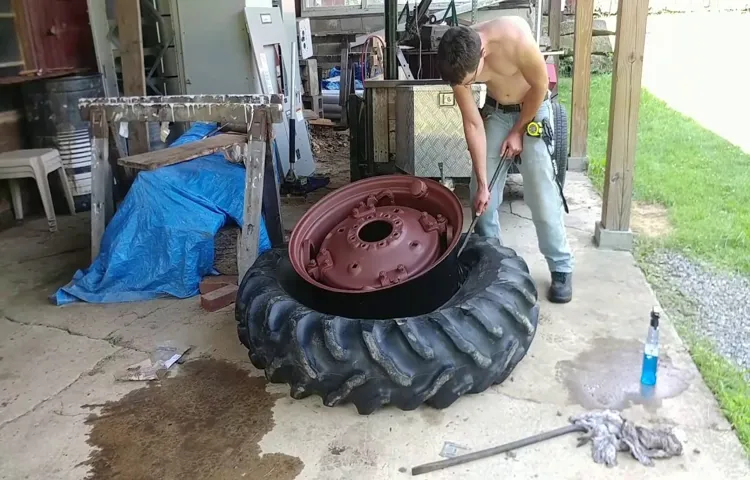
Putting a tractor tire on a rim can be a daunting task, but with the right tools and techniques, it’s a manageable process. Safety first! Before you start, make sure that you have adequate protective gear, including gloves, eye protection, and clothing that covers your arms and legs. The first step is to clean the rim and tire thoroughly and to inspect them for any damage, such as cracks or breaks.
Once you’ve determined that they’re in good condition, you can begin the process of putting the tire onto the rim. Start by placing the rim on a level surface and using a jack to lift the tire onto it. Use a lubricant to help the tire slide over the rim, and be sure to check the tire’s position as you work to ensure that it’s even.
Finally, use a tire inflator to inflate the tire to the correct pressure, and then check it again to make sure it’s evenly seated. Congratulations – you’ve successfully put a tractor tire on a rim!
Check the tire size and rim type
When it comes to maintaining your vehicle, safety should be your top priority. One crucial aspect that many drivers overlook is checking the tire size and rim type. It may seem like a simple task, but it can have a significant impact on the safety and performance of your car.
First, make sure to check your tire size against the manufacturer’s recommended size for your vehicle. Using the wrong size tire can result in poor handling, reduced fuel efficiency, and even accidents. Additionally, it’s important to ensure that the rim type matches your tire.
For example, if you have a tubeless tire, you’ll need a rim with a valve stem hole. Using the wrong type can result in a blowout while driving, which can be incredibly dangerous. Ultimately, taking the time to check your tire size and rim type may seem like a small task, but it could mean the difference between a safe drive and a potentially life-threatening situation.
So, always put safety first and make sure to double-check these essential components before hitting the road.
Use proper personal protective equipment (PPE)
“Personal Protective Equipment” When it comes to safety in the workplace, the first and most important step is to always use proper personal protective equipment (PPE). Whether you work in construction, manufacturing, or any other industry where there are potential hazards, wearing the appropriate PPE can make all the difference in preventing accidents and injuries. PPE can include items such as hard hats, safety glasses, gloves, respirators, and earplugs.
It’s essential to not only have access to these items, but to also ensure that they fit properly and are worn correctly. For example, a hard hat that doesn’t fit snugly on the head or is worn backwards offers little protection. Taking the time to properly inspect and wear your PPE can save you from harm on the job.
As the saying goes, it’s better to be safe than sorry!
Preparation
Putting a tractor tire on a rim is not an easy task— it can be time-consuming and requires preparation before you start the process. Firstly, you need a tire that is specific to your tractor model, and it is important to check the manufacturer’s specifications to ensure that the tire is suitable for the rim. Once you have the proper tire and rim, make sure the tire is clean from any debris or foreign objects.
You can use a wire brush to clean the rim and then place the tire on top of it. Before you start pressing down the tire onto the rim, apply some lubrication, like dish soap, to assist in the mounting process. Start on one side of the tire and work your way around until the tire is fully on the rim.
Remember to keep an eye on the tire pressure, check the valve stem, and add air as necessary. With these steps, even someone with no prior experience can put a tractor tire on a rim with great ease.
Clean the rim and tire beads
If you want to ensure the longevity and overall performance of your tires, proper cleaning and maintenance is important. One crucial step in this process is cleaning the rim and tire beads. These areas can collect dirt, debris, and brake dust over time, which can lead to corrosion and damage if left unchecked.
To prepare for this task, start by gathering a few supplies, such as a bucket of water, a cleaning solution or soap, brushes, and a hose or pressure washer. Make sure to wear protective gloves and eyewear, as these areas can be particularly dirty and gritty. Once you have your supplies ready, begin by removing any loose debris with a brush or compressed air.
Then, use your cleaning solution and a brush to scrub the rim and tire beads thoroughly. Rinse with water and dry with a clean towel. By taking the time to properly clean and maintain your tires, you can extend their lifespan and ensure safe driving.
Apply lubricant (if necessary)
When it comes to preparing your equipment for use, applying lubricant is sometimes necessary. Lubrication reduces friction and prevents damage, making it a crucial step in maintaining your equipment. Before applying lubricant, make sure to clean the surface thoroughly to ensure maximum effectiveness.
Choosing the right type of lubricant is also essential, as some materials may require specific formulas. You can check the manufacturer’s recommendations or consult with a specialist for advice. Once you have chosen the appropriate lubricant, apply it evenly and sparingly, avoiding excess, which may attract dirt and debris.
Lubricant can also help preserve the lifespan of your equipment and provide a smoother user experience. By taking the time to prepare your equipment with lubricant, you can ensure safe and reliable operation every time you use it.
Installation
Putting a tractor tire on a rim is an essential process that needs to be done correctly to avoid any mishaps. First, you need to use a mounting machine to attach the tire to the rim. Next, you should check the tire pressure and ensure that you meet the manufacturer’s recommended guidelines.
After that, inflate the tire and put it on the vehicle. Tighten the bolts evenly, alternating between them, to prevent the wheel from becoming lopsided. Finally, test the tractor on maneuvers such as going in reverse, turning, and braking to ensure that the tire is holding up correctly.
Following these simple steps can help you put the tractor tire on a rim without facing any issues. By doing so, you can ensure that your tractor operates safely and runs smoothly.
Place the tire on the rim
When it comes to changing a tire, the first step is to place the tire on the rim. This might seem like a simple task, but it’s important to do it correctly to ensure the tire is properly mounted. First, lubricate the rim with soapy water or tire lubricant to ensure the tire slides on easily.
Then, line up the valve stem with the hole in the rim and push the tire onto one side of the rim. Use tire levers to work the remaining tire onto the rim, being careful not to pinch the inner tube. Once the tire is fully on the rim, inflate it slightly to make sure it sits evenly.
With the tire securely on the rim, you can move on to the next step in changing your tire. Remember, taking your time during this process will ultimately save you time and frustration down the road. So, take a deep breath, follow these steps, and before you know it, you’ll be back on the road again.
Align the valve stem with the rim hole
When it comes to installing a tire onto a rim, one crucial step is aligning the valve stem with the rim hole. The valve stem serves as the air inlet, so it must match up with the designated opening on the rim. If it does not, it can cause air leaks or uneven tire wear over time.
To align the valve stem properly, take note of where it is located on the tire and then position it to match up with the corresponding slot on the rim. It may take some maneuvering and adjusting to get it right, but taking the extra time to ensure proper alignment can save you from potential tire issues down the road. So, the next time you install a tire, take care to align the valve stem with the rim hole and enjoy a smooth and safe ride.
Use a mounting tool to pull the tire over the rim
If you’re changing a tire, the mounting process can be a challenge. To make it easier, use a mounting tool to pull the tire over the rim. This tool helps you avoid damaging the tire or the rim as you mount it.
Make sure the tire is properly placed on the rim before starting. Then, insert the mounting tool between the tire and the rim, and hook it around the edge of the tire. With a little bit of effort and patience, you can pull the tire over the rim using the mounting tool.
This will leave you with a properly mounted tire, ready to use on your vehicle. Remember, safety first: always follow proper tire-changing procedures and consult your vehicle manual before attempting any maintenance. By using a mounting tool, you can make the tire-changing process a little bit easier and safer.
Try it out and see the difference for yourself!
Double-check the tire bead placement
When installing new tires on your vehicle, it’s essential to check the bead placement to ensure a smooth and safe ride. The tire bead is the stiff wire that runs on the inner edge of the tire and attaches to the rim. If not placed correctly, the tire can easily come off the rim, causing a blowout or worse.
To ensure proper placement, start by cleaning both the tire and rim to remove any debris or dirt. Next, line up the tire beads with the valve stem on the rim and push the tire onto the rim. Double-check the placement by running your hand around the tire to make sure the beads are entirely inside the rim.
Then, inflate the tire to the recommended pressure, and you’re good to go! By double-checking the tire bead placement, you’re ensuring your safety and the safety of others on the road.
Inflation
When it comes to putting a tractor tire on a rim, it may seem like a daunting task at first. However, with some guidance and a few helpful tips, it can be done successfully. First, make sure you have the correct size and type of tire for your tractor.
Next, before attempting to put the tire on the rim, inflate it to the recommended pressure. This will make it easier to stretch the tire over the rim and avoid any damage. When positioning the tire on the rim, make sure it is centered and even.
Then, use a tire iron to gradually work the tire over the rim, making sure to keep it evenly spaced as you go. It may take some effort, but with patience and a steady hand, you’ll soon have your new tire mounted and ready for use. Remember to always follow safety precautions when working with tractor tires and rims, and don’t hesitate to seek professional help if needed.
Inflate the tire to the recommended pressure
Inflation Making sure that your tires are inflated to the correct pressure is crucial for both safety and better gas mileage. Every vehicle has a recommended tire pressure, which can usually be found on a sticker inside the driver’s door or in the owner’s manual. Inflation is the process of adding air to the tire until it reaches that recommended pressure.
Under-inflation can cause a range of problems like increased rolling resistance, resulting in reduced fuel economy, uneven tread wear, and even tire failure. Over-inflated tires, on the other hand, can be equally problematic, leading to a harsher ride, reduced traction, and even a higher risk of a blowout. It’s important to check your tire pressure regularly, at least once a month or before heading on long road trips.
If the tires are low, find a gas station or service station with an air compressor and inflate them to the recommended pressure. Use your own tire gauge, if possible, as the ones attached to the air pump may not be accurate. Remember to always re-check the pressure after inflating to ensure that you haven’t overfilled the tire.
In conclusion, taking care of your tires through inflation can go a long way in ensuring your safety on the road and saving you money in the long run. Remember, check your tire pressure regularly, inflate them to the recommended pressure, and always double-check your work. It may seem like a small task, but it can make all the difference for your vehicle’s performance.
Check for any leaks or defects
When inflating a tire, it’s important to carefully check for any leaks or defects. Even a small leak can lead to low tire pressure and affect your vehicle’s performance and safety. Before filling the tire with air, inspect it closely for any obvious damage or signs of wear and tear.
Check the valve stem for cracks or damage and make sure it’s securely in place. Also, examine the tire casing for any ruptures, tears, or bulges. A bulge in the sidewall or tread can indicate a weakened area that could lead to a dangerous blowout.
Once you’ve inspected the tire, connect the air hose and inflate it to the recommended pressure, which can be found in your vehicle’s owner’s manual or on the tire itself. Take note of the tire pressure gauge readings and listen for any hissing sounds or other signs of a leak. If you suspect there is a leak, use a tire pressure gauge to monitor the pressure and make sure it doesn’t drop too quickly.
By properly inflating your tires and checking for any leaks or defects, you can help ensure a smoother, safer ride for you and your passengers.
Conclusion
In conclusion, putting a tractor tire on a rim may seem daunting, but with a little elbow grease and some know-how, it can be done. And as with any task in life, the key is to stay positive and persistent. Or, as the old saying goes, when the going gets tough, the tough get a tractor tire on a rim!”
FAQs
What equipment is needed to put a tractor tire on a rim?
You will need a tractor tire jack, rim clamps, and a tire lever.
How do you properly inflate a tractor tire on a rim?
Check the manufacturer’s recommended tire pressure, and use an air compressor to slowly inflate the tire to that pressure, using a tire gauge to check the pressure periodically.
Can you put a tubeless tire on a rim that previously had a tube tire?
Yes, you can put a tubeless tire on a rim that had a tube tire, as long as the rim can accommodate the size of the tire.
How do you ensure a proper fit when putting a tractor tire on a rim?
Check the size and manufacturer specifications of both the tire and rim to make sure they are compatible, and use rim clamps to hold the rim tightly in place while mounting the tire.
What is the recommended torque for tightening the bolts on a tractor tire rim?
Refer to the manufacturer’s specifications for the recommended torque specifications, as different rims and bolts may have different requirements.
What is the proper way to balance a tractor tire on a rim?
Use a tire balancing machine to identify any imbalance in the tire, and add weights as necessary to ensure a smooth and balanced rotation.
What safety precautions should be taken when putting a tractor tire on a rim?
Always wear appropriate protective gear such as gloves and eye protection, make sure the equipment is properly secured, and follow all manufacturer guidelines and specifications.

