Are you looking to add an extra touch of comfort to your RVing experience? Investing in an awning is a great way to provide shade and shelter while enjoying the great outdoors. However, installing an awning can seem like an intimidating task. Don’t worry – we’ve got you covered! In this blog post, we’ll guide you through the step-by-step process of how to put up an awning on your RV.
With just a few tools and some patience, you’ll have a new addition to your RV that will make all your adventures even more enjoyable. So, let’s get started!
Table of Contents
Prepare Your RV and Awning
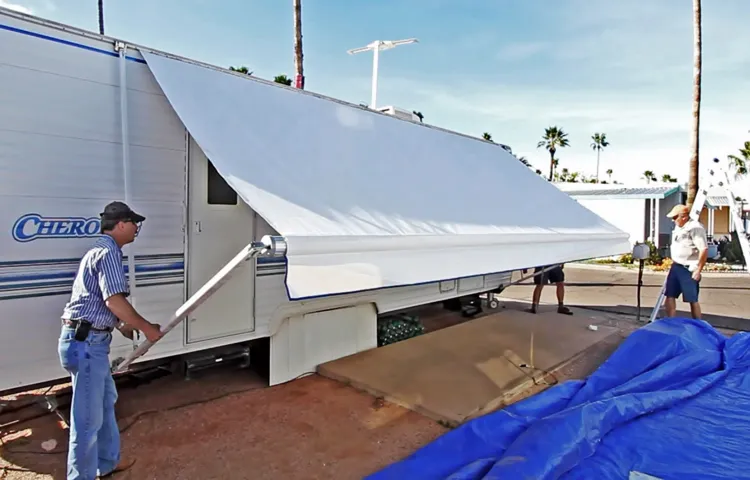
Putting up an awning on an RV can seem daunting, but it’s actually a straightforward process that can make your outdoor experience much more enjoyable. Firstly, you need to prepare your RV by locating the rail where the awning is meant to attach. Once located, insert the awning into the rail, making sure it is securely in place.
Next, extend the awning’s arms to the desired height, ensuring you follow the instructions provided by the manufacturer. You can then adjust the tension to make sure the awning is taut. Once the awning is up, anchor it using stakes or tie-downs to prevent it from being damaged by wind or weather.
It’s important to remember to retract the awning before driving away to avoid any damage to the RV or awning itself. Overall, putting up an awning on your RV can be an easy, hassle-free process that can provide you with the perfect spot for outdoor relaxation or entertainment.
Clear the Installation Area
When installing an awning onto your RV, it’s essential to clear the installation area and prepare both the RV and the awning for the installation process. The first step in this process is to ensure that the area where the awning will be attached to the RV is free from debris, dust, and other materials that may interfere with the awning’s installation. You should remove any obstacles, such as tree branches or other items that may obstruct the installation process.
Additionally, make sure that the area is free from any obstructions that may damage the RV or the awning during the installation process. After clearing the area, you can then start preparing the RV and awning for installation. This may include adjusting hardware settings or placing brackets onto the RV.
By thoroughly preparing your RV and the awning for installation, you can ensure a successful installation process with minimal complications. So, take your time, clear the installation area, and make sure everything is ready before proceeding with the installation process.
Mount the Awning Brackets
When it comes to mounting your awning brackets to your RV, there are a few things you’ll need to prepare beforehand. Firstly, make sure the area you’re attaching the brackets to is clean and free of any debris that could affect the bracket’s grip. Secondly, ensure you have the right bracket for your awning type and RV make and model.
Once you’ve done that, place the bracket in position on your RV, marking where the holes will need to be drilled. Make sure you have a drill bit that is the same size as the screws that come with your brackets to avoid any issues. After drilling the holes, screw the brackets securely into place, making sure they’re level and won’t buckle under the weight of the awning.
By properly installing your awning brackets, you’ll be able to enjoy your outdoor space in no time! Keyword: Awning Brackets
Extend Brackets and Snap Awning in Place
Before hitting the road in your RV, it’s important to ensure that your awning is properly prepared and secured for the journey ahead. One key step in this process is to extend the brackets on your awning and snap it into place. This will not only provide additional support for your awning while you’re traveling, but it will also help to prevent any damage from occurring due to wind or other adverse weather conditions.
To extend your brackets, simply loosen the screws on each bracket and slide them outward until they are securely in place. Next, snap your awning into place by sliding it into the brackets and tightening the screws. This will help to keep your awning in place during your travels, keeping you and your RV protected from the elements.
So don’t forget to take the time to properly prepare your awning before hitting the road – it will be well worth the effort in the long run!
Secure the Awning
Putting up an awning on an RV is a great way to extend your living space and enjoy the outdoors while still being protected from the sun and rain. But it’s important to make sure that your awning is securely attached to your rig to prevent any accidents or damage. To start, make sure that the ground where you want to set up your awning is level and clear of any obstructions.
Then, check that your RV’s awning rail is clean and free of any debris. Next, slowly extend your awning and attach it to the rail using the appropriate hardware. Make sure to tighten the hardware securely to keep the awning in place.
Finally, secure the legs of the awning to the ground using stakes or weights to prevent any swaying or collapsing. By taking these simple steps, you can safely and easily enjoy your outdoor space with the added protection of an awning on your RV.
Tighten the Awning Arms
When it comes to setting up an awning, one of the most important steps is ensuring that the arms are secure. Loose awning arms can cause all sorts of problems, from sagging fabric to wobbling supports. To tighten the arms, start by lifting the fabric up and away from any clips or pins that are holding it in place.
Then, use a wrench or pliers to tighten the bolts on the arm where it connects to the main support. Make sure to tighten each bolt evenly and be careful not to overtighten, which can damage the arm. Once the arms are securely tightened, lower the fabric back down and double-check that everything is taut.
With a few simple steps, you can have a sturdy and reliable awning that will protect you from the sun and rain for years to come.
Adjust the Awning Pitch
When it comes to securing your awning, adjusting the pitch is one important factor to consider. This involves changing the angle at which the awning extends from your RV or home. Doing so not only provides shade in a more efficient manner but also ensures that water doesn’t pool on the fabric during rainfall.
To adjust the pitch, you’ll need to loosen the knobs on the awning arms and slide them up or down to the desired angle. Once you’ve found the pitch that works best for you, tighten the knobs to keep it in place. This simple step will keep your awning safe and secure while providing you with maximum shade and protection from the elements.
So, take a few moments to adjust the pitch of your awning and enjoy the great outdoors comfortably!
Tips for Using Your RV Awning
If you’re new to RVing, learning how to put up an awning on your RV may seem daunting. But with the right knowledge and practice, it can become a relatively easy and quick process. First off, make sure to read the instructions provided by your awning manufacturer, as there may be specific steps and safety precautions to follow.
It’s also a good idea to have a friend or family member help you for added support and safety. When positioning your RV, try to find a flat and level spot, as this will make the process smoother. To put up the awning, start by releasing the tension arms and pulling out the support legs.
Then, slowly unroll the awning while making sure it’s straight and aligned with the RV. Finally, adjust the height and tightness of the awning to your liking, and secure it by staking down the legs and adding optional support straps. With these tips and some practice, putting up your RV awning can be a breeze!
Choose the Right Time to Set Up Your Awning
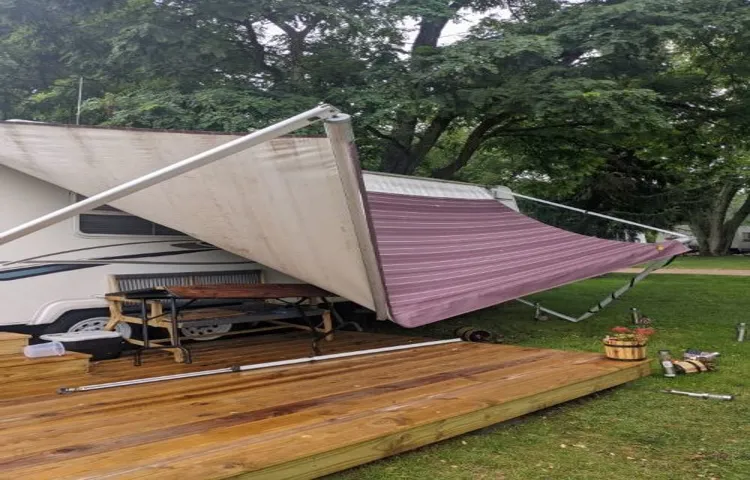
Setting up your RV awning is a great way to enjoy the beautiful outdoors while still having a comfortable and shaded space to relax in. However, it’s important to choose the right time to do it. If the weather is windy or rainy, it’s best to wait until conditions improve before setting up your awning to avoid any potential damage or accidents.
Once you’ve determined the weather conditions are favorable, make sure to properly secure the awning to your RV and use the appropriate stakes and tie-downs to keep it in place. Be mindful of any nearby trees or branches that could scratch your awning or cause damage, and always follow the manufacturer’s instructions for proper setup and use. With a little planning and care, your RV awning can provide the perfect outdoor oasis for all your camping adventures.
So go ahead and make the most of your trip with a cozy and comfortable outdoor space to enjoy the great outdoors!
Use Awning Tie-Downs for Security
When setting up your RV awning, it’s important to take certain precautions to keep it from getting damaged or even blown away by wind gusts. One effective way to add extra security is by using awning tie-downs. These handy devices come in a variety of styles but all work to keep your awning stable and prevent it from flapping in the wind.
You can attach them to stakes in the ground or even to the wheels of your RV for added strength. This will help to protect your awning from damage and ensure your camping trip goes smoothly. Remember to always follow the manufacturer’s instructions when using tie-downs to ensure they’re being used properly and efficiently.
With a little extra effort and care, you can extend the life of your RV awning and have a worry-free experience on your travels.
Conclusion
Congratulations! You’re now an awning extraordinaire! With a little bit of patience, a dash of finesse, and a pinch of determination, you’ve successfully put up your very own RV awning. You’re now one step closer to that ultimate road trip, where comfort and convenience are just a few snaps away. But remember, putting up an awning is not just about functionality.
It’s about style and making a statement. So go out there and flaunt that awning like a boss! Just don’t forget to invite us for that next camping trip.”
FAQs
What tools do I need to put up an awning on my RV?
You’ll need a screwdriver, level, tape measure, drill and bits, and possibly a ladder.
Can I install an awning on an RV by myself?
It’s possible, but it’s recommended to have someone help you since the awning fabric can be heavy and awkward to maneuver.
What should I consider when choosing an awning for my RV?
You should consider the size of your RV, the intended use of the awning, your budget, and the material and durability of the awning.
How do I measure the length of an awning for my RV?
Measure the distance from the top of the RV’s awning rail (closest to the roof) to the bottom of the RV’s roller tube.
Can I install an awning on any type of RV?
Awning installation typically depends on the design and structure of your RV, so it may not be possible or recommended for certain models.
How do I maintain my RV awning?
Regularly clean the awning with a soft brush and a mild cleaner, let it fully dry before rolling it up, and store it in a cool and dry place when not in use.
Do I need a permit to install an awning on my RV?
It depends on the regulations in your area, so it’s best to check with your local government agency or RV park management.