

Have you ever wondered what makes a good blog introduction? Well, look no further because today we’re going to dive deep into the art of crafting the perfect opening for your blog post. Like the first impression you make when meeting someone new, your blog introduction sets the tone for the rest of your content. It’s the hook that grabs your readers’ attention and entices them to keep reading.
But how do you create an introduction that is both captivating and informative? In this blog post, we’ll explore the key elements of an effective blog introduction and provide you with some tips and tricks to help you make your opening paragraphs shine. So, grab a cup of coffee and get ready to learn the secrets of crafting an irresistible blog introduction. Let’s dive in!
Table of Contents
Why remove an awning from an RV roller?
If you’re wondering how to remove an awning from your RV roller, you’re in the right place. There can be several reasons why you may want to remove the awning, whether it’s for repairs, replacements, or simply to have a change of style. Whatever the case may be, removing an awning from an RV roller is a relatively simple process that you can do yourself with a few basic tools.
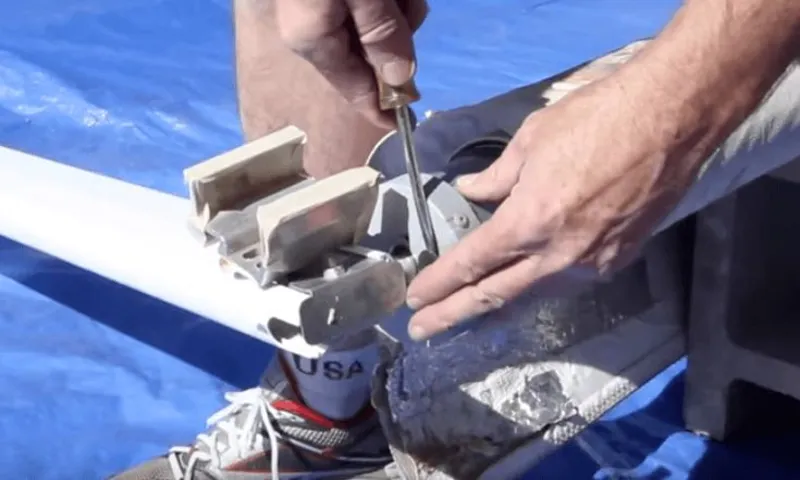
First, you’ll need to locate the bolts or screws that hold the awning in place. These are usually found on the end caps or brackets that attach the awning to the RV. Once you’ve located these fasteners, use a wrench or screwdriver to loosen and remove them.
Be sure to support the awning as you do this, as it can be quite heavy. Once the fasteners are removed, carefully slide the awning out of the roller, being mindful of any tension in the fabric. With a little patience and some basic tools, you’ll have your awning removed from the RV roller in no time.
Tools and materials needed
Removing an awning from an RV roller can be a straightforward process with the right tools and materials. First and foremost, you will need a ladder to safely reach and access the awning. Additionally, you will need a screwdriver or drill with the appropriate bit to unfasten any screws or bolts holding the awning in place.
It is also essential to have a helper to ensure the awning is adequately supported and controlled during the removal process. Additionally, having a tarp or drop cloth can be handy to protect the RV and the ground from any debris or dirt that may fall during the removal. Lastly, having some gloves to protect your hands can be beneficial, especially if there are any sharp edges or materials that could cause injury.
With these tools and materials, you will be ready to confidently remove the awning from the RV roller.
Step-by-step guide to removing the awning from the RV roller
Removing the awning from your RV roller can seem like a daunting task, but with a step-by-step guide, it can be a relatively simple process. The first step is to make sure the awning is fully retracted and the arms are locked in place. Next, locate the tension knobs or screws on the awning arms and loosen them to relieve the tension.
Once the tension is released, carefully remove the awning arms from the brackets on the side of the RV. Be sure to hold onto the arms as you remove them to prevent them from swinging down and potentially causing injury. Once the arms are removed, you can then roll up the awning fabric manually, making sure to keep it tight and secure as you roll.
Finally, remove any screws or brackets that are holding the fabric in place on the roller, and gently slide the fabric off of the roller. And there you have it! You’ve successfully removed the awning from your RV roller. Now you can clean it, make any necessary repairs, or replace it with a new one if needed.
Step 1: Safety precautions
awning, RV roller, removing, safety precautions
Step 2: Positioning the RV
In this step-by-step guide, we will walk you through the process of removing the awning from the RV roller. This is an important task when it comes to maintaining and replacing your awning. The first step is to position the RV in a suitable location.
You want to make sure that there is enough space around the RV to work comfortably. It’s also important to choose a flat surface, as this will make it easier to manipulate the awning. Once you have found the perfect spot, it’s time to move on to the next step.
Step 3: Lowering the awning
In order to remove the awning from your RV roller, you need to know the step-by-step process. Lowering the awning is the third step in this process, and it can be a bit tricky if you’re not familiar with the procedure. But don’t worry, I’m here to guide you through it.
First, make sure you have someone to help you. It’s always easier and safer to have an extra set of hands when dealing with large and heavy objects like an awning. Next, locate the awning’s tension knob.
This knob is typically found on one end of the roller, and it’s used to control the tension of the awning fabric. Turn the tension knob counterclockwise to release the tension. Once the tension is released, you can start lowering the awning.
To do this, locate the awning strap or pull-down loop. This will be attached to the fabric of the awning, usually near the center. Grab hold of the strap or loop and pull it down towards the ground.
As you lower the awning, make sure you have a firm grip on the strap or loop to ensure that it doesn’t slip out of your hands. Also, be mindful of the weight and size of the awning as it comes down. It’s a good idea to have someone assist you in guiding the awning as it comes down to prevent any accidents or damage.
Keep lowering the awning until it is fully extended and resting on the ground. Once it is lowered, you can move on to the next step of removing the awning from the RV roller. Remember, safety is always a priority when working with heavy objects like an awning.
Step 4: Removing the awning fabric
Removing the awning fabric from an RV roller may seem like a daunting task, but with the right steps, it can be done easily. The first thing you need to do is ensure the awning is fully retracted and secure. This will prevent any unexpected movements or accidents while you’re working.
Once that’s done, locate the awning rail on the RV and remove any screws or bolts holding the fabric in place. Carefully slide the fabric out of the rail, making sure not to damage it in the process. If the fabric is stuck or difficult to remove, try lubricating the rail with a silicone spray to make it easier to slide out.
Once the fabric is free from the rail, detach any remaining connections such as support arms or tensioners. Be sure to keep track of any hardware or components you remove so you can easily reassemble the awning later. With these steps, you’ll be able to remove the awning fabric from the RV roller without any hassle.
Step 5: Detaching the awning arms
Removing the awning arms from your RV roller is an important step when it comes to detaching the awning. This process can be a bit tricky if you’re not familiar with it, but don’t worry, I’m here to guide you through it step by step. First, locate the awning arms on either side of the awning.
These arms are responsible for supporting the awning and can be found attached to the RV roller. To detach them, you will need to release the tension on the springs. This can be done by using a winding tool to turn the spring tension adjustment bolt counterclockwise.
As you do this, you will notice that the tension on the springs decreases, allowing you to easily remove the awning arms from the RV roller. Once the tension has been released, you can simply slide the awning arms out of the roller. Be sure to keep a firm grip on the arms as you do this to prevent them from sliding out too quickly.
With the awning arms detached, you are one step closer to removing the awning from your RV roller.
Step 6: Removing the roller
Removing the roller from the RV awning may seem like a daunting task, but with the right steps, it can be done easily. To start, make sure you have all the necessary tools handy, such as a ladder and a screwdriver. First, carefully extend the awning to its full length to ensure it is securely locked in place.
Then, locate the two pins that hold the roller in place at each end of the awning. Use the ladder to reach these pins and remove them with the screwdriver. Once the pins are removed, gently release the tension in the awning fabric by slowly rolling it up manually.
Be cautious as you do this to prevent any sudden releases or injury. With the tension released, you can now slide the awning fabric off the roller and set it aside. Finally, unscrew the roller from the RV wall using the screwdriver and carefully remove it.
Congratulations, you have successfully removed the roller from your RV awning!
Tips and tricks for removing an awning from an RV roller
If you’re looking to remove an awning from your RV roller, there are a few tips and tricks that can make the process easier and more efficient. First, make sure you have all the necessary tools on hand, such as a ladder, socket wrench, and rubber mallet. Start by extending the awning to its full length and securing it in place with straps or bungee cords.
This will prevent any sudden movements while you’re working on it. Next, locate the awning’s roller on one side of the RV. Using a socket wrench, carefully loosen and remove the bolts that hold the awning in place.
Once the bolts are out, gently slide the awning out of the roller. Be mindful of any tension or spring mechanisms that may be attached to the awning. If you’re unsure how to detach these, it’s best to consult the RV’s manufacturer or a professional.
With the awning detached, you can now clean and inspect it for any damage or wear. If necessary, you can also replace or repair any parts before reattaching the awning to the roller. Remember to take your time and follow any specific instructions provided by the manufacturer to ensure a successful removal and reattachment process.
Conclusion
Removing an awning from an RV roller may seem like a daunting task, but fear not! With a little bit of know-how and some common household tools, you’ll have that awning off faster than you can say ‘shade for days’. First things first, you’ll want to gather your supplies. This includes a ladder (for those hard to reach places), a screwdriver (preferably one with multiple interchangeable heads for maximum convenience), and a trusty sidekick to hold the ladder steady and offer moral support.
Next, you’ll want to carefully inspect the awning to identify any screws or bolts holding it in place. Unscrew or unbolt these bad boys, being careful not to strip any threads in the process. Remember, we want a smooth removal, not a chaotic mess! Once the screws and bolts are all unscrewed and unbolted, it’s time for the magic trick.
Gently but firmly, send those screws and bolts on a one-way trip to the land of ‘Who needs shade anyway?’. This can be done by using your screwdriver to push them out from the roller side of the awning. It’s like pulling a rabbit out of a hat, but with less fur and more aluminum.
Now here comes the fun part. With your mighty strength, pull the awning fabric away from the roller. It might feel a bit stubborn at first, but with enough determination, it’ll surrender and come free.
Just think of it as a game of tug-of-war with a really long and temperamental rope. At this point, you’re almost there! It’s time to detach the awning fabric from the RV itself. This is usually done by removing some sort of attachment mechanism, like snaps or hooks.
Unsnap, unhook, and unleash the fabric from its confines. You’ll feel a sense of liberation equivalent to a butterfly breaking free from its cocoon. And there you have it, my awning removing aficionados! You’ve successfully removed an awning from an RV roller like a pro.
FAQs
How do I remove an awning from an RV roller?
To remove an awning from an RV roller, start by retracting the awning completely. Then, locate the awning’s roller tube and unscrew the bolts or screws that hold it in place. Carefully slide the roller tube out of the awning fabric, taking care not to damage the fabric. Finally, detach any support arms or brackets that are attached to the RV.
Can I remove an awning from an RV roller by myself?
Yes, you can remove an awning from an RV roller by yourself if you follow the proper steps and have the right tools. However, it is always recommended to have someone assist you, especially if the awning is large or heavy.
What tools do I need to remove an awning from an RV roller?
To remove an awning from an RV roller, you will need a set of standard hand tools, including a screwdriver or drill with the appropriate bits, wrenches or pliers, and possibly a ladder or step stool to reach higher areas. Additionally, having a second person to assist you can be helpful, especially when removing larger awnings.
Do I need to disconnect any cables or electrical connections when removing an awning from an RV roller?
It depends on the specific awning and RV setup. Some awnings may be connected to the RV’s electrical system, in which case you will need to disconnect the electrical connections before removing the awning. Other awnings may have support arms or cables that need to be detached. Consult the manufacturer’s instructions or an RV professional to ensure you know which connections need to be disconnected before removing the awning.
How long does it take to remove an awning from an RV roller?
The time it takes to remove an awning from an RV roller can vary depending on factors such as the size and complexity of the awning, your level of experience, and the tools you have available. On average, it may take anywhere from 30 minutes to a couple of hours to remove an awning.
Can I reuse the awning fabric after removing it from an RV roller?
In most cases, you can reuse the awning fabric after removing it from an RV roller. However, it is important to inspect the fabric for any signs of wear and tear, damage, or fading. If the fabric is still in good condition, you can reattach it to a new roller or use it for other purposes. If the fabric is damaged or worn out, you may need to replace it.
Are there any safety precautions I should take when removing an awning from an RV roller?
Yes, there are several safety precautions you should take when removing an awning from an RV roller. Firstly, make sure you have a stable and secure ladder or step stool to use when accessing higher areas. Additionally, wear appropriate protective gear, such as gloves and safety glasses, to protect yourself from any sharp edges or debris. Finally, be cautious when handling heavy awning components and ask for assistance if needed.