
Have you ever found yourself in a situation where you roll over a nail and now have to deal with the headache of a flat tire? It’s the worst! Not only do you have to spend time fixing the tire, but you also have the added expense of repairing or replacing it. But fear not, we’re here to guide you on how to remove that pesky nail from your tire! First things first, it’s important to have the proper tools on hand before attempting to remove the nail yourself. This typically includes a tire plug kit and a tire iron.
If you don’t have these tools, it’s recommended that you consult a professional to avoid any further damage to your tire. If you do have the tools, start by locating the nail and check to see if it’s punctured through the tread. If it hasn’t, you may be lucky enough to avoid a flat tire and just need to remove the nail.
To do this, use your tire iron to gently pull the nail out of the tire. Be sure to do this slowly and carefully to avoid causing any additional damage. However, if the nail has punctured through the tread, it’s likely that you’ll need to use a tire plug kit to fix the issue.
This involves inserting a plug into the punctured hole, sealing it with adhesive, and trimming the excess off. It’s important to note that while removing a nail from your tire may seem like a simple task, it can be dangerous if not done properly. If you’re not comfortable doing it yourself, it’s always best to consult a professional.
In conclusion, dealing with a flat tire is never fun, but removing a nail from your tire doesn’t have to be a daunting task. Just remember to have the proper tools on hand and proceed slowly and carefully.
Table of Contents
Identify the Damaged Tire
If you find yourself with a nail in your tire, the first step towards removing it is to identify the damaged tire. This may seem obvious but it’s important to double check and make sure you are dealing with the right tire. Once you have confirmed which tire is damaged, you can begin the removal process.
However, before removing the nail, it’s important to inspect the tire and assess the damage caused by the nail. If the puncture is too severe, removing the nail may result in a flat tire. In such cases, it’s best to seek professional help or replace the tire altogether.
However, if the puncture is smaller, you may be able to remove the nail and patch the tire. Before attempting to remove the nail, make sure the vehicle is properly supported and the handbrake is engaged. It’s also important to use puncture repair tools that are specifically designed for the job.
By identifying the damaged tire and carefully assessing the damage, you can increase your chances of successfully removing the nail and safely repairing the tire.
Visually Inspect the Tire for Damage
When examining your tire for damage, it’s important to identify the specific areas that are in need of attention. Look for any visible signs of wear and tear, such as cracks or bulges on the sidewalls, punctures, cuts or tears on the tread surface, or any other irregularities that catch your eye. If you notice any air leaks, make sure to mark the spot so that you can return to it later.
Additionally, check for any nails or sharp objects that may have caused the damage. It’s important to keep in mind that excessive wear on your tire can cause it to fail prematurely, so be sure to take note of any damage and make necessary repairs or replacements before hitting the road again. Remember, prevention is key – keeping your tires in good condition will ensure the safety and efficiency of your vehicle, as well as help you save money in the long run.
Find the Location of the Nail
If you notice your car is pulling to one side, or you hear a thumping sound as you drive, it could be a sign of a damaged tire. It’s important to identify and repair the issue as soon as possible to avoid further damage or potential accidents. One way to identify a damaged tire is by visually inspecting it for any signs of wear and tear, bulges, or punctures.
If you’re unsure of what to look for, you can also take your car to a professional mechanic who can inspect it for you. In some cases, a special device might be used to find the location of the nail or other sharp object causing the damage. Once the damaged tire has been identified, it’s important to replace or repair it as soon as possible to ensure the safety of you and your passengers on the road.
Don’t wait when it comes to tire maintenance, take action to identify and fix any issues before they become a bigger problem. Stay safe on the road and make sure your tires are in good condition and properly inflated.
Tools You’ll Need
If you’ve noticed a nail stuck in your tire, you will need a few tools to remove it. You’ll need a socket set along with a pair of pliers or vice grip pliers to help loosen the nail. It’s also advisable to have a repair kit on hand, consisting of a rubber plug, a reaming tool, and a needle-like inserting tool.
These tools will help you patch the hole in your tire once you’ve successfully removed the nail. But before you proceed with removing the nail, make sure you completely deflate the tire first for easier and safer access. Once the tools are ready, carefully grasp the nail with the pliers and gently turn it counter-clockwise.
Gradually loosen the nail until you can easily pull it out of the tire. Inspect the hole for other sharp objects and use the reaming tool to enlarge it slightly for the plug to fit. Finally, insert the plug using the inserting tool as deep as possible, cut the excess, and pump up your tire with the handy patch kit.
Remember, a quick and efficient fix can save you money and prevent a dangerous situation on the road.
Safety Gloves
When it comes to safety gloves, it’s important to have the right tools handy to ensure maximum protection. First, you’ll need a good pair of safety gloves that fit your hands properly. Ill-fitting gloves can lead to accidents and injuries.
Next, consider the type of work you’ll be doing and choose gloves made from the appropriate material for that task. For instance, gloves made of leather or Kevlar are ideal for handling sharp objects, while gloves made of rubber are great for working with chemicals. Additionally, you may want to consider adding grip-enhancing tools, such as special hand grips or grip pads, to your gloves to ensure you have the best possible grip when handling tools.
By using the right tools and keeping safety in mind at all times, you can protect yourself from workplace injuries and accidents. Remember to take breaks as needed and always wear your safety gloves to keep your hands safe and injury-free.
Pliers
When it comes to any type of DIY project, having the right tools is essential. One tool that you will likely need is a good pair of pliers. A multi-functional tool, pliers can be used for a variety of tasks depending on their design.
Some common types of pliers include slip-joint pliers, needle-nose pliers, and locking pliers. Slip-joint pliers are versatile and great for general use, while needle-nose pliers are perfect for reaching into tight spaces and gripping small objects. Locking pliers, meanwhile, are designed for gripping and holding objects firmly in place.
When shopping for pliers, look for ones that are made from durable materials and have a comfortable grip. A good pair of pliers can come in handy for a wide range of tasks, from twisting wires and removing nails to bending metal and tightening bolts. So, be sure to include pliers in your tool kit to get the job done right.
Tire Repair Kit
If you want to be prepared in case of a flat tire, owning a tire repair kit is a must. However, you’re also going to need a few essential tools to make the repair process easier. First off, you’ll need some pliers to remove the punctured object from the tire.
Needle nose pliers work best, as they can easily grip the object without damaging the tire further. Next, a tire pressure gauge is essential to make sure the tire is and stays properly inflated after the repair. Additionally, it’s helpful to have a sharp utility knife or scissors to trim any excess material from the patch or plug.
Finally, a tire reamer and plugger tool, often included in tire repair kits, will make patching the hole a breeze. By having these tools on hand, you’ll be ready to tackle any tire repair with confidence and ease.
Removing the Nail
If you’ve discovered a nail in your tire, don’t panic; you can remove it quite easily with a few simple tools. The first step is to locate the puncture and determine how far the nail has penetrated the tire. If the nail is only partially embedded, you may be able to remove it manually with a pair of pliers.
However, if the nail is deeply seated, you’ll need to use a tire repair kit specifically designed for this purpose. Start by deflating the tire and removing it from the wheel. Then, use a probe tool to locate the puncture and mark its location.
Next, insert the reamer tool into the puncture, turning it clockwise to enlarge the hole, and then insert the repair plug into the hole using the insertion tool. Finally, trim any excess plug material from the surface of the tire and reinflate it to the recommended pressure. With these steps, you’ll remove the nail and save yourself from getting stranded on the road with a flat tire.
Deflate the Tire
When you discover a nail in your tire, the first thing you must do is to deflate the tire. This is important because leaving the tire inflated can cause further damage to your vehicle or even make it unsafe to drive. To remove the nail, you need to find the location of the puncture and use a pair of pliers to pull it out from the tire.
Make sure to wear gloves to protect your hands. Once the nail is removed, you should also use a tire plug or patch to seal the puncture and prevent it from leaking air. This will ensure that the tire remains safe and functional until a permanent repair or replacement can be made.
Remember, safety is always a top priority, and taking the time to properly deflate the tire and remove the nail can save you from costly repairs and potential accidents down the road.
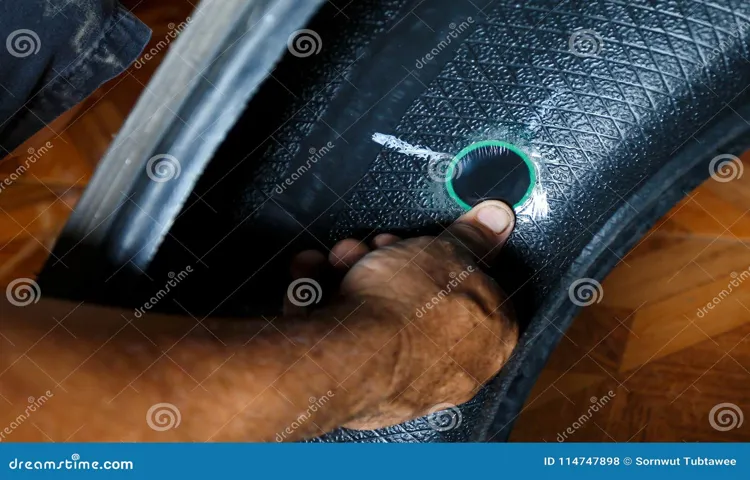
Remove the Nail from the Tire Tread
Removing a nail from your tire tread can seem like a daunting task, but it’s essential for the longevity and safety of your vehicle. The first step is to locate the nail and determine how deep it has penetrated the rubber. If it’s just stuck in the surface, you may be able to remove it with a pair of pliers.
However, if it’s deeper, you’ll need to use a tire repair kit that includes a reamer and plug. The reamer is used to clean out the hole, and the plug is then inserted to seal the puncture. It’s important to follow the instructions carefully and ensure that the plug is secure.
It’s also a good idea to have a professional look at the tire afterward to make sure the repair was successful. Remember, driving on a tire with a nail can cause further damage and even a blowout, so it’s better to address the issue as soon as possible.
Use Pliers to Pull Out the Nail
Removing a nail that has been embedded in wood can be a daunting task, but with the right tool and technique, it can be easily done. Pliers are one of the best tools to use for this job. Firstly, it’s important to ensure that the nail is not sticking out on the other side of the wood.
If it is, you’ll need to use a hammer to push it through and then pull it out from the other side. Once this has been done, take your pliers and grasp the nail as close to the wood as possible. Slowly and firmly pull upwards, using a rocking motion if necessary, until the nail is removed completely.
Pliers provide excellent grip and leverage, enabling you to pull the nail out with ease. Additionally, they also come in different sizes and shapes, so you can choose one that best fits the size of the nail and the wood. With a little patience and the right tool, removing a nail can be a quick and easy job.
Repairing the Tire
Have you ever found yourself with a nail in your tire? Don’t panic, it’s a common issue that can be easily resolved! The first step is to determine the location of the nail in the tire. If it’s in a repairable area such as the tread, then you can remove the nail and patch up the hole. To remove the nail, use a pair of pliers or a screwdriver and carefully pull it out.
Be sure to do this slowly to avoid causing any further damage to the tire. If the nail is causing air to leak out quickly, then it’s best to call a professional who can safely remove it. Once the nail is removed, use a tire repair kit to patch up the hole.
This typically includes a rubber plug and a tool to insert it into the hole. Follow the instructions carefully and make sure the patch is secure before inflating the tire again. Remember, taking care of your tires is important for both your safety and the longevity of your vehicle.
Insert the Repair Plug into the Tire Hole
Inserting the repair plug in a tire hole is the next step in repairing a punctured tire. After locating the hole, you’ll need to insert a repair plug into the opening to seal the hole. Most repair kits come with a needle-like tool to guide the plug into the hole.
Firstly, you need to lubricate the tool with rubber cement or rubber lubricant. Insert the tool into the hole and push it all the way through. Withdraw the tool partially while still holding onto the plug.
Trim the excess portion of the plug, leaving just enough to create a seal. Once the plug is in place, inflate the tire and check the pressure to ensure that the plug is holding. This fix is a temporary solution, and it’s crucial to get the tire checked by a professional as soon as possible, and this will ensure a safer driving experience.
So, if you are in a remote location or unable to take the tire to a tire specialist, this could be the solution you need.
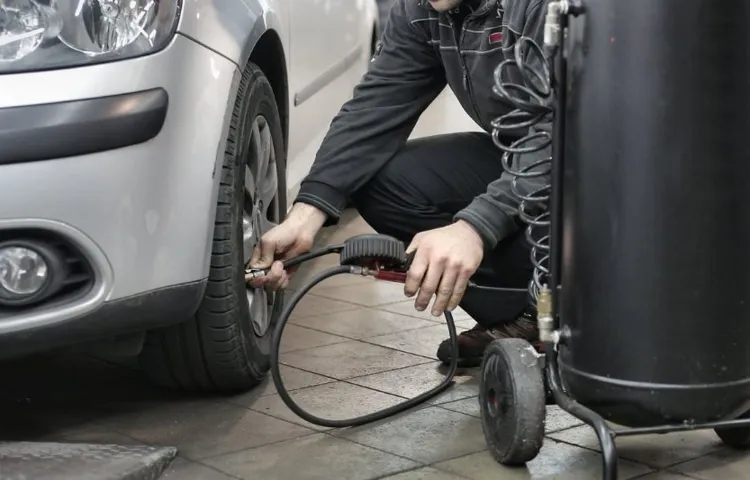
Inflate the Tire and Check for Leaks
When it comes to repairing a tire, one of the most critical steps is to inflate the tire and check for leaks. This process ensures that the tire is in good condition and is safe to drive on. To begin, you’ll need an air compressor or a bike pump to inflate the tire to the recommended pressure level.
This information can usually be found in your owner’s manual or inside the driver’s side door. Once the tire is inflated, it’s important to inspect it for leaks. This can be done using soapy water, which can help you identify any leaks by causing the surface to bubble where air is escaping.
It’s crucial to find and fix any leaks before driving on the tire, as driving on a leaky tire can be dangerous and potentially lead to a blowout. Always remember to check the tire’s pressure regularly to ensure it remains at the recommended level for your vehicle’s make and model. By taking these steps, you’ll ensure that your tire is in tip-top shape and ready to hit the road!
Conclusion
Removing a nail from a tire may seem like a daunting task, but fear not! With the right tools and a little bit of know-how, you’ll be able to tackle this challenge with ease. Remember, it’s always better to be safe than sorry, so if you’re unsure about your ability to remove the nail, seek the help of a professional. And, as always, stay sharp out on the road – you never know what obstacles may lie ahead!”
FAQs
What are common signs that a tire has a nail in it?
The most common signs are a slow leak in the tire, a visible nail or screw in the tire, or a hissing sound coming from the tire.
Can you drive on a tire with a nail in it?
It is not recommended to drive on a tire with a nail in it as it can cause further damage and compromise the safety of the driver and passengers.
How do you identify the location of the nail in the tire?
One can identify the location of the nail in the tire by inspecting the tire carefully, looking for any visible punctures or enter/exit wounds. Another method would be to spray soapy water on the tire and look for bubbles where air is escaping.
Can a tire with a nail in it be repaired?
Yes, a tire with a nail can be repaired if the puncture is not too large (typically less than ¼ inch in diameter) and is located on the tread of the tire.
How do you remove a nail from a tire?
To remove a nail from a tire, one must use pliers or a pair of needle-nose pliers to gently pull out the nail. It is important to ensure that the tire does not lose any air during the process.
What is the cost of repairing a tire with a nail in it?
The cost of repairing a tire with a nail in it can vary depending on the tire repair service and the severity of the puncture. On average, it typically costs between $10 to $30.
How often should you check your tires for nails or other punctures?
It is recommended to check your tires for nails or other punctures every month or before embarking on a long road trip.