Are you tired of your RV awning fabric looking old, worn-out, or damaged? Don’t worry, removing RV awning fabric may sound like a daunting task, but with the right steps and tools, it can be a breeze. Whether you need to replace your fabric due to wear and tear or you simply want to change up the look of your RV, this blog post will guide you through the process. Get ready to transform your RV’s exterior and enjoy a fresh, new awning fabric that enhances your outdoor living experience.
Let’s dive in and learn how to remove RV awning fabric!
Introduction
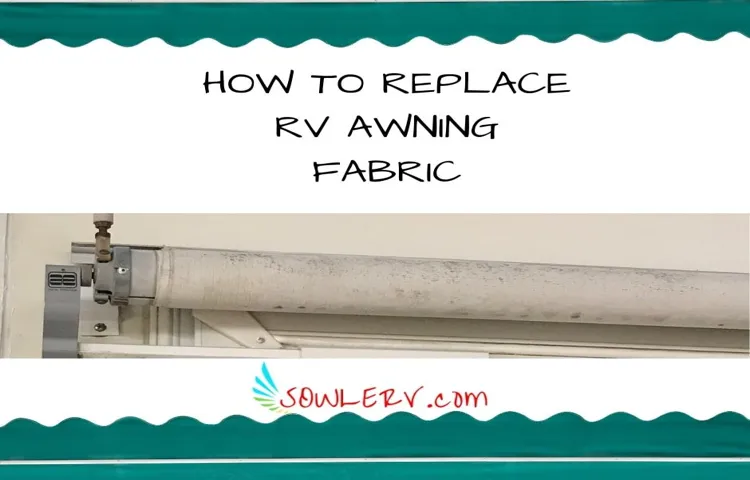
Are you looking to remove the fabric on your RV awning? Whether it’s because you want to replace it with a new fabric or simply need to clean it, removing the awning fabric can be a straightforward process if you know the steps to take. First, you will need to extend the awning fully to access the fabric. Next, you’ll want to locate the stitching that attaches the fabric to the roller tube.
Using a seam ripper or another sharp tool, carefully remove the stitching. Be sure to take note of the direction in which the fabric is rolled onto the roller tube as this will be important when reattaching the new fabric. Once the stitching is removed, gently pull the fabric off the roller tube.
Store the old fabric in a safe place or dispose of it properly. With the fabric removed, you can now clean or replace it based on your needs. Installing a new fabric follows a similar process, but in reverse.
Fold the new fabric in half lengthwise and slide it onto the roller tube, aligning it with the direction marked earlier. Sew the fabric in place using a sewing machine or needle and thread. Finally, reattach the awning to the RV, making sure it rolls out smoothly.
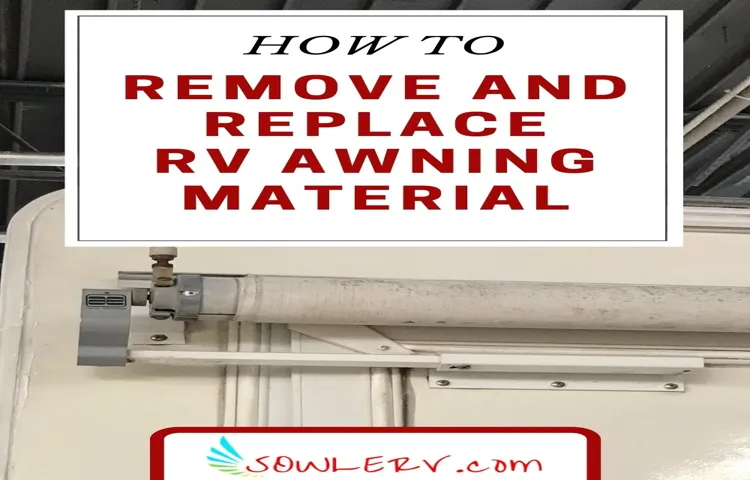
Removing and replacing RV awning fabric can be a DIY project that will help refresh the look of your RV and keep it functioning properly.
Why Remove RV Awning Fabric?
RV awnings can be a great addition to your outdoor living space, providing shade and protection from the elements. However, there may come a time when you need to remove the awning fabric for various reasons. Whether you’re looking to replace worn-out fabric, make repairs, or just want to change up the look of your RV, removing the awning fabric is a necessary step.
In this blog post, we’ll explore the reasons why you might need to remove RV awning fabric and discuss the steps involved in doing so.
Safety Precautions
safety precautions
Tools and Materials Needed
If you’re looking to remove the fabric from your RV awning, there are a few tools and materials you’ll need to get the job done. First and foremost, you’ll need a ladder or step stool to reach the awning and work safely at a height. Additionally, you’ll need a screwdriver or drill with the appropriate bits to remove any screws or bolts holding the awning in place.
It’s also a good idea to have a partner or friend help you with the process, as they can provide an extra set of hands and ensure your safety. In terms of materials, you may need replacement fabric for the awning, as well as any necessary hardware or accessories. It’s important to take your time and be cautious when removing the fabric, as it can be delicate and easily damaged.
By having the right tools and materials on hand, you’ll be well-prepared to successfully remove your RV awning fabric.
List of Tools
“Tools and Materials Needed for Your Project” When taking on a new project, it’s important to have the right tools and materials to get the job done efficiently and effectively. Whether you’re a seasoned DIY enthusiast or just starting out, having a well-stocked toolbox will make the process much smoother. So, what are some essential tools and materials you should have on hand? First and foremost, a good set of basic hand tools is a must.
This includes screwdrivers, wrenches, pliers, and a hammer. These tools will come in handy for a wide range of tasks, from assembling furniture to hanging pictures on the wall. Another essential tool is a power drill.
This versatile tool can be used for drilling holes, driving screws, and even mixing paint or mortar. Invest in a high-quality drill with a variety of bits and attachments to tackle any project that comes your way. For larger projects, such as building a deck or remodeling a room, you’ll need some heavy-duty tools.
A circular saw is perfect for making straight cuts in lumber, while a miter saw is ideal for making precise angled cuts. A jigsaw is also handy for cutting curves or irregular shapes. In addition to tools, it’s important to have the right materials on hand.
This can include screws, nails, bolts, and other fasteners. It’s also a good idea to have a selection of adhesives, such as wood glue, construction adhesive, and epoxy, for bonding different materials together. Safety should also be a top priority, so make sure to have safety glasses, gloves, and a dust mask on hand.
These will protect you from potential hazards and ensure that you can work comfortably and confidently. By having these essential tools and materials in your arsenal, you’ll be well-prepared to tackle any project that comes your way. So, stock up your toolbox and get ready to unleash your DIY skills!
List of Materials
In order to complete certain DIY projects, it’s important to gather all the necessary tools and materials beforehand. This will ensure that you have everything you need and that you won’t have to make multiple trips to the store. The specific tools and materials needed will vary depending on the project, but there are a few common items that are often required.
Basic tools such as a hammer, screwdriver set, and tape measure are essential for many projects. Other tools such as a drill, saw, and level may also be needed depending on the task at hand. In addition to tools, you will also need various materials.
This could include things like nails, screws, sandpaper, and paint. It’s important to make a list of all the tools and materials you will need before starting a project so that you can gather everything in advance. This will help ensure a smooth and efficient DIY experience.
Step-by-Step Guide
If you’re looking to remove your RV awning fabric, don’t worry – it’s easier than you might think! Follow these simple steps to get the job done. First, make sure you have all the necessary tools on hand, such as a ladder, a screwdriver, and a helper if needed. Start by retracting the awning completely, then locate the screws that hold the fabric in place.
Carefully remove these screws, taking care not to damage the awning or the fabric. Once the screws are removed, gently pull the fabric out of the awning channel, making sure to keep it straight and untangled. You may need to enlist the help of a friend to hold the other end of the fabric while you remove it.
Once the fabric is completely removed, inspect it for any damage or wear and tear. If necessary, you can replace the fabric with a new one by following the same steps in reverse. With a little bit of patience and a few simple tools, you can easily remove and replace your RV awning fabric.
Step 1: Choose a Suitable Working Area
office workspace, suitable working area, productivity, comfortable, distractions, natural light, ergonomic furniture, organization, declutter, personalization, plants, productivity boost When it comes to creating your perfect office workspace, choosing a suitable working area is the first and most crucial step. Having a designated space solely dedicated to work can greatly enhance your productivity and make you feel more comfortable throughout the day. But what exactly makes a working area suitable? Well, think about the environment you thrive in.
Consider factors such as natural light, the availability of ergonomic furniture, and minimal distractions. A workspace flooded with natural light can improve your mood and keep you alert. Ergonomic furniture, such as an adjustable chair and a desk at the right height, can reduce the risk of health problems and discomfort.
Make sure to keep your workspace organized and decluttered, as a cluttered environment can be distracting and hinder your focus. Personalize your workspace with items that inspire and motivate you. Adding plants to your office not only adds a touch of nature but has also been shown to increase productivity.
By taking the time to create a suitable working area, tailored to your preferences and needs, you are setting the stage for a productivity boost and a more enjoyable work experience.
Step 2: Extend the Awning Completely
awning So you’ve decided to extend your awning, but where do you start? Step 2 of our step-by-step guide is all about extending the awning completely. Once you’ve located the manual or remote control for your awning, it’s time to get things moving. Start by pressing the button or pulling the cord to extend the awning.
As the awning starts to unfurl, you’ll want to make sure it goes all the way out to its full extended position. This is important because if the awning is not fully extended, it may not provide adequate shade or protection from the elements. So, take your time and ensure that the awning is fully extended before moving on to the next step.
Happy awning extending!
Step 3: Remove the End Caps
Removing the end caps is an essential step when it comes to replacing damaged or worn-out end caps on any piece of furniture or equipment. Whether you’re working with a chair, table, or even a treadmill, the end caps play an important role in providing stability and preventing damage to both the furniture and the floor. To remove the end caps, you’ll need a few basic tools like a flathead screwdriver or a pry bar.
Start by inspecting the end cap to determine how it is attached to the furniture. Some end caps may be secured with screws or bolts, while others may simply snap into place. If it is secured with screws or bolts, use the appropriate tool to carefully remove them.
If the end cap is attached by snapping into place, use the screwdriver or pry bar to gently pry it away from the furniture. Be careful not to apply too much force as you don’t want to damage the furniture or the end cap itself. Once the end cap is loose, carefully pull it away from the furniture until it is completely removed.
Repeat this process for any other end caps that need to be replaced. With the end caps removed, you can now move onto the next step of replacing them with new ones.
Step 4: Unzip the Awning Fabric
In this step-by-step guide, we will walk you through the process of unzipping the awning fabric. Unzipping the fabric is an important step in replacing or repairing your awning. To begin, locate the zipper on the awning and ensure it is fully closed.
Next, gently grip the zipper pull and pull it downwards, applying steady but gentle pressure. As you unzip the fabric, be careful not to pull too hard or fast, as this may damage the zipper or the fabric itself. Take your time and move slowly, ensuring that the zipper is fully opened before proceeding with any further repairs or replacements.
By following these steps and taking your time, you can safely and effectively unzip the awning fabric, allowing you to continue with any necessary repairs or maintenance.
Step 5: Remove the Screws and Clamps
In our previous steps for removing a broken screw, we’ve covered some essential techniques, such as prepping the screw, creating a guide hole, and using pliers to grip and twist it out. But what happens when the screw is too stubborn to budge? Don’t worry; we have another trick up our sleeve. Step 5 involves removing the screws and clamps.
Once you’ve loosened the screw as much as possible, it’s time to take out the screws and clamps holding the broken piece in place. This step is crucial because it allows you to have a better view and access to the broken screw. It also prevents any damage to the surrounding area while working on extracting the screw.
To begin, you’ll need a screwdriver and a pair of pliers. Start by unscrewing all the screws holding the clamps in place. Be sure to do this carefully and keep track of which screws go where.
Once all the screws are removed, gently remove the clamps to reveal the broken screw beneath. With a clear view and more space, you can resume your extraction process with improved control and precision.
Step 6: Detach the Awning Fabric
The next step in replacing or repairing your awning is to detach the fabric. This can be a bit tricky, but with some patience and the right tools, it can be done. Firstly, you need to remove any screws or fasteners that are holding the fabric in place.
These may be located on the side or bottom of the awning, so make sure to check all areas. Once the screws are removed, gently pull the fabric away from the frame. Be careful not to tug too hard, as this could damage the fabric or the frame.
If the fabric is stuck, you can use a flathead screwdriver or a putty knife to gently pry it away. Once the fabric is detached, carefully roll it up and set it aside. This will allow you to clean or repair the fabric separately.
Step 7: Roll Up and Store the Awning Fabric
Once you’ve finished using your awning, it’s time to roll it up and store it properly. This will help protect it from any damage and ensure it stays in good condition for future use. To start, make sure the fabric is dry before rolling it up.
Wet fabric can lead to mold and mildew growth, so it’s important to let it air out completely. Begin rolling the fabric from one end, making sure to roll it tightly. You can use a strap or rope to secure the rolled fabric in place.
Once it’s securely rolled up, store it in a clean and dry area, away from any sharp objects or potential hazards. It’s also a good idea to cover it with a protective bag or tarp to prevent dust and dirt from accumulating. Following these steps will help prolong the lifespan of your awning fabric and ensure it’s ready for use when you need it again.
Conclusion
So there you have it, the clever and witty guide on how to remove RV awning fabric! By following these step-by-step instructions, you’ll be a pro at taking down your awning in no time. Remember, always approach this task with caution and safety in mind. Take it slow, pay attention to detail, and don’t be afraid to ask for help if needed.
With a bit of practice and the right tools, you’ll be able to remove your RV awning fabric like a seasoned traveler. Who knows, maybe you’ll even start giving awning removal workshops at the next RV convention! But for now, go forth and conquer that awning – happy fabric removal!”
Proper Care and Maintenance of RV Awning Fabric
Taking care of your RV awning fabric is crucial to ensuring its longevity and performance. By following a few simple steps, you can keep your awning fabric in top shape and extend its lifespan. To start, make sure to regularly clean your awning fabric to remove any dirt, debris, or stains.
Use a mild detergent, sponge, and water to gently scrub the fabric, and be sure to rinse it thoroughly to remove any soap residue. Additionally, it’s important to inspect your awning fabric for any tears or damage. If you notice any issues, repair them promptly to prevent further damage.
Lastly, when not in use, make sure to properly store your awning fabric. Roll it up tightly and use a protective cover to shield it from the elements. By following these steps, you can enjoy your RV awning fabric for years to come.
Removing the Awning Fabric the Right Way
Removing the awning fabric from your outdoor space might seem like a daunting task, but with the right steps, it can be a straightforward process. By following this step-by-step guide, you can ensure that you remove the awning fabric safely and efficiently. First, begin by retracting the awning completely.
This will make it easier to access the fabric and prevent any potential damage during the removal process. Once the awning is fully retracted, locate the screws or brackets that are holding the fabric in place. These are usually located on the top and bottom of the frame.
Using a screwdriver or wrench, carefully remove the screws or brackets from one end of the awning. It’s important to take your time and not rush this step, as it will determine the stability of the fabric during the removal process. Once the screws or brackets are removed, gently pull the fabric out of the track or groove.
Next, move to the other end of the awning and repeat the process of removing the screws or brackets. Take care not to damage the fabric or the frame as you remove the second side. Once both ends are free, you can begin to carefully roll up the fabric from one end to the other.
As you roll up the fabric, be mindful of any obstructions or obstacles that may be in the way. You may need to gently navigate the fabric around these objects to prevent any tears or snags. Once the fabric is rolled up, secure it with zip ties or straps to keep it in place.
Finally, inspect the awning frame for any dirt, debris, or damage. Use a soft brush or cloth to remove any built-up dirt or dust. If you notice any tears or damage to the frame or fabric, it’s important to address these issues before reattaching the awning fabric.
Enjoy a Fully Functional RV Awning
rv awning
FAQs
How do I remove the fabric from my RV awning?
To remove the fabric from your RV awning, start by extending the awning fully. Then, locate the awning fabric’s roller tube and slide the fabric out of the track. Once the fabric is out of the track, carefully roll it up and secure it with bungee cords or straps.
What tools do I need to remove RV awning fabric?
To remove RV awning fabric, you will need a ladder, a screwdriver or wrench (depending on the type of awning), bungee cords or straps to secure the fabric, and possibly a helper to assist with the process.
Can I remove the awning fabric by myself, or do I need professional help?
It is possible to remove the RV awning fabric by yourself, especially if you are comfortable working at heights and have the necessary tools. However, if you are unsure or uncomfortable with the process, it is always best to seek professional assistance to avoid any accidents or damage.
How often should I remove and replace my RV awning fabric?
The frequency of replacing your RV awning fabric depends on various factors such as usage, exposure to weather elements, and the overall condition of the fabric. On average, it is recommended to inspect the fabric annually and replace it every 5 to 10 years or whenever signs of wear, tear, or damage are evident.
How can I clean the RV awning fabric before removing it?
To clean the RV awning fabric before removal, start by hosing it down to remove any loose dirt or debris. Then, prepare a mixture of mild soap and water and scrub the fabric gently with a soft brush or sponge. Rinse thoroughly and allow the fabric to dry completely before proceeding with the removal process.
Are there any specific care instructions for storing the removed RV awning fabric?
When storing the removed RV awning fabric, it is best to clean and dry it thoroughly to prevent mold or mildew growth. Once dry, roll it up tightly and secure it with bungee cords or straps. Store the rolled-up fabric in a dry and clean area, away from sunlight and extreme temperatures.
Can I reuse the removed RV awning fabric?
In certain cases, you may be able to reuse the removed RV awning fabric if it is still in good condition and fits properly. However, it is recommended to inspect the fabric for any signs of wear, tear, or damage before reusing it. Additionally, be sure to check if the fabric is compatible with your awning model and specifications.