Cracked windshields can be a common problem for car owners, but the solution doesn’t always have to be replacing the entire windshield. In fact, there are ways to repair a cracked windshield without going through the hassle and expense of a full replacement. So, if you’re wondering how to fix that unsightly crack in your windshield, we’ve got you covered.
In this article, we’ll explore some DIY methods and professional options for repairing a cracked windshield, saving you time and money in the process. So, let’s dive in and find out how to fix that crack before it spreads!
Table of Contents
Introduction
Are you tired of dealing with a cracked windshield? It can be frustrating and expensive to replace it, but what if there was a way to repair it without having to shell out a ton of money? Well, luckily for you, there are some DIY methods that might just do the trick. One option is using a windshield repair kit, which typically includes a resin that you can apply to the crack to seal it up. This can help prevent further damage and potentially save you from having to replace the windshield altogether.
Another option is to use a DIY remedy like clear nail polish or super glue to fill in the crack. While these methods may not be as effective as a professional repair, they can offer a temporary fix until you are able to get it properly repaired or replaced. Just remember, these DIY methods are not meant to be a permanent solution, and it’s always best to consult a professional for any significant damage.
Why should you repair a cracked windshield?
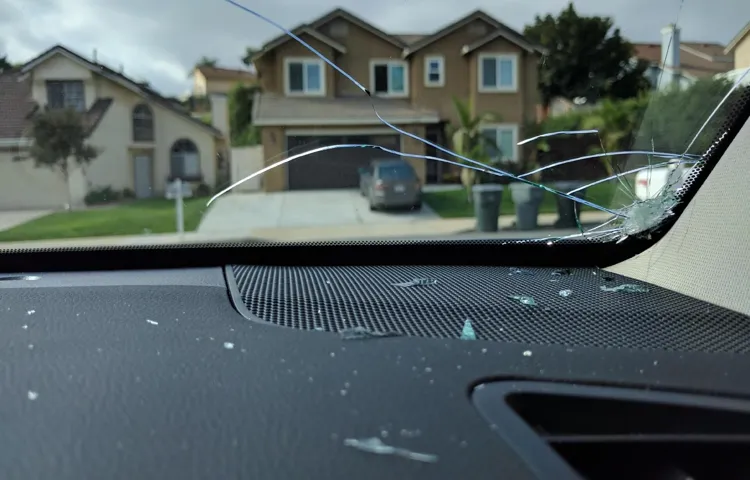
Cracked windshields are a common problem for many drivers. They can happen due to a variety of reasons, such as rocks or debris hitting the glass, extreme temperature changes, or even stress from the vehicle’s frame. While some might think that a small crack or chip in their windshield is no big deal, it’s important to understand that ignoring the problem can lead to more serious consequences down the road.
In this blog post, we’ll discuss why repairing a cracked windshield is essential for maintaining both your safety and the integrity of your vehicle.
Safety concerns of driving with a cracked windshield
Introduction: Driving with a cracked windshield may not seem like a big deal, but it’s important to understand the safety concerns that accompany this seemingly minor issue. A crack in your windshield can compromise your visibility on the road, putting you and your passengers at risk. Additionally, a cracked windshield is more prone to shattering in the event of an accident or even a small impact, potentially causing serious injuries.
In this blog post, we will explore the safety concerns of driving with a cracked windshield and why it’s crucial to have it repaired or replaced as soon as possible to ensure your safety on the road.
Assessing the crack
If you find yourself with a cracked windshield, it can be a frustrating and costly problem to deal with. However, there are certain steps you can take to repair the crack without having to replace the entire windshield. One option is to use a windshield repair kit, which can be purchased at an auto parts store or online.
These kits typically include a resin that can be applied to the crack, and with the help of a special tool, the resin is injected into the crack and then cured with UV light. This method can help prevent the crack from spreading and improve the overall appearance of the windshield. However, it is important to note that not all cracks can be successfully repaired using this method.
Cracks that are longer than a few inches or located at the edge of the windshield may require a full replacement. It is always best to consult with a professional to determine the best course of action for your specific situation.
Size and location of the crack
When assessing a crack, it’s important to consider its size and location. The size of the crack will determine its severity and potential for further damage. Larger cracks indicate more significant structural issues and may require immediate attention.
On the other hand, smaller cracks may be cosmetic and less of a concern. However, it’s still essential to monitor these smaller cracks as they can expand over time. Additionally, the location of the crack is crucial in understanding its cause and potential consequences.
For instance, a crack near a window or door may indicate foundation settlement, while a crack on an exterior wall may be a sign of structural issues or water damage. By assessing the size and location of the crack, you can determine the appropriate course of action to ensure the safety and stability of your property.
Types of cracks
assessing the crack
Gather the necessary supplies
When it comes to repairing a cracked windshield without replacing it, gathering the necessary supplies is the first step. You will need a windshield repair kit, which can be easily found at an automotive supply store or online. These kits typically include a resin adhesive, curing strips, and a syringe for applying the adhesive.
Additionally, you may need a razor blade or utility knife to clean the area around the crack, as well as a microfiber cloth for wiping away any excess adhesive. It’s important to ensure that you have all of these supplies on hand before attempting to repair the crack, as having everything ready will make the process much smoother.
Windshield repair kit
windshield repair kit. “Hey there! So you’ve noticed a chip or a crack on your windshield, and you’re wondering if you can fix it yourself with a windshield repair kit. Well, the good news is that you can! But before you start, let’s make sure you gather all the necessary supplies.
Now, the first thing you’ll need is a windshield repair kit, which you can easily find at your local auto parts store or online. These kits usually come with all the tools and materials you need to repair small chips and cracks on your windshield. They typically include a resin, an applicator, curing strips, and a razor blade.
It’s important to choose a high-quality kit that is specifically designed for windshield repairs to ensure the best results. Additionally, you’ll need some clean towels or rags, a pair of rubber gloves to protect your hands, and a clean and dry surface to work on. Once you have all these supplies ready, you’ll be good to go and ready to repair your windshield in no time!”
Protective gear
Protective gear is essential when taking part in certain activities or professions that pose risks to one’s safety. From construction workers to medical professionals, having the right gear can make a significant difference in preventing injuries or accidents. To gather the necessary supplies, it is crucial to assess the specific needs of the task at hand.
For example, construction workers may require hard hats to protect against falling objects, safety goggles to shield their eyes from debris, and steel-toed boots to prevent foot injuries. Similarly, medical professionals may need personal protective equipment (PPE) such as gloves, masks, and gowns to protect against exposure to harmful substances or infectious diseases. By understanding the potential hazards and requirements of the activity or profession, individuals can ensure that they have the appropriate gear to keep themselves safe.
Cleaning the crack
Imagine this: you’re driving along a busy highway and suddenly, a small rock hits your windshield causing a tiny crack. It may seem like a minor inconvenience, but if left unaddressed, that crack can quickly spread and compromise the integrity of your windshield. The good news is that there are ways to repair a cracked windshield without having to replace the entire thing.
One of the first steps is to clean the crack thoroughly. This involves using a glass cleaner or a mixture of vinegar and water to remove any dirt or debris from the crack. By doing this, you ensure that the repair material adheres properly and the crack is properly filled.
So remember, if you find yourself with a cracked windshield, don’t panic – a little bit of cleaning and some simple repairs can go a long way in preserving the life of your windshield.
Dirt and debris removal
Dirt and debris can easily accumulate in the cracks of surfaces over time, making it essential to regularly clean them out for both aesthetic and functional purposes. To effectively clean the crack, start by using a brush or broom to gently remove any loose dirt or debris on the surface. This will help prevent further buildup and make the cleaning process easier.
Next, use a vacuum cleaner or a handheld vacuum with a narrow attachment to suck up any remaining dirt and debris from the crack. Be thorough in your cleaning efforts to ensure that all the dirt is removed. After vacuuming, you can use a damp cloth or sponge to wipe down the crack and remove any stubborn dirt or stains.
For more stubborn dirt and debris, you may need to use a specialized cleaning solution or detergent. Simply apply the solution to the crack and scrub gently with a brush or sponge. Rinse the crack thoroughly with water and dry it completely to prevent further damage or mold growth.
By regularly cleaning the crack, you can ensure that it remains clean and free from dirt and debris, improving both the appearance and functionality of the surface.
Cleaning with alcohol
alcohol, cleaning, crack Cleaning the crack in various surfaces can be a challenging task, but using alcohol as a cleaning agent can make the process much easier. Alcohol, particularly isopropyl alcohol, is a versatile and effective cleaner that can handle a wide range of dirt and stains. Whether you’re trying to clean a crack in your window, bathroom tile, or even a piece of electronic equipment, alcohol can be a reliable solution.
Firstly, alcohol is great for removing grime and sticky residue. The crack in your window might accumulate dirt over time, making it difficult to see clearly through it. By dabbing a cloth soaked in alcohol onto the crack, you can effectively dissolve and remove this build-up.
Similarly, in the bathroom, alcohol can be used to clean the cracks between tiles, getting rid of any mold or mildew that may have formed. Even with electronics, alcohol can safely clean the intricate cracks and crevices, without damaging sensitive components. Another advantage of using alcohol for cleaning is its quick-drying nature.
Unlike water or other cleaning agents, alcohol evaporates rapidly, leaving behind a dry and clean surface. This is particularly useful when cleaning electronics, as you can use alcohol to safely remove dirt from the cracks without worrying about any liquid seeping into the delicate internals. It’s essential to note that when cleaning with alcohol, choosing the right concentration is crucial.
Isopropyl alcohol with a concentration of 70% or higher is recommended for most cleaning tasks. Lower concentrations may not be as effective, while higher concentrations can be overly harsh and may damage certain surfaces. In conclusion, alcohol is a valuable tool for cleaning cracks in various surfaces.
Its ability to dissolve grime and sticky residue, coupled with its quick-drying nature, make it an ideal choice for tackling even the toughest cleaning tasks. Just remember to select the appropriate concentration and be cautious when cleaning delicate surfaces or electronics. With alcohol, you can easily restore the cleanliness and appearance of cracked surfaces in no time.
Sealing the crack with resin
If you’ve got a cracked windshield, don’t panic! There’s a way to repair it without having to replace the entire thing, and it’s called sealing the crack with resin. This process is relatively simple and can be done at home with a windshield repair kit. First, make sure the crack is clean and dry by using a soft cloth and some glass cleaner.
Next, apply the resin to the crack using the provided applicator. Gently press the resin into the crack, making sure it fills the entire space. After that, place a piece of clear tape over the crack and press down firmly to ensure the resin stays in place.
Allow the resin to dry completely, which usually takes about 24 hours. Once it’s dry, remove the tape and gently scrape away any excess resin with a razor blade. Voila! Your cracked windshield is now good as new.
Remember, this method is best for small cracks and chips. If you have a larger crack or if the crack is in your line of sight while driving, it’s best to consult a professional.
Preparing the windshield for repair
crack repair, windshield repair, sealing crack with resin When it comes to fixing a cracked windshield, one of the most important steps is sealing the crack with resin. This process involves filling the crack with a special resin that bonds the glass together and prevents it from spreading further. It’s kind of like patching up a leak in a plumbing pipe – you want to seal it up tight to prevent any more damage.
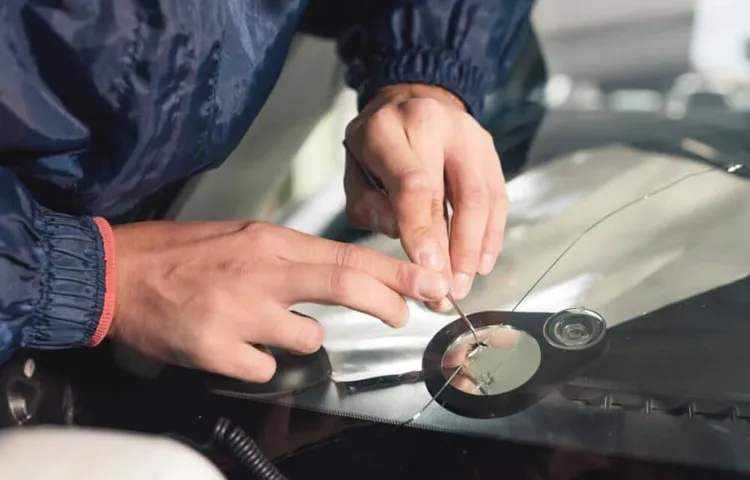
To start, the technician will clean the crack and the surrounding area with a special cleaning solution. This helps to remove any dirt or debris that could interfere with the bonding process. Once the area is clean, the technician will apply a small amount of resin to the crack.
They will then use a special tool to push the resin into the crack, making sure it fills in all the nooks and crannies. After the resin is applied, the technician will use a curing light to harden the resin. This usually only takes a few minutes, and once the resin is hardened, the crack will no longer be visible.
It’s like magic! Sealing the crack with resin is an important step in the windshield repair process because it helps to reinforce the glass and prevent further damage. If the crack is not sealed properly, it could continue to spread, leading to a more extensive repair or even the need for a full windshield replacement. So, it’s definitely not something you want to skip.
In conclusion, if you find yourself with a cracked windshield, make sure to have it repaired as soon as possible. And remember, sealing the crack with resin is an essential part of the repair process. So, find a reputable repair shop and let the experts work their magic.
Before you know it, your windshield will be good as new and you can hit the road with peace of mind.
Injecting resin into the crack
Injecting resin into the crack is a crucial step in the process of sealing it. Resin is a strong adhesive that can bond with various materials, making it ideal for repairing cracks. To begin, the crack should be thoroughly cleaned and dried to ensure a proper seal.
Next, a small hole is drilled at each end of the crack to prevent it from spreading further. Once the preparation is complete, the resin can be injected into the crack using a specialized syringe or applicator. The resin should be forced into the crack under pressure to ensure that it fills every crevice and cavity.
As the resin is injected, it seeps into the cracks and forms a strong bond with the surrounding material. This helps to reinforce the crack and prevent further damage. After the resin has been injected, it needs to cure and harden, usually through exposure to UV light or by using a catalyst.
This will ensure that the resin sets properly and forms a durable seal. Once the resin has hardened, the crack will be sealed, and the repaired area should be strong and stable. Overall, injecting resin into the crack is a vital step in the process of sealing it and restoring the integrity of the damaged material.
Curing the resin
“Sealing the crack with resin” So you’ve noticed a crack in your wall or maybe a chip in your favorite vase. Don’t worry, there’s a solution – resin! Resin is a versatile material that can be used to seal cracks and restore the integrity of damaged objects. Once applied, resin cures and hardens, creating a strong and durable bond.
To seal a crack with resin, first, you need to prepare the surface. Clean the area thoroughly to remove any dirt or debris that could affect the adhesion of the resin. Use sandpaper to roughen the edges of the crack, allowing the resin to grip better.
Next, mix the resin according to the manufacturer’s instructions. Resin comes in various forms, such as epoxy resin or polyurethane resin, so make sure to choose the right type for your specific needs. Once mixed, apply the resin to the crack using a brush or a putty knife.
Make sure to work the resin into the crack, ensuring it fills all the gaps. After applying the resin, leave it to cure. The curing time will depend on the type of resin used, but it usually takes a few hours to several days.
During this time, the resin will harden and form a strong bond with the surface, sealing the crack and restoring the stability of the object. Once the resin has cured, you can sand and polish the surface to achieve a smooth and seamless finish. If necessary, you can also paint or coat the sealed area to match the surrounding surface.
Sealing cracks with resin is an effective and affordable way to fix damaged objects and prevent further deterioration. Whether it’s a crack in your wall, a chip in your pottery, or a split in your wooden furniture, resin can come to the rescue. So don’t let those cracks ruin your day – grab some resin and get sealing!
Smoothing the repaired area
One of the final steps in repairing a cracked windshield without replacing it is smoothing out the repaired area. After filling in the crack with resin and allowing it to dry, there may be a slight unevenness or roughness on the surface. To smooth out the area, you can use a windshield repair kit that includes a smoothing tool or a plastic razor blade.
Gently scrape the surface of the repaired area to remove any excess resin and create a smooth finish. Be careful not to apply too much pressure or scrape too aggressively, as this can damage the windshield. Once you have achieved a smooth surface, use a microfiber cloth to clean the repaired area and remove any residue.
This will leave your windshield looking clear and smooth, without any visible signs of the previous crack.
Removing excess resin
In the process of repairing a fiberglass item, such as a boat or a surfboard, one of the important steps is removing excess resin. When applying resin to the damaged area, it is common for some excess resin to spill over onto the surrounding area. This excess resin can create an uneven surface or dripping marks, which will need to be smoothed out for a seamless repair.
To remove the excess resin, you can use a scraper or a putty knife to gently scrape away the excess. It’s important to be careful not to scrape too hard or apply too much pressure, as this can damage the underlying fiberglass. After removing the excess resin, you can use a sanding block or sandpaper to further smooth out the repaired area.
This will help to blend the repaired area with the rest of the surface, ensuring a professional finish. It’s important to take your time and be patient during this step, as it can make a big difference in the overall appearance of the repair.
Buffing the surface
smoothing the repaired area, buffing the surface
Final steps
If you’re faced with a cracked windshield, don’t panic just yet! There are ways to repair it without having to replace the entire windshield. One option is to use a windshield repair kit, which can be purchased at most automotive supply stores. These kits typically come with a resin that can be injected into the crack, filling in the damaged area and preventing the crack from spreading further.
It’s important to follow the instructions carefully and take your time to ensure a proper repair. Another option is to have the crack repaired by a professional. Many auto glass repair shops offer windshield repair services, where they can use specialized tools and techniques to fix the crack.
This can be a more expensive option, but it may provide a more durable and long-lasting repair. It’s important to address a cracked windshield as soon as possible, as it can compromise the structural integrity of the glass and pose a safety risk. So, don’t wait too long to take action and find a solution that works for you!
Inspecting the repair
Final steps in inspecting the repair can ensure that the job has been done correctly and that the problem has been resolved. One of the first things to check is whether all the necessary parts and materials have been used. This can include checking for any missing or broken parts, as well as ensuring that the correct type of materials have been used.
Additionally, it is important to inspect the overall quality of the work done. This can involve checking for any signs of poor craftsmanship, such as uneven or shaky repairs. It is also important to test the repaired item or system to ensure that it is functioning properly.
For example, if a repair was done on a vehicle, it would be necessary to test drive it to ensure that all the repairs have been successful. Finally, it is helpful to assess the durability of the repair and make sure that it will last. This can involve looking at the materials used and considering any potential future problems that may arise.
By performing these final steps, you can have confidence that the repair has been done correctly and can trust that it will last.
Testing the windshield for durability
windshield durability, testing windshield, final steps, windshield strength. In our pursuit of ensuring the utmost safety for our customers, we are always looking for ways to improve the durability of our windshields. As we approach the final steps of testing, we are filled with anticipation and excitement to see the results of our hard work.
We have put our windshields through rigorous tests to ensure their strength and resilience, and now it’s time to see if they meet our stringent standards. It’s like the final stretch of a race, where all the training culminates in a burst of speed and determination. Just as an athlete pushes themselves to their limits, we push our windshields to theirs, subjecting them to extreme temperatures, high-speed impacts, and other harsh conditions.
Will they be able to withstand the forces of nature and the challenges of everyday life? Will they emerge victorious in the face of adversity? These are the questions that drive us as we embark on the final steps of our testing process. Stay tuned as we reveal the results and continue to innovate and improve our windshields for your ultimate protection on the road.
Conclusion
So there you have it, folks. The secret to fixing a cracked windshield without spending a fortune on a replacement. With just a few household items and a little bit of elbow grease, you can have your windshield looking as good as new.
But before we conclude, let’s take a moment to reflect on the ingenuity and resourcefulness required to achieve this feat. Repairing a cracked windshield without replacing it is like improv comedy for your car. It’s about thinking on your feet, using the tools available, and finding creative solutions to life’s little inconveniences.
It demonstrates that sometimes, the solution to a problem is not found in the obvious or the expected, but in the unexpected and unconventional. It teaches us to look beyond the surface, to see the hidden potential in even the most seemingly broken circumstances. So the next time you find yourself faced with a cracked windshield, remember that you have the power to fix it yourself.
Embrace your inner MacGyver, channel your DIY spirit, and let your wit and cleverness guide you to automotive victory. And who knows, maybe one day, you’ll find yourself on the side of the road, helping a fellow driver repair their cracked windshield with nothing more than a roll of tape and a can of hairspray. Because when it comes to automotive problem-solving, there’s no challenge too great and no cracked windshield too stubborn for the determined, resourceful, and witty amongst us.
Happy repairing!”
Benefits of repairing a cracked windshield
windshield repair Your cracked windshield may seem like a minor annoyance, but it’s crucial to get it repaired as soon as possible. Not only does repairing a cracked windshield improve your visibility and safety on the road, but it also offers several other benefits. One of the final steps in the windshield repair process is the application of resin.
This resin is injected into the crack or chip and then cured with UV light. The resin helps to restore the structural integrity of the windshield, preventing further cracking or spreading. It also improves the appearance of the damaged area, making it less noticeable.
By repairing your cracked windshield, you are saving yourself time and money in the long run. If you neglect to repair a small crack, it has the potential to spread and become a much larger problem. This can result in the need for a complete windshield replacement, which is not only more expensive but also more time-consuming.
Additionally, repairing a cracked windshield is more environmentally friendly than replacing it. When you opt for a repair, you are keeping the damaged windshield out of the landfill, reducing waste. So, don’t delay.
Take action and get your cracked windshield repaired for improved safety, appearance, and environmental impact.
When to seek professional help
When it comes to seeking professional help, it’s important to take the final steps to ensure you’re making the right decision. One key factor to consider is your own mental state. If you’re finding it difficult to cope with everyday tasks, experiencing intense emotions, or having trouble sleeping, it may be a sign that professional help is needed.
Additionally, if you’ve tried self-help techniques or sought support from friends and family but haven’t seen any improvement, it might be time to reach out to a professional. Remember, seeking help doesn’t mean you’re weak or incapable of handling your problems on your own. In fact, seeking professional help shows strength and a willingness to prioritize your mental health.
So, don’t hesitate to take the final steps and reach out for the support you need. You deserve to live a happy and fulfilling life.
FAQs
Can a cracked windshield be repaired without replacing it?
Yes, it is possible to repair a cracked windshield without replacing it. There are professional windshield repair services available that can fix small cracks and chips using specialized techniques and materials.
How long does it take to repair a cracked windshield?
The time it takes to repair a cracked windshield can vary depending on the size and severity of the crack. In general, most repairs can be completed within 30-60 minutes.
Is windshield repair a permanent solution?
While windshield repair can successfully fix small cracks and chips, it is important to note that it is not always a permanent solution. Over time, the repaired area may become more visible or the crack may spread, requiring a replacement.
What is the cost of repairing a cracked windshield?
The cost of repairing a cracked windshield can vary depending on various factors such as the size of the crack, the location of the crack, and the service provider. On average, windshield repair costs range from $50 to $150.
Can I drive with a cracked windshield?
It is generally not recommended to drive with a cracked windshield, especially if the crack obstructs your view or compromises the structural integrity of the glass. It is important to get the crack repaired or replaced as soon as possible.
Will insurance cover the cost of repairing a cracked windshield?
Many insurance policies provide coverage for windshield repairs, either fully or partially. It is recommended to contact your insurance provider to understand your specific coverage and any deductible that may apply.
Are there any DIY methods to repair a cracked windshield?
While there are various DIY kits available in the market for windshield repair, it is generally advised to seek professional help for a proper and long-lasting repair. DIY methods may not yield the same results and could potentially worsen the crack.