
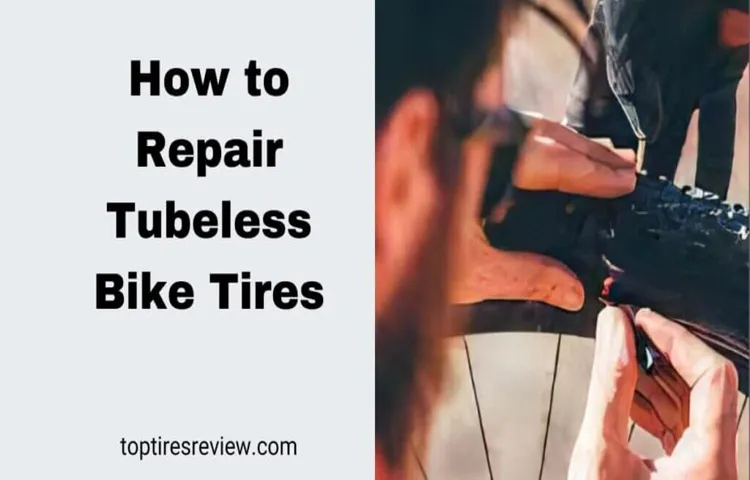
Have you ever been on a peaceful bike ride, only for it to be abruptly interrupted by a flat tire? If you’re a frequent cyclist, you know this is an all-too-common problem. But don’t worry, there’s a solution: tubeless tires. Not only do they reduce the chance of flats, but they also allow for better traction and a smoother ride.
However, just like with traditional tires, tubeless tires can still suffer punctures or damage. In this blog post, we’ll explore how to repair a tubeless bike tire so you can get back on the road in no time.
Table of Contents
Tools Needed
If you’re looking to repair a tubeless bike tire, there are a few tools you’ll need. First and foremost, you’ll need a tire plug kit, which typically consists of a set of plugs and an insertion tool. This will allow you to insert a plug into the puncture to seal it from the inside.
You may also want to have a pair of tire levers on hand to help remove the tire from the rim if necessary. Additionally, a small pump or CO2 inflator can be helpful for re-inflating the tire once the repair has been made. Finally, it’s always a good idea to have a tire sealant in your repair kit.
This can be used preventatively to seal small punctures before they become bigger problems. With these tools in hand, you’ll be ready to tackle any puncture that comes your way and get back on the road in no time.
– Tire levers
When embarking on a bike ride, it’s crucial to ensure you have the right tools in case of emergencies. One of the essential tools to bring with you is a set of tire levers. These small, handheld tools have a curve at one end, allowing you to loosen the tire from the rim without damaging the wheel.
They are incredibly useful for fixing flats or changing tires during bike rides. Even if you’re not a seasoned cyclist, tire levers are easy to use and can save you a lot of time and frustration if you’re stuck with a flat in the middle of nowhere. So, make sure you have a set of tire levers with you the next time you go for a ride.
You never know when you’ll need them!
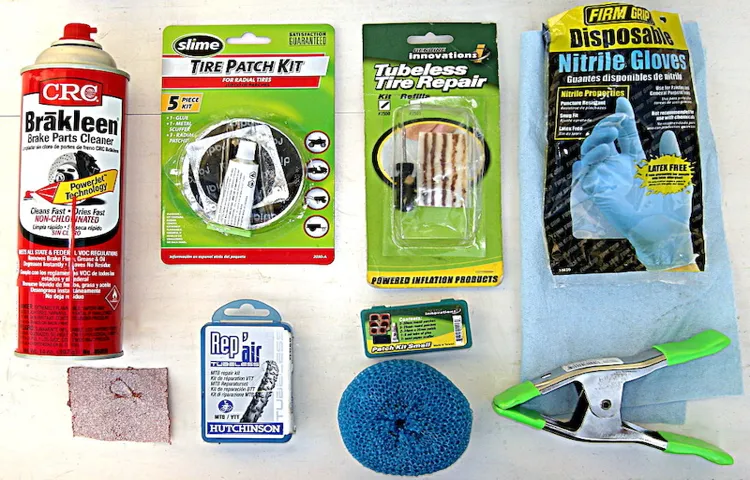
– Tubeless sealant
Tubeless sealant is a must-have for anyone who wants to go tubeless on their bike. It seals punctures on the go, keeps your tires running smoother, and adds an extra layer of protection to your bike. But what tools do you need to have on hand to use tubeless sealant? Firstly, you’ll need a valve core removal tool to remove your valve core and inject the sealant into your tire.
You’ll also need tire levers to remove the tire from the rim, sealant injector, and tire pump to inflate your tire. Most importantly, you need gloves to protect your hands from the sealant. Some bike shops offer a tubeless conversion kit, which includes all the necessary tools for going tubeless, but you can also purchase them separately.
By having these tools on hand, you’ll be prepared to handle any tubeless sealant needs you might encounter while out on your bike.
– Valve core remover
When it comes to maintaining your bike, having the right tools is essential. One such tool that every bike owner should have in their kit is a valve core remover. This simple yet effective tool is used to remove the valve core from the valve stem, making it easy to add or remove air from your bike’s tires.
Without a valve core remover, you risk damaging the valve stem or even the tire itself when trying to add or remove air. Investing in a valve core remover can save you both time and money in the long run, as it will prevent potential damage to your bike and ensure that your tires are properly inflated to improve your overall riding experience. So don’t neglect this important tool when maintaining your bike, and make sure to add a valve core remover to your kit today.
Locating the Leak
If you’re experiencing a flat tire on your tubeless bike, the first step is to locate the source of the leak. One common way to do this is by using a combination of water and soap. Mix the two together in a spray bottle and spray it onto the tire while rotating the wheel.
If there’s a leak, bubbles will form where the air is escaping. Once you’ve identified the location of the leak, you need to assess the severity of the damage. If it’s a small puncture, you can usually use a tubeless repair kit to patch the hole.
These kits usually contain a special plug that you insert into the hole. Make sure to push it in firmly and then trim the excess material. However, if the hole is too large or the damage is too severe, you may need to replace the tire altogether.
Always carry a repair kit with you on your rides, and don’t forget to refresh your sealant when necessary to prevent future flat tires! Overall, learning how to repair a tubeless bike tire can save you time, money, and a lot of hassle on your next ride.
– Remove the tire from the wheel
To locate a leak in your tire, the first thing you need to do is remove the tire from the wheel. This may seem daunting, but it is relatively easy to do with the right tools. You will need a tire lever, pliers, and a valve stem tool.
Use the tire lever to pry the tire away from the rim, starting on one side and working your way around until the tire is completely off. Then, use the pliers to remove the valve stem and let the air out. Once the tire is deflated, you can inspect it for any punctures or cracks.
You can also try submerging the tire in water to see if any bubbles form, indicating where the leak is coming from. This can be a helpful trick if the puncture is not immediately visible. Remember to always wear gloves when handling a tire, as they can be sharp and cause injury.
By locating the leak, you can determine the best course of action for repairing or replacing the tire.
– Check for punctures or damage to the tire itself
When you notice that your tire is low on air, the first thing to do is to locate the leak and address it. One simple method is to fill the tire with air and listen for the hissing sound that indicates where air is escaping. Another option is to mix soapy water and apply it to the tire, looking for bubbles that signify the leak’s location.
Once you locate the leak, you should identify its cause, which could be a result of several factors. Some possible culprits include damaged valve stems, ripped tire sidewalls, or nails or screws that have punctured the tire. Check for punctures or damage to the tire itself and remove the offending object.
In worst-case scenarios, the tire may need to be replaced entirely. If the tire is repairable, you can use a patch kit or take it to a professional mechanic. Remember, even the smallest leak can lead to serious problems, so it’s essential to address the issue as soon as possible.
Keep a spare tire, a tire pressure gauge, and an air pump on hand, so you can be prepared for any potential issues.
– Check the valve to ensure it is not the source of the leak
When you suspect a leak in your plumbing system, the first thing you should do is locate it. This can be a bit challenging as the source of the leak may not always be apparent. One effective way of locating a leak is to check the valve to ensure it is not the source of the problem.
If the valve is faulty or damaged, it can cause leaks and dripping. In such cases, you need to replace the valve. However, if the valve is not the source of the problem, you need to conduct a thorough inspection of your pipes.
Look for cracks, dents, or any other sign of damage. You can also turn off all appliances that use water and check your water meter. If it’s still running, you have a leak somewhere.
Remember, timely detection of leaks can save you a lot of money in repairs and prevent water damage.
Sealing the Leak
If you’re an avid cyclist, knowing how to repair a tubeless bike tire is an essential skill to have. The good news is that it’s not as complicated as it may seem. First, identify the source of the leak by spinning the tire and listening for the hissing sound.
Once you locate the puncture, remove any foreign objects from the tire, such as thorns or glass shards. Next, use a tire sealant, which can be injected through the valve stem or applied directly to the puncture. The sealant will fill any holes or gaps in the tire and create a protective coating to prevent future leaks.
The final step is to reinflate the tire to the recommended pressure and spin the wheel to distribute the sealant evenly. With these simple steps, you can quickly and easily repair a tubeless bike tire and get back on the road in no time.
– Add tubeless sealant to the tire through the valve stem or puncture hole
If you’ve noticed a puncture or leak in your tubeless tire, don’t worry, sealing it is easier than you think. The first step is to remove the wheel from the bike and find the puncture. This can be done by submerging the wheel into a bucket of water and looking for bubbles.
Once you’ve found the leak, clean the area thoroughly and let it dry completely. Then, add tubeless sealant to the tire, either through the valve stem or puncture hole. The sealant will coat the inside of the tire and fill any small punctures or leaks, effectively sealing them.
It’s important not to overinflate the tire after sealing as this can cause the sealant to break down. Remember to regularly check the tire to ensure it’s still holding air and top up the sealant as needed. Sealing a tubeless tire doesn’t need to be a daunting task, and with some sealant and a little know-how, you can be back on your bike with minimal downtime.
– Reinstall the tire onto the wheel
After locating the hole in your tire, it’s time to seal the leak. One effective method is to use a tire repair kit. First, rough up the area around the hole with the provided rasp tool.
Then, insert the reaming tool to clean the hole and make it slightly larger. Take a plug from the kit and thread it through the eye of the insertion tool. Coat the plug with rubber cement and insert it into the hole until only a small amount is visible.
Use the pliers to pull the tool out while holding the plug in place. Trim any excess material and inflate the tire to the proper pressure. After sealing the leak, it is essential to reinstall the tire onto the wheel correctly.
A properly sealed tire can be the difference between a smooth and confident driving experience and a dangerous blowout on the side of the road. So, make sure to use a tire repair kit properly, and always double-check to ensure that the tire is securely fastened onto the wheel.
– Inflate the tire to the recommended pressure
If you’ve noticed that your tire is losing air, you may have a leak that needs to be sealed before you can inflate the tire to the recommended pressure. One quick and easy fix is to use a tire sealant, which can be purchased at most automotive stores. First, remove the valve cap and attach the sealant canister to the valve stem.
Press the button on the canister to release the sealant into the tire. Then, reattach the valve cap and inflate the tire to the recommended pressure. The sealant will fill any punctures or leaks and allow you to safely drive on the tire until you can have it replaced or repaired.
It’s important to note that sealant is not a permanent solution and should not be used if the tire has a large or permanent puncture. Always check your tire warranty and manufacturer guidelines before using a sealant.
Preventing Future Leaks
If you want to prevent future leaks in your tubeless bike tire, you’ve come to the right place! The first step to avoiding leaks is to choose the right tire sealant. Opting for a high-quality sealant can significantly decrease the likelihood of punctures and leaks. Another crucial step is to keep your tires appropriately inflated, as under-inflated tires are more susceptible to damage and leaks.
Additionally, it’s essential to regularly inspect your tires to check for signs of wear and tear. If you spot any issues, address them immediately before they lead to a leak. Finally, be mindful of the terrain you’re riding on and make sure your tires are suitable for the environment.
By taking these preventative measures, you can significantly reduce the chances of experiencing a leak in the future. And in the event that a leak does occur, follow our guide on how to repair a tubeless bike tire using readily-available tools and a little bit of know-how.
– Regularly check tire pressure
To prevent future leaks, it’s crucial to regularly check your tire pressure. Keeping the proper air pressure in your tires not only ensures a smoother ride but also helps prevent potential leaks and punctures. Plus, it can improve your vehicle’s fuel efficiency and extend the life of your tires.
Checking your tire pressure is easy and can be done with a handheld pressure gauge or at a gas station with an air pump. Simply locate your vehicle’s recommended tire pressure, usually found on a sticker inside the driver’s door or in your owner’s manual, and ensure each tire matches that number. It’s important to check your tire pressure at least once a month, especially during temperature changes, as cold weather can cause tire pressure to drop.
By making tire pressure checks a routine part of your car maintenance, you can avoid future leaks and keep your vehicle running smoothly.
– Replace damaged tire
If you want to prevent future tire leaks, the best way is to make sure you replace any damaged tires as soon as possible. When a tire gets damaged, whether it’s from a puncture or sidewall crack, it can weaken the entire structure of the tire. This can lead to slow leaks that will eventually cause you to lose pressure and, ultimately, result in a flat tire.
Even if the tire still seems to hold air, it’s best to replace it sooner rather than later to avoid any potential safety issues. A brand new tire is more resistant to damage and will be less likely to experience leaks. So, if you notice any damage to your tire, it’s important to get it replaced promptly to prevent any future leaks.
– Refresh sealant every few months
To prevent future leaks, it’s essential to refresh sealant every few months. Sealant is a thin layer of material applied to surfaces to prevent leakage. Over time, sealant can deteriorate, crack, or become damaged due to environmental factors, such as sun exposure or extreme weather conditions.
When sealant is damaged, it can no longer provide the necessary protection against leaks. Refreshing sealant every few months ensures that it remains in good condition. This involves applying a new layer of sealant to the surface and allowing it to dry completely.
It’s a quick and easy process that can save you from costly repairs in the long run. Remember, prevention is always better than cure.
Conclusion
In conclusion, repairing a tubeless bike tire is a piece of cake with the right tools and knowledge. Remember to always inspect your tire for damage, remove any debris, and apply sealant before inflating. Don’t forget to practice safety precautions such as wearing gloves and eye protection.
With the right mindset and a little practice, you’ll be back on the road in no time. When it comes to tubeless bike tire repair, don’t let the fear deflate your ambition. Keep your tires inflated, your spirits high, and pedal on!”
FAQs
What is a tubeless bike tire?
A tubeless bike tire is a type of tire that does not require an inner tube for inflation.
How do I know if my bike tire is tubeless?
The easiest way to tell if your bike tire is tubeless is to look for a sealant valve, which is typically located near the rim of the tire.
How does a tubeless bike tire get punctured?
Tubeless bike tires can be punctured by sharp objects such as nails or glass, just like traditional tires.
Can I repair a tubeless bike tire myself?
Yes, you can repair a tubeless bike tire yourself with a tire plug kit and some sealant. However, it is important to follow the instructions carefully and to replace the tire as soon as possible.
How long does it take to repair a tubeless bike tire?
Repairing a tubeless bike tire can take anywhere from 10 minutes to an hour, depending on the severity of the puncture and your level of experience.
What should I do if I can’t repair my tubeless bike tire?
If you are unable to repair your tubeless bike tire, you may need to replace it. Consult a bike mechanic or take your bike to a local shop for assistance.
How can I prevent my tubeless bike tire from getting punctured?
To prevent punctures, make sure to keep your tires properly inflated, avoid riding over sharp objects, and consider using tire liners or thicker tires for added protection.