
Hey there! Have you ever wondered how the windshield wipers on your car work? Well, it all comes down to a crucial component called the windshield linkage. This little mechanism is responsible for connecting the wiper arms to the motor, allowing them to move back and forth across your windshield. Think of the windshield linkage as the conductor of an orchestra, directing the wiper arms in perfect harmony.
Without it, your wipers would be nothing more than limp noodles, unable to effectively clear away rain, snow, or debris. To better understand the importance of the windshield linkage, think about the last time you drove in a heavy rainstorm. Remember how the wiper blades effortlessly swept away the raindrops, keeping your windshield clear and your vision unobstructed? That was all thanks to the smooth operation of the windshield linkage.
In simpler terms, the windshield linkage is like a bridge that connects the wiper motor to the wiper arms. When you activate the wipers, the motor sends power through the linkage, causing the wiper arms to move in a synchronized motion across your windshield. This ensures that every inch of glass is efficiently cleared, no matter the weather conditions.
Now that you have a basic understanding of the windshield linkage, you can appreciate its importance in keeping you safe on the road. So the next time you turn on your wipers, take a moment to give a nod of appreciation to the unsung hero behind the scenes – the windshield linkage.
Table of Contents
- 1 What is the windshield linkage?
- 2 Why does the windshield linkage need repair?
- 3 Common signs of a damaged windshield linkage
- 4 Tools needed for the repair
- 5 Supplies needed for the repair
- 6 Preparing the car for the repair
- 7 Removing the windshield wiper blades and arms
- 8 Disconnecting the electrical connections
- 9 Removing the windshield linkage
- 10 Inspecting the linkage for any signs of damage
- 11 Cleaning the linkage to ensure smooth operation
- 12 Positioning the new linkage
- 13 Attaching the electrical connections
- 14 Installing the windshield wiper blades and arms
- 15 Testing the functionality of the new linkage
- 16 Checking for any adjustments or fine-tuning needed
- 17 Benefits of repairing the windshield linkage
- 18 Routine maintenance tips to prevent future issues
- 19 Conclusion
- 20 FAQs
What is the windshield linkage?
Have you ever wondered what the windshield linkage is? Well, let’s break it down for you. The windshield linkage is a vital component of your Honda Element’s windshield wiper system. It is responsible for connecting the wiper motor to the wiper arms, allowing them to move back and forth across the windshield.
Without a functioning windshield linkage, your wipers won’t be able to clear away rain, snow, or debris effectively, compromising your visibility while driving. If you’re experiencing issues with your Honda Element’s windshield wipers, such as the wipers not moving or getting stuck in one position, it may be a sign of a faulty windshield linkage. Fortunately, repairing the windshield linkage is a relatively straightforward process that can be done with some basic tools and a bit of patience.
By following a few steps, you can get your wipers back in working condition and ensure a clear view of the road ahead.
Why does the windshield linkage need repair?
If you’re a Honda Element owner, there’s a good chance you’ve encountered issues with your windshield linkage at some point. This mechanism is responsible for connecting your wipers to the motor, allowing them to sweep back and forth across your windshield. Over time, the linkage can become worn or damaged, causing your wipers to malfunction or stop working altogether.
There are several reasons why the windshield linkage may need repair. One common issue is rust or corrosion, which can cause the linkage to become stuck or seize up. Another possibility is damage from an accident or collision, which can bend or break the linkage components.
Additionally, the linkage may become loose or detached if the connecting bolts or screws become loose over time. Whatever the cause of the problem, it’s important to address issues with your windshield linkage promptly to ensure clear visibility and safe driving conditions.
Common signs of a damaged windshield linkage
If you own a Honda Element and are experiencing issues with your windshield wipers not working properly, it could be a sign of a damaged windshield linkage. The windshield linkage is responsible for connecting the wiper motor to the wiper arms, allowing them to move back and forth across the windshield. When this linkage becomes damaged or worn out, it can cause a variety of issues, including the wipers not moving at all or only moving in one direction.
Additionally, you may notice unusual noises coming from the wiper motor or the wipers becoming stuck in a certain position. If you suspect that your windshield linkage is damaged, it’s important to address the issue promptly to ensure the safety of yourself and others on the road. Taking your Honda Element to a reputable auto repair shop or contacting a qualified technician is recommended to properly diagnose and repair the problem.
By addressing the issue promptly, you can restore the functionality of your windshield wipers and ensure clear visibility on the road.
Hey there, DIY enthusiasts! Are you ready to embark on a new project? Well, step right up because today we’re going to dive into the exciting world of gathering the necessary tools and supplies. Whether you’re a seasoned DIY-er or just starting out, having the right tools and supplies is essential to any successful project. It’s like having all the ingredients before baking a cake – without them, you’ll end up with a half-baked mess! So, let’s roll up our sleeves and get started on this first crucial step.
Gather your tools, gather your supplies, and let’s create something amazing together!
Tools needed for the repair
When it comes to repairing the windshield linkage on your Honda Element, there are a few tools that you will need to have on hand. First and foremost, you will need a good set of screwdrivers, both Phillips and flathead, as these will be used to remove screws and fasteners. Additionally, a ratchet set with various sizes of sockets will be necessary for loosening and tightening bolts.
You will also want to have a pair of pliers handy for any small tasks that may arise during the repair process. Finally, a can of lubricant spray will be essential for ensuring smooth movement of the windshield wipers once the linkage is repaired. By having these tools readily available, you can tackle the repair with confidence and get your Honda Element back on the road in no time.
Supplies needed for the repair
If you’ve noticed that the windshield wipers on your Honda Element aren’t working properly, the issue may lie with the windshield linkage. Fortunately, repairing the windshield linkage is a relatively straightforward process that you can do yourself. Before you get started, you’ll need a few supplies.
First, you’ll need a replacement windshield linkage. You can usually find these at an auto parts store or online. You’ll also need a set of basic hand tools, such as a screwdriver and pliers, to remove the old linkage and install the new one.
Additionally, it’s a good idea to have some lubricant on hand to ensure smooth operation of the new linkage. With these supplies in hand, you’ll be ready to tackle the repair and get your Honda Element’s windshield wipers working like new again.
So, you’ve discovered that your windshield linkage is damaged and you need to remove it. Don’t worry, we’ve got you covered with step 2 of our windshield replacement guide! In this step, we’ll walk you through the process of removing the damaged windshield linkage, so you can get your windshield replaced and your car back on the road in no time. Having a damaged windshield linkage can be quite a nuisance.
It can make it difficult to properly operate your windshield wipers, leading to reduced visibility and potential safety hazards. That’s why it’s crucial to address this issue as soon as possible. But how do you go about removing the damaged windshield linkage? Well, it’s simpler than you might think.
Just like solving a puzzle, this process requires careful precision and a bit of patience. However, with our step-by-step instructions, you’ll be able to navigate through the removal process easily. Imagine your damaged windshield linkage as a tangled mess of wires or a jigsaw puzzle with missing pieces.
By following the right steps and using the proper tools, you’ll be able to unravel the mess and put everything back into place. So, without further ado, let’s dive into step 2: removing the damaged windshield linkage. And remember, if you ever feel overwhelmed or unsure, don’t hesitate to reach out to a professional for assistance.
After all, their expertise can make all the difference in ensuring a successful windshield replacement process.
Preparing the car for the repair
If you’re having trouble with your Honda Element’s windshield linkage and need to repair it, there are a few steps you should take to prepare the car beforehand. First, make sure you have all the necessary tools and materials for the repair. This may include a wrench, screwdriver, replacement parts, and any lubricants or cleaners that may be needed.
Next, park the car in a safe and well-lit area where you can easily access the windshield. It’s important to have plenty of space to work and to have good lighting so you can see what you’re doing. Once the car is parked, carefully remove any debris or obstructions from the windshield area.
This could include leaves, dirt, or other objects that may have accumulated over time. By clearing the windshield area, you’ll have a clean and clear workspace to perform the repair. Finally, it’s always a good idea to refer to the car’s manual or consult with a professional before attempting any repairs.
They can provide specific instructions for your Honda Element and help ensure that the repair is done correctly.
Removing the windshield wiper blades and arms
Are you tired of your Honda Element windshield wipers not working properly? One common issue that may arise is a faulty windshield wiper linkage. If your wipers are not moving smoothly or are skipping across the windshield, it may be time to repair or replace the linkage. A simple and cost-effective fix for this problem is to remove the windshield wiper blades and arms.
This allows for better access to the linkage and makes it easier to inspect and repair. To remove the wiper blades and arms, start by pulling the wiper blades away from the windshield, making sure to lift the wiper arm off the windshield. Then, locate the small tab at the bottom of the wiper arm and press it down to release the blade.
Once released, gently pull the wiper blade away from the arm. To remove the wiper arm, use a small socket wrench or pliers to loosen the nut at the base of the arm. Once the nut is loosened, gently wiggle and pull the wiper arm until it lifts off the linkage spindle.
With the blades and arms removed, you can now inspect the windshield wiper linkage for any damage or wear. If necessary, you can then proceed to repair or replace the linkage to ensure your wipers are functioning properly.
Disconnecting the electrical connections
If you’re experiencing issues with your Honda Element’s windshield linkage, it may be necessary to repair or replace it. One of the first steps in this process is disconnecting the electrical connections. Before attempting any repairs, it’s important to ensure that the vehicle’s battery is disconnected to prevent any electrical shocks or damage.
Once the battery is disconnected, locate the electrical connections near the windshield wiper motor. These connections are usually secured with a bolt or clip. Carefully remove the bolt or clip, and gently pull the electrical connections apart.
It’s important to handle the connections with care to avoid any damage. By disconnecting the electrical connections, you can safely proceed with repairing the windshield linkage on your Honda Element.
Removing the windshield linkage
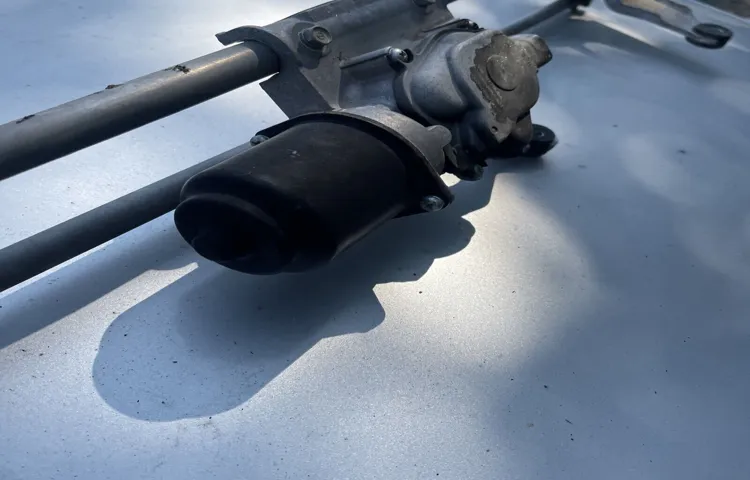
If you are experiencing issues with the windshield wipers on your Honda Element, it may be due to a problem with the windshield linkage. The windshield linkage is responsible for connecting the wiper motor to the wiper arms, allowing them to move back and forth across the windshield. Over time, the linkage can become worn or damaged, causing the wipers to malfunction or stop working altogether.
In order to repair the windshield linkage, you will first need to remove it from the vehicle. This can be done by disconnecting the wiper motor and removing any bolts or screws that are holding the linkage in place. Once the linkage is removed, you can inspect it for any signs of damage or wear.
If necessary, you can then replace the linkage with a new one to restore the functionality of your wipers.
Hey there! So, you’ve made it to Step 3 of our windshield repair guide – inspecting and cleaning the windshield linkage. This step is crucial in ensuring that your car’s windshield operates smoothly and efficiently. Just like a well-oiled machine, your windshield linkage needs regular maintenance to keep everything running smoothly.
Picture this: you’re driving down the road, enjoying a beautiful day, when suddenly, you notice that your windshield wipers are struggling to clear away the rain. Not only is this annoying, but it can also be dangerous, as it affects your visibility on the road. That’s where inspecting and cleaning the windshield linkage comes in.
Think of your windshield linkage as the backbone of your wiper system. It connects the wiper motor to the wiper arms, allowing them to move back and forth across the windshield. Over time, dirt, grime, and debris can build up in this linkage, causing it to become stiff and inefficient.
So, how do you go about inspecting and cleaning the windshield linkage? First, you’ll want to visually inspect the linkage for any signs of damage or wear. Look for loose or broken connections, as well as any signs of rust or corrosion. If you notice any issues, it’s best to address them as soon as possible to prevent further damage.
Next, it’s time to clean the linkage. You can start by using a soft brush or cloth to remove any loose dirt and debris. Then, grab a can of compressed air and blow out any remaining particles from those hard-to-reach nooks and crannies.
Finally, lubricate the linkage with a silicone-based lubricant to ensure smooth movement. By taking the time to inspect and clean your windshield linkage, you’ll not only prolong the life of your wiper system but also ensure that your windshield wipers work as they should, even in the harshest weather conditions. Plus, you’ll avoid any pesky wiper malfunctions that can be a major hassle when you’re out on the road.
Inspecting the linkage for any signs of damage
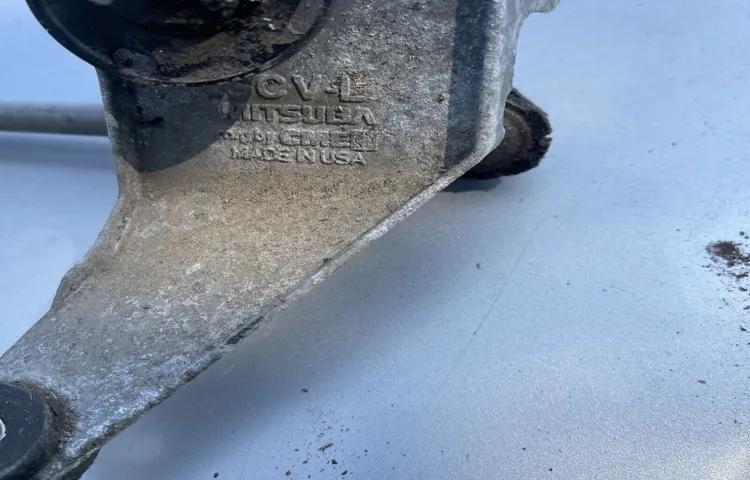
If you are experiencing issues with your Honda Element windshield linkage, it is important to inspect it for any signs of damage. The windshield linkage is responsible for connecting the wiper motor to the wiper arms, allowing them to move back and forth across the windshield. Over time, the linkage can become worn or damaged, leading to problems with the wipers.
To begin repairing the windshield linkage, start by inspecting it thoroughly. Look for any signs of rust, corrosion, or bending. If the linkage appears to be damaged, it may need to be replaced.
If it is just a simple issue, such as a loose or disconnected arm, it can sometimes be easily fixed by tightening or reconnecting the arm. If the linkage needs to be replaced, it is important to purchase a genuine Honda replacement part. This will ensure that the new linkage is of high quality and will fit properly on your Element.
Once you have the replacement linkage, you will need to remove the old one. This can be done by disconnecting the wiper arms from the linkage and removing any screws or bolts holding the old linkage in place. Carefully remove the old linkage and set it aside.
Next, install the new linkage by following the reverse order of removal. Make sure to tighten all screws or bolts securely, ensuring that the new linkage is firmly in place. Once the new linkage is installed, reconnect the wiper arms and test the wipers to make sure they are working properly.
By inspecting and replacing the windshield linkage as needed, you can ensure that your Honda Element’s wipers are working effectively and safely.
Cleaning the linkage to ensure smooth operation
So your Honda Element’s windshield wipers are acting up, and you suspect a problem with the linkage. Don’t worry, it’s a common issue that can be easily fixed. The first step is to locate the windshield wiper motor, which is typically located under the hood near the base of the windshield.
Once you’ve found it, take a closer look at the linkage that connects the motor to the wiper arms. Examine it for any signs of damage or wear. If you notice any bent or broken parts, it’s time to replace them.
However, if the linkage appears to be in good shape, the problem may simply be dirt or debris interfering with its smooth operation. To clean it, disconnect the linkage from the wiper motor and carefully remove any dirt or debris using a brush or compressed air. Be sure to clean all the moving parts thoroughly.
Once everything is clean, reassemble the linkage and test the wipers to make sure they’re working properly. If the problem persists, it may be a sign of a more serious issue and you should consult a professional for further assistance.
Hey there, car enthusiasts! If you’ve been following along with our step-by-step guide on replacing a windshield linkage, then you’re in for a treat today. We’ve finally made it to step 4: installing the new windshield linkage. Now, you might be wondering why this step is so important.
Well, think of it as the backbone of your car’s windshield wipers. Without a properly functioning linkage, your wipers won’t be able to do their job effectively, which can be a major safety hazard, especially during those rainy days. So, let’s dive right in and learn how to get this crucial component in place! Installing a new windshield linkage might sound daunting, but fear not, it’s actually quite a straightforward process.
Just like building a puzzle, all the pieces have to fit together perfectly for it to work smoothly. And that’s exactly what we’re going to do today. First things first, you need to locate the mounting points for the linkage.
These are usually located just below the windshield and are secured with bolts. It’s important to keep track of these bolts, as you’ll need them later to attach the new linkage. Next, remove the old linkage by unscrewing the bolts and gently pulling it out.
It’s like saying goodbye to an old friend, but don’t worry, the new one is ready to step in and take its place. Now comes the fun part – installing the new windshield linkage. Carefully line up the mounting points with the holes on the new linkage and secure them with the bolts you set aside earlier.
Make sure everything is snug, but not too tight, as you don’t want to damage any of the components. Once the new linkage is securely in place, it’s time to give it a test run. Turn on your wipers and watch them glide across the windshield.
Positioning the new linkage
If you’re wondering how to repair the windshield linkage on your Honda Element, you’ve come to the right place. The windshield linkage is an essential component that connects the wiper arms to the wiper motor, allowing the wipers to move back and forth smoothly. Over time, the linkage can become worn or damaged, causing the wipers to malfunction or stop working altogether.
Fear not, though, as repairing the windshield linkage is a relatively straightforward process that can be done at home with a few basic tools. First, you’ll need to remove the wiper arms and the plastic trim panel that covers the linkage. Then, you can inspect the linkage for any signs of damage or wear.
If you notice any broken or corroded parts, you can easily replace them with new ones. Once the new parts are installed, you can reassemble the linkage and test the wipers to ensure they are functioning properly. With a little bit of DIY spirit and the right tools, you can have your windshield linkage repaired and your wipers working like new in no time.
Attaching the electrical connections
When it comes to repairing the windshield linkage on a Honda Element, one crucial step is attaching the electrical connections. This is an important part of the repair process because the electrical connections ensure that the windshield wipers function properly. To attach the electrical connections, you will need to locate the wiring harness and corresponding connectors.
These connectors are usually found near the windshield wiper motor. Once you have located the connectors, simply align them and push them together until they click into place. It’s essential to ensure a secure connection to avoid any electrical issues.
Be sure to test the windshield wiper function after attaching the electrical connections to ensure everything is working correctly. With this easy step, you’ll be one step closer to repairing your Honda Element windshield linkage.
Installing the windshield wiper blades and arms
If you’re having trouble with your Honda Element’s windshield wiper linkage, don’t worry – you’re not alone. It’s a common issue that can be easily fixed with a little bit of know-how and the right tools. One of the first steps in repairing the windshield linkage is to install the windshield wiper blades and arms correctly.
To do this, you’ll need to remove the old blades and arms by loosening the nuts that secure them in place. Then, carefully slide them off the wiper linkage. Once the old blades and arms are removed, it’s time to install the new ones.
Start by sliding the new arms onto the wiper linkage and tighten the nuts to secure them in place. Then, attach the new blades onto the arms, making sure they are aligned correctly. Finally, test the wipers to ensure they are working properly.
By following these steps, you’ll have your Honda Element’s windshield wiper blades and arms installed and ready to go in no time.
Finally, after patiently following the steps of repairing your windshield linkage, you’ve reached the pivotal moment – testing the repairs. It’s time to put your handy work to the ultimate test and see if your windshield now operates smoothly and effortlessly. Imagine the satisfaction of seeing your windshield glide up and down effortlessly, as if it were floating on a gentle breeze.
But before we dive into the testing process, let’s recap the journey so far. From diagnosing the issue with your malfunctioning windshield, disassembling the wiper arm, replacing the damaged linkage, to reassembling the parts, you’ve come a long way. Now, it’s time to take the final step and see if your efforts have paid off.
So, grab your tools and let’s dive into the exciting world of testing the repaired windshield linkage.
Testing the functionality of the new linkage
If you own a Honda Element and are experiencing problems with your windshield wiper linkage, you’re not alone. The windshield wiper linkage is a crucial component that connects the wiper arms to the wiper motor. When this linkage becomes damaged or worn, it can lead to erratic movement or even complete failure of the wiper blades.
Repairing the windshield wiper linkage on a Honda Element can be a straightforward process if you have the right tools and a little know-how. First, you’ll need to remove the wiper arms by gently prying off the plastic caps at the base of the arms and then removing the nuts that hold them in place. Once the arms are removed, you can access the wiper linkage assembly underneath.
Check for any signs of damage, such as bent or broken rods or worn-out bushings. If you notice any damage, you’ll need to replace the faulty components. You can find replacement linkage parts for your Honda Element at your local auto parts store or online.
It’s essential to ensure that you purchase the correct parts specifically designed for your make and model to guarantee a proper fit. When it comes time to install the new linkage, start by attaching the rods to the wiper motor using the appropriate fasteners. Be sure to tighten them securely to prevent any future issues.
Next, connect the wiper rods to the wiper arms, ensuring that they are aligned correctly. You may need to adjust the positions of the arms to ensure smooth and consistent movement. Once everything is securely in place, it’s time to test the functionality of the new linkage.
Turn on your Honda Element and activate the windshield wipers in different settings to see if they move smoothly and effectively. If everything is working correctly, you’re all set. Repairing the windshield wiper linkage on a Honda Element is a relatively simple DIY task that can save you time and money.
Checking for any adjustments or fine-tuning needed
Have you ever experienced a problem with your Honda Element windshield linkage? If so, don’t worry because there are solutions available to help you repair it. One common issue with the windshield linkage is that it may become loose or misaligned over time, causing your windshield wipers to not function properly. To fix this, you can start by inspecting the linkage for any visible damage or looseness.
If you notice any problems, you can try tightening the screws or bolts that hold the linkage in place. Additionally, you may need to adjust the position of the linkage to ensure that it is properly aligned with the wiper motor. If these adjustments don’t solve the issue, you may need to replace the entire windshield linkage assembly.
Fortunately, this is a relatively simple fix that can be done using basic hand tools. By following these steps, you can quickly and easily repair your Honda Element windshield linkage and get your wipers back in working order.
Have you ever stopped to appreciate the small yet significant parts of your car that contribute to a smooth and enjoyable driving experience? One such part is the windshield linkage – a seemingly inconspicuous component that plays a crucial role in the functioning of your vehicle’s windshield wipers. Without a properly functioning windshield linkage, navigating through rainy or snowy weather would become quite a challenge. In this blog post, we will delve into the importance of a well-maintained windshield linkage, the signs of a malfunctioning one, and why it’s essential to address any issues promptly.
So buckle up and join us on this journey to discover the joy of a properly functioning windshield linkage.
Benefits of repairing the windshield linkage
Are you experiencing issues with your Honda Element’s windshield wipers? The culprit might be a faulty windshield linkage. The windshield linkage is responsible for connecting the wiper motor to the wiper arms, allowing them to move back and forth across the windshield. When this linkage starts to wear out or become damaged, it can lead to problems, such as wipers not moving at all or only moving in one direction.
To repair the windshield linkage on your Honda Element, you will need to carefully remove the wiper assembly and inspect the linkage for any signs of damage. If there are any broken or worn out parts, they will need to be replaced. Repairing the windshield linkage can have several benefits, including improved visibility during rain or snowstorms, ensuring proper functioning of the wiper system, and avoiding potential damage to the windshield.
So, if you’re experiencing issues with your Honda Element’s windshield wipers, consider repairing the windshield linkage to keep your wipers working effectively and ensure a clear view of the road ahead.
Routine maintenance tips to prevent future issues
If you own a Honda Element, you may have experienced issues with the windshield linkage. When this component becomes damaged or worn out, it can cause problems with the movement and functionality of your windshield wipers. However, there are steps you can take to repair the windshield linkage and prevent future issues.
One important routine maintenance tip is to regularly inspect the linkage for any signs of wear or damage. This can include looking for loose or missing bolts, rusty or bent arms, or any other visible signs of wear. By catching these issues early, you can address them before they lead to more serious problems.
Another tip is to keep the linkage properly lubricated. This will help to prevent rust and ensure smooth movement of the wipers. Using a silicone-based lubricant is a good choice, as it will not attract dirt or debris.
Additionally, always make sure the windshield wipers are properly aligned and tightened. This will help to prevent undue strain on the windshield linkage and extend its lifespan. By following these routine maintenance tips, you can keep your Honda Element’s windshield linkage in good condition and avoid costly repairs down the road.
Conclusion
In conclusion, repairing a Honda Element windshield linkage is like a delicate dance between your vehicle and the laws of physics. It requires a keen eye, a steady hand, and just a touch of magic. First, you must gather your tools and prepare yourself mentally for the task ahead.
Like a surgeon preparing for an intricate operation, you must focus your mind and steady your nerves. Once you are primed and ready, it’s time to dive in. Like a detective solving a crime, you must carefully examine the evidence to diagnose the problem.
Is it a broken linkage arm or a loose bolt? Is it a villainous windstorm or just bad luck? Only by unraveling the mystery can you begin to restore order to your windshield. With your diagnosis in hand, it’s time to get to work. Like a skilled mechanic, you must carefully remove the old, damaged component and replace it with a shiny new one.
But be warned, my friend – this task is not for the faint of heart. It requires patience, precision, and the ability to contort yourself into seemingly impossible positions. But fear not, for with every twist and turn of the wrench, you are inching closer to victory.
Like a knight in shining armor rescuing a damsel in distress, you are saving your Honda Element from a fate of eternal windshield woe. And finally, after all the sweat and tears have been shed, comes the moment of triumph. With a satisfied grin on your face and a twinkle in your eye, you step back and admire your handiwork.
Your Honda Element’s windshield linkage is restored to its former glory, functioning flawlessly once again. So, my fellow DIYers, take heart in the fact that you have conquered this repair challenge. You have shown the world that you are not afraid to get your hands dirty and tackle the impossible.
FAQs
What are the common causes of windshield linkage damage in a Honda Element?
The common causes of windshield linkage damage in a Honda Element can include wear and tear, corrosion, impact from debris or accidents, and improper maintenance.
How can I diagnose if my Honda Element’s windshield linkage is damaged?
To diagnose if your Honda Element’s windshield linkage is damaged, you should check for any unusual noises when operating the wipers, difficulty in moving the wipers, wipers not returning to their normal position, or visible signs of damage or disconnection.
Can I repair the windshield linkage in my Honda Element by myself?
It is possible to repair the windshield linkage in a Honda Element by yourself if you have the necessary tools and mechanical knowledge. However, it is recommended to consult with a professional mechanic for accurate diagnosis and proper repairs.
Is it better to repair or replace the windshield linkage in a Honda Element?
Whether to repair or replace the windshield linkage in a Honda Element depends on the extent of the damage and the cost-effectiveness. In some cases, a repair might be sufficient, while in others, a replacement may be necessary to ensure proper functionality and long-term durability.
Can I prevent windshield linkage damage in my Honda Element?
While it is not entirely preventable, there are steps you can take to minimize the risk of windshield linkage damage in your Honda Element. These include regular maintenance, avoiding driving in extreme weather conditions, clearing debris from the wiper blades and linkage, and avoiding excessive force when using the wiper system.
How much does it cost to repair the windshield linkage in a Honda Element?
The cost of repairing the windshield linkage in a Honda Element can vary depending on the extent of the damage, the cost of replacement parts, and the labor fees charged by the repair shop. It is recommended to obtain quotes from multiple sources for an accurate estimate.
Can a damaged windshield linkage affect the overall safety of my Honda Element?
Yes, a damaged windshield linkage in a Honda Element can affect the overall safety as it may impair the visibility and effectiveness of the windshield wipers, especially during rainy or snowy conditions. It is essential to address any windshield linkage issues promptly to ensure optimal safety while driving.