
Have you ever been driving down the road, minding your own business, when suddenly you notice that your rear view mirror has fallen off? It’s a frustrating and potentially dangerous situation, as you rely on your mirror to see what’s happening behind you while you’re on the road. But fear not, because we’re here to help you repair your rear view mirror on your windshield! Think of your rear view mirror as the eyes in the back of your head, ensuring your safety and giving you peace of mind while driving. Like any part of your car, it’s susceptible to wear and tear over time.
So, if it has detached from its mount or fallen off completely, it’s essential to fix it promptly. The good news is that repairing a rear view mirror on your windshield isn’t as complicated as it may seem. With a few simple tools and some basic know-how, you can have your mirror back in place and functioning correctly in no time.
In this blog post, we’ll walk you through the step-by-step process of repairing your rear view mirror, so you can get back on the road with confidence. First, you’ll need to assess the damage and identify the root cause of the problem. Is it a simple case of the adhesive giving out, or is there a more significant issue with the mount? Once you’ve determined the cause, you can move on to the next steps: gathering the necessary materials and preparing the area for repair.
Next, we’ll guide you through the process of removing the old adhesive and cleaning the windshield and mirror surfaces. This step is crucial to ensure a strong bond between the mirror and the windshield. We’ll also provide tips on choosing the right adhesive for your specific mirror and windshield combination.
Once you’ve cleaned and prepped the surfaces, it’s time to apply the adhesive and reattach the mirror to the windshield. We’ll walk you through the proper techniques for applying the adhesive and securing the mirror in place. We’ll also discuss the importance of allowing the adhesive to dry completely before putting any pressure on the mirror.
In addition to the step-by-step instructions, we’ll also provide some troubleshooting tips for common issues that may arise during the repair process. Whether it’s a stubborn adhesive residue or a loose mount, we’ll help you overcome any obstacles you may encounter. So, if you’re stuck with a loose or fallen rear view mirror on your windshield, don’t fret! With a little patience and some basic tools, you can repair it yourself and save money in the process.
Table of Contents
Introduction
Are you wondering how to repair a rear view mirror on your windshield? Don’t worry, it’s actually a fairly simple process that you can do yourself. First, you’ll need to remove the old mirror. This can usually be done by loosening a set screw or by prying it off with a flathead screwdriver.
Once the old mirror is removed, you’ll need to clean the windshield where the mirror will be attached. Use rubbing alcohol or glass cleaner to ensure a clean surface. Next, apply a thin layer of adhesive to the back of the new mirror and press it firmly onto the windshield.
Hold it in place for a few minutes to allow the adhesive to bond. Finally, give it a little time to dry before adjusting the mirror to the desired position. And that’s it! You’ve successfully repaired your rear view mirror on your windshield.
Now you can drive with confidence, knowing that you have a clear view of the road behind you.
Importance of a Rear View Mirror
rear view mirror, importance of a rear view mirror, benefits of a rear view mirror Introduction: When you think about driving, what is the first thing that comes to mind? Most likely, it’s the steering wheel, the pedals, or maybe even the open road ahead. But have you ever stopped to think about the importance of your rear view mirror? That small, often overlooked piece of equipment plays a crucial role in keeping you safe on the road. It allows you to see what’s happening behind you, giving you valuable information about the traffic around you and helping you make informed decisions while driving.
In this blog post, we will explore the significance of a rear view mirror and why it should never be underestimated.
Causes of a Damaged Rear View Mirror
damaged rear view mirror, causes of damaged rear view mirror, rear view mirror damage
The Benefits of Repairing a Rear View Mirror
rear view mirror, repair, benefits
Tools and Materials You Will Need
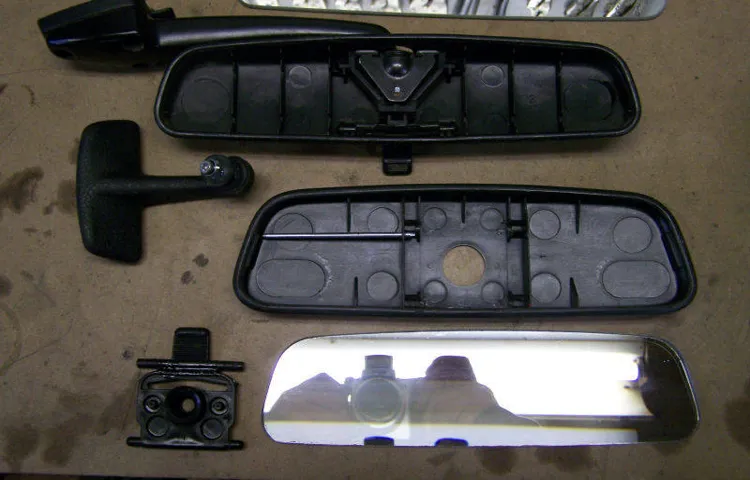
If your rear view mirror has fallen off of your windshield, don’t panic! It’s a common issue that can be easily fixed with just a few tools and materials. To repair your rear view mirror, you will need a replacement mirror adhesive kit, a clean cloth, rubbing alcohol, a razor blade or scraping tool, a piece of sandpaper, and a suction cup (optional). These tools and materials will ensure that you have everything you need to successfully reattach your mirror and restore your view of the road.
With these items in hand, you’ll be able to fix your rear view mirror in no time and get back to driving safely.
List of Necessary Tools
When it comes to tackling a new project, it’s important to have the right tools and materials on hand. Whether you’re a seasoned DIYer or just getting started, having the necessary tools can make all the difference in the success of your project. So, what are the tools and materials you will need? Let’s take a look.
First and foremost, a basic toolkit is essential. This should include a set of screwdrivers (both standard and Phillips head), a hammer, a tape measure, and a set of pliers. These tools will come in handy for a wide range of projects, from hanging pictures to assembling furniture.
Next, you’ll want to have a few specialized tools on hand, depending on the type of project you’re tackling. For example, if you’re planning on doing any electrical work, a wire stripper, voltage tester, and a set of wire cutters are essential. If you’re working with wood, a set of chisels, a hand saw, and a power drill will be your go-to tools.
In addition to tools, it’s important to have the right materials for your project. This can include anything from nails and screws to paint and brushes. Before starting your project, take the time to gather all the materials you will need, as well as any accessories like sandpaper or primer.
Having the right tools and materials will not only make your project easier, but it will also ensure that the end result is something you can be proud of. So, take the time to gather what you need before getting started, and don’t be afraid to invest in quality tools that will last. With the right tools and materials at your disposal, there’s no project too big or too small that you can’t tackle.
List of Materials
List of Materials When embarking on a DIY project, it’s important to have the right tools and materials at hand. Here’s a handy list of the essentials you’ll need to get started: Measuring Tape: This versatile tool will come in handy for measuring and marking out your materials accurately.
Screwdriver Set: A good quality set of screwdrivers in various sizes will be your go-to for assembling and disassembling furniture, installing fixtures, and more.
Hammer: From hanging pictures to pounding in nails, a hammer is a must-have for any DIYer. Hand Saw: Whether you’re cutting through wood or plastic, a hand saw is essential for precise, clean cuts.
Power Drill: A power drill is a game-changer when it comes to drilling holes and driving screws quickly and efficiently.
Level: To ensure that your shelves, pictures, and other installations are straight, a level is essential. Pliers: From pulling out nails to gripping and bending wires, a good set of pliers will come in handy for a wide range of tasks.
Safety Equipment: This includes safety goggles, gloves, and a dust mask to protect yourself while you work.
Step-by-Step Guide
So, you’ve noticed that your rear view mirror on the windshield is broken or loose and you’re wondering how to fix it. Don’t worry, I’ve got you covered! Repairing a rear view mirror on a windshield may seem intimidating, but with a few simple steps, you can have it fixed in no time. First, gather the necessary tools for the job.
You’ll need a replacement mirror, a screwdriver, and some adhesive. Once you have everything ready, it’s time to get started. Start by removing the old mirror.
This can usually be done by loosening a set screw or twisting the mirror base counterclockwise. Be careful not to apply too much force, as you don’t want to damage the windshield. Once the old mirror is removed, clean the area where the mirror was attached.
Use a mild glass cleaner and a clean cloth to remove any dirt or residue. This will ensure a strong bond when you attach the new mirror. Now it’s time to attach the new mirror.
Apply adhesive to the back of the mirror base and press it firmly onto the windshield. Hold it in place for a few minutes to allow the adhesive to set. After the adhesive has dried, you can test the mirror to make sure it is securely attached.
Adjust it to your desired position and make sure it stays in place. If everything looks good, you’re all done! Repairing a rear view mirror on a windshield may seem daunting, but with these easy steps, you can tackle the job with confidence. Now you can hit the road with a fully functional mirror that will keep you safe on your journeys.
Step 1: Assess the Damage
assess the damage, step-by-step guide
Step 2: Remove the Broken Mirror
When it comes to removing a broken mirror, it’s important to proceed with caution to avoid any potential injuries or further damage. In this step-by-step guide, I will walk you through the process of safely removing a broken mirror. The first step is to gather the necessary tools, including thick gloves, safety goggles, and a dust mask.
These will help protect you from any sharp glass fragments or dust particles. Once you’re properly equipped, carefully begin removing any larger broken pieces of the mirror, taking care not to apply too much pressure and risk injuring yourself. It’s important to properly dispose of these larger pieces in a sturdy bag to prevent any potential accidents.
After removing the larger pieces, use masking tape to create a grid pattern over the remaining fragments of the mirror. This will help keep the pieces in place and prevent them from falling and causing further damage. Finally, use a dustpan and brush to gently sweep up the broken mirror pieces, being mindful to avoid any direct contact with the glass.
Once you’ve collected all the broken fragments, dispose of them in a secure container designated for glass waste. With these step-by-step instructions, you can safely and effectively remove a broken mirror. Remember to always prioritize your safety and take the necessary precautions throughout the process.
Step 3: Clean the Windshield Surface
cleaning your windshield, windshield surface, clean and clear windshield, remove dirt and grime, streak-free windshield, sparkling windshield, cleaning solution, microfiber cloth, wiping motions, wipe away any remaining residue, crystal clear view on the road
Step 4: Prepare the New Mirror
new mirror, prepare, step-by-step guide
Step 5: Attach the New Mirror
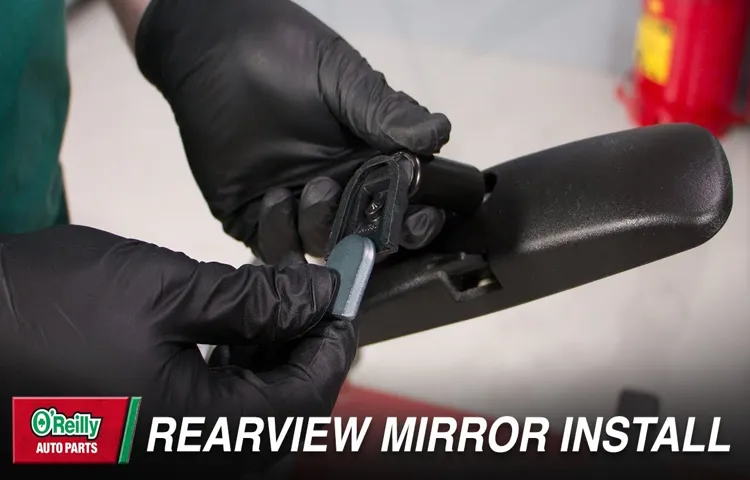
Replacing a mirror on a car can seem like a daunting task, but with the right tools and instructions, it can be done easily. Once the old mirror has been removed, it’s time to attach the new one. Start by placing the mirror onto the base plate and aligning the screw holes.
Once aligned, insert the screws and tighten them firmly. It’s important to make sure the mirror is securely attached to prevent any accidents while driving. After the screws are tightened, give the mirror a gentle tug to ensure it is stable.
If it moves or feels loose, tighten the screws further. Once the mirror is securely attached, double-check that it is in the correct position and adjusts correctly. If everything looks good, you’re done! Your car’s mirror is now replaced and ready for use.
Step 6: Test and Adjust
In the final step of the website development process, it’s time to put your website to the test. Testing and adjusting are crucial to ensuring your website is functioning as intended and offering the best possible user experience. This step involves checking all the features and elements of your website, from the navigation menu to the contact form and everything in between.
Test every link, button, and interactive element to make sure they are working correctly. It’s also important to test your website on different devices and browsers to ensure compatibility. Additionally, ask for feedback from friends, family, or even your target audience to gather insights on how to improve your website.
Remember, the success of your website depends on how well it caters to the needs and preferences of your visitors, so be willing to make adjustments based on user feedback. By testing and adjusting your website, you can catch any issues or areas for improvement before launching it to the public, ensuring a smooth and enjoyable user experience.
Additional Tips and Safety Precautions
When it comes to repairing a rearview mirror on your windshield, there are a few additional tips and safety precautions that you should keep in mind. First and foremost, it’s important to make sure that you have all the necessary tools and materials before you start the repair process. This may include a screwdriver, adhesive, and a clean cloth for wiping down the windshield.
Additionally, it’s a good idea to wear protective gloves and eyewear to prevent any injuries while working on the mirror. Before removing the existing rearview mirror, it’s important to ensure that the area around it is clean and free of any debris. Use the clean cloth to wipe down the windshield surface, making sure to remove any dust or dirt that may affect the adhesion of the new mirror.
Once the area is clean, carefully remove the old mirror by unscrewing or unclipping it from its mount. When installing the new mirror, follow the manufacturer’s instructions and use the adhesive provided. Apply a small amount of adhesive to the mount or the back of the mirror, depending on the type of mirror you have.
Make sure to press the mirror firmly onto the windshield and hold it in place for a few minutes to allow the adhesive to bond properly. After the mirror is securely in place, avoid touching it or putting any undue pressure on it for at least 24 hours. This will give the adhesive enough time to fully cure and ensure that the mirror stays in place.
Additionally, be cautious when adjusting the mirror to prevent any damage. Gently adjust it to the desired position without applying too much force. In conclusion, repairing a rearview mirror on your windshield requires some preparation and caution.
By following these additional tips and safety precautions, you can ensure that the repair process is successful and that the mirror stays securely in place. So, get your tools ready, take your time, and soon enough you’ll have a perfectly functioning rearview mirror again.
Tip 1: Use a Mirror Adhesive
One additional tip that can greatly help with installing a mirror is to use a mirror adhesive. This adhesive is specifically designed for securing mirrors to walls or other surfaces and provides a strong and durable bond. When applying the adhesive, make sure to follow the manufacturer’s instructions carefully.
It’s important to apply the adhesive evenly and in the right amount to ensure a secure and long-lasting bond. Additionally, be sure to wear gloves and protective eyewear when working with the adhesive to protect yourself from any potential harm. Taking these extra precautions will help ensure a successful mirror installation and a safe working environment.
Tip 2: Seek Professional Help if Needed
professional help, safety precautions, seeking professional help, mental health professional, safety measures, avoid potential risks, trained experts As much as we may strive to handle things on our own, there may come a time when seeking professional help is the best option. When it comes to mental health issues, it’s crucial to reach out to a trained expert who can provide the necessary support and guidance. These professionals have the knowledge and experience to assess your situation accurately and offer evidence-based interventions.
Whether you’re struggling with anxiety, depression, or any other mental health concerns, seeking professional help is a proactive step towards bettering your well-being. It’s important to remember that there’s absolutely no shame in asking for help. In fact, it shows immense strength and self-awareness.
Mental health professionals can provide you with coping strategies, therapy, and medication management, if necessary. They are equipped to navigate the complexities of the human mind and help you regain control of your life. Moreover, by seeking professional assistance, you can avoid potential risks and ensure your safety.
These experts are trained to recognize warning signs and implement safety measures to protect you from harm. Don’t underestimate the importance of seeking professional help when needed. It can be the turning point towards a happier and healthier life.
Safety Precaution: Wear Protective Gloves
protective gloves, safety precautions, safety tips In addition to wearing protective gloves, there are several other safety precautions you should take when working with hazardous materials or engaging in potentially dangerous activities. First and foremost, it’s important to follow all safety guidelines and instructions provided by the manufacturer or supervisor. This may include wearing additional personal protective equipment such as goggles, masks, or aprons.
It’s also crucial to work in a well-ventilated area, especially when handling chemicals or substances that produce fumes or dust. Another important tip is to always wash your hands thoroughly after removing your gloves, as this will help to prevent any contamination or transfer of potentially harmful substances. Additionally, it’s a good idea to inspect your gloves regularly for any signs of wear or damage, and replace them as needed to ensure maximum protection.
Taking these additional safety precautions will help to minimize the risk of accidents or injuries and ensure your safety while working with hazardous materials or engaging in potentially dangerous activities.
Safety Precaution: Use Caution When Handling Glass
glass, safety precautions, handling, caution
Conclusion
And there you have it, a step-by-step guide on how to repair your rear view mirror on your windshield. Remember, it’s always important to stay safe on the road, and having a properly functioning mirror is a crucial part of that. So, whether your mirror fell off due to a rogue bird pooping on your windshield or maybe just a particularly intense karaoke session, now you have the know-how to fix it yourself and save some money in the process.
As they say, it’s all about keeping an eye on the road and an eye on your budget. Happy mirror repairing!”
Final Thoughts
additional tips and safety precautions for hiking trails Before embarking on a hiking adventure, it’s important to take some additional precautions to ensure your safety and enjoyment. First and foremost, always make sure to pack the necessary supplies. This includes extra water, snacks, a map or GPS device, a first aid kit, and appropriate clothing and footwear.
It’s also a good idea to let someone know where you’re going and when you expect to be back, just in case. As you hit the trail, keep in mind that weather conditions can change rapidly in the outdoors. Check the forecast before heading out and be prepared for the unexpected.
Carry extra layers of clothing, rain gear, and sunscreen to protect yourself from the elements. It’s also a good idea to bring a whistle or other signaling device, in case you become lost or need to attract attention. When hiking, it’s important to stay on designated trails and avoid taking shortcuts or creating new paths.
This not only helps protect the natural environment, but it also reduces the risk of getting lost or injured. Pay attention to any trail markers or signs along the way and follow any posted rules or regulations. One of the most important safety precautions when hiking is to be aware of your surroundings and watch out for potential hazards.
Keep an eye out for wildlife, slippery rocks or roots, and steep drop-offs. Use caution when crossing streams or walking on uneven terrain. Always be mindful of your footing and take your time to avoid accidents.
Lastly, it’s crucial to practice Leave No Trace principles when hiking. This means packing out all trash, including food scraps, and leaving natural and cultural resources as you found them. Respect any wildlife you encounter and maintain a safe distance.
Importance of Regular Maintenance
importance of regular maintenance Regular maintenance is crucial for keeping your vehicle in top shape and ensuring its longevity. However, it’s not just about getting your oil changed and tires rotated. There are additional tips and safety precautions that you should keep in mind to maximize the benefits of regular maintenance.
One important tip is to regularly check and replace your vehicle’s filters. The air filter and cabin filter can become clogged with dirt and debris over time, affecting the performance of your engine and the air quality inside your car. By replacing these filters on a regular basis, you can improve fuel efficiency and avoid potential respiratory issues.
Another safety precaution to consider is checking your vehicle’s brakes. Faulty brakes can be a major hazard on the road, so it’s crucial to have them inspected and serviced regularly. Signs of brake wear include squeaking or grinding noises, a vibrating steering wheel, or a soft brake pedal.
If you notice any of these signs, it’s important to get your brakes checked immediately. In addition, it’s important to regularly inspect and maintain your vehicle’s tires. Proper tire maintenance includes checking the tire pressure, rotating the tires, and ensuring that the tread wear is even.
Regular tire maintenance not only improves your vehicle’s handling and fuel efficiency but also enhances your safety on the road. Furthermore, don’t forget about your vehicle’s fluids. Checking and replacing essential fluids such as engine oil, transmission fluid, coolant, and brake fluid on a regular basis is crucial for maintaining optimal performance.
Neglecting these fluids can lead to engine damage, overheating, and even brake failure. Lastly, make sure to follow the manufacturer’s recommended maintenance schedule for your vehicle. This schedule outlines the specific maintenance tasks that should be performed at regular intervals.
FAQs
How do I repair a rear view mirror that has fallen off my windshield?
To repair a rear view mirror that has fallen off your windshield, you will need to purchase a rear view mirror adhesive kit. Clean the windshield and mirror bracket thoroughly, then apply the adhesive according to the instructions on the kit. Press the mirror firmly against the windshield and hold it in place for the recommended drying time.
Can I use super glue to reattach a rear view mirror to my windshield?
While super glue may seem like a quick fix, it is not recommended for reattaching a rear view mirror to a windshield. Rear view mirror adhesive is specifically designed to bond to glass and hold up to temperature and vibration changes. It provides a strong and durable hold, unlike super glue which may not be able to withstand these conditions.
What should I do if the rear view mirror on my windshield is loose?
If the rear view mirror on your windshield is loose, it is important to address it promptly. Begin by checking the tightening screw or set screw on the mirror bracket. Tighten it securely, but be careful not to overtighten and damage the windshield. If the mirror continues to be loose, you may need to replace the mirror bracket or adhesive.
How long does it take for rear view mirror adhesive to dry?
The drying time for rear view mirror adhesive can vary depending on the specific product and manufacturer’s instructions. Generally, it takes around 1-2 hours for the adhesive to fully dry and cure. It is important to avoid touching or adjusting the mirror during this time to ensure a strong bond is formed.
Can I remove a rear view mirror from my windshield without causing damage?
Yes, you can remove a rear view mirror from your windshield without causing damage. Start by using a hairdryer or heat gun to warm up the adhesive behind the mirror. Gently pry the mirror off using a plastic or rubber tool to avoid scratching the glass. If there is any residue left on the windshield, use adhesive remover or rubbing alcohol to clean it off.
Is it possible to repair a cracked rear view mirror on a windshield?
Unfortunately, a cracked rear view mirror on a windshield cannot be repaired. Once the mirror is cracked, it is best to replace it to ensure optimal visibility and safety. Most rear view mirrors are easily removable and replaceable, and you can find replacement mirrors at automotive parts stores or online.
How often should I check the rear view mirror on my windshield for any issues?
It is a good idea to regularly inspect the rear view mirror on your windshield for any issues at least once every few months. Check for any signs of looseness, cracks, or damage to the mirror or mirror bracket. By catching and addressing any issues early on, you can prevent potential hazards and ensure clear visibility while driving.