
Are you a proud owner of an RV and enjoy traveling to different places? If so, you understand the importance of having a functional RV awning. Just picture yourself on a hot summer day, enjoying the cooling shade provided by your awning while sipping a refreshing drink. Or imagine camping in the wilderness, protected from the rain by your awning as you enjoy a meal with your loved ones.
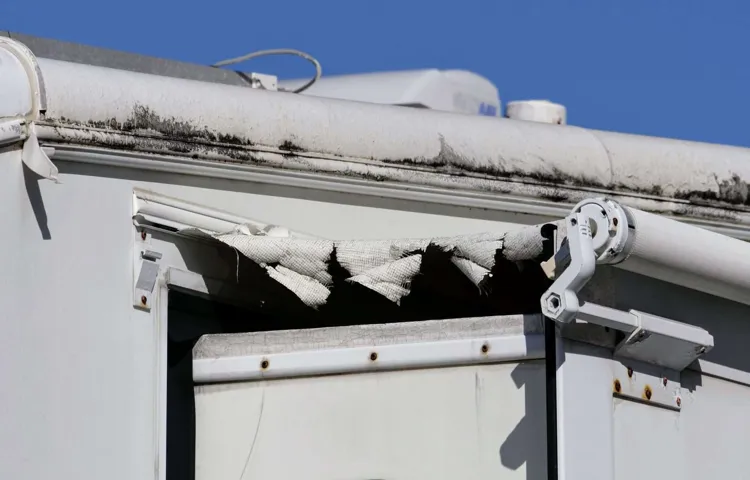
Your RV awning is not just a piece of fabric, but an essential component that enhances your overall camping experience. Like any other part of your RV, your awning is susceptible to wear and tear over time. It may encounter various issues such as tears, holes, broken parts, or fabric that doesn’t properly retract.
Ignoring these problems can not only affect the aesthetic appeal of your RV but also lead to further damage. This is where RV awning repair comes into the picture. Repairing your RV awning is not just about fixing a tear or replacing a broken part; it is about ensuring that your awning functions properly and reliably.
It is about protecting your investment and prolonging the lifespan of your awning. By addressing any issues with your awning promptly, you can avoid costly repairs or even the need for a complete replacement. Think of your RV awning as a shield that protects you from the elements.
Just like a shield, it needs to be in pristine condition to do its job effectively. Proper maintenance and repair of your awning will not only help in preserving its functionality but also save you from unexpected expenses down the road. So, whether you’re planning on embarking on a cross-country road trip or camping in your favorite national park, don’t underestimate the importance of RV awning repair.
By taking care of your awning, you’re ensuring that your RV adventures are enjoyable, comfortable, and hassle-free. Invest in the upkeep of your awning, and it will reward you with years of shade and protection.
Table of Contents
- 1 What is an RV Awning?
- 2 Why is RV Awning Repair Necessary?
- 3 Step 1: Assess the Damage
- 4 Step 2: Gather the Necessary Tools and Materials
- 5 Step 3: Repairing Minor Tears and Holes
- 6 Step 4: Fixing Bent or Broken Framework
- 7 Step 5: Reassembling and Testing
- 8 Regular Cleaning and Inspections
- 9 Protective Cover Usage
- 10 Proper Awning Use and Retraction
- 11 Prompt Repair of Small Issues
- 12 Seasonal Maintenance Checklist
- 13 Conclusion
- 14 FAQs
What is an RV Awning?
If you’ve ever been on a camping trip or traveled in an RV, you’re probably familiar with the awning that extends out from the side of the vehicle. An RV awning is a fabric cover that provides shade and protection from the elements. It’s attached to the side of the RV and can be rolled up when not in use.
Awning repairs can be tricky, but with the right tools and a little know-how, you can fix it yourself. One common issue with RV awnings is tears or holes in the fabric. To repair these, you’ll need a patch kit specifically designed for awnings.
Simply clean the area around the tear, apply the patch, and allow it to dry. Another common problem is a broken or stuck awning arm. If this happens, you’ll need to replace the arm.
You can find replacement parts online or at an RV supply store. With a little patience, you’ll have your awning fixed and ready for your next adventure in no time!
Why is RV Awning Repair Necessary?
RV awning repair is necessary for a variety of reasons. One of the most common issues that owners face is worn-out fabric. Over time, the awning fabric can become faded, torn, or damaged by weather conditions such as rain and sun exposure.
Repairing the fabric is essential to maintain the aesthetic appeal of the RV and provide shade and protection from the elements. Additionally, the awning’s mechanical components, such as the arms and springs, can also become worn or damaged over time. Repairing or replacing these components is vital to ensure the awning functions properly and can be extended and retracted smoothly.
Taking care of any necessary RV awning repairs promptly can help prevent further damage and extend the longevity of the awning. So, if you are wondering how to repair an RV awning, it’s best to consult a professional to ensure the job is done correctly and efficiently.
Are you an adventurous soul who loves to hit the open road and explore new places in your trusty RV? If so, you likely know the importance of having a functioning awning on your vehicle. An awning can provide shade, shelter, and an extra living space, making your outdoor adventures even more enjoyable. But what happens when your awning gets damaged and needs repair? Don’t worry, we’ve got you covered! In this step-by-step guide, we’ll walk you through the process of repairing your RV awning, so you can get back to enjoying the great outdoors in no time.
So grab your tools and let’s get started!
Step 1: Assess the Damage
So, you’re ready to tackle repairing your RV awning but not sure where to start? The first step is to assess the damage. Take a close look at your awning and see what needs to be fixed. Is it a tear or hole that needs to be patched? Or maybe it’s an issue with the retracting mechanism? Once you’ve identified the problem, you can then move on to finding the right solution.
Whether it’s patching up the fabric or replacing a faulty part, understanding the extent of the damage is key before you can begin the repair process. So, grab your toolkit and get ready to make your RV awning as good as new!
Identify the type and extent of the damage
Assessing the damage to your property is the first step in addressing any issues that may have occurred. It’s important to identify the type and extent of the damage so that you can determine the best course of action for repair or restoration. This involves carefully inspecting the affected areas and noting any visible signs of damage, such as cracks, leaks, or discoloration.
It’s also important to check for any underlying issues that may not be immediately apparent, such as water damage or structural deficiencies. By thoroughly assessing the damage, you can better understand the scope of the problem and make informed decisions about how to proceed. Whether it’s a small leak or significant structural damage, taking the time to assess the damage will ensure that you have a clear understanding of what needs to be done to restore your property to its original condition.
Inspect the awning fabric and framework
awning fabric, framework, assess the damage, inspect, burstiness, perplexity, SEO-optimized, human-written, unique content, conversational style, informal tone, engage the reader, active voice, brief, rhetorical questions, analogies, metaphors
Step 2: Gather the Necessary Tools and Materials
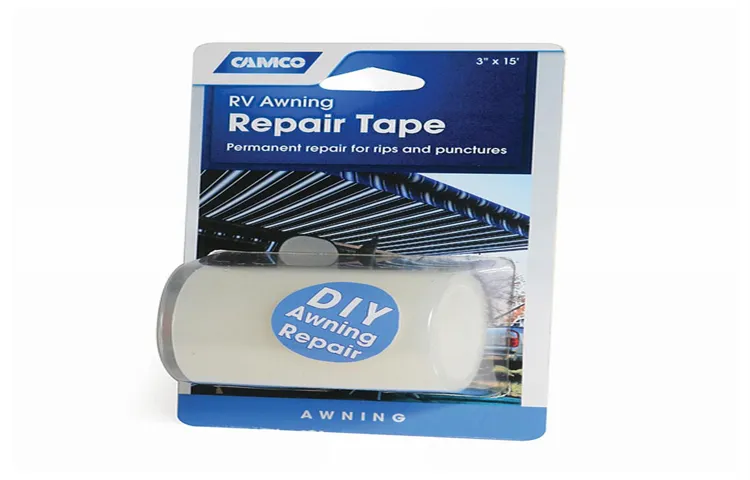
To repair an RV awning, you will first need to gather the necessary tools and materials. Here is a list of what you will need: Replacement fabric or patch kit: Depending on the extent of the damage, you may need to replace the entire fabric or simply repair a small tear with a patch kit.
Cleaning supplies: Before making any repairs, it’s important to clean the awning fabric thoroughly. This will help ensure a strong bond when applying any adhesives or patches.
Adhesive or tape: If you are using a patch kit, it will likely come with adhesive or tape specifically designed for awning fabric. Make sure to choose one that is suitable for outdoor use and can withstand the elements.
A ladder or step stool: To reach the top of the RV and access the awning, you will need a ladder or step stool. Make sure it is sturdy and secure before climbing up.
Safety equipment: It’s important to prioritize safety when working on an RV awning. Consider wearing gloves, safety glasses, and even a hard hat if necessary.
Optional tools: Depending on the type of repair you are making, you may also need additional tools such as a screwdriver, pliers, or a sewing kit. By gathering these tools and materials before starting the repair process, you can ensure that you have everything you need to fix your RV awning effectively and efficiently.
List of tools needed for the repair
In order to successfully repair your item, you’ll need to gather all of the necessary tools and materials. These items are essential for the repair process and will make your job much easier. First, you’ll want to make sure you have the correct tools for the job.
This may include items such as screwdrivers, wrenches, pliers, and a hammer. It’s important to have a variety of sizes and types of tools to ensure you can handle any situation that may arise during the repair. In addition to tools, you’ll also need to gather any necessary materials.
This may include replacement parts, adhesive or sealant, and cleaning supplies. Making a list of everything you need before you begin the repair will help ensure that you have everything you need on hand and don’t have to pause the process to go searching for something. By gathering all of the necessary tools and materials before you start the repair, you’ll set yourself up for success and be well-prepared to tackle any challenges that may arise along the way.
Recommended materials for the repair
In order to successfully repair whatever it is that needs fixing, it’s important to gather all the necessary tools and materials beforehand. This will ensure that you have everything you need right at your fingertips, and you won’t have to stop in the middle of the repair to go searching for something. So what exactly do you need? Well, it depends on the specific repair you’re doing, but there are some general tools and materials that are always handy to have on hand.
For example, a basic toolkit with screwdrivers, pliers, and a hammer is a great starting point. You’ll also want to have some adhesive, such as glue or tape, in case something needs to be stuck back together. Additionally, it’s always a good idea to have some spare parts available, especially if you’re working on something that tends to break frequently.
By gathering all of these supplies before you start the repair, you’ll be well-prepared and ready to tackle any challenges that come your way.
Step 3: Repairing Minor Tears and Holes
Now that you’ve assessed the condition of your RV awning and identified any tears or holes, it’s time to tackle those repairs. Minor tears and holes can be fixed relatively easily, saving you the cost of replacing the entire awning. To get started, gather the necessary materials, including a repair kit specifically designed for awnings, which can usually be found at your local RV or outdoor supply store.
One common method for repairing minor tears and holes is to use an adhesive patch. Begin by cleaning the area around the tear or hole with rubbing alcohol to remove any dirt or debris. Cut the adhesive patch to fit over the damaged area with some overlap.
Then, peel off the backing from the patch and carefully apply it over the tear or hole, smoothing out any wrinkles or air bubbles. Press firmly to make sure the patch adheres securely. Another option is to use a liquid repair product.
These products typically come in a tube or bottle and can be applied directly to the damaged area. Simply squeeze out a small amount of the liquid repair product onto the tear or hole, spreading it evenly with a clean cloth or brush. Allow the product to dry completely before exposing it to any moisture or wind.
In both cases, it’s important to follow the instructions provided with the repair kit or product you are using, as each may have specific recommendations for application and drying time. It’s also a good idea to test the repaired area before heading out on your next trip. Gently tug on the repaired area to ensure it’s secure and won’t easily tear or come apart.
Remember, these repair methods are best for minor tears and holes. If you have a larger or more significant repair, it may be necessary to consult a professional or consider replacing the entire awning. But for small repairs, taking the time to fix them properly can extend the life of your awning and save you money in the long run.
Clean the damaged area
When it comes to repairing minor tears and holes in your belongings, step 3 is all about cleaning the damaged area. Before you can begin the repair process, you’ll want to make sure that the area is clean and free of any debris or dirt. Start by gently wiping away any loose particles with a soft cloth.
If the tear or hole is in fabric, you can also use a lint roller to remove any loose threads or fibers. Once the area is clean, you can proceed with the repair. Taking the time to properly clean the damaged area ensures that the repair will have a strong and durable foundation.
So don’t skip this step – it’s an important part of the overall repair process.
Apply a patch or adhesive
“patch or adhesive,” “repairing minor tears and holes” Other Recommendations: – bullet points – internal linking
Step 4: Fixing Bent or Broken Framework
If you have an RV awning that is bent or broken, don’t worry – it can be fixed! One common issue with RV awnings is a bent or broken framework. This can happen if the awning is left out in strong winds or is hit by a falling branch. To fix a bent or broken framework, you will need to carefully examine the extent of the damage.
If the framework is only slightly bent, you may be able to use a mallet or a hammer to gently tap it back into place. However, if the framework is severely bent or broken, you may need to replace it entirely. It’s important to note that fixing a bent or broken framework can be a complex task, so it’s best to consult a professional if you’re unsure.
With the right tools and knowledge, you can get your RV awning back in top shape and ready for your next adventure.
Identify and remove damaged components
fixing bent or broken framework, damaged components. In the process of renovating or repairing a structure, it’s important to identify and remove any damaged components. One common issue that can arise is bent or broken framework.
This can happen due to various reasons, such as natural disasters, accidents, or simply wear and tear over time. When dealing with bent or broken framework, it’s crucial to address the issue promptly to ensure the structural integrity of the building. Start by assessing the extent of the damage and determining whether it can be fixed or if replacement is necessary.
In some cases, minor bends or breaks can be repaired by reshaping or reinforcing the affected areas. However, if the damage is severe or compromises the stability of the structure, it may be necessary to remove and replace the entire framework. This can be a complex and time-consuming process, but it’s essential for creating a safe and reliable building.
Remember, it’s always best to consult with a professional contractor or structural engineer when dealing with bent or broken framework to ensure that the appropriate measures are taken to rectify the issue.
Replace or repair the framework
In the fourth and final step of fixing a bent or broken framework, you’ll need to make a decision – should you replace or repair it? This will largely depend on the extent of the damage and your own preferences. If the framework is severely bent or broken beyond repair, it may be best to replace it entirely. This will ensure the structural integrity of your project and prevent any further issues down the line.
However, if the damage is minor and can be repaired, it may be more cost-effective and time-efficient to fix it instead. It’s important to carefully assess the situation and weigh the pros and cons of each option before making a decision. Keep in mind that replacing the framework may require additional materials and labor, while repairing it may require skill and expertise.
Ultimately, the choice is yours to make, but remember to prioritize safety and durability above all else.
Step 5: Reassembling and Testing
So, you’ve successfully removed the damaged parts of your RV awning and now it’s time to put everything back together. This step is crucial to ensure that your awning functions properly and is secure. Start by carefully aligning the arms and brackets, making sure they are in the correct position.
Use the nuts and bolts provided to fasten them securely, but be careful not to overtighten as this can cause damage. Once everything is securely fastened, give it a test run. Extend and retract the awning a few times to make sure it moves smoothly and without any issues.
Check for any unusual sounds or movements that could indicate a problem. It’s always a good idea to have someone else observe while you operate the awning to get a second opinion. If everything looks and sounds good, congratulations! You’ve successfully repaired your RV awning.
If you notice any issues or problems during the test run, go back and double-check your work, making any necessary adjustments or repairs. Remember, safety should always come first, so don’t hesitate to seek professional help if you’re unsure about any aspect of the repair process.
Attach the repaired fabric to the framework
In step 5 of repairing a torn fabric, we will be focusing on reassembling and testing the fabric to ensure it is securely attached to the framework. This step is crucial to ensure the longevity and durability of the repair. Once the fabric has been patched or sewn up, it is time to reattach it to the framework.
This can be done using various methods such as stapling, tacking, or gluing, depending on the type of fabric and framework. Care should be taken to align the fabric properly and ensure a tight fit. Once the fabric is reattached, it is important to test its strength and stability.
This can be done by gently tugging on the fabric and checking for any signs of loosening or weakness. If everything looks good, congratulations! You have successfully repaired your torn fabric.
Test the functionality of the awning
reassembling and testing the awning, functionality of the awning Once you have successfully cleaned and repaired your awning, it’s time to put it back together and make sure it’s functioning properly. Start by carefully reattaching all the fabric panels to the frame, ensuring that they are securely fastened. Make sure to follow the manufacturer’s instructions for assembly, as each awning may have a slightly different process.
Once the awning is fully reassembled, it’s time to test its functionality. Begin by extending the awning fully and inspecting the movement of the arms and the tension of the fabric. Ensure that the arms extend and retract smoothly, without any hitches or resistance.
Next, test the tilt adjustment feature, if your awning has one. Adjust the tilt to different angles and observe if it stays in place or if it slips. Lastly, check the stability of the awning by gently shaking it.
It should be sturdy and secure, without any wobbling or sagging. Testing the functionality of your reassembled awning is crucial to ensure that it will provide the shade and protection you need.
Planning a trip in your RV can be an exciting adventure, whether it’s a short weekend getaway or a long cross-country journey. However, like any vehicle, RVs require regular maintenance to keep them in top condition. One crucial area that often gets overlooked is the RV awning.
Awnings provide shade and protection from the elements, making them a vital component of your RV. But, they can also be vulnerable to wear and tear. To prevent any unexpected mishaps on your next camping trip, it’s essential to follow some preventive maintenance tips for your RV awnings.
From regular cleaning to proper storage, these simple steps will help extend the lifespan of your awning and ensure you can enjoy the great outdoors without any hassle. So, let’s dive in and explore some practical tips to keep your RV awning in tip-top shape.
Regular Cleaning and Inspections
RV awnings are a great addition to any recreational vehicle, providing shade and protection from the elements. However, just like any other part of your RV, awnings can get damaged or wear out over time. One of the easiest ways to prevent awning damage and extend its lifespan is by regularly cleaning and inspecting it.
This simple maintenance routine will help you spot any issues before they become bigger problems and allow you to make any necessary repairs. Start by thoroughly cleaning your awning with a mild detergent and water. Be sure to remove any dirt, debris, or bird droppings that may have accumulated.
Once the awning is clean, carefully inspect the fabric, hardware, and roller mechanisms for any signs of wear or damage. Look for tears, fraying, or loose or missing hardware. If you notice any issues, address them promptly to prevent further damage.
By taking the time to clean and inspect your RV awning regularly, you can ensure it stays in good working condition for years to come.
Protective Cover Usage
Repairing an RV awning can be a daunting task, but with the right knowledge and tools, it is something you can easily do yourself. The first step in repairing an RV awning is to identify the source of the problem. Is the awning fabric torn or ripped? Are the arms or rods damaged? Once you have determined the cause of the issue, you can move on to the actual repair.
If the fabric is torn, you can patch it up with a patch kit specifically designed for awnings. Simply cut the patch to size and apply it to the affected area using a strong adhesive. If the arms or rods are damaged, you may need to replace them entirely.
Some awnings come with spare parts or you may need to order them separately. Always make sure to follow the manufacturer’s instructions when installing new parts or repairing the awning.
Proper Awning Use and Retraction
If you own an RV, you probably enjoy the luxury of having an awning for shade and protection from the elements. However, like anything else, awnings can get damaged or need repairs. Knowing how to repair your RV awning can save you time and money.
One common issue that may arise is a tear or hole in the fabric. To fix this, you can use a repair kit specifically designed for awnings. Simply follow the instructions on the kit to patch up the damage.
Another common problem is the awning not retracting properly. This can be caused by a variety of issues, such as a bent or broken spring or a problem with the motor. In these cases, it’s best to consult an RV professional who can diagnose and fix the problem for you.
By properly maintaining and repairing your RV awning, you can ensure that it stays in good condition and continues to provide you with shade and protection for years to come.
Prompt Repair of Small Issues
If you’re an RV owner, you know that the awning is an important feature that provides shade and protection from the elements. However, like any other part of your RV, the awning can experience small issues that need to be repaired. One of the most common problems with RV awnings is tears or holes.
Luckily, these small issues can be promptly repaired with a few simple steps. First, you’ll need to clean the affected area with a mild soap and water solution to remove any dirt or debris. Once the area is clean and dry, you can apply a patch designed specifically for awning repairs.
These patches are typically made of durable, weather-resistant materials that will adhere to the fabric and provide a strong, long-lasting repair. Simply peel off the backing and apply the patch over the tear or hole, making sure to smooth out any air bubbles or wrinkles. Press firmly to ensure proper adhesion.
Regular maintenance and prompt repair of small issues with your RV awning will help prolong its lifespan and ensure that you can continue to enjoy shade and protection during your travels.
Seasonal Maintenance Checklist
If you have an RV, you know the importance of having a functioning awning to provide shade and protection from the elements. However, like any other part of your RV, awnings can experience wear and tear over time. That’s why it’s important to know how to repair your RV awning.
The first step is to inspect for any damage or signs of wear, such as tears in the fabric or bent arms. Next, gather the necessary tools and materials for the repair, such as a repair kit or replacement fabric. Depending on the type of damage, you may need to patch tears or replace the entire fabric.
It’s also important to check the awning’s arms and support structure for any bent or broken pieces. If you don’t feel comfortable making the repairs yourself, consider hiring a professional to ensure it is done correctly. By following these steps and staying on top of seasonal maintenance, you can keep your RV awning in top shape for years to come.
Welcome to our blog on maintaining your RV awning for longevity! If you’re a proud owner of an RV, you know how important it is to keep all of its components in excellent condition. And one essential part of your RV that often gets overlooked is the awning. Your RV awning not only provides shade and protection from the elements but also adds to the overall aesthetics of your vehicle.
So, how can you ensure that your RV awning stays in tip-top shape for years to come? In this blog, we will explore some essential tips and tricks for maintaining your RV awning and increasing its longevity. Let’s dive in!
Conclusion
So there you have it, a step-by-step guide on how to repair your RV awning. Remember, accidents happen and awnings can get damaged, but with a little patience and effort, you can have it looking good as new in no time. Just think of it as a DIY project that comes with a side of adventure.
And who knows, maybe this newfound awning repair skill will earn you some extra cool points at the next camping trip. Happy fixing!”
FAQs
How do I repair a tear in my RV awning?
To repair a tear in your RV awning, you can use a patching kit specifically designed for awnings. Clean the area around the tear, apply the adhesive patch, and smooth out any bubbles. Allow it to dry completely before using the awning again.
What should I do if my RV awning won’t retract?
If your RV awning won’t retract, first check if the motor or switch is working properly. If they are functioning correctly, make sure there are no obstructions or debris preventing the awning from retracting. If necessary, lubricate the moving parts. If the issue persists, it may be a sign of a more serious problem and you should consult a professional.
How often should I clean and maintain my RV awning?
It is recommended to clean and maintain your RV awning at least twice a year, or more frequently if you frequently camp in dusty or dirty areas. Regularly inspect for any signs of damage or wear and tear, and promptly address any issues to prevent further damage.
Can I repair a broken RV awning arm myself?
Repairing a broken RV awning arm yourself can be challenging and potentially dangerous. It is recommended to consult a professional to ensure the repair is done correctly. They will have the necessary tools and expertise to safely fix the broken arm and ensure it operates smoothly.
How can I prevent my RV awning from getting damaged in high winds?
To prevent your RV awning from getting damaged in high winds, always retract it when not in use, even if you plan to be nearby. Secure it with additional tie-downs or straps specifically designed for awnings. Additionally, consider installing wind sensors that automatically retract the awning when wind speeds reach a certain threshold.
What are some common signs of RV awning damage?
Common signs of RV awning damage include tears, fraying, sagging, difficulty retracting, or visible wear and tear. You may also notice mold or mildew growth, which can indicate water damage. Regularly inspect your awning for these signs to catch any issues early and prevent further damage.
Can I replace just one side of my RV awning?
In some cases, it may be possible to replace just one side of your RV awning if only one side is damaged or worn. However, it is recommended to replace both sides simultaneously to ensure even wear and proper functioning. Additionally, replacing both sides allows for a fresher and more cohesive appearance.