Do you own an RV with a torn awning? Don’t let it ruin your camping trip! A damaged RV awning can lead to leaks, sun damage, and make your outdoor living space less enjoyable. But don’t worry – fixing your RV awning tear doesn’t have to be difficult or costly. With a few tools and some basic steps, you can repair your RV awning tear and get back to enjoying the great outdoors in no time.
In this step-by-step guide, we’ll walk you through the process of repairing your RV awning tear, so you can get back to living your best camping life. Let’s get started!
Table of Contents
Assess the Damage
If you notice a tear in your RV awning, the first thing you need to do is assess the damage. Check the size, location, and type of tear to determine if it can be repaired or if the entire awning needs to be replaced. Small tears can be fixed with a patch kit, while larger tears may require professional help.
Additionally, consider the material of your awning as it may impact the repair process. Whatever the size of the tear, it’s important to address it as soon as possible to prevent further damage and keep your RV safe from the elements. With the right approach and materials, you can repair your RV awning tear and maintain its durability for many trips to come.
Inspect the Extent of the Tear
When it comes to assessing the damage on a tear, it’s important to inspect the extent of the tear to determine the severity of the issue. This involves carefully examining the size, location, and depth of the tear. A small tear may only require minimal repairs, while a larger tear may require a more extensive repair or even a replacement.
If the tear is deep, it may be necessary to remove damaged portions of the affected material and repair the underlying structures to ensure proper function and structural integrity. By properly assessing the damage, you can make an informed decision about how to proceed with the repair or replacement of the torn material. It’s essential to address the tear promptly to prevent further damage and avoid compromising the safety of the affected structure.
So don’t ignore a tear and take the necessary steps to address it before it leads to more significant problems.
Identify the Material of the Awning
When it comes to assessing the damage on your awning, the first step is to identify its material. This is crucial as different materials have varying levels of durability and resistance to wear and tear. For instance, canvas awnings are prone to mold and mildew, while vinyl awnings are more susceptible to tears and cracks.
Assessing the damage will allow you to determine the extent of the repair work needed, which will affect the cost and timeframe for the repair process. Additionally, identifying the material of your awning will help you choose the appropriate cleaning and maintenance methods to prevent further damage and prolong its lifespan. So the next time you notice any signs of damage on your awning, take a closer look at its material before proceeding with any repairs or maintenance.
Gather the Necessary Tools and Materials
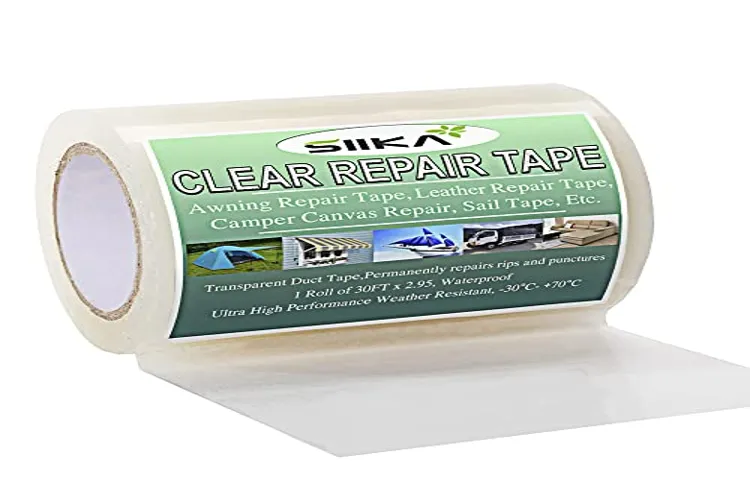
Before repairing an RV awning tear, it’s important to gather all the necessary tools and materials. You’ll need a patch kit specifically designed for awning repairs, which typically includes an adhesive patch and cleaning solution. Additionally, you’ll need a ladder to access the awning, a pair of scissors to trim the patch to size, and a clean cloth to wipe down the affected area.
If you’re repairing a larger tear, you may also need a sewing kit and extra cloth to reinforce the repair. It’s important to ensure that you have all the necessary materials before beginning the repair process to ensure a smooth and successful repair. By gathering these tools and materials beforehand, you’ll save time and frustration later on in the repair process.
Don’t forget to take all the safety precautions needed, and remember to work carefully to ensure a high-quality and long-lasting repair.
Prepare the Area
Before starting any project, it’s essential to gather all the necessary tools and materials to ensure a successful outcome. When preparing the area for your project, take stock of the required tools and ensure they’re clean and in good working condition. Commonly used tools may include paintbrushes, sandpaper, tapes, and rollers, among others, depending on the specific project’s requirements.
It’s also important to identify and acquire the necessary materials, such as paint, primer, wallpaper, or wood, for instance, and ensure they’re of high quality. Quality materials guarantee a better outcome and reduce the likelihood of needing to redo the project sooner than intended. Proper preparation of the area you’ll be working in also includes ensuring the space is clean and organized, with any necessary protective gear, such as gloves or goggles, available and ready for use.
By gathering all the tools and materials, you’ll save yourself time and frustration, and the job will be much smoother and more enjoyable.
Get Safety Equipment (goggles, gloves, etc.)
If you’re planning to start a DIY project, one of the most important things you need to do is to gather the necessary tools and materials. But more importantly, before you start working, you should ensure that you have the proper safety equipment to protect yourself from any potential hazards. Safety goggles, gloves, and other protective gear are essential when working with power tools, saws or blades, or handling chemicals and solvents.
You can never be too careful when it comes to safety, and wearing the appropriate safety gear can decrease the risk of accidents and injuries. Always remember to check the safety standards that apply and invest in good quality gear that provides optimal protection for your DIY project needs. With safety equipment, you can work with confidence and ensure your peace of mind while working on your next DIY project.
Get Repair Materials (fabric patches, adhesive, etc.)
Before you start repairing your damaged fabric, make sure you have all the necessary tools and materials. It’s essential to have everything in one place to avoid any distractions or interruptions while repairing. Firstly, gather fabric patches in different sizes and colors, as they can help you patch up small tears or holes that appear on your favorite garments.
Additionally, an adhesive, such as fabric glue or tape is necessary to keep the patch in place and ensure it sticks to the fabric without falling off. A sewing needle and thread can also come in handy if you need to fix any loose threads or sew the patch onto the fabric properly. Scissors, pins, and a measuring tape are other crucial tools you may need to make the repair process easier and more accurate.
Lastly, grab a clean cloth and some mild detergent, which can help you clean the damaged area and remove any stains before you start repairing it. With all the necessary tools and materials on hand, you can quickly and efficiently repair any damaged fabric.
Repairing the Tear
If you have an RV, then you know how important your awning is. It provides shade and shelter while you are camping, and it can really enhance your outdoor experience. However, accidents happen, and tears in your awning can occur.
Luckily, repairing an RV awning tear is not as difficult as you might think. First, you want to assess the damage and determine how bad the tear is. If it is small, then you can patch it up yourself with a repair kit.
However, if the tear is larger, you might want to consider taking it to a professional. It’s important to make sure the repair is done correctly, so you don’t end up causing more damage. Additionally, if you plan on using the awning in windy conditions, you should reinforce the repair with extra tape or clamps.
With a little effort, you can have your awning looking as good as new in no time!
Clean and Dry the Area
When repairing a tear in fabric, it’s important to begin by cleaning and drying the area around the tear. Any dirt, dust, or debris on the fabric could interfere with the repair process and make it difficult to achieve a smooth, seamless fix. You’ll want to use a damp cloth to gently wipe down the area around the tear, being careful not to spread the tear or cause further damage to the fabric.
Once you’ve cleaned the area, you should allow it to dry completely before moving on to the next step in the repair process. By taking the time to clean and dry the tear before starting the repair, you’ll be setting yourself up for success and ensuring that your repair is as effective as possible. So, grab a cloth, get the area clean and dry, and let’s get started fixing that tear!
Apply Adhesive to the Tear
When it comes to repairing a tear, applying adhesive is a crucial step. But, it’s important to make sure the adhesive you are using is appropriate for the type of tear you are repairing. For example, if you are repairing a tear in fabric, you’ll want to use a fabric glue that will bond the torn edges together seamlessly.
Once you’ve selected the appropriate adhesive, carefully apply a small amount onto the tear, using a brush or your finger to spread it evenly. Make sure to press the torn edges together firmly, holding them in place for a few minutes to allow the adhesive to dry. And voila! Your tear is repaired and ready to go.
Remember, taking the time to properly repair a tear will not only save you money in the long run, but it will also prolong the lifespan of your item. So why not give it a try?
Attach the Fabric Patch
To repair a tear in fabric, you need to attach a fabric patch. First, you’ll need to find a patch that matches the color and texture of the torn fabric as closely as possible. Cut the patch to a size that’s slightly larger than the tear.
Then, turn the torn fabric inside out and place the patch over the tear, making sure it covers the entire area. Pin the patch in place to keep it from shifting. Use a needle and thread to hand-sew the patch onto the fabric, working in small, tight stitches.
Start from the inside of the garment and work your way towards the outside, making sure that the seam is secure and that the patch is firmly attached. When you’re finished, trim any excess thread and turn the garment right side out. With a bit of patience and attention to detail, your tear will be repaired in no time.
Smooth out the Patch and Let it Dry
When repairing a tear in your wall, it’s important to take your time and smooth out the patch. While it might be tempting to rush the job, a meticulously patched wall will look much better in the end. Once you’ve applied the joint compound to the wall, use a putty knife to gently smooth out the surface of the patch.
Don’t worry if it doesn’t look perfect right away – you can always sand it down later. After you’ve smoothed out the patch to your satisfaction, let it dry completely. This can take anywhere from a few hours to overnight, depending on the size of the patch and the humidity in your home.
Once the patch is dry, sand it down if necessary and repeat the process until you’re satisfied with the results. With a little patience and attention to detail, your wall will be as good as new in no time!
Consider Professional Help
If you have a tear in your RV awning, it might be tempting to take matters into your own hands and attempt to fix it yourself. However, it’s important to consider seeking professional help instead. RV awnings can be complex structures, and attempting to repair them without the proper knowledge or tools can further damage the awning or even pose a safety hazard.
Professional repair services have experienced technicians who can quickly assess the damage and provide the necessary repairs to get your awning back in top shape. Plus, they often offer warranties on their work, giving you added peace of mind. So, while DIY projects can be fun and satisfying, it’s best to leave the delicate repairs to the experts and enjoy your RV adventures with a functioning awning.
When to Seek Professional Help
If you are feeling overwhelmed with your mental health struggles, it may be time to consider seeking professional help. Whether it’s anxiety, depression, or other mental health concerns, a mental health professional can provide the necessary support to help you through difficult times. A mental health professional can offer a safe space to talk about your feelings, provide coping mechanisms, and help you develop a plan for moving forward.
It’s important to remember that seeking help does not mean you are weak, but rather it shows courage and strength in acknowledging that you need support. By seeking professional help, you can build a stronger foundation for your mental health and overall wellbeing. Don’t hesitate, there are plenty of resources available to help you find the support you need.
Preventive Measures to Avoid Future Tears
Repairing an RV awning tear may seem like a daunting task, but there are preventable measures you can take to avoid future tears. First, be mindful of the weather. If it’s exceptionally windy or stormy, it’s best to retract the awning.
Additionally, avoid folding or rolling the awning if there’s any debris or dirt on it as this can cause friction and lead to tearing. It’s also crucial always to check the hardware that attaches the awning to your RV. Preventative maintenance such as lubrication and tightening components should be a part of your routine.
Lastly, make it a habit to inspect your awning before and after each trip to catch any small tears before they become larger ones. By following these tips, you can avoid costly repairs and enjoy your RV awning for years to come. However, if your awning does end up with a tear, you can follow the steps on how to repair an RV awning tear to ensure you’re back to soaking up the sun in no time!
Proper Cleaning and Maintenance
To keep your furniture looking new, you should use preventive measures to avoid future tears. Proper cleaning and maintenance are crucial in taking care of your furniture. You don’t want to end up with tears on your sofa or chairs just because you didn’t take the time to clean and maintain them.
One preventive measure is to vacuum your furniture regularly to remove dirt and dust that can cause wear and tear. You can also use covers to protect your furniture from stains and spills, especially if you have kids or pets. Additionally, you should always read the care instructions provided by the manufacturer before cleaning your furniture.
This will help you avoid using cleaning products that can damage the fabric and cause tears. By taking these preventive measures, you can ensure that your furniture will look great for years to come.
Storing the Awning Correctly
If you want to ensure that your awning lasts for years, it’s important to store it correctly during periods of non-use. One of the easiest and most effective ways to prevent future tears is to clean the awning before putting it away. Simply use a soft-bristled brush or sponge, soap and water to remove any dirt, debris, or mildew that may have accumulated during use.
Once cleaned, allow the awning to dry completely before folding it neatly. It’s essential to avoid overcrowding or overstuffing the awning during storage to prevent hard creases from developing, which can weaken the fabric. Instead, fold it loosely and tuck it away in a cool, dry place like a garage or closet.
By taking these preventive measures, you can ensure that your awning is ready for use whenever you need it, for years to come.
Avoiding Sharp Objects and Stresses
When it comes to preventing future tears, it’s important to pay attention to the everyday stresses and sharp objects in our lives. One of the easiest ways to avoid tears is to take the necessary precautions when handling sharp objects. It’s important to use tools that are specifically designed for cutting or slicing and to always cut away from the body.
Additionally, being mindful of heavy lifting and sudden movements can also prevent tears. It’s also beneficial to take regular breaks and stretch to alleviate any strain on the muscles and joints. With these simple preventive measures, you can reduce your risk of tears and continue to lead a healthy and active lifestyle without worrying about setbacks.
Conclusion
Repairing an RV awning tear may seem like a daunting task, but with the right tools and techniques, you can be back to relaxing in the shade in no time. It’s important to inspect and clean your awning regularly, as a tear can quickly worsen if left unattended. Once you’ve identified the tear, gather your materials and carefully patch it up with a high-quality adhesive.
Remember to take your time and follow the instructions closely, as rushing the repair could result in further damage. With a little patience and elbow grease, your RV awning will be as good as new and ready to weather any storm.”
FAQs
What causes tears in RV awnings and how can I prevent them?
RV awnings can tear due to weather conditions, excessive use, improper storage, or accidental damage. To prevent tears, be sure to properly store your awning when not in use, avoid leaving it open in windy conditions, and inspect it regularly for any signs of wear and tear.
Can a torn RV awning be repaired or does it need to be replaced entirely?
In many cases, a torn RV awning can be repaired rather than replaced entirely. Consult with a professional RV awning repair company to determine the best course of action for your specific situation.
How much does it typically cost to repair a torn RV awning?
The cost of repairing a torn RV awning varies based on the severity of the tear and the materials needed for repair. A simple tear can potentially be repaired for around $100, while more complex repairs may range up to several hundred dollars.
Can I repair a tear in my RV awning myself or should I leave it to professionals?
While it is possible to repair a tear in an RV awning yourself, it is typically recommended to leave such tasks to professionals to ensure a proper and safe repair. Attempting a repair on your own may result in further damage or even injury.
How long does a typical RV awning repair take?
The length of time it takes to repair an RV awning depends on the severity of the damage and the availability of the necessary materials. Simple repairs can be completed in a few hours, while complex repairs may take several days.
Can a repaired RV awning be as strong as a new one?
While a repaired RV awning may not be as strong as a brand new one, a professional repair job using high-quality materials can often provide sufficient strength and durability to last for many more years of use.
How can I find a reliable RV awning repair company in my area?
One way to find a reliable RV awning repair company is to ask for recommendations from fellow RV owners or online RV groups. You can also search online for local repair companies and read reviews from past customers before making a decision.