
Have you ever found yourself staring at a scratch on your windshield and wondering how to make it disappear? Scratches on windshields can not only be unsightly but also compromise the safety of your vehicle. From small dings to deep gouges, these blemishes can obstruct your vision and potentially lead to further damage if left untreated. But fear not, because we have the answers you’re looking for! In this blog, we will dive into the world of windshield scratch repair and explore effective techniques to restore your windshield to its pristine condition.
So grab your tools and let’s get to work on making those scratches disappear!
Table of Contents
Introduction
Have you ever noticed scratches on your windshield and wondered how to repair them? Scratched windshields can be a major annoyance and can also affect your visibility while driving. Luckily, there are some solutions available to help you fix those pesky scratches. One option is to use a windshield repair kit, which typically includes a resin that can fill in the scratches and make them less noticeable.
Another option is to use toothpaste or baking soda mixed with water to create a paste that can be gently rubbed onto the scratches. This can help to polish and buff out the scratches, making them less visible. However, it’s important to note that these methods may not work for deep or severe scratches.
In such cases, it may be necessary to contact a professional windshield repair technician who can assess the damage and recommend the best course of action. So, the next time you notice scratches on your windshield, don’t panic. There are options available to help you restore its clarity and improve your driving experience.
Understanding Windshield Scratches
windshield scratches
Why Repairing Scratches is Important
Why Repairing Scratches is Important
Choosing the Right Repair Method
So, you’ve got a scratch on your windshield and you’re wondering how to repair it. Well, the good news is that there are a few different methods you can try, depending on the severity of the scratch. If it’s just a small, surface-level scratch, you may be able to fix it yourself using a windshield repair kit.
These kits typically include a resin that you apply to the scratch and then cure with a UV light. This can help to fill in the scratch and make it less visible. However, if the scratch is deeper or more severe, it may be necessary to have your windshield replaced altogether.
In these cases, it’s best to consult with a professional auto glass repair specialist who can assess the damage and recommend the best course of action. Remember, it’s important to address windshield scratches as soon as possible, as they can compromise the integrity of the glass and potentially lead to more serious damage down the road. So don’t wait – take care of that scratch and keep your windshield looking as good as new!
Assessing the Depth of the Scratch
“Choosing the Right Repair Method for Assessing the Depth of the Scratch” When it comes to dealing with scratches on your car, it’s important to assess the depth of the scratch before deciding on the best repair method. Not all scratches are created equal, and different methods may be required depending on the severity of the damage. To determine the depth of the scratch, you can run your fingernail over the surface.
If your nail doesn’t catch on the scratch, it’s likely a surface-level scratch that can be easily fixed with some polishing and waxing. However, if your nail does catch on the scratch, it means the damage has gone through the clear coat and into the paint layer. In this case, you may need to consider a more advanced repair method, such as using a touch-up paint or visiting a professional body shop.
Touch-up paint can be used to fill in the scratch and blend it with the surrounding paint, but it may not be as effective for deep scratches. A professional body shop, on the other hand, can provide more intensive repair options, such as sanding, priming, and repainting the affected area. It’s also important to consider the size and location of the scratch when choosing a repair method.
Small, minor scratches may be easily fixable with DIY methods, while larger or more complex scratches may require professional expertise. Additionally, scratches on highly visible areas of the car, such as the hood or doors, may warrant a more meticulous repair process to ensure a seamless finish. In conclusion, assessing the depth of a scratch is crucial for choosing the right repair method for your car.
By determining the severity of the damage, considering the size and location of the scratch, and weighing the available repair options, you can ensure that your car gets the proper care and attention it needs to look its best. So next time you encounter a scratch, take a moment to assess the depth and make an informed decision on the best way to restore your car’s surface.
Selecting the Appropriate Repair Kit
s “repair kit,” “choosing the right repair method” Have you ever found yourself in a situation where something is broken and you’re not quite sure how to fix it? It can be overwhelming trying to figure out the best way to approach a repair. That’s why it’s important to consider the specific problem you’re trying to solve before choosing a repair method or repair kit. Different repair kits are designed for different types of repairs, and selecting the appropriate one can make all the difference in the world.
So, how do you know which repair method and kit is right for you? Before making a decision, it’s essential to assess the nature of the damage. Is it a small crack or a large hole? Is it a surface-level scratch or a deep dent? Understanding the extent of the damage will help guide you in the right direction. For example, if you’re dealing with a minor scratch on a wooden surface, a simple wood filler kit would likely be sufficient.
On the other hand, if you’re faced with a more severe issue like a burst pipe, you’ll need a plumbing repair kit specifically designed for fixing leaks. Consider your skill level and the tools you have on hand. Some repair kits may require specialized tools or techniques that you may not be familiar with.
If you’re an inexperienced DIYer, it’s important to choose a repair method that aligns with your abilities. For example, if you’re not comfortable using power tools, you might want to opt for a simple adhesive repair kit instead of attempting a more complex repair that requires drilling or sawing. Another factor to consider is the type of material you’re working with.
Different repair kits are designed to work with specific materials, such as wood, metal, or plastic. Using the wrong repair method or kit on a particular material could lead to further damage or a subpar repair job. So, be sure to read the instructions and product descriptions carefully to ensure compatibility.
Ultimately, selecting the appropriate repair kit is all about being informed and making an educated decision. Consider the nature of the damage, your skill level, and the materials involved. By taking these factors into account, you can confidently choose the right repair method and kit to fix whatever is broken.
Preparing the Windshield for Repair
Have you ever noticed scratches on your windshield that seem impossible to get rid of? Instead of spending money on professional repairs, you can actually attempt to fix them yourself! The first step in repairing scratches on a windshield is to prepare the area for repair. Start by thoroughly cleaning the windshield with a mild detergent and water. This will remove any dirt or debris that could interfere with the repair process.
Next, dry the windshield completely to ensure a smooth surface for the repair. Once the windshield is clean and dry, apply a clear tape over the scratches. This will help hold the glass together and prevent the scratches from spreading further.
By taking these steps to prepare the windshield for repair, you can increase the chances of a successful fix and save yourself some money in the process!
Gathering the Necessary Tools and Materials
Preparing the windshield for repair is an important step in the process of fixing any cracks or chips. Before you can begin the actual repair, you need to gather all the necessary tools and materials. One of the main tools you will need is a windshield repair kit, which typically includes a resin and applicator.
It’s important to choose a high-quality kit to ensure the best results. You will also need a microfiber cloth, razor blade or glass scraper, and some masking tape. These items will help you clean the damaged area and create a barrier around it to protect the surrounding glass.
Once you have gathered all the necessary tools and materials, you can move on to the next step, which involves preparing the windshield for repair.
Cleaning the Windshield Surface
Cleaning the Windshield Surface When it comes to repairing a windshield, one of the first steps is preparing the surface for the repair. This ensures that the repair will be effective and long-lasting. The windshield surface needs to be clean and free of any debris, dirt, or grime that could interfere with the repair process.
Cleaning the windshield surface is a simple yet crucial step that should not be overlooked. To clean the windshield surface, you will need a few basic supplies. Start by gathering a bucket of warm water, some dish soap, a sponge or soft cloth, and a squeegee.
Mix a small amount of dish soap with the warm water in the bucket. Dip the sponge or cloth into the soapy water and gently scrub the windshield surface in circular motions. Be sure to cover the entire surface, paying extra attention to any areas that are particularly dirty or greasy.
After scrubbing the windshield surface, rinse the sponge or cloth and wring out any excess water. Use the clean sponge or cloth to rinse away the soapy residue on the windshield. Again, be thorough and cover the entire surface.
Once the windshield surface is rinsed, it’s time to use the squeegee to remove any remaining water and streaks. Start at the top of the windshield and pull the squeegee down in a straight line, using firm, steady pressure. Repeat this motion across the entire surface of the windshield until it is completely dry and streak-free.
Cleaning the windshield surface is an important step in preparing it for repair. By removing any dirt or debris, you can ensure that the repair process goes smoothly and the final result is a clear and intact windshield. Don’t skip this step – take the time to clean the windshield before moving on to the next step in the repair process.
Repairing Minor Scratches
If you’ve ever noticed a small scratch on your car’s windshield, you might be wondering what you can do to fix it. Fortunately, there are some simple steps you can take to repair minor scratches on your windshield and restore its clarity. First, gather some supplies, such as glass cleaner, a microfiber cloth, and a windshield repair kit.
Start by cleaning the area around the scratch with the glass cleaner and cloth. This will ensure that there is no dirt or debris that could interfere with the repair process. Then, following the instructions on the windshield repair kit, apply the resin to the scratch and cover it with a curing strip.
Allow the resin to dry completely, and then remove the strip. Finally, use the glass cleaner and cloth to clean the area again, and you should find that the minor scratch is now barely visible. By taking these simple steps, you can save money on professional repairs and restore your windshield to its former glory.
Using a Glass Polish
glass polish, minor scratches Have you ever noticed a scratch on your glass that seems to stick out like a sore thumb? Whether it’s a scratch on your car windshield or a scratch on your favorite pair of sunglasses, minor scratches can be frustrating to deal with. But fear not, because there is a solution – glass polish! Glass polish is a fantastic tool for repairing minor scratches on glass surfaces. It’s easy to use and can make a world of difference in restoring the appearance of your glass.
The polish works by using fine abrasive particles to gently buff away the scratches, leaving your glass looking smooth and shiny once again. To use glass polish, start by cleaning the glass surface thoroughly to remove any dirt or debris. Then, apply a small amount of the glass polish to a soft cloth or sponge and gently rub it onto the scratch in a circular motion.
Be sure to apply a bit of pressure, but not too much, as you don’t want to damage the glass further. As you continue to polish, you may notice that the scratch begins to fade away. This is a good sign! Keep polishing until the scratch is no longer visible, and then wipe away any excess polish with a clean cloth.
Glass polish is a great option for repairing minor scratches because it is easy to use and can save you time and money. Instead of replacing the entire glass surface, you can simply polish away the scratch and restore the glass to its former glory. So the next time you notice a minor scratch on your glass, don’t panic.
Grab some glass polish and give it a try. You’ll be amazed at the results and glad you didn’t have to replace the entire glass surface. Happy polishing!
Applying a Scratch Filler
scratch filler, minor scratches, repairing, application, technique In this blog post, we will delve into the world of scratch repair and focus on a common issue: minor scratches. While it’s frustrating to discover a scratch on your beloved car or furniture, the good news is that you can easily fix it yourself with the right tools and technique. One of the key components for repairing minor scratches is a scratch filler.
A scratch filler is a specially formulated product designed to fill in the scratch and create a smooth surface. It acts as a camouflage by blending in with the surrounding area, making the scratch less noticeable. But how do you apply a scratch filler effectively? Well, it’s all about technique.
First, clean the scratched area thoroughly to remove any dirt or debris. Then, apply a small amount of scratch filler to a microfiber cloth or sponge. Gently rub the filler into the scratch using circular motions.
Be sure to work the filler into the scratch, so it fills in all the crevices. Once the scratch is filled, wipe away any excess filler using a clean cloth. Lastly, let the filler dry completely before applying any additional steps, such as polishing or waxing.
By following these steps and using the right technique, you can repair minor scratches and restore the appearance of your car or furniture.
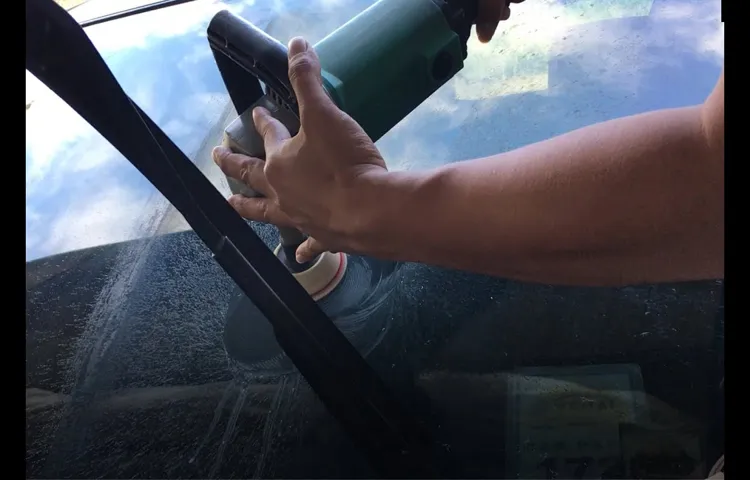
Buffing and Polishing the Area
Buffing and polishing the area is an essential step in repairing minor scratches on a surface. Whether it’s a scratch on your car, furniture, or any other object, buffing and polishing can help restore its original appearance. This process involves using a specialized compound and a polishing pad to gently remove the scratched layer and blend it with the surrounding area.
It is important to approach this task with patience and care, as rushing can cause further damage to the surface. By applying gentle pressure in circular motions, you can gradually smooth out the scratch and bring back the shine. Remember to wipe away any excess compound and inspect the area for any remaining scratches.
If needed, you can repeat the buffing and polishing process until the desired result is achieved. So next time you notice a minor scratch, don’t panic. With some buffing and polishing, you can make it disappear and restore the beauty of your belongings.
Repairing Deep Scratches
Driving on the open road can often lead to some unfortunate mishaps, like finding deep scratches on your windshield. While it may be tempting to ignore these scratches or replace the entire windshield, there is an alternative solution that won’t break the bank. You can actually repair deep scratches on your windshield with a few simple steps.
First, gather the materials you’ll need: a windshield repair kit, which typically includes a resin, bridge, and a curing light. Once you have your kit ready, clean the damaged area thoroughly. Next, apply the resin to the scratch, making sure to follow the instructions provided by the manufacturer.
Use the bridge to press the resin into the scratch, ensuring that it fills the entire gap. Finally, use the curing light to harden the resin and finish off the repair process. With a little patience and some elbow grease, you can have your windshield looking as good as new in no time.
Using a Windshield Repair Resin
windshield repair resin, deep scratches When it comes to repairing deep scratches on your windshield, using a windshield repair resin can be a game-changer. This specially formulated resin is designed to fill in the scratches and restore the integrity of your windshield. The process is relatively simple and can be done at home with just a few tools.
First, clean the area around the scratch with a mild detergent and warm water. This will ensure that the resin adheres properly to the glass. Next, apply a small amount of the repair resin to a clean cloth and gently rub it into the scratch.
Be sure to follow the manufacturer’s instructions for the best results. Once the resin is applied, use a UV light to cure it. The light will activate the resin, causing it to harden and bond with the glass.
After a few minutes of curing, the resin will be fully hardened and the scratch will be virtually invisible. Using a windshield repair resin is a cost-effective and convenient way to fix deep scratches on your windshield, saving you time and money compared to getting a full windshield replacement.
Filling the Scratch with Resin
Deep scratches in your vehicle’s paint can be a real eyesore. Not only do they stand out, but they can also leave your car vulnerable to rust and other damage. Fortunately, there is a solution – filling the scratch with resin.
Resin is a versatile material that can be used to fill in deep scratches and restore your paintwork to its former glory. To repair deep scratches with resin, you’ll need to start by cleaning the damaged area thoroughly. Use a gentle soap and water solution to remove any dirt or debris that may be trapped in the scratch.
Once the area is clean, you can apply the resin using a small brush or applicator. Be sure to spread it evenly over the scratch, filling it completely. After applying the resin, you’ll need to let it dry and cure.
This can take anywhere from a few hours to a few days, depending on the type of resin you’re using. Once the resin is completely dry, you can sand it down to smooth out any imperfections and blend it in with the surrounding paintwork. Finally, you can finish off the repair by applying a coat of clear coat or wax to protect the newly repaired area.
This will help to seal in the resin and give your paintwork a clean, polished finish. Repairing deep scratches with resin is a great way to restore your vehicle’s appearance and protect it from further damage. By following these steps, you can fill in those unsightly scratches and enjoy a flawless paint job once again.
So why not give it a try and see the difference it can make? Your car will thank you!
Curing the Resin
resin cure, repair deep scratches
Final Steps and Maintenance
Scratches on windshields can be a real nuisance, but with the right approach, you can easily repair them and restore the clarity of your glass. The first step is to clean the windshield thoroughly to remove any dirt or debris. Next, assess the depth of the scratches.
If they are shallow, you can try using a specialized glass polishing compound to buff them out. Apply the compound to a soft cloth and gently rub it into the scratched area in circular motions. This will help remove any superficial scratches and restore a smooth surface.
For deeper scratches, you may need to use a glass repair kit. These kits usually contain a resin that can fill in the scratches and create a smooth finish. Follow the instructions carefully to achieve the best results.
After repairing the scratches, be sure to clean the windshield once again to remove any residue from the repair process. Regularly inspect and clean your windshield to maintain its clarity and prevent further damage. With these simple steps, you can easily repair scratches on your windshield and keep it looking as good as new.
Cleaning and Inspecting the Repair
After successfully cleaning and inspecting the repair, the final steps and maintenance are crucial to ensure the longevity and effectiveness of the fix. It is essential to make sure that all surfaces are thoroughly cleaned and free from any debris or contaminants. This can be done using a gentle cleanser and a soft cloth or sponge.
Once the cleaning process is complete, it’s important to inspect the repaired area for any signs of damage or wear. This includes checking for any loose or broken parts, cracks, or leaks. If any issues are found, they should be addressed immediately to prevent further damage.
Additionally, it’s important to regularly maintain the repaired area to prevent any future problems. This includes keeping it clean and free from dirt or grime and checking for any signs of wear or damage. By following these final steps and performing regular maintenance, you can ensure that the repair will last and continue to function properly for years to come.
Applying a Glass Sealant
glass sealant maintenance, applying glass sealant So, you’ve successfully applied a glass sealant to protect and enhance the shine of your windows or mirrors. But what comes next? How do you maintain that sparkling finish for as long as possible? Well, the final steps and ongoing maintenance are just as important as the application itself. A key consideration is to let the sealant cure properly.
This means avoiding any contact with water or cleaning products for at least 24 hours. Giving the sealant enough time to harden will ensure its longevity and effectiveness in repelling dirt and water. Imagine it like baking a cake – if you take it out of the oven too soon, it might collapse, and you’ll be left with a soggy mess.
So, give the sealant the time it needs to fully set and bond with the glass surface. Once the sealant has cured, you can start enjoying the benefits. But keep in mind that regular maintenance is crucial to keep your glass looking its best.
Regularly cleaning the surface with a soft cloth or microfiber towel will help remove dust and fingerprints. Avoid using abrasive materials or harsh chemicals that can damage or strip away the protective sealant. Another important tip is to avoid excessive scrubbing or rubbing motion when cleaning.
Remember, the sealant is there to do the heavy lifting, so gentle wiping should suffice. Think of it as washing a car with a protective wax coating – you wouldn’t vigorously rub the surface, right? The same principle applies here. In addition to regular cleaning, it’s a good idea to periodically inspect the glass for any signs of wear or damage to the sealant.
If you notice any areas where the sealant has become compromised, it’s best to reapply or touch up those sections to maintain the protective barrier. So, to summarize, the final steps after applying a glass sealant include allowing it to cure properly and avoiding contact with water or cleaning products during this time. Once cured, regular maintenance is important, including gentle cleaning with a soft cloth or microfiber towel and periodic inspection for any signs of wear or damage.
Preventing Future Scratches
preventing scratches, final steps, maintenance. So, you’ve successfully removed those pesky scratches from your beloved car. Now, it’s time to take a few final steps to ensure that you prevent future scratches and keep your car looking brand new.
One important step is to invest in a high-quality car wax. Applying a layer of wax to your car’s exterior not only gives it a gorgeous shine but also acts as a protective barrier against scratches. The wax fills in any tiny imperfections on the surface of the paint, creating a smooth and glossy finish that makes it harder for scratches to penetrate.
Another key aspect of preventing scratches is regular car maintenance. Make sure to wash your car frequently, especially after driving on dusty or gravelly roads, as dirt and debris can cause scratches when they come in contact with your car’s paint. Additionally, consider parking your car in a covered area or using a car cover to shield it from potential hazards like falling branches or bird droppings.
By following these final steps and incorporating them into your regular car care routine, you can maintain a scratch-free and stunning-looking car for years to come. So why wait? Give your car the protection it deserves and enjoy that showroom finish every day.
Conclusion
And there you have it, a windshield that sparkles and shines as if it were brand new! So the next time you encounter a scratch on your windshield, don’t panic. With a few simple steps and a little bit of elbow grease, you can easily repair it yourself. Remember, scratches are like battles scars on your windshield, they tell a story of all the adventures you’ve been on.
So why not embrace them and give your windshield the love and care it deserves? After all, a scratched windshield is just another opportunity to show off your DIY skills and impress your friends. So grab your materials, put on your favorite repair song, and get to work! Your windshield will thank you later.
FAQs
What causes scratches on a windshield?
Scratches on a windshield can be caused by various factors, such as rocks or debris on the road, improper cleaning techniques, or even windshield wipers that are worn or damaged.
Can minor scratches on a windshield be repaired?
Yes, minor scratches on a windshield can often be repaired using DIY windshield repair kits or by seeking professional help from an auto glass repair specialist.
What are some common DIY methods to repair scratches on a windshield?
Some common DIY methods to repair scratches on a windshield include using toothpaste, baking soda mixed with water, or windshield repair kits that contain a resin-based solution.
How effective are DIY methods in repairing scratches on a windshield?
The effectiveness of DIY methods in repairing scratches on a windshield depends on the severity and depth of the scratches. While some minor scratches can be successfully repaired, deeper or more severe scratches might require professional intervention.
When should I seek professional help to repair scratches on my windshield?
It is recommended to seek professional help for repairing scratches on a windshield if the scratches are deep or extensive, or if the DIY methods have not yielded satisfactory results.
What can I expect during a professional windshield scratch repair?
During a professional windshield scratch repair, the technician will typically clean the affected area, apply a specialized resin to fill the scratch, and then cure it using ultraviolet light. The resin helps to restore the clarity and integrity of the windshield.
How much does it cost to repair scratches on a windshield?
The cost of repairing scratches on a windshield can vary depending on the severity of the scratches, the type of repair method used, and the service provider. On average, DIY kits can cost between $10-30, while professional repairs can range from $50-200.