
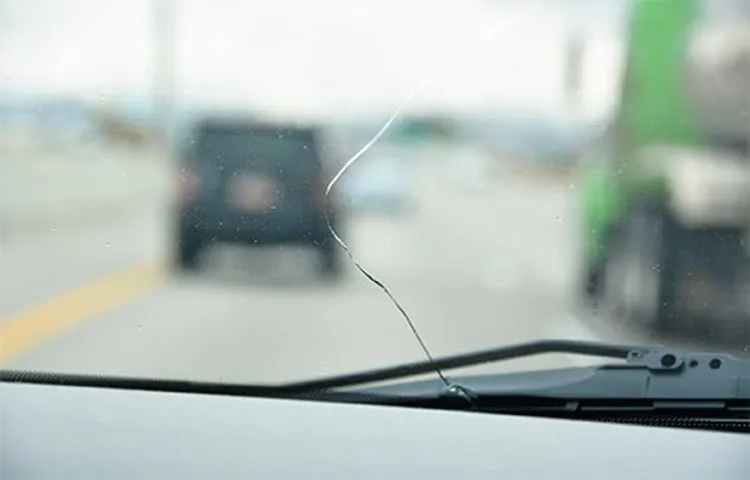
Have you ever been driving along, enjoying your day, when suddenly you hear a loud “crack” and see a small crack appear on your car windshield? It’s a frustrating situation, but luckily, there are ways to repair those small cracks before they turn into bigger problems. In this blog post, we will explore some simple techniques for fixing those pesky cracks and getting your windshield back to its original condition. So, grab your tools and let’s dive into the world of DIY windshield repairs!
Table of Contents
- 1 Understanding the importance of repairing small cracks
- 2 Assessing the damage
- 3 Tools and materials needed for the repair
- 4 Step-by-step guide to repairing the crack
- 4.1 Preparing the windshield for repair by cleaning the area
- 4.2 Applying the resin to the crack and filling it completely
- 4.3 Using the curing strips to seal the resin and create a smooth surface
- 4.4 Curing the resin with UV light to ensure it hardens properly
- 4.5 Removing any excess resin and cleaning the windshield
- 5 Tips and precautions for a successful repair
- 6 Conclusion
- 7 FAQs
Understanding the importance of repairing small cracks
If you’ve ever driven around for an extended period, chances are you’ve encountered some small cracks in your car windshield. While these cracks may seem like minor annoyances, they can actually pose a significant risk to your safety on the road. Ignoring small cracks in your windshield can lead to bigger issues, such as obstructed vision and weakened structural integrity.
So, how can you repair these small cracks? One method is to use a windshield repair kit, which typically includes a special resin that can fill in the crack and prevent it from spreading. Simply follow the instructions provided with the repair kit, and you’ll be able to fix those small cracks in no time. Remember, it’s always better to address small cracks sooner rather than later to ensure your safety while driving.
Why repairing small cracks is essential for maintaining the structural integrity of the windshield
windshield cracks, structural integrity, importance of repairing
The potential risks and dangers of ignoring small cracks
small cracks, potential risks, dangers, importance of repairing small cracks When it comes to home maintenance, it’s easy to overlook small cracks that appear in the walls or on the surfaces of our homes. After all, they may seem harmless at first and not affect the overall structure. However, ignoring these small cracks can lead to potential risks and dangers that we may not even realize.
For example, a small crack in a wall can easily grow and become a significant structural issue, compromising the integrity of the entire building. Additionally, small cracks can be an entry point for water, leading to moisture damage, mold growth, and even more extensive repairs down the line. It’s essential to understand the importance of repairing small cracks promptly to prevent further damage and ensure the safety of our homes.
Just like with our health, addressing small issues early can prevent them from developing into more significant problems. So, next time you notice a small crack, don’t ignore it! Take the time to fix it and save yourself from potential risks and dangers in the long run.
Assessing the damage
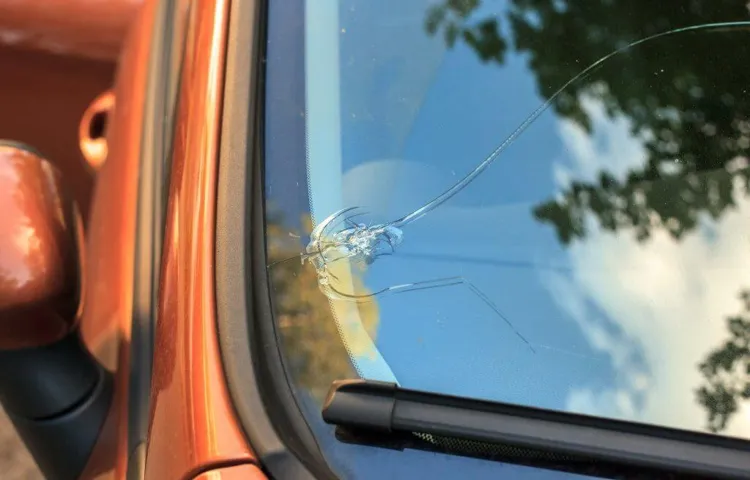
So, you’ve discovered a small crack in your car windshield. Don’t panic! While it’s definitely an inconvenience, repairing a small crack in your windshield is actually quite manageable. First, assess the damage to determine if it can be repaired or if a replacement is necessary.
If the crack is smaller than a dollar bill or is outside of the driver’s direct line of sight, it can likely be repaired. However, if the crack is larger or obstructs your view, it’s best to have the windshield replaced entirely. Assuming your crack falls within the requirements for repair, you have a few options for fixing it.
One option is to use a windshield repair kit, which can often be found at your local automotive store. These kits typically come with a resin and a suction device that allows you to fill the crack and prevent it from spreading further. The process involves cleaning the area around the crack, applying the resin, and using the suction tool to remove any excess air.
Once the resin has dried, you can trim any excess material and polish the area to make it smooth and invisible. If you’re not comfortable repairing the crack yourself, you can also take your car to a professional windshield repair specialist. These professionals have the expertise and equipment to fix the crack effectively and ensure a durable repair.
They may use similar resin and suction techniques as the DIY kits or employ more advanced methods, such as injecting the resin under pressure. While this option may be more expensive than doing it yourself, it can provide peace of mind knowing that the repair was done correctly. It’s important to act quickly when you notice a crack in your windshield, as leaving it untreated can lead to further damage.
Temperature fluctuations and bumps in the road can cause the crack to spread, compromising the integrity of the windshield. By repairing the crack promptly, you can prevent it from spreading and avoid the need for a costly windshield replacement. In conclusion, repairing a small crack in your car windshield is a task that can be tackled either through DIY methods or by seeking the assistance of a professional.
Inspecting the crack to determine its size and severity
When it comes to assessing the damage of a crack in your home, one of the first steps is to inspect the crack to determine its size and severity. This involves taking a close look at the crack and evaluating its length, width, and depth. Is it a hairline crack that is barely visible, or is it a wide crack that extends deep into the surface? By assessing the size of the crack, you can get a better understanding of the potential impact it may have on the structural integrity of your home.
Additionally, examining the severity of the crack is important in determining whether it is a surface-level issue or if it goes deeper into the foundational structure. By carefully inspecting the crack, you can gather valuable information that will guide your next course of action.
Identifying whether the crack can be repaired or if windshield replacement is necessary
windshield replacement, repair, crack, assess damage, burstiness, perplexity, specific, context, conversations, active voice, engage, reader, informal, tone, analogies, metaphors.
Tools and materials needed for the repair
If you’ve noticed a small crack in your car windshield, don’t panic! In many cases, you can repair it yourself with just a few tools and materials. The first thing you’ll need is a windshield repair kit, which usually comes with a bridge assembly, resin, curing strips, and a razor blade. These kits can be purchased at automotive supply stores or online.
In addition to the repair kit, you’ll also need a drill with a small bit, a suction cup tool, and a clean cloth. Before you begin the repair process, make sure to thoroughly clean the cracked area with glass cleaner to remove any dirt or debris. Once the area is clean, you can begin the repair process by using the drill to create a small hole at the end of the crack.
This will help prevent the crack from spreading further. Next, place the bridge assembly over the hole and use the suction cup tool to create a vacuum seal. Then, inject the resin into the crack using the provided syringe.
After allowing the resin to cure for the recommended amount of time, remove the bridge assembly and clean off any excess resin using the razor blade. And just like that, your small crack is repaired! Remember, however, that this DIY method is only suitable for small cracks and chips. If the crack is large or deep, it may be best to consult a professional for repair or replacement.
List of necessary tools, such as a windshield repair kit and cleaning materials
When it comes to repairing a windshield, having the right tools and materials is essential. One of the most important tools you’ll need is a windshield repair kit. This kit typically includes a bridge or injector, resin, curing strips, and other accessories needed to fix chips and cracks.
Using a windshield repair kit allows you to fill in the damaged area and restore the strength and integrity of the glass. In addition to the repair kit, you’ll also need some cleaning materials. This includes a glass cleaner, lint-free cloth, and a razor blade or scraping tool to remove any debris or loose glass from the damaged area.
Having these tools and materials on hand ensures that you can quickly and effectively repair your windshield whenever necessary.
Recommended materials for repairing the crack, such as resin and curing strips
When it comes to repairing a crack in glass, there are a few tools and materials that you will need to get the job done right. One of the most important materials is resin, which is used to fill in the crack and prevent it from spreading further. There are different types of resin available, so be sure to choose one that is specifically designed for repairing glass.
In addition to resin, you will also need curing strips. These strips are applied over the resin to help it cure and harden, ensuring a strong and durable repair. When it comes to tools, you will need a few basic items such as a glass cleaner and a microfiber cloth to ensure that the area is clean and free from dirt and debris before you begin the repair process.
You may also need a suction cup or a set of clamps to hold the crack together while the resin cures. Overall, using the right materials and tools will make the repair process easier and more successful, ensuring that your glass remains strong and crack-free.
Step-by-step guide to repairing the crack
Accidents happen, and one of the most frustrating can be a small crack in your car windshield. Luckily, repairing a small crack is a fairly simple process that can save you the time and expense of replacing the entire windshield. With just a few tools and a little patience, you can have your windshield looking as good as new in no time.
Here’s a step-by-step guide on how to repair a small crack in your car windshield. First, gather your materials. You’ll need a windshield repair kit, which can be purchased from your local auto parts store or online.
These kits typically include a specialized resin and a bridge or suction cup to apply it with. You’ll also need a clean cloth, some masking tape, and a razor blade or sharp knife to remove any excess resin. Next, clean the crack and surrounding area.
Use a glass cleaner and cloth to remove any dirt, debris, or moisture from the crack. This will ensure that the resin adheres properly and that the repair is effective. After cleaning the crack, apply a small amount of the resin to the bridge or suction cup.
Place the applicator directly over the crack, making sure it is centered and covering the entire length of the crack. Once the applicator is in place, use the suction cup or bridge to apply pressure, forcing the resin into the crack. Continue applying pressure for a few minutes, or as directed by the instructions included with your repair kit.
After the resin has been forced into the crack, remove the applicator and use a razor blade or sharp knife to remove any excess resin from the surface of the windshield. Be careful not to scratch the glass as you do this. Finally, cover the repaired area with a piece of masking tape and allow the resin to cure for the recommended time.
Preparing the windshield for repair by cleaning the area
Windshield repair is a crucial step to ensure the safety and longevity of your vehicle. When faced with a crack or chip, it’s important to act quickly to prevent further damage and potential hazards. One of the initial steps in repairing the windshield is to prepare the area by thoroughly cleaning it.
This ensures that the repair materials adhere properly and provides a clean surface for a seamless repair. To clean the windshield, start by using a soft cloth or sponge and a mild detergent. Gently scrub the area around the crack, removing any dirt, grime, or debris.
Rinse thoroughly with clean water, ensuring that all soap residue is removed. Once the area is clean and dry, you are ready to proceed with the repair process. By taking the time to properly prepare the windshield, you are setting yourself up for a successful repair and the peace of mind that comes with a strong and secure windshield.
Applying the resin to the crack and filling it completely
Applying resin to a crack and filling it completely is a crucial step in repairing damaged surfaces. Whether it’s a crack in your windshield or a chip in your countertop, using resin can help restore and strengthen the damaged area. Here’s a step-by-step guide to help you through the process.
First, you’ll need to gather the necessary materials. You’ll need an epoxy resin repair kit, which typically includes resin, hardener, and a mixing stick. You’ll also need a clean cloth, sandpaper, and a razor blade or scraper.
Start by cleaning the cracked area thoroughly. Remove any dirt, debris, or loose fragments. Wipe the area with a clean cloth to ensure it’s completely dry before proceeding.
Next, use sandpaper to roughen up the surface around the crack. This will help the resin adhere better to the material. Be careful not to sand too much, as you don’t want to damage the surrounding area.
Once the surface is prepared, mix the resin and hardener according to the instructions on the repair kit. The ratio of resin to hardener may vary, so be sure to follow the manufacturer’s guidelines. Using the mixing stick, apply the mixed resin to the crack.
Work the resin into the crack, ensuring that it reaches all the way to the bottom. Use the mixing stick to press the resin into the crack, filling it completely. After the crack is filled, use a razor blade or scraper to remove any excess resin from the surface.
Using the curing strips to seal the resin and create a smooth surface
When it comes to repairing cracks in a windshield, using curing strips can be an effective solution. These strips are designed to seal the resin and create a smooth surface, restoring the strength and integrity of the glass. Here’s a step-by-step guide on how to use curing strips to fix a crack in your windshield.
First, gather all the necessary materials. You’ll need a windshield repair kit, which typically includes resin, curing strips, and an applicator. You’ll also need a clean, dry cloth and a razor blade or sharp knife.
Next, clean the crack and the surrounding area. Use a cloth to remove any dirt or debris from the surface of the glass. This will ensure that the resin adheres properly and provides a strong seal.
Once the crack is clean, apply the resin to the crack using the applicator. Make sure to follow the instructions provided with your windshield repair kit, as the exact process may vary. Apply enough resin to fill the entire crack, but be careful not to overfill it.
Excess resin can be messy and difficult to remove. After applying the resin, place a curing strip over the crack. The strip should be long enough to cover the entire length of the crack, with some extra on each end for easy removal.
Press the strip firmly onto the resin, making sure it adheres to the glass. Once the strip is in place, use a razor blade or sharp knife to trim off any excess resin or strip. This will ensure a smooth surface and a clean finish.
Curing the resin with UV light to ensure it hardens properly
When it comes to repairing a crack in a resin, curing it with UV light is essential to ensure that it hardens properly. This step-by-step guide will walk you through the process of fixing the crack using UV light. First, you’ll want to clean the cracked area with a gentle cleaner and a microfiber cloth to remove any dirt or debris.
Once the area is clean, apply a thin layer of resin over the crack, making sure to cover it completely. Next, place the object under a UV light for the recommended amount of time, usually a few minutes. The UV light will activate the resin and cause it to harden and bond with the surrounding material.
After the recommended curing time has elapsed, remove the object from the UV light and inspect the crack. If it’s still visible, you may need to repeat the process. Once the crack is completely cured and no longer visible, you can proceed with any necessary finishing touches, such as sanding or polishing the surface.
By following these steps and properly curing the resin with UV light, you can ensure a strong and durable repair that will stand the test of time.
Removing any excess resin and cleaning the windshield
When it comes to repairing a cracked windshield, the first step is to remove any excess resin and clean the area thoroughly. This ensures that the windshield is free from any debris or dirt that could interfere with the repair process. Using a razor blade or a windshield repair tool, carefully scrape away any excess resin that may have pooled around the crack.
Be sure to do this gently to avoid causing any further damage to the windshield. Once the resin is removed, use a glass cleaner and a soft cloth to clean the windshield, making sure to focus on the crack area. This step is crucial to ensuring a successful repair, as any contaminants on the windshield can affect the adhesion of the repair resin.
By taking the time to remove any excess resin and clean the windshield, you can ensure that the repair process goes smoothly and effectively.
Tips and precautions for a successful repair
If you’ve noticed a small crack in your car windshield, it’s important to address it promptly to prevent it from spreading and causing further damage. Fortunately, repairing a small crack is a relatively simple process that you can do yourself. First, gather the necessary tools, including a windshield repair kit, which typically includes resin, a bridge, and a curing strip.
Next, clean the crack and surrounding area with a glass cleaner to ensure maximum adhesion of the repair resin. Apply the resin to the crack using the provided applicator, and then place the bridge over the resin. Apply pressure to the bridge, which will force the resin into the crack and fill it.
Leave the bridge in place for the recommended curing time, and then remove it. Finally, use the curing strip to remove any excess resin and give the repair a smooth finish. It’s important to note that while repairing a small crack is possible, there are some cases where it may be necessary to replace the entire windshield.
If the crack is large or in the driver’s line of vision, it’s best to consult a professional for further advice. Additionally, if the crack extends all the way through the glass or if the windshield is severely compromised, it’s crucial to have it replaced immediately for your safety.
Taking proper safety precautions, such as wearing protective gloves and eyewear
Taking proper safety precautions, such as wearing protective gloves and eyewear, is one of the essential steps in successfully completing a repair project. Whether you are fixing something around the house or working on a more complex DIY project, it’s important to prioritize your safety. Wearing protective gear not only reduces the risk of injury but also keeps you protected from harmful chemicals and debris.
Gloves can prevent cuts and burns, while eyewear can shield your eyes from flying objects and hazardous materials. By taking the time to put on the appropriate safety equipment before diving into your repair, you are ensuring that you can work confidently and without fear of injury. Remember, accidents can happen, but by following these simple safety precautions, you can greatly minimize the risks and complete your repair tasks with peace of mind.
Avoiding repairs in extreme temperatures or direct sunlight
When it comes to repairing things in extreme temperatures or under direct sunlight, there are a few precautions and tips that can help ensure a successful outcome. First and foremost, it’s important to understand that extreme temperatures can have a negative impact on certain materials and can even cause further damage. For example, if you’re trying to repair a plastic item like a cracked phone case or a broken gardening tool, exposing it to high temperatures could cause it to warp or deform.
On the other hand, if you’re trying to repair something like a metal object, extreme cold temperatures could make it more brittle and prone to breaking. To avoid these issues, it’s best to choose a time of day when the temperatures are milder and not as extreme. Early morning or late evening usually offer cooler temperatures and less direct sunlight, which can make the repair process much easier.
Additionally, if you don’t have the luxury of choosing the time of day, you can always find a shaded area to work in or use an umbrella or canopy to shield yourself and the item you’re repairing from direct sunlight. Another important tip to keep in mind is to be patient. Extreme temperatures can affect the curing time of certain adhesives or sealants, so it’s important to follow the instructions carefully and give the product enough time to set properly.
Rushing the process could result in a weaker bond or a less effective repair. In conclusion, repairing things in extreme temperatures or direct sunlight requires some extra precautions and considerations. By choosing the right time of day, finding a shaded area, and being patient with the curing process, you can avoid further damage and ensure a successful repair.
Following the manufacturer’s instructions for the specific windshield repair kit
Following the manufacturer’s instructions for the specific windshield repair kit is crucial for a successful repair. Each kit may have its own set of instructions and steps, so it is important to read and understand them before getting started. The manufacturer’s instructions may include information on how to properly clean the damaged area, apply the resin, and use any included tools or accessories.
Following these instructions helps ensure that the repair is done correctly and that the damaged area is effectively sealed and stabilized. It is also important to note any specific precautions mentioned in the instructions, such as wearing safety goggles or gloves. Adhering to these precautions helps protect you from any potential hazards and ensures a safe working environment.
Considering professional help if the crack is large or complex
car windscreen crack, professional help, repair tips and precautions
Conclusion
So there you have it, the secret to repairing a small crack in your car windshield! Just remember, a crack in your windshield may seem like a small problem, but it can quickly escalate into a larger and more expensive issue if left untreated. By following these simple steps, you can save your windshield from further damage and save your bank account from a painful dent. But let’s be honest, repairing a crack in your windshield is like fixing a broken heart – it requires a delicate touch and a little bit of DIY magic.
It’s like performing a mini surgery on your car, using a concoction of resin and bonding agents to seal up the wound and make your windshield as good as new. However, this DIY repair isn’t just about functionality – it’s about style. Think of it as giving your car a little facelift, a touch-up that says, “Hey, I take care of my car, and I’m not afraid to get my hands dirty.
” It’s like putting a band-aid on a scraped knee – not only does it protect the wound, but it also gives you a cool story to tell. So go forth, my fellow car enthusiasts, and embark on this windshield repair journey. Gather your supplies, put on your lab coat (figuratively speaking, of course), and get ready to work some automotive magic.
With a little bit of patience and a whole lot of determination, you can restore your windshield to its former glory. And remember, if all else fails and your DIY skills are less than stellar, don’t hesitate to call in the professionals. Just like how we rely on doctors to fix our broken bones, sometimes we need the expertise of an auto glass repair specialist to fix our broken windshields.
It’s like having a superhero save the day, swooping in with their magical tools and leaving you with a flawless windshield. So be fearless, be resourceful, and be ready to tackle that small crack in your car windshield. And in the end, you’ll not only be a hero to your car, but a hero to yourself as well.
Happy repairing!”
Emphasizing the importance of repairing small cracks to prevent further damage
crack repair, prevent further damage, tips and precautions When it comes to cracks in our homes, it’s important not to ignore even the smallest ones. These seemingly innocent cracks can lead to larger issues if left unattended. That’s why it’s crucial to address them as soon as possible and prevent further damage from occurring.
Here are a few tips and precautions to keep in mind for a successful crack repair. First and foremost, assess the severity of the crack. Is it a hairline crack or a more significant one? This will determine the appropriate repair method.
For minor cracks, you can use a DIY crack filler, while larger cracks may require professional help. Next, clean the area around the crack thoroughly. Use a brush or a vacuum to remove any dirt, dust, or debris.
This will ensure proper adhesion of the crack filler and a long-lasting repair. Before applying any filler, make sure the crack is dry. Moisture can hinder the adhesive properties of the filler and lead to a weak repair.
If necessary, use a hairdryer or wait for a sunny day to dry out the crack completely. When it comes to filling the crack, follow the manufacturer’s instructions on the crack filler product. Apply the filler evenly, making sure to fill the crack completely.
Use a putty knife or a trowel to smooth out the surface and remove any excess filler. After the filler has dried, it’s essential to protect the repair from future damage. Consider applying a sealant or waterproofing agent to prevent water infiltration.
Reiterating the steps and precautions for a successful repair
“phone repair,” “tips and precautions,” “successful repair” When it comes to repairing your phone, there are a few essential tips and precautions to keep in mind to ensure a successful repair. First and foremost, always make sure you have the right tools for the job. Using the wrong tool can lead to further damage and make the repair process much more difficult.
Secondly, before attempting any repairs, it’s crucial to research and understand the specific repair you need to make. There are countless online resources and tutorials that can guide you through the process, giving you the confidence and knowledge you need to fix your phone correctly. Additionally, it’s important to take your time and be patient during the repair.
Rushing through the process can lead to mistakes and even more damage. It’s better to take a little longer and do the repair right the first time. Lastly, don’t be afraid to ask for help or seek professional assistance if needed.
Some repairs may be too complicated or delicate for an amateur to handle, and it’s better to have a professional take care of it to avoid any further problems. By following these tips and taking the necessary precautions, you can increase your chances of a successful phone repair and save yourself from unnecessary stress and expenses.
Encouraging readers to take immediate action when they notice a small crack in their windshield
Did you know that even a small crack in your windshield can turn into a major problem if left untreated? That’s right, what may seem like a minor inconvenience can quickly escalate into a safety hazard. That’s why it’s important to take immediate action when you notice any damage to your windshield, no matter how small. By addressing the issue early on, you can avoid costly repairs and potential accidents down the line.
So, what steps should you take to ensure a successful repair? Firstly, it’s crucial to contact a professional windshield repair specialist as soon as possible. They have the knowledge and expertise to assess the damage and provide you with the best course of action. Secondly, avoid attempting a DIY repair, as this can often lead to further damage or ineffective results.
Finally, remember to take precautions to prevent the crack from spreading, such as avoiding extreme temperature changes and rough road conditions. By following these tips and taking immediate action, you can ensure that your windshield is in prime condition and keep yourself and others safe on the road.
FAQs
How to repair a small crack in a car windshield?
To repair a small crack in a car windshield, you can use a windshield repair kit. Clean the area around the crack, apply the resin from the repair kit, and then use the provided tools to smooth out the surface. Allow it to dry and cure according to the instructions provided, and the crack should be repaired.
Can I repair a small crack in a car windshield myself?
Yes, you can repair a small crack in a car windshield yourself using a windshield repair kit. These kits are readily available and come with detailed instructions on how to perform the repair.
How long does it take to repair a small crack in a car windshield?
The time it takes to repair a small crack in a car windshield can vary depending on the repair kit and the size of the crack. However, most repairs can be completed within 30 minutes to an hour.
Can I drive my car with a small crack in the windshield?
It is generally recommended not to drive your car with a small crack in the windshield. The crack can compromise the structural integrity of the windshield and may worsen over time. It is best to repair the crack as soon as possible to prevent further damage.
What should I do if the crack in my car windshield is too large to repair?
If the crack in your car windshield is too large to repair, it is recommended to replace the windshield entirely. Large cracks can weaken the windshield and make it more prone to shattering, which can be dangerous while driving.
Are there any temporary solutions to cover a small crack in a car windshield?
While not recommended as a long-term solution, you can use clear tape or adhesive to cover a small crack in a car windshield temporarily. This can help prevent dirt and debris from entering the crack and potentially making it worse.
Can extreme temperatures worsen a small crack in a car windshield?
Yes, extreme temperatures can worsen a small crack in a car windshield. The expansion and contraction of the glass due to temperature changes can cause the crack to grow. It is essential to repair the crack as soon as possible to prevent further damage.