

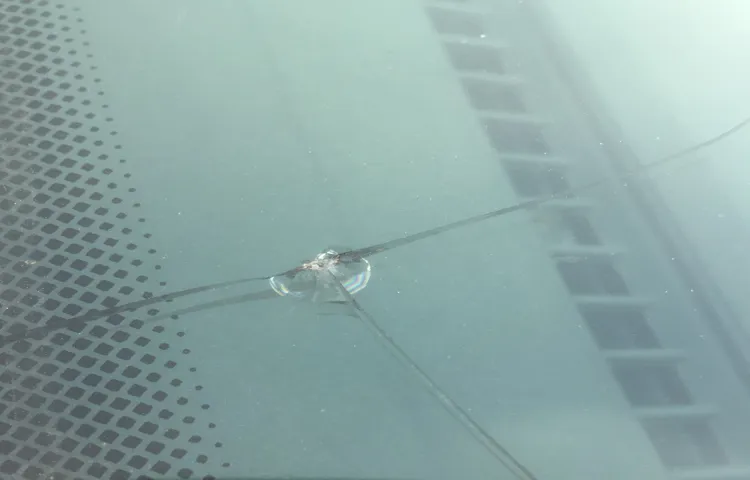
Do you have a small crack in your windshield that’s causing you stress? Don’t worry, you’re not alone. Windshield cracks are a common issue that many people face, but thankfully there are solutions available. In this blog post, we’ll explore how to repair a small windshield crack and get your car looking good as new.
Just like a small cut on your finger, a tiny crack on your windshield may not seem like a big deal at first. However, if left untreated, it can quickly spread and become a much larger problem. That’s why it’s important to address the issue as soon as possible.
But how exactly do you repair a small crack in your windshield? Is it something you can do yourself, or do you need to take it to a professional? We’ll answer all these questions and more in the following paragraphs. So let’s dive in and get your windshield back in top shape!
Table of Contents
Introduction
Are you tired of seeing that irritating crack on your windshield every time you get in your car? Don’t fret – repairing a small windshield crack is actually easier than you might think. With just a few simple tools, you can tackle this DIY project in no time. First, clean the chip or crack with a mixture of warm water and dish soap.
Once it’s dry, apply a windshield repair kit, which usually consists of a resin that fills in the crack and hardens when exposed to UV light. Make sure to follow the instructions carefully, as each kit may have slightly different steps. By taking the time to repair small windshield cracks, you can prevent them from spreading and potentially necessitating a full windshield replacement.
So why not take matters into your own hands and fix that crack today? Your windshield will thank you!
What Causes Small Windshield Cracks
small windshield cracks Introduction: Have you ever noticed a small crack in your windshield and wondered how it got there? It can be frustrating to see these tiny cracks appear seemingly out of nowhere, especially when you’re not sure what caused them. Small windshield cracks can be caused by a variety of factors, and understanding these causes can help you prevent them from happening in the future. In this article, we will explore some of the common causes of small windshield cracks and offer tips on how to avoid them.
So let’s dive in and unravel the mystery behind those pesky cracks!
Why You Should Repair Small Windshield Cracks
small windshield cracks, repair windshield cracks, windshield crack repair, importance of windshield crack repair, benefits of repairing small windshield cracks, cost of repairing windshield cracks
Assessing the Crack
If you’ve noticed a small crack in your windshield, it’s important to assess the damage before deciding on the best course of action. Start by examining the size and location of the crack. If it’s less than six inches long and not in the driver’s line of sight, you may be able to repair it yourself with a windshield repair kit.
These kits typically include a special resin that you can apply to the crack, which will bond with the glass and prevent it from spreading further. However, it’s important to note that this method is only suitable for small, non-obtrusive cracks. If the crack is larger or in a critical area, it’s best to consult with a professional auto glass repair service to ensure the safety and integrity of your windshield.
Remember, taking prompt action to repair a small crack can help prevent it from turning into a larger, more expensive problem down the line.
Determining the Type of Crack
crack types, assessing cracks
Measuring the Size of the Crack
When it comes to assessing the size of a crack, there are a few key factors to consider. One important aspect is the length of the crack. A longer crack can indicate that it has been there for a longer period of time and may require more extensive repair.
Additionally, the width of the crack is also important to consider. A wider crack could suggest that the structural integrity of the surface has been compromised and may require immediate attention. Another factor to look at is the depth of the crack.
A deeper crack may indicate that there is a more serious underlying issue that needs to be addressed. By considering these factors, you can accurately measure the size of the crack and determine the best course of action for repair.
Repairing the Crack
If you’ve noticed a small crack in your windshield, don’t panic! While it may seem like a major issue, there are actually simple steps you can take to repair it yourself. First, gather the necessary supplies – a windshield repair kit, which typically includes a resin compound and a curing film. Next, clean the cracked area with a mild detergent and water, ensuring that it is free of any debris or dirt.
Once the area is clean, follow the instructions on the repair kit to apply the resin compound to the crack. Use the curing film to cover the area and allow the resin to dry and harden. After the recommended drying time, remove the film and use a razor blade to carefully scrape off any excess resin.
Voila! Your windshield crack should now be repaired and hardly noticeable. Remember, while DIY windshield repair can save you money, it’s important to assess the severity of the crack and seek professional help if needed.
Materials Needed
“Materials Needed for Repairing a Crack: Fixing It Like a Pro!” So, you’ve discovered an unsightly crack in your wall, and you’re determined to fix it like a pro. Well, first things first, you’ll need a few materials to get the job done right. Don’t worry, though, it’s not as daunting as it may seem.
To start, you’re going to need a putty knife or a scraper to remove any loose or damaged material from the crack. This will ensure that the repair will adhere properly and last for a long time. Next, you’ll need some joint compound or spackling paste.
This is what you’ll use to fill in the crack and make it smooth. In addition to joint compound, you’ll also need some fine-grit sandpaper. Once the compound has dried, you’ll use the sandpaper to smooth out any rough edges and make the repaired area blend in seamlessly with the rest of the wall.
To apply the joint compound and sand the crack, you’ll need a sanding block or sanding sponge. These tools will make the process much easier and give you better control over the repair. Lastly, you’ll need some primer and paint to finish off the job.
Primer will help seal the repaired area and ensure that the paint adheres properly. So, don’t forget to grab a roller or brush and the appropriate color of paint to match your wall. There you have it – the materials you need to repair a crack like a pro.
With these items in hand, you’ll be well on your way to making that crack disappear. So, roll up your sleeves and get ready to tackle that repair with confidence!
Step 1: Clean the Crack
concrete crack repair, clean the crack. Repairing a crack in your concrete surface is an essential task in order to maintain its durability and prevent further damage. Before you can start the actual repair process, it’s important to first clean the crack thoroughly.
This step is crucial because it ensures that any dirt, debris, or loose particles are removed from the crack, allowing the repair material to adhere properly. To clean the crack, you can start by using a wire brush or a stiff bristle brush to remove any loose dirt and debris. Be sure to brush along the crack, applying a bit of pressure to dislodge any stubborn particles.
You can also use a garden hose or a pressure washer to flush out any hidden dirt or stagnant water that may be trapped inside the crack. Once you have removed all the loose debris, it’s also a good idea to use a vacuum cleaner to further clean the crack. This step helps ensure that all the fine particles and dust are completely removed, allowing the repair material to bond effectively.
Another important step in cleaning the crack is to wash it with a mild detergent or a concrete cleaner. This helps remove any oil, grease, or stains that may be present on the surface, which could interfere with the bonding of the repair material. After washing the crack, you should rinse it thoroughly with clean water to remove any residue from the cleaner.
Make sure to allow the crack to dry completely before proceeding with the repair process. By taking the time to clean the crack properly, you are preparing it for a successful repair. This step ensures that the repair material will bond effectively and provide a long-lasting solution for your cracked concrete surface.
So, before you reach for the repair material, don’t forget to give that crack a thorough cleaning!
Step 2: Apply the Repair Kit
To repair a crack in your wall, the next step is to apply the repair kit. This is where the real magic happens! The repair kit typically includes a patching compound, a putty knife, and sandpaper. Start by applying a thin layer of the patching compound over the crack with the putty knife.
Make sure to cover the entire crack and extend the compound a few inches on each side. Smooth out the compound as best as you can, using the putty knife to feather the edges so that it blends seamlessly with the surrounding wall. Let the compound dry according to the manufacturer’s instructions, usually about 24 hours.
Once it’s dry, take your sandpaper and gently sand the patched area until it’s smooth and level with the rest of the wall. Wipe away any dust or debris with a damp cloth. Now, step back and admire your handiwork! The crack should be completely sealed and ready for the next step, which is priming and painting.
So don’t stop now, you’re almost there!
Step 3: Cure the Resin
After you have applied the resin into the crack to fill it, the next step is to cure the resin. Curing the resin involves exposing it to a specific amount of heat or UV light, depending on the type of resin you are using. This process helps the resin harden and bond with the surrounding material, creating a strong and durable repair.
To cure the resin, you can use a heat gun or a UV light curing system. If you are using a heat gun, carefully apply heat to the repaired area, moving the gun in a back-and-forth motion to ensure even distribution of heat. Be cautious not to overheat the resin, as this can cause it to bubble or become discolored.
If you are using a UV light curing system, place the repaired object under the UV light for the recommended amount of time. Make sure to follow the manufacturer’s instructions for the curing process, as different types of resin may require different exposure times. During the curing process, it is important to keep the repaired object in a stable position to prevent any movement or shifting of the resin.
This will ensure a strong bond and minimize the risk of the crack reopening. Once the resin has fully cured, check for any imperfections or unevenness in the repair. If necessary, you can sand down the surface to smooth out any rough edges or bumps.
After this final touch, your repair should be complete and ready to use. Remember, proper curing of the resin is crucial for a successful repair. Take your time and follow the instructions carefully to ensure the best results.
With a little patience and care, you can restore your cracked object back to its original condition.
Step 4: Remove Excess Resin
Once you have applied the resin to the crack in your windshield and it has had time to cure, you will need to remove any excess resin that may be left on the surface. This step is crucial for ensuring a smooth and seamless repair. To remove the excess resin, you will need to use a razor blade or a windshield scraper.
Carefully scrape off the excess resin, paying attention to not scratch the surrounding glass. It is important to be gentle yet thorough in this step to ensure that all excess resin is removed. Once all the excess resin has been removed, take a clean, lint-free cloth and wipe down the windshield to remove any remaining residue.
This will leave your windshield looking clean and clear. Now your windshield repair is complete, and you can hit the road with confidence, knowing that your crack has been taken care of.
Additional Tips for Repairing Small Windshield Cracks
When it comes to repairing small windshield cracks, there are a few additional tips to keep in mind. First and foremost, it’s important to address the crack as soon as possible. Even the smallest crack can spread and become a larger problem, so taking immediate action is key.
Another tip is to use a windshield repair kit specifically designed for small cracks. These kits typically come with resin and a tool to inject it into the crack, allowing it to fill the void and prevent further damage. Additionally, it’s important to clean the windshield thoroughly before attempting any repairs.
Any dirt or debris on the surface can interfere with the effectiveness of the repair. Finally, be sure to follow the instructions included with the repair kit carefully. Each kit may have slightly different steps and techniques, so it’s essential to read and follow the provided instructions for the best results.
By following these tips, you can effectively repair small windshield cracks and prevent them from becoming a larger issue.
Conclusion
In conclusion, my clever comrades, repairing a small windshield crack is as easy as fixing a broken promise with duct tape. With a few simple steps and a touch of finesse, you can save yourself a trip to the auto repair shop and a pocket full of moolah. Remember, patience is key, just like waiting for the perfect sarcastic comeback.
So grab your superhero cape and your handy-dandy DIY kit, because you’re about to conquer that pesky crack like a champ. Now go forth, my fellow glass warriors, and may your windshields stay as flawless as the wit in this conclusion!”
FAQs
Can a small windshield crack be repaired?
Yes, small windshield cracks can be repaired using specialized repair kits available in the market.
What causes small windshield cracks?
Small windshield cracks can be caused by various factors such as flying debris, temperature fluctuations, and impact from objects.
How long does it take to repair a small windshield crack?
The repair process for a small windshield crack usually takes around 30 minutes to 1 hour, depending on the severity of the crack.
Can a small windshield crack spread and become larger over time?
Yes, if left untreated, a small windshield crack can spread due to the constant pressure and vibrations experienced while driving.
Is it safe to drive with a small windshield crack?
It is not recommended to drive with a small windshield crack as it can compromise the structural integrity of the windshield and pose a safety risk.
How much does it cost to repair a small windshield crack?
The cost of repairing a small windshield crack can vary depending on factors such as the size of the crack and the location. On average, it can cost around $50 to $100.
Can I repair a small windshield crack myself or should I seek professional help?
While there are DIY repair kits available, it is recommended to seek professional help for small windshield crack repairs to ensure proper and long-lasting results.