
Have you ever been driving down the road and suddenly heard a loud “ping” as a stone chip hits your windshield? It can be a frustrating experience, especially if the chip is in your line of sight. Not only does it obstruct your view, but it can also lead to larger cracks if left untreated. But fear not, because repairing a stone chip on your windshield is easier than you might think.
With a few simple tools and some patience, you can save yourself the hassle and expense of replacing the entire windshield. In this blog post, we will walk you through the step-by-step process of repairing a stone chip on your windshield, so you can get back on the road with a clear view ahead. So let’s dive in and start fixing that pesky stone chip!
Table of Contents
Introduction
Are you tired of looking at that annoying stone chip on your windshield? Don’t worry, I’m here to help you fix it! A stone chip can be a common occurrence while driving, especially if you frequently travel on highways or roads with loose gravel. But fortunately, repairing a stone chip on your windshield is a relatively simple process that you can do yourself. All you need is a windshield repair kit, which you can easily find at any automotive store or online.
These kits usually come with all the necessary tools and materials for the repair, including a resin that will fill in the chip and prevent it from spreading further. So don’t let that unsightly chip ruin the appearance of your windshield any longer. Grab a repair kit and follow these simple steps to get your windshield looking brand new again!
What is a Stone Chip?
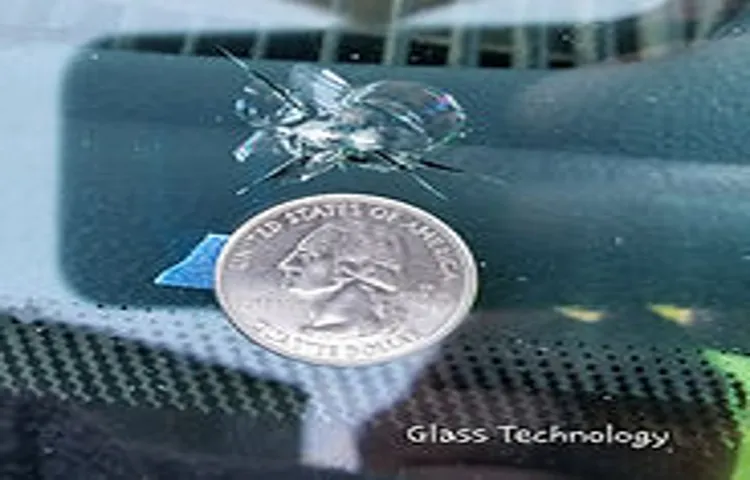
Stone chips are a common occurrence on the roads, but do you really know what they are? You may have noticed small, white marks on your windshield or paintwork after driving on gravelly or rough surfaces. These small marks are actually stone chips, which are caused by small rocks or gravel being thrown up from the road and hitting your vehicle. The impact from these stones can cause small chips or cracks in your windshield, as well as scratches or dents in the paintwork.
Stone chips may seem like a minor issue, but if left untreated, they can lead to more serious damage and costly repairs. So it’s important to understand what stone chips are and how to prevent and repair them.
Importance of Repairing Stone Chips
stone chip repair, repairing stone chips, importance of stone chip repair. Introduction: Picture yourself driving down the road, enjoying the wind in your hair and the open road ahead. Suddenly, a small stone is kicked up by the car in front of you, and bam! It hits your windshield, leaving behind a tiny chip.
You might be tempted to brush it off as a minor inconvenience, but did you know that repairing stone chips is actually quite important? In this blog, we will explore the reasons why stone chip repair should be a top priority for any car owner. So grab a cup of coffee and let’s dive in!
Materials Needed
If you’ve found a stone chip on your windshield, repairing it as soon as possible is important to prevent further damage. Fortunately, fixing a stone chip is a relatively simple process that can be done at home with just a few materials. First, you’ll need a windshield repair kit, which can be purchased online or at a local automotive store.
These kits typically include a resin and a device to inject the resin into the chip. Additionally, you’ll need a clean cloth, rubbing alcohol, and a razor blade or sharp knife for cleaning and preparing the chip. Having all these materials on hand will ensure a smooth and efficient repair process.
Windshield Repair Kit
windshield repair kit, materials needed
Clean Cloth
clean cloth. One of the most essential tools for keeping our homes clean is a clean cloth. But what exactly do we need to have in our arsenal to ensure we can effectively clean and maintain our living spaces? Well, the materials needed are pretty simple and straightforward.
Firstly, you’ll need a set of microfiber cloths. These are incredibly effective at trapping and removing dust, dirt, and grime from surfaces. They also have the added benefit of being reusable and washable, making them a sustainable choice.
Additionally, having a few lint-free cloths on hand is essential for tasks that require a streak-free shine, such as cleaning windows and mirrors. The lint-free texture ensures that no fibers are left behind on surfaces, leaving them sparkling clean. Another handy material to have is a soft bristle brush or toothbrush.
These are great for tackling small and hard-to-reach areas, such as grout lines, corners, and crevices. Lastly, don’t forget to have a supply of gentle cleaning solutions on hand. These can include mild dish soap, vinegar, and water.
They are effective at breaking down grease and grime without causing damage to surfaces. So, with these materials in your cleaning arsenal, you’ll be well-equipped to tackle any cleaning job that comes your way. Bye-bye dirt and hello clean cloth!
Rubbing Alcohol
rubbing alcohol, disinfectant, cleaning solution, isopropyl alcohol
Protective Gloves
When it comes to protective gloves, there are a few important materials that you need to know about. The most common material used for protective gloves is vinyl. Vinyl gloves are lightweight and cost-effective, making them a popular choice for a wide range of applications.
They provide protection against some chemicals, but they are not as durable as other materials. Another material commonly used for protective gloves is latex. Latex gloves are known for their flexibility and comfort, making them a great choice for tasks that require a high level of dexterity.
However, it’s important to note that some people may have allergies to latex, so alternative options may be necessary. Nitrile gloves are another popular material choice for protective gloves. Nitrile gloves are resistant to chemicals and punctures, making them a great option for tasks that involve handling hazardous substances.
They are also latex-free, making them a suitable option for those with latex allergies. Lastly, there are leather gloves, which provide excellent protection against cuts, abrasions, and punctures. They are commonly used in industries such as construction and welding.
By considering the specific requirements of your task, you can choose the right material for your protective gloves and ensure that you have the necessary level of protection.
Step-by-Step Guide
Are you tired of looking at that annoying stone chip on your windshield? Don’t worry, fixing it is easier than you might think! In this step-by-step guide, I’ll show you how to repair a stone chip on your windshield and restore its clarity and strength. First, gather the necessary materials: a windshield repair kit, which usually includes a resin, applicator, and curing film. Begin by cleaning the chip and the surrounding area with a glass cleaner.
Next, apply the resin to the chip by following the instructions provided in the repair kit. Make sure to fill the chip completely, but avoid overfilling. After applying the resin, place the curing film over the chip and carefully remove any air bubbles.
Finally, use a UV light or sunlight to cure the resin and harden it. With this simple process, you can easily repair a stone chip on your windshield and prevent it from spreading and causing further damage. So why wait? Get rid of that unsightly chip and enjoy a clear view while driving!
Step 1: Assess the Damage
assess the damage When faced with a damaged property, it’s important to take a step back and assess the situation before taking any action. This is the first step in our step-by-step guide to dealing with property damage. Assessing the damage allows you to understand the extent of the problem and determine the best course of action to take.
Start by carefully inspecting the area and documenting any visible damage. Take photos or videos of the damaged areas and make notes of any observations. This will not only be useful for insurance purposes but also provide a clear picture of what needs to be addressed.
Don’t forget to check for any hidden damage as well. It can be easy to overlook certain areas, so be thorough in your assessment. By taking the time to assess the damage, you’ll be better equipped to handle the situation and make informed decisions moving forward.
Step 2: Clean the Area
cleaning the area, neat and tidy, clutter-free, organized space, cleaning supplies, dusting, sweeping, wiping, disinfecting, sparkling clean, fresh and inviting. So now that you’ve gathered your cleaning supplies and put on your favorite cleaning playlist, it’s time to tackle the next step in our guide to cleaning: cleaning the area. This step is all about making sure your space is neat and tidy, clutter-free, and organized.
After all, what good is a clean space if it’s still filled with clutter? To start, take a moment to assess the area and identify any items that don’t belong or need to be put away. Clear away any unnecessary clutter to create a clean and open space. This will not only make cleaning easier but also give your area a more organized and inviting feel.
Next, grab your trusty duster and start dusting away. Dust can accumulate on surfaces, shelves, and furniture, so be sure to give everything a good wipe down. Don’t forget to dust the corners and hard-to-reach areas as well.
A thorough dusting will help remove any allergens and make the space feel fresh and clean. After dusting, it’s time to tackle the floors. Depending on your flooring type, you may need to sweep, vacuum, or mop.
If you have hardwood or tile floors, a quick sweep should do the trick. If you have carpet, a vacuum cleaner will help remove any dirt and debris. For an extra clean feel, you can also consider giving your floors a good mopping.
Now that the dust has been banished and the floors are looking spotless, it’s time to wipe down any surfaces. Use a disinfecting cleaner to clean countertops, tables, and other surfaces. Pay attention to high-touch areas such as doorknobs, light switches, and remote controls.
Step 3: Apply the Windshield Repair Kit
windshield repair kit
Step 4: Allow the Resin to Cure
Now that you’ve carefully mixed and poured your resin onto your desired surface, it’s time to let it cure. Curing is the process of allowing the resin to harden and solidify into a durable finish. This step is crucial to ensure that your resin project turns out beautifully and lasts for a long time.
The curing time for resin can vary depending on the specific brand and type of resin you’re using. It’s important to follow the manufacturer’s instructions and allow the resin to cure for the recommended amount of time. Typically, most resins take at least 24 hours to fully cure, but some may require up to 48 hours or longer.
During the curing process, it’s important to create an environment that promotes the resin’s hardening. Make sure the area where your project is located is free from dust, dirt, and other contaminants that could potentially mar the surface of the resin. You can cover your project with a box or a dome to protect it from any airborne debris.
Keep in mind that curing times can also be affected by factors such as temperature and humidity. Ideally, the room should be kept at a temperature between 70 and 75 degrees Fahrenheit (21-24 degrees Celsius) and with low humidity levels. Extreme temperatures and high humidity can slow down the curing process or even prevent it from fully occurring.
To check if your resin has cured, gently touch the surface with your finger. It should feel solid and not leave any marks. Additionally, you can also check the resin’s instructions to see if there are any specific tests or criteria to determine if it’s fully cured.
Once your resin has cured, you can proceed with any additional steps you may need, such as sanding, polishing, or applying a top coat to enhance the finish. Remember to handle your cured resin project with care to avoid any scratches or cracks. Curing your resin properly is a crucial step in achieving a successful resin project.
Step 5: Remove Excess Resin
In the final step of the resin removal process, it’s time to remove any excess resin that may have accumulated. This step is crucial for achieving a smooth and flawless finish on your resin project. To remove excess resin, you’ll need to carefully inspect your project for any drips or uneven surfaces.
If you notice any areas where the resin has pooled or dripped, you can use a craft knife or sandpaper to gently scrape away the excess resin. Be sure to take your time and work slowly, as you don’t want to accidentally remove too much resin or damage your project. Once you have removed all the excess resin, you can give your project a final inspection to ensure that it looks perfect before setting it aside to cure.
By following these steps and taking the time to remove any excess resin, you can ensure that your finished project will be professional-looking and polished.
Preventing Future Stone Chips
Have you ever experienced the frustration of driving down the road and hearing that dreaded “ping” sound as a stone chips your windshield? It’s an all-too-common occurrence that can be not only annoying but also potentially dangerous if left unattended. Fortunately, there are steps you can take to prevent future stone chips and keep your windshield in pristine condition. One of the best ways to prevent stone chips is by maintaining a safe distance from the vehicle ahead of you.
This allows you more time to react to any debris that may be kicked up by the other vehicle’s tires. Additionally, maintaining a safe following distance can help prevent stone chips caused by objects flying off of vehicles in front of you. Another preventive measure you can take is avoiding driving on gravel and unpaved roads as much as possible.
These types of roads are more likely to have loose stones and debris that can cause chips and cracks in your windshield. If you must drive on these types of roads, be sure to do so at a slower speed to minimize the risk of damage. Investing in a protective film for your windshield is another great way to prevent stone chips.
These films are optically clear and can provide a strong barrier against flying rocks and debris. They are also designed to be self-healing, meaning that any small chips or scratches will disappear over time. In a nutshell, preventing future stone chips on your windshield requires a combination of safe driving habits and the use of protective measures.
By maintaining a safe distance from other vehicles, avoiding unpaved roads when possible, and utilizing a protective film, you can greatly reduce the risk of damage to your windshield. So the next time you hit the road, remember to keep your distance and protect your windshield from those pesky stone chips.
Maintain a Safe Following Distance
“Maintain a Safe Following Distance” Preventing Future Stone Chips When we’re out on the road, it’s easy to get caught up in the hustle and bustle of traffic. We want to get to our destination as quickly as possible, and sometimes that means driving a little too close to the car in front of us. But did you know that maintaining a safe following distance is not only crucial for avoiding accidents, but it can also help prevent those pesky stone chips on your windshield? You see, when you tailgate the car in front of you, you’re not leaving enough space for those tiny pebbles and debris on the road to safely pass by.
Instead, they get kicked up by the tires of the vehicle ahead and come crashing into your windshield like tiny missiles. And trust me, dealing with stone chips can be a real headache. They not only ruin the aesthetic appeal of your car but can also compromise the structural integrity of your windshield.
So how do we prevent this from happening? It’s simple – maintain a safe following distance. The general rule of thumb is to leave at least a three-second gap between you and the car in front of you. This gives you enough time and space to react if something unexpected happens on the road, like a sudden stop or a flying stone.
By keeping this distance, you’re allowing any debris to become airborne and safely pass over your vehicle, without causing any damage. Think of it this way: maintaining a safe following distance is like giving your car a force field. It acts as a buffer zone between you and the vehicles around you, protecting you from any potential hazards.
So, the next time you find yourself in heavy traffic or on a gravelly road, remember to keep your distance. It’s not only safer for everyone on the road but also helps keep your windshield free from those pesky stone chips. Drive smart, stay safe, and enjoy a chip-free journey!
Avoid Rough Roads and Construction Zones
stone chips, preventing stone chips, rough roads, construction zones
Repair Small Chips Before They Expand
Preventing future stone chips is crucial for maintaining the appearance and integrity of your vehicle. These small chips may seem harmless at first, but if left unrepaired, they can quickly escalate into larger cracks that require expensive repairs. It’s like a tiny crack in a dam – if left unattended, it can lead to a catastrophic failure.
So, it’s important to take action as soon as you notice a small chip on your windshield or any other part of your car. Think of it as taking care of a small cut on your hand before it becomes infected and turns into something much worse. By repairing these small chips promptly, you can prevent them from expanding and causing further damage to your vehicle.
It’s a small investment of time and money now that can save you from much bigger headaches down the road.
Conclusion
And there you have it, the fool-proof guide to repairing a stone chip on your windshield. Remember, it’s not just about fixing the damage, it’s about saving the soul of your car. No more staring at that unsightly blemish every time you get behind the wheel.
Now, you can drive with the confidence of a freshly polished Rolls-Royce, knowing that you have conquered the pesky problem of stone chips. So go forth, my intrepid car enthusiasts, and show those chips who’s boss. Happy repairing!”
Taking the time to repair stone chips on your windshield is crucial for maintaining its integrity and ensuring your safety on the road.
Taking the time to repair stone chips on your windshield is crucial for maintaining its integrity and ensuring your safety on the road. Not only can a small stone chip turn into a big crack if left unattended, but it can also impair your vision while driving, putting you and your passengers at risk. To prevent future stone chips, there are a few simple steps you can take.
Firstly, keep a safe distance from large trucks and construction vehicles, as they are more likely to kick up rocks and debris. Secondly, avoid driving too closely behind other cars, as they may kick up stones from the road. Additionally, be mindful of where you park your car, especially in areas with heavy foot traffic or near construction sites.
Lastly, consider installing a protective film or shield on your windshield, which can provide an extra layer of defense against flying debris. By being proactive and taking these preventative measures, you can significantly reduce the chances of getting stone chips in the future and keep your windshield in excellent condition.
FAQs
What causes stone chips on windshields?
Stone chips on windshields are typically caused by small rocks or debris being kicked up by other vehicles or by road construction.
How can I prevent stone chips on my windshield?
To prevent stone chips on your windshield, maintain a safe distance from other vehicles and avoid following behind trucks and vehicles with loose cargo. You can also consider applying a protective film or coating on your windshield.
Can a stone chip on a windshield be repaired?
Yes, a stone chip on a windshield can often be repaired. There are DIY kits available or you can also take your vehicle to a professional windshield repair service.
Is it necessary to repair a stone chip on a windshield?
It is generally recommended to repair a stone chip on a windshield as soon as possible. If left untreated, the chip could expand and lead to a crack, compromising the integrity of the windshield.
How long does it take to repair a stone chip on a windshield?
The time needed to repair a stone chip on a windshield can vary depending on the type and size of the chip, as well as the repair method used. In most cases, it can be done within 30 minutes to an hour.
Can I repair a stone chip on my windshield myself?
Yes, there are DIY kits available for repairing stone chips on windshields. However, it is important to follow the instructions carefully and assess if the chip is within the recommended size and location for DIY repair.
How much does it cost to repair a stone chip on a windshield?
The cost of repairing a stone chip on a windshield can vary depending on several factors such as the location, severity, and type of chip. On average, professional repairs can range from $50 to $100.
Can a repaired stone chip on a windshield be noticeable? A8. In many cases, a properly repaired stone chip on a windshield should be virtually invisible. However, some types of chips or cracks may still leave a slight mark or blemish, though it should not affect the overall visibility through the windshield.
Are all stone chips on windshields repairable?
Not all stone chips on windshields can be repaired. If the chip is too large or if it has spread into multiple cracks, it may require a windshield replacement instead.
Will repairing a stone chip on a windshield make it as strong as before?
While a properly repaired stone chip can restore the structural integrity of the windshield, it may not be as strong as before the damage occurred. However, it should still provide adequate protection and durability.