
Have you ever found yourself staring at a scratch on your windshield, wondering how it got there and how you can fix it? Windshield scratches can be a frustrating problem, especially when they obstruct your view while driving. But fear not, because in this blog post, we’ll explore some effective methods to repair surface scratches on your windshield. Just like how a scratch on a brand-new car can ruin its appearance, scratches on your windshield can impair your vision and compromise your safety on the road.
They can be caused by various factors, such as debris hitting your windshield while driving or using the wrong tools to clean it. No matter how small or superficial the scratch may seem, it’s essential to address it promptly to prevent it from spreading and potentially leading to more significant damage. Luckily, there are several DIY methods available that can help you repair surface scratches on your windshield and restore its clarity.
So, let’s dive in and explore these techniques so that you can embark on the journey of fixing those unsightly windshield scratches.
Table of Contents
Introduction to Surface Scratches on Windshields
Do you have annoying surface scratches on your windshield? Don’t worry, it happens to the best of us! Whether it’s from debris on the road or careless parking, these scratches can be a real eyesore. But fear not, because I’m here to show you how to repair those surface scratches and restore the clarity of your windshield. The first step is to thoroughly clean the windshield to remove any dirt or grime that may be hiding the extent of the scratches.
Then, you’ll want to assess the depth of the scratches to determine the best method of repair. If the scratches are shallow, you can try using a windshield polish or a DIY remedy such as toothpaste or baking soda. These abrasive substances can help buff out the scratches and make them less visible.
However, if the scratches are deeper or more severe, it may be necessary to use a windshield repair kit or seek professional help. These kits typically include a resin that can be applied to the scratches, filling them in and making them virtually invisible. So don’t let those surface scratches ruin the view out of your windshield.
With a little bit of time and effort, you can restore it to its former glory.
What are surface scratches and how do they occur?
surface scratches, windshield, occur, introduction
Importance of repairing surface scratches on windshields
windshield, surface scratches, repair, importance. Introduction to Surface Scratches on Windshields Have you ever noticed those annoying little scratches on your windshield? You know the ones I’m talking about – those tiny imperfections that seem to appear out of nowhere and quickly multiply. They may seem harmless at first, but trust me, they can cause big problems if left untreated.
These surface scratches on your windshield may not seem like a big deal, but they can impair your visibility and compromise the structural integrity of your windshield. So, what’s the big deal? Why should you bother repairing these scratches? Well, in this blog post, I’m going to dive into the importance of repairing surface scratches on windshields and why it’s crucial to address them sooner rather than later. Trust me, you won’t want to miss this!
Methods for Repairing Surface Scratches on Windshields
Are you frustrated by the surface scratches on your windshield? Thankfully, there are methods you can try at home to repair them and save yourself the cost of a full windshield replacement. One option is to use a windshield repair kit, which typically includes a resin that can fill in the scratches and restore the glass to its original clarity. These kits are widely available and relatively easy to use.
Another method you can try is using toothpaste or baking soda mixed with water. Apply the mixture to the scratches and gently rub it in using a soft cloth. This can help to buff out the scratches and make them less noticeable.
However, it’s important to note that these methods are best for surface scratches and may not be effective for deeper or more severe damage. If you’re unsure or the scratches remain after attempting these methods, it’s always best to consult a professional for further assistance.
DIY methods for repairing surface scratches
If you’ve ever had the unfortunate experience of finding surface scratches on your windshield, you’ll know how frustrating it can be. These scratches not only affect the aesthetics of your car, but they can also hinder your visibility while driving. Thankfully, there are DIY methods available to help repair these surface scratches and restore your windshield to its former glory.
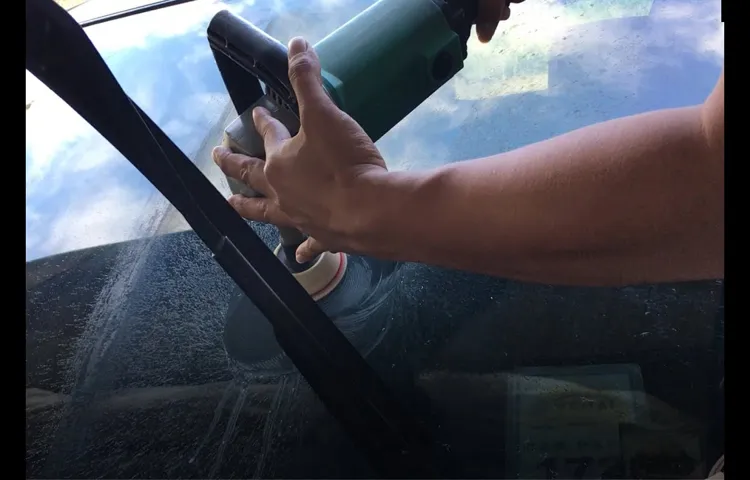
One effective method involves using a glass polishing compound and a microfiber cloth. Simply apply a small amount of the compound to the scratched area and gently rub it in a circular motion. This will help remove the scratches and restore the clarity of your windshield.
Another option is to use toothpaste as a makeshift polish. Apply a small amount of toothpaste to the scratch and rub it in with a soft cloth. The abrasive properties of the toothpaste can help smooth out the scratch and make it less noticeable.
However, it’s important to note that these DIY methods are only suitable for minor surface scratches. If you have deep or extensive damage to your windshield, it’s best to seek professional help for the repair.
Professional methods for repairing surface scratches
Windshield repair can be a costly and inconvenient task, especially when it comes to scratches on the surface. However, there are professional methods that you can utilize to repair these surface scratches and restore your windshield to its former glory. One such method is the use of a windshield repair kit, which typically includes a resin that can be applied to the scratch and left to harden.
Once the resin has dried, it can be buffed and polished to create a smooth and clear surface. Another method involves the use of a scratch remover, which is a specialized compound that can be applied to the scratch and then buffed out using a microfiber cloth. This process helps to remove any surface imperfections and restore the windshield’s clarity.
Additionally, there are online tutorials and guides available that can provide step-by-step instructions for repairing surface scratches on windshields. By following these professional methods and taking the time to carefully repair the scratches, you can save yourself money and avoid the hassle of replacing your windshield.
Step-by-Step Guide on DIY Surface Scratches Repair
If you’ve ever had the unfortunate experience of finding surface scratches on your windshield, don’t fret! With a little time and effort, you can repair those scratches yourself and avoid the expense of taking your car to a professional. Here’s a step-by-step guide on how to repair surface scratches on your windshield. First, gather the necessary supplies: glass polishing compound, microfiber cloth, glass cleaner, and a windshield repair kit.
Start by cleaning the windshield thoroughly with the glass cleaner to ensure there is no dirt or debris that could further scratch the surface. Next, apply a small amount of the glass polishing compound to the microfiber cloth and begin rubbing it into the scratched area using firm, circular motions. Continue to polish the area for several minutes, adding more compound as needed.
Once you’re satisfied with the result, wipe away any excess compound with a clean microfiber cloth. Finally, use the windshield repair kit to fill in any remaining scratches with the resin provided. Follow the instructions carefully and allow the resin to cure before wiping away any excess.
With a little patience and attention to detail, you can restore your windshield to its original, scratch-free condition. So, next time you find surface scratches on your windshield, don’t worry – you’ve got this!
Materials and tools needed for the repair process
Surface scratches can be unsightly and can detract from the overall appearance of your belongings. However, repairing these scratches doesn’t have to be a complicated task. With the right materials and tools, you can easily fix surface scratches on various surfaces such as wood, metal, and plastic.
To begin the repair process, you’ll need a few key materials. First and foremost, you’ll need a scratch repair kit or some form of scratch remover. These kits typically include abrasive compounds, polishing compounds, and microfiber cloths.
Additionally, you may need some sandpaper with different grits, depending on the severity of the scratch. For deeper scratches, you may also need a wood filler or a metal filler, depending on the surface you’re working with. Lastly, you’ll need some sort of sealer or protective coating to finish off the repair process and prevent future scratches.
In terms of tools, you’ll need a few basic items. A soft cloth or sponge will come in handy for cleaning the surface and applying the repair products. You may also need a sanding block or sanding pad to help smooth out the surface and blend the repaired area with the surrounding area.
If you’re working with wood, a putty knife or scraper may be necessary for applying the filler. Finally, a buffer or polishing pad can be helpful for achieving a smooth and glossy finish after the repair process. Now that you have all the necessary materials and tools, it’s time to dive into the step-by-step process of repairing surface scratches.
By following these instructions carefully, you can restore your belongings to their former glory and enjoy a scratch-free surface once again.
Assessing the severity of the surface scratch
“surface scratch” Other important keywords used: severity, step-by-step guide, DIY, repair Surface scratches on various objects can be quite bothersome. Whether it’s on your car, furniture, or electronic device, they can be a constant source of irritation. The severity of the scratch plays a crucial role in determining the appropriate repair technique.
A surface scratch is typically a minor blemish, superficial in nature, that only affects the topmost layer of the material. It is usually not deep enough to expose the underlying layers or cause structural damage. To assess the severity, carefully examine the scratch in good lighting.
Run your finger gently over the affected area to determine if it can be felt or if it’s just a visual imperfection. If the scratch is shallow and doesn’t penetrate the surface completely, it can usually be fixed with a simple DIY repair. Let’s dive into a step-by-step guide on how to repair surface scratches yourself, saving you both time and money.
Preparing the windshield for repair
windshield repair, DIY surface scratches repair, preparation, step-by-step guide, surface scratches, repair kit. When it comes to repairing surface scratches on your windshield, it’s important to begin with proper preparation. By following a step-by-step guide, you can ensure that your DIY repair is effective and long-lasting.
First, gather all the necessary materials for the job, including a windshield repair kit. These kits typically include a resin or adhesive, a syringe or applicator, and a curing strip. Next, thoroughly clean the surface of the windshield with a glass cleaner to remove any dirt or debris.
This will allow the repair materials to adhere properly to the glass. Once the windshield is clean, use a sharp blade or razor to carefully remove any loose or protruding bits from the scratch. This will create a smooth surface for the repair.
Finally, apply a small amount of the repair resin or adhesive to the scratch and use the syringe or applicator to push it into the damaged area. Follow the instructions provided with the repair kit to ensure proper application and cure time. With the right preparation, you can tackle surface scratches on your windshield with confidence and restore its clarity and integrity.
Applying the chosen repair method
surface scratches repair, DIY repair method, step-by-step guide If you have noticed surface scratches on your furniture or other surfaces, don’t panic! These scratches can be easily repaired using a DIY method. In this step-by-step guide, I will walk you through the process of repairing surface scratches so that you can restore the appearance of your belongings. The first step in repairing surface scratches is to assess the severity of the damage.
If the scratch is shallow and only affects the top layer of the material, you can proceed with the DIY repair method. However, if the scratch is deep and has penetrated deep into the material, it may be best to seek professional help. Once you have assessed the damage, you can gather the necessary materials for the repair.
You will need a microfiber cloth, a mild dish soap, water, a scratch repair kit or a DIY solution such as toothpaste or baking soda, and a soft cloth or brush for application. To begin the repair process, start by cleaning the surface around the scratch. Use a microfiber cloth, water, and a mild dish soap to gently remove any dirt or debris.
Once the surface is clean, dry it thoroughly before proceeding to the next step. Next, apply the scratch repair solution to the surface scratch. If you are using a scratch repair kit, follow the instructions provided to apply the solution.
If you are using a DIY solution such as toothpaste or baking soda, mix it with a small amount of water to form a paste and apply it to the scratch using a soft cloth or brush. Gently rub the solution into the scratch in a circular motion, being careful not to apply too much pressure. After applying the scratch repair solution, let it sit for a few minutes or as instructed by the product.
This will allow the solution to work its magic and help fill in the scratch. Once the recommended time has elapsed, use a clean, soft cloth to gently buff away any excess solution from the surface. Again, use a circular motion and apply minimal pressure to avoid causing further damage.
Finishing touches and aftercare for the repaired surface scratches
surface scratches repair, finishing touches, aftercare, DIY, step-by-step guide. So, you’ve successfully repaired the surface scratches on your beloved piece of furniture or car, but your job isn’t quite done yet. In order to truly restore the item to its former glory and ensure it stays that way, there are a few finishing touches and aftercare steps you’ll want to take.
First and foremost, make sure the repaired area is completely dry before proceeding. This may take a few hours or overnight, depending on the type of repair you performed. Once it’s dry, gently sand the area with fine-grit sandpaper to even out any imperfections and create a smooth surface.
Be sure to use a light touch and go in the same direction as the grain or pattern of the material. Next, it’s time to apply a protective coating to the repaired area. If you’re working with wood, choose a clear varnish or lacquer that matches the sheen of the surrounding surface.
For plastic or metal, an automotive-grade clear coat spray will work well. Apply the coating in thin, even layers, allowing each layer to dry before applying the next. This will help protect the repaired area from future scratches and ensure a seamless finish.
Once the protective coating is dry, you may notice a slight difference in color or sheen between the repaired area and the surrounding surface. To blend the two together, you can use a color-matching touch-up pen or paint. Take your time and carefully apply the product to the repaired area, feathering it out towards the edges.
Allow it to dry and assess the color match. If needed, you can repeat this step until you achieve a seamless blend. Finally, to maintain the repaired surface and prevent further damage, it’s important to take some aftercare steps.
Benefits of Professional Surface Scratches Repair
Do you have annoying surface scratches on your windshield that are affecting your visibility while driving? If so, don’t worry because there is a solution! By availing the services of professional surface scratches repair, you can easily fix those unsightly scratches and enjoy a clear view of the road ahead. The benefits of this service are numerous. Firstly, it is a cost-effective solution compared to replacing the entire windshield.
Secondly, it saves you time as the repair process is quick and efficient. Additionally, professional surface scratches repair restores the structural integrity of the windshield, ensuring its durability and preventing further damage. So, why put up with those annoying scratches when you can have a clear and unobstructed view? Trust the experts to provide you with high-quality and long-lasting results, allowing you to drive with confidence and peace of mind.
Expertise and experience in repairing surface scratches
surface scratches repair, professional surface scratches repair
Specialized tools and techniques for effective repair
surface scratches repair, specialized tools and techniques, professional surface repair
Long-lasting results and warranty of the repair
car surface scratches repair, professional surface scratches repair, long-lasting results, warranty of the repair If you’re tired of staring at those unsightly surface scratches on your car, it’s time to consider professional surface scratches repair. Trusting the job to a professional not only ensures a high-quality and long-lasting repair, but it also comes with the added benefit of a warranty. When you attempt to repair surface scratches on your own, you run the risk of making the problem worse or not achieving the desired results.
But with a professional, you can be confident that they have the expertise and tools needed to tackle the job effectively. Plus, they back up their work with a warranty, so if anything goes wrong after the repair, you can rest easy knowing it will be taken care of. By investing in professional surface scratches repair, you can enjoy the peace of mind that comes with knowing your car will look its best for years to come.
Conclusion
And there you have it, a simple and effective solution for repairing surface scratches on your windshield. Just remember, not all scratches are created equal, so always assess the damage before determining the best approach. Whether you choose toothpaste or nail polish, just make sure to follow the steps carefully and take your time.
After all, a scratched windshield is like a bad hair day – it’s definitely not a good look. So, why not give your windshield the makeover it deserves? With a little patience and the right materials, you’ll have those scratches saying goodbye and your windshield looking brand new again. So, go ahead and show those scratches who’s boss – because nobody messes with your windshield’s flawless shine!”
FAQs
How can I repair surface scratches on my windshield?
To repair surface scratches on a windshield, you can start by cleaning the damaged area with a glass cleaner. Then, use a windshield repair kit that contains a resin to fill in the scratches. Follow the instructions on the kit to apply the resin and cure it with UV light. Finally, use a glass polish to buff the area and make it smooth.
Are there any DIY methods to fix surface scratches on a windshield?
Yes, there are some DIY methods to fix surface scratches on a windshield. You can try using toothpaste or baking soda mixed with water to create a paste and gently rub it on the scratches. Another method is to use a glass repair liquid that is designed specifically for windshield scratches. However, it is important to note that these DIY methods may not provide a permanent solution and it’s always recommended to consult a professional for major repairs.
Can using a windshield repair kit remove all types of surface scratches?
While a windshield repair kit can effectively remove minor surface scratches, it may not be able to completely remove deep or significant scratches. It is important to assess the severity of the scratches before attempting to use a windshield repair kit. If the scratches are too deep or extensive, it is recommended to consult a professional for proper repair or replacement.
Is it possible to prevent surface scratches on a windshield?
While it is not always possible to prevent surface scratches on a windshield, there are some preventive measures you can take. Avoid parking your vehicle near trees or bushes that may brush against the windshield. Use windshield wipers carefully and replace them when they start to wear out. Additionally, avoid using abrasive cleaners or rough materials when cleaning the windshield.
Can windshield scratch repair be covered by insurance?
Whether or not windshield scratch repair is covered by insurance depends on your specific insurance policy. Some insurance policies may cover windshield repairs or replacement, while others may require a separate windshield coverage add-on. It is recommended to contact your insurance provider and inquire about the coverage for windshield scratch repair.
How much does it cost to repair surface scratches on a windshield?
The cost of repairing surface scratches on a windshield can vary depending on the extent of the damage and the repair method used. DIY methods may cost less, typically ranging from $10 to $40. Professional repair services can cost anywhere from $50 to $200, depending on the severity of the scratches and the type of repair required.
Can I drive with surface scratches on my windshield?
It is generally safe to drive with surface scratches on a windshield as long as they do not obstruct your vision. However, it is important to note that over time, these scratches can weaken the integrity of the windshield and may lead to further damage. It is recommended to have the scratches repaired as soon as possible to ensure the safety and longevity of your windshield.