
Do you love hitting the road in your RV and enjoying the great outdoors, but lately, your joyride has been dampened by a torn awning? A torn RV awning can be frustrating and can also lead to further damages if not repaired immediately. While it may seem like a daunting task, repairing a torn RV awning can be a straightforward process if you know what to do. In this blog post, we’ll guide you through the steps to repair a torn RV awning, so you can get back to enjoying your travels.
Whether it’s a small tear caused by weather elements or a more significant tear caused by an accident, we’ve got you covered. So, let’s get started!
Table of Contents
Assessing the Damage
If you have a torn RV awning, the first step is to assess the damage and determine the extent of the tear. If it’s a small tear, you may be able to fix it yourself using a patch kit. These kits typically include a patch and adhesive that you apply to the tear.
However, if the tear is too large, you may need to replace the entire awning. To do this, you’ll need to order a replacement awning of the same size and style as your current one. Once the new awning arrives, you can remove the old awning and install the new one using the same hardware.
It’s important to make sure the replacement awning is properly tensioned so that it stays in place and doesn’t sag or flap in the wind. With a little bit of effort, you can repair or replace your RV awning and get back to enjoying your time on the road.
Locating the Tear
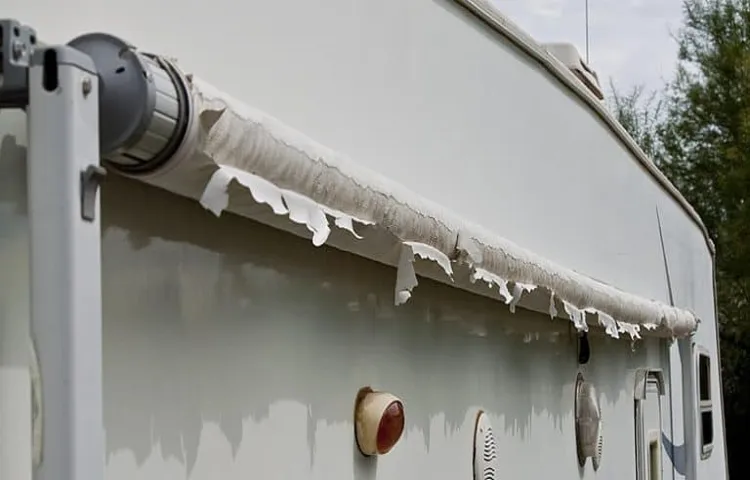
When assessing the damage to your torn object, the first step is to locate the tear. It may seem obvious, but it’s important to take the time to carefully examine the object and get a clear understanding of the extent of the damage. Identify the full length and depth of the tear, as well as any frayed edges or loose threads.
This will help you determine the best course of action when it comes to repairing the tear. One useful technique is to hold the object up to the light and examine it from different angles, as this can help to reveal any hidden tears or damage that may not be immediately apparent. Once you have a good understanding of the damage, you can begin to assess your options for repair, whether that involves sewing, patching or replacing the damaged area.
By taking the time to carefully assess the damage, you can ensure that your repair job is effective and long-lasting.
Measuring the Tear
When it comes to assessing a tear, there are a few important steps to take in order to get the best possible outcomes. First, it’s crucial to properly clean the area around the tear, removing any debris or foreign objects that may be present. Next, a close examination using a bright light and magnification tool can help to determine the extent of the damage.
In some cases, additional testing such as X-rays or MRIs may be necessary. It’s important to keep in mind that tears can vary in severity, so proper diagnosis and treatment are key. Whether it’s a small tear or a more significant injury, seeking prompt medical attention is critical to ensure the best possible recovery.
By taking these steps, you can help to ensure that your injury is properly evaluated and treated, allowing you to get back to your normal activities as quickly and safely as possible. So, always remember to take care of the tear to live a healthy life.
Preparing for Repair
Repairing a torn RV awning can be a daunting task, but with some preparation, it can be a relatively simple process. The first step is to assess the damage and determine the best course of action. If the tear is small, it can often be fixed with a patch kit.
However, if the tear is larger or in a high-stress area, it may require the replacement of the entire awning. Before attempting any repairs, it’s important to have all the necessary tools and materials on hand. This can include a patch kit, awning repair tape, a ladder, a drill, and replacement fabric.
It’s also important to follow the manufacturer’s instructions carefully and to work slowly and methodically to avoid further damage. One helpful tip is to clean the area around the tear thoroughly before beginning any repairs. This will help ensure that the patch or tape adheres properly and provides a strong seal.
It’s also a good idea to have an extra set of hands to assist with the repair process, as some steps may require lifting or holding the awning in place. Ultimately, repairing a torn RV awning requires patience, attention to detail, and a steady hand. With a bit of preparation and the right tools, however, it is a manageable task that can save you time and money in the long run.
So don’t hesitate to tackle that tear head-on and get your RV awning looking and functioning like new again!
Cleaning the Area
When preparing for a repair, it is important to begin by cleaning the area. This involves removing any debris or clutter that may accumulate around the damaged object. For example, if repairing a cracked bathroom tile, it would be best to remove any loose pieces or grout from the surrounding area to ensure a clean and smooth surface for the repair.
Additionally, wiping down the area with a damp cloth can help remove any dirt and dust that may have accumulated, making for a cleaner and more effective repair. By taking the time to properly clean the area before beginning a repair, you can ensure a better outcome and potentially avoid any complications that may arise from working on a dirty or cluttered surface. So, before you grab your tools and get to work, take a moment to tidy up and prepare the area for a successful repair.
Gathering Materials
When beginning your repair project, it’s important to gather all the necessary materials beforehand. This will save you time, energy and frustration in the long run. Make a list of all the supplies you’ll need, including tools, replacement parts, adhesives, and safety equipment.
If you’re unsure about which materials you’ll need, consult a professional or do research online. Don’t skimp on quality when it comes to purchasing supplies, as using low-quality materials can compromise the success of your repair. By having everything you need at your fingertips, you’ll be able to work more efficiently and make the necessary repairs quickly.
Remember, preparation is key to a successful repair job.
Repairing the Tear
If you’re the lucky owner of an RV, you know that awnings can provide shade, protection, and a cozy outdoor space. However, sometimes accidents happen, and tears or holes may occur. Luckily, repairing a torn RV awning is a lot easier than you may think.
First, you will need to determine the extent of the damage and purchase a repair kit that is appropriate for your specific awning material. Then, clean the area thoroughly and apply the patch according to the instructions on the kit. It’s important to ensure the patch is firmly attached and that no air bubbles are present.
Once the patch is in place, give it sufficient time to dry and cure before retracting or using the awning. Keep in mind that regular maintenance and inspection of your awning can help you detect any damage early and avoid costly repairs in the future. By following these simple steps, you’ll be back to enjoying your outdoor space in no time!
Choosing a Repair Method
When it comes to repairing a tear in a piece of clothing, there are a few different methods to choose from. One of the most common approaches is to simply sew up the tear using a needle and thread. This method can work well for small tears, but for larger ones or tears in more delicate fabrics, it may not be the best option.
Another approach is to use a patch to cover the tear, either on the front or back of the clothing. This can be a good choice for tears that are too large or unattractive to simply sew up. When deciding which repair method to use, it’s important to consider the size and location of the tear, as well as the type of fabric involved.
Choosing the right approach can help ensure that the repair looks good and is durable enough to stand up to regular wear and tear.
Applying the Patch
After carefully assessing the tear on the article of clothing, the first step in repairing the damaged spot is to apply the patch. A patch is a piece of material that will be placed over the tear and sewn in place to reinforce the damaged area. Before applying the patch, it’s important to clean the area around the tear thoroughly.
This will ensure that there is no dirt or residue left on the fabric, which may affect the adhesion of the patch. Also, make sure that the patch is slightly larger than the tear so that it can cover the damaged area. Once the patch is cut to the desired size, apply a fabric glue to the backside of the patch and place it over the tear.
Make sure it covers the entire damaged area. Then, sew the patch in place along the edges to secure it further. In the end, applying a patch to a tear is a great way to repair the article of clothing and extend its lifespan.
Sealing the Edges
Sealing the edges of a torn item can be a bit intimidating, but with the right tools and techniques, it can be a simple fix. To begin, inspect the tear and clean any debris or loose threads from the area. Next, apply a small amount of fabric glue to the edges of the tear and press them together.
Use a clothespin or binder clip to hold the edges in place while the glue dries. For a more secure fix, you can sew the edges of the tear together, making sure to use small, even stitches. To reinforce the repair, you can also apply an iron-on patch or piece of fusible interfacing to the back of the tear.
With these easy steps, you’ll have your torn item looking as good as new in no time! So don’t stress about those pesky tears – just follow these simple tips and you’ll be sealing edges like a pro in no time.
Preventing Future Tears
Repairing a torn RV awning can be a frustrating and time-consuming task, but with the right techniques, you can prevent future tears and enjoy your outdoor adventures without worry. To begin with, inspect your awning regularly for any signs of tearing or wear and tear. If you notice a small tear, address it immediately with a patch or sealant to prevent it from becoming a larger tear.
When setting up your awning, ensure that it is securely fastened and correctly positioned to minimize the risk of any tears caused by wind or other weather conditions. Additionally, avoid placing any sharp or heavy objects on your awning or hanging it with too much weight, as this can increase the risk of tears. Lastly, when it comes to storing your awning, be sure to clean and dry it thoroughly before packing it away to prevent any mold or mildew growth, which can weaken the material and cause tears.
By following these tips, you can prevent future tears and enjoy your RV awning for years to come.
Routine Maintenance
Routine maintenance is crucial to preventing future tears in your belongings. Just like how taking your car in for regular maintenance can prevent major breakdowns, doing routine maintenance on your belongings can prevent tears and other damages. This means regularly cleaning and inspecting your items to ensure they are in good condition.
For example, regularly cleaning and conditioning leather items can prevent them from drying out and cracking. Additionally, inspecting seams and stitching on clothing and bags can help identify and repair any weak spots before they become tears. By taking care of your belongings, you can extend their lifespan and prevent the need for expensive repairs or replacements down the road.
So don’t neglect your routine maintenance, it could save you time and money in the long run.
Proper Storage
Proper storage is crucial when it comes to preventing future tears in your belongings. Whether it’s clothing, bedding, or even electronics, the way you store them can make a huge difference in their longevity. For example, if you decide to fold your sweaters and stack them on a shelf, you may find that they stretch out of shape over time.
Instead, consider hanging them up in a closet or using a specialized sweater organizer. Similarly, if you leave your electronics in direct sunlight or without protection from dust, they may become damaged. Invest in a protective case and store them in a cool, dry place to extend their life.
By taking the time to properly store your belongings, you can prevent tears and ensure that they last for years to come.
Conclusion
Repairing a torn RV awning requires a steady hand, a little DIY know-how, and a willingness to get a little dirty. It may seem like a daunting task, but with the right tools and a positive attitude, you can patch up that tear and get back on the road in no time. Remember, a little creativity can go a long way – so if all else fails, just channel your inner MacGyver and improvise! With enough duct tape and elbow grease, anything is possible.
“
FAQs
What causes an RV awning to tear?
An RV awning may tear due to wear and tear, strong winds, weight, and age.
Can a torn RV awning be repaired?
Yes, a torn RV awning can be repaired. The repair process will depend on the extent of the damage.
How can I evaluate the damage to my RV awning?
You can check for any visible holes, tears, or punctures to identify the damage to your RV awning.
What materials are needed to repair an RV awning?
You will need an RV awning repair kit, a ladder, a clean cloth, rubbing alcohol, and a sharp knife to complete the repairs.
Is it possible to prevent an RV awning from tearing?
Yes, you can prevent your RV awning from tearing by rolling it out only when needed, avoiding exposure to extreme weather conditions, and cleaning it regularly.
Can I repair my RV awning myself or should I hire a professional?
You can repair your RV awning yourself if the damage is minor. However, if the damage is extensive, it’s best to hire a professional.
How long does it take to repair a torn RV awning?
The time it takes to repair a torn RV awning may vary depending on the extent of the damage and the repair process used, but it typically takes a few hours to a day.