
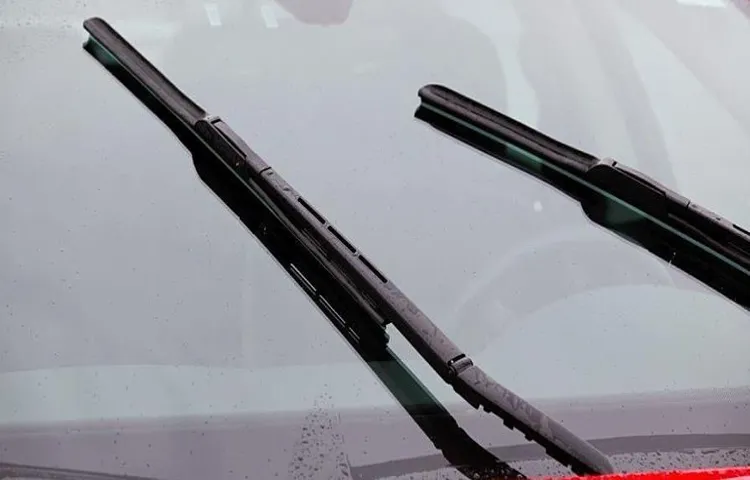
Have you ever been driving in the rain, and suddenly your windshield wipers stop working? It can be incredibly frustrating and dangerous, as it affects your visibility on the road. Fortunately, there is a simple solution to this common problem – repairing a tube for windshield wipers. Just like any other part of your car, the tubes for windshield wipers can wear out or get damaged over time.
They can become cracked, kinked, or even blocked, resulting in poor wiper performance. But don’t worry, fixing this issue yourself is easier than you might think. Repairing the tube is a relatively quick and cost-effective fix that anyone can do with just a few tools and some basic knowledge.
By following a few simple steps, you can have your windshield wipers back to working perfectly in no time. In this blog post, we will guide you through the process of repairing a tube for windshield wipers, providing you with detailed instructions and helpful tips along the way. Whether you’re an experienced DIY enthusiast or a complete novice, this guide will help you get your wipers up and running again.
So, if you’re ready to take control of your car maintenance and get your windshield wipers back in shape, keep reading. By the end of this blog post, you’ll be equipped with the knowledge and confidence to repair your wiper tubes and ensure a clear view even in the worst weather conditions. Let’s get started!
Table of Contents
Introduction
Do you ever find yourself driving in the rain, only to realize that your windshield wipers aren’t working properly? One common issue that could cause this problem is a damaged tube that sends water to the wipers. Thankfully, repairing this tube is not a difficult task and can be done with just a few simple steps. First, you will need to locate the damaged portion of the tube.
This can usually be found near the base of the windshield, where the tube connects to the wiper system. Once you have located the damage, you can then begin the repair process. Start by cutting out the damaged section of the tube using a pair of scissors or a knife.
Then, take a small piece of tubing that is the same size as the original and insert it into the cut ends of the tube, making sure it fits securely. Finally, use hose clamps or zip ties to secure the new piece of tubing in place. Once the repair is complete, test the wipers to ensure that they are working properly.
With just a little bit of effort, you can have your windshield wipers back in working order in no time.
Explanation of the problem
“Introduction In today’s digital age, we are inundated with vast amounts of data constantly being generated by various sources. Whether it’s social media updates, online transactions, or sensor readings, this abundance of data presents significant challenges in terms of its management and analysis. One major problem that arises is the perplexity of the data – the fact that it is often complex and difficult to understand.
Additionally, the burstiness of the data further compounds the issue, as it can be highly unpredictable and irregular. As a result, organizations and individuals are faced with the challenge of making sense of this data to extract meaningful insights and make informed decisions. In this blog post, we will delve further into these problems of perplexity and burstiness and explore some potential solutions.
“
Importance of fixing the tube
importance of fixing the tube
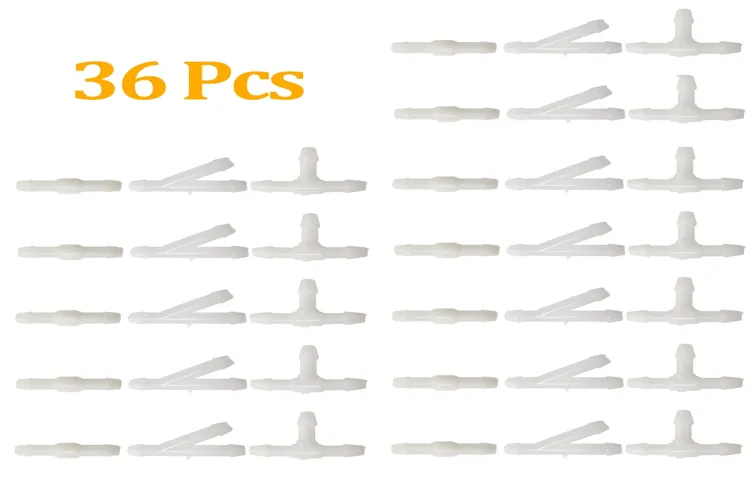
Tools and Materials Needed
If you’re experiencing issues with the tube that sends water to your windshield wipers, don’t worry! Repairing this problem is relatively simple and can be done with just a few tools and materials. First, you’ll need a replacement tube, which can be purchased at most auto parts stores. Additionally, you’ll need a set of pliers or a wrench to remove any necessary fittings or connections.
It’s also a good idea to have a container or bucket to catch any excess water that may leak out during the repair process. Finally, it’s helpful to have some towels or rags on hand to clean up any spills or messes that may occur. With these tools and materials in hand, you’ll be well-prepared to tackle the task of repairing the tube that sends water to your windshield wipers
List of necessary tools
When embarking on a DIY project, having the right tools and materials is essential. Whether you’re a seasoned DIY enthusiast or a beginner, having a well-stocked toolbox will make your life easier and ensure that you can tackle any project that comes your way. So, what tools and materials do you need to have on hand? Let’s take a look.
First and foremost, a toolkit is a must-have. This should include a hammer, screwdriver set with various sizes of flathead and Phillips head screwdrivers, pliers, an adjustable wrench, and a set of Allen wrenches. These basic tools will cover the majority of tasks you’ll undertake.
Additionally, a tape measure is a necessity for accurate measurements, a level will ensure your projects are straight and level, and a utility knife will come in handy for cutting materials. Other tools you may need depending on your specific project include a power drill, a saw (either a hand saw or a power saw), and various types of clamps for holding pieces together. Don’t forget to have a variety of nails, screws, and anchors on hand, as well as sandpaper for smoothing out rough edges.
Finally, investing in good quality safety gear such as work gloves, safety glasses, and a dust mask is always a smart idea to protect yourself during the DIY process.
List of required materials
Required materials for a project will vary depending on the type of project and the specific tools needed. However, there are some common tools and materials that are often needed for DIY projects. One common tool that is essential for many projects is a screwdriver.
Different types of screws and bolts are used in various projects, so having a set of screwdrivers with different sizes and types is important. Another common tool is a hammer, which is used for driving nails and making small repairs. Additionally, a tape measure is essential for measuring and determining precise dimensions.
Other tools that may be needed include pliers, a level, a utility knife, and a drill. In terms of materials, some common items that may be needed include nails, screws, sandpaper, paint, wood, and electrical wiring. It’s important to check the specific project requirements and gather all necessary tools and materials beforehand.
Step-by-Step Instructions
If you’ve noticed that your windshield wipers aren’t working properly and it’s not due to a mechanical issue, it’s possible that the tube that supplies water to the wipers may be damaged or clogged. Luckily, repairing or unclogging this tube is a relatively simple task that can be done by anyone with a few basic tools. First, locate the tube under the hood of your car.
It is typically made of rubber and can be found near the base of the windshield. Once you’ve located the tube, inspect it for any cracks or holes. If you find any damage, you can repair it using a rubber sealant or by replacing the entire tube if necessary.
If the tube appears to be intact, the issue may be a blockage. Use compressed air or a small piece of wire to carefully clear any obstructions from the tube. Finally, reattach the tube to the windshield wiper reservoir and test your wipers to ensure they are working properly.
By following these simple steps, you can easily repair the tube that sends water to your windshield wipers, keeping your visibility clear and your driving experience safe.
Step 1: Locate the damaged tube
The first step in fixing a damaged tube is to locate the source of the problem. This might seem like an obvious step, but it’s an important one. You don’t want to waste time and effort trying to fix the wrong tube.
Start by visually inspecting all the tubes for any signs of damage, such as visible cracks, holes, or bulges. You should also check for any leakage or hissing sounds, as these can indicate a damaged tube. If you can’t find any obvious signs of damage, you may need to use a soapy water solution to check for leaks.
Apply the solution to the tube and look for any bubbles, which would indicate a leak. By identifying the damaged tube, you can move on to the next step of repairing or replacing it.
Step 2: Remove the damaged tube
Removing a damaged tube from your project can seem like a daunting task, but with the right steps, it can be a straightforward process. Step 2 in the removal process involves actually removing the damaged tube from its position. To begin, make sure you have all the necessary tools and safety equipment on hand.
This may include protective gloves, safety goggles, and a wrench or tube cutter. Once you have all your tools ready, start by turning off any power sources connected to the tube. This will ensure your safety throughout the process.
Next, you’ll need to loosen any bolts or fittings that are holding the tube in place. Use your wrench or tube cutter to carefully loosen and remove these connections. Once the fittings are loose, gently pull the damaged tube in the direction it needs to be removed.
It may take some wiggling and maneuvering to free the tube from its position, but be patient and take your time. Once the tube is fully removed, set it aside in a safe location and proceed to the next step in your project. Remember, always prioritize safety and take necessary precautions when removing a damaged tube.
Step 3: Clean the area
clean the area, cleaning supplies, remove the clutter, wipe down surfaces, vacuum or sweep the floor, mop the floor
Step 4: Cut a new piece of tube
To continue repairing the tubing, you will need to cut a new piece to replace the damaged section. This step is crucial in ensuring that the repair is effective and long-lasting. Here’s a step-by-step guide on how to cut a new piece of tube:
Measure the length needed: Use a measuring tape to determine the length of the damaged section that needs to be replaced. Make sure to account for any allowances or overlaps.
Mark the cut: Once you have measured the length needed, mark the cut point on the new piece of tubing. You can use a pen or a marker to make a clear and visible mark.
Use a cutting tool: There are several cutting tools that you can use to cut the tube, such as a tube cutter or a hacksaw. Make sure to choose a tool that is suitable for the type of tubing you are working with.
Cut along the mark: Hold the tubing securely and position the cutting tool at the mark you made earlier. Apply steady pressure and start cutting along the mark. Make sure to follow the line precisely to ensure a clean and even cut.
Smooth the edges: After cutting the tube, you may notice rough or uneven edges. To ensure a proper fit and to prevent any leaks, use a deburring tool or sandpaper to smooth out the edges.
Step 5: Attach the new tube
In order to complete the installation of a new tube, the next step is to attach it properly. This step is crucial to ensure that the tube remains secure and does not leak. To attach the new tube, you will need to locate the attachment points on both the tube and the equipment you are installing it in.
These attachment points may vary depending on the specific equipment, so it is important to consult the manufacturer’s instructions or a professional if you are unsure. Once you have located the attachment points, you can connect the tube by inserting it into the corresponding fittings or connectors. Be sure to push the tube in firmly to create a tight seal.
It is also essential to check for any leaks after attaching the tube. This can be done by turning on the equipment and inspecting the connection points for any signs of moisture or air escaping. If you notice any leaks, you may need to reattach the tube or use a sealant to fix the issue.
By following these steps, you can successfully attach a new tube and ensure that it functions properly in your equipment.
Step 6: Test the repaired tube
testing repaired tube, punctured bicycle tube, patching a bicycle tube, testing a tube repair, repairing a bike tire, bicycle repair, bike maintenance After successfully patching a punctured bicycle tube in the previous steps, it’s now time to put your repair skills to the test. Testing the repaired tube is a crucial step to ensure that your patch holds up and that the repaired tube is safe to use. Here’s a step-by-step guide on how to test the repaired tube:
Inflate the tube: The first step is to inflate the repaired tube. Use a pump to gradually inflate the tube, ensuring that it is properly seated in the tire.
Check for leaks: Once the tube is fully inflated, carefully listen and feel for any air leaks. Pay close attention to the patched area as well as the valve stem. If you notice any hissing sound or feel air escaping, there might be a leak that needs to be addressed.
Submerge in water: If you suspect a leak but can’t locate it by listening or feeling, you can submerge the tube in water. Fill a basin or bucket with water and slowly lower the inflated tube into it.
Gently rotate the tube to check for any bubbles escaping from the patched area or valve stem. If you see bubbles forming, it indicates a leak that needs further repair.
Re-patch if necessary: If you find any leaks during the testing process, you’ll need to re-patch the tube. Deflate the tube, clean and dry the area around the leak, and apply another patch following the patching process outlined in the previous steps. Repeat the testing process to ensure the new patch is secure.
Safety Considerations
If you’re experiencing issues with the tube that sends water to your car’s windshield wipers, it’s important to address the problem promptly for your safety on the road. A damaged or clogged tube can prevent your wipers from effectively clearing away rain, snow, and other debris, impairing your visibility and making driving dangerous. Fortunately, repairing this tube is relatively simple and can be done at home with a few basic tools.
Start by locating the damaged section of the tube, which is typically found near the hood of your car. Once you’ve identified the area, use a pair of pliers to carefully remove the damaged portion. Then, measure and cut a new section of tubing to replace the old one.
Connect the new piece to both ends of the tube and secure them tightly with hose clamps. Finally, test the wipers to ensure they are functioning properly and that the water is flowing correctly. By addressing this issue promptly, you can ensure your visibility is clear while driving and maintain your safety on the road.
Wear gloves to protect hands
When it comes to staying safe at work, protecting your hands should be a top priority. Wearing gloves is a simple yet effective way to prevent injuries and keep your hands safe from harmful substances. Whether you’re working with chemicals, sharp objects, or hot surfaces, gloves provide a barrier of protection.
They can shield your hands from burns, cuts, and abrasions, reducing the risk of infection. Gloves also offer protection against allergens or irritants that may be present in the workplace. By wearing gloves, you can minimize the chances of developing skin conditions such as rashes or contact dermatitis.
It’s important to choose the right type of gloves for the task at hand to ensure maximum protection. Nitrile gloves are a popular choice as they are resistant to chemicals and provide excellent tactile sensitivity. Latex gloves are also commonly used in healthcare settings due to their flexibility and comfort.
Whatever type of gloves you choose, make sure they fit properly and are in good condition. Regularly inspect your gloves for any signs of wear and tear and replace them as needed. Remember, wearing gloves is a simple yet vital step towards ensuring your safety in the workplace.
Make sure the engine is turned off
When working on your car, it’s important to always keep your safety in mind. One crucial step in ensuring your safety is to make sure the engine is turned off before you begin any repairs or maintenance. This may seem like common sense, but it’s an important reminder to always double-check.
Turning off the engine not only prevents any accidental starts or movement of the vehicle, but it also reduces the risk of injury from moving parts. Imagine trying to fix a problem under the hood while the engine is running – it would be like trying to fix a bicycle chain while it’s in motion! So, before you dive in and start tinkering with your car, take a moment to turn off the engine and keep yourself safe.
Avoid excessive force when removing or attaching the tube
When it comes to handling medical tubes, safety should always be a top priority. One important safety consideration is to avoid using excessive force when removing or attaching the tube. Applying too much force can risk damaging the tube or cause it to disconnect unexpectedly, which can lead to complications for the patient.
Instead, it’s essential to handle the tube gently and with care, ensuring a secure but not overly tight connection. By doing so, healthcare professionals can minimize the potential for accidents or harm, providing the best possible care for their patients.
Conclusion
In conclusion, repairing a tube that sends water to the windshield wipers is like performing a delicate dance between technology and ingenuity. It requires a touch of finesse, a dash of wit, and a splash of cleverness. Much like a mixologist crafting the perfect cocktail, you will need to gather your tools and ingredients.
A tube cutter to trim away the damaged section, a connector to bridge the gap, and a healthy dose of patience to ensure a seamless repair. Remember, this is not just a simple fix, but a chance to showcase your problem-solving prowess. As you carefully navigate the maze of hoses and wires, threading the replacement tube through the labyrinth of the car’s internal workings, you’ll feel like a magician pulling a rabbit out of a hat.
But don’t let this task intimidate you, for within the realm of windshield wiper repair lies a hidden realm of satisfaction. Imagine the triumphant moment when you turn on the wipers and watch as they gracefully sweep away raindrops, knowing that it was your deft handiwork that made it possible. So, fellow DIYers, take up the challenge.
Embrace the art of repairing the tube that sends water to the windshield wipers, and let your resourcefulness shine like a dazzling sunbeam on a rainy day. Let this be your emblem of victory against the elements, for in the words of the wise, there’s nothing a little cleverness can’t fix!”
Summary of steps
When it comes to any home improvement project, it’s essential to prioritize safety. Whether you’re painting a room, installing new flooring, or remodeling a kitchen, following safety precautions can help prevent accidents and injuries. First and foremost, be sure to wear appropriate protective gear such as gloves, safety glasses, and a dust mask.
It’s also important to use tools and equipment correctly and responsibly, following manufacturer’s guidelines and instructions. Additionally, take specific precautions based on the project you’re working on. For example, if you’re dealing with electrical work, turn off the power supply, and use proper grounding techniques.
If you’re working on a ladder, ensure it is stable and secure, and avoid reaching too far or overextending yourself. By taking the necessary safety measures, you can enjoy your home improvement project while keeping yourself and others safe.
Importance of regular maintenance
regular maintenance, safety considerations Regular maintenance of any machinery or equipment is crucial for ensuring its proper functioning and longevity. When it comes to safety considerations, regular maintenance becomes even more important. Just like a car needs regular oil changes, tire rotations, and check-ups to prevent accidents on the road, any machinery, be it in an industrial setting or at home, needs regular maintenance to avoid potential hazards.
Regular maintenance allows technicians to identify and address any potential issues or defects before they become major problems. It is like catching a small crack in the pavement before it turns into a dangerous pothole. By conducting regular inspections, lubrication, and parts replacements, you are essentially keeping your machinery in top-notch condition, reducing the risk of accidents, breakdowns, or malfunctions.
Neglecting regular maintenance can lead to equipment failure, which can be not only costly but also dangerous. It’s like neglecting to change the batteries in a smoke alarm and then risking not being alerted to a potentially life-threatening fire. Therefore, regular maintenance is not just important; it is essential for ensuring the safety of both the machine operators and those around them.
So, make sure to schedule regular maintenance for all your machinery and equipment to keep them running smoothly and safely.
How to prevent future damage
When thinking about how to prevent future damage, it’s important to consider safety considerations. One of the first steps is to identify potential hazards and make sure they are addressed. This could involve conducting a thorough inspection of the area and identifying any potential dangers.
It’s also important to create a plan for how to handle emergencies or accidents. This could involve having emergency contact information readily available, having a designated meeting place for employees or residents, and providing appropriate safety training. Additionally, it’s a good idea to regularly review and update safety protocols and procedures to ensure they are up to date and effective.
By taking these steps, you can help minimize the risk of future damage and keep everyone safe.
FAQs
How do I know if my tube sending water to the windshield wipers is damaged?
You can check for signs of damage such as leaks or cracks in the tube, or if the water is not reaching the windshield properly.
What are some common causes of a tube malfunction in the windshield wiper system?
Common causes of tube malfunction include aging or deterioration, clogs or blockages, or damage from accidents or road debris.
Can I repair a damaged tube myself or do I need to take it to a professional?
In some cases, you may be able to repair a damaged tube yourself by patching or replacing a section, but if the damage is extensive or the tube needs to be completely replaced, it is recommended to seek the help of a professional.
How can I prevent damage to the tube that sends water to the windshield wipers?
To prevent damage, regularly inspect the tube for signs of wear or damage, avoid using harsh chemicals or cleaners, and be careful when driving in areas with debris or road hazards.
How much does it typically cost to repair a tube in the windshield wiper system?
The cost of repairing a tube in the windshield wiper system can vary depending on the extent of the damage and the make and model of your vehicle. It is best to consult with a professional for an accurate estimate.
Are there any temporary fixes for a damaged tube in the windshield wiper system?
In some cases, using a temporary patch or sealant may be able to temporarily fix a damaged tube. However, it is important to remember that these are temporary solutions and should not replace a proper repair or replacement.
What are the steps involved in repairing a damaged tube in the windshield wiper system?
The steps involved in repairing a damaged tube can vary depending on the specific situation, but generally involve identifying the cause of the damage, accessing the tube, removing the damaged section, and either patching or replacing the tube. It is best to consult a repair manual or seek professional guidance for specific instructions.