
If you’ve noticed that your windshield seal is damaged or starting to show signs of wear and tear, it’s important to address the issue as soon as possible. A damaged windshield seal can lead to potential water leaks, wind noise, and even compromise the structural integrity of your vehicle. But don’t worry, repairing your windshield seal doesn’t have to be a complicated or expensive task.
With a few simple steps, you can restore the seal and ensure your windshield is properly protected. In this blog post, we’ll guide you through the process of repairing your windshield seal, so you can get back on the road with confidence.
Table of Contents
Introduction
If you’ve noticed a leak or a drafty breeze coming through your windshield, it’s likely that your windshield seal needs some attention. A damaged or worn-out windshield seal can lead to various issues, including water leaks, wind noise, and even further damage to your windshield. Repairing the windshield seal is a relatively straightforward process that you can do yourself with a few tools and some patience.
In this blog post, we’ll walk you through the steps on how to repair your windshield seal and restore its effectiveness. So, grab your toolkit and let’s get started!
Why is a windshield seal important?
windshield seal, importance of windshield seal
Signs of a damaged windshield seal
“damaged windshield seal” Introduction: Have you ever wondered if your car’s windshield seal is in good condition? The windshield seal, also known as the weatherstripping, is the rubber lining that surrounds the edges of your windshield. Its main role is to keep out water, dust, and other debris from entering the interior of your vehicle. Over time, this seal can become damaged due to wear and tear, extreme weather conditions, or accidents.
In this blog post, we will explore the signs of a damaged windshield seal and why it is essential to address this issue promptly. So, let’s get started and learn how to keep your windshield seal in top shape for a clear and safe driving experience.
Tools and materials needed
To repair a windshield seal, you’ll need a few tools and materials. First, you’ll need a windshield seal repair kit. This typically includes adhesive and a sealant that is designed specifically for repairing windshield seals.
You may also need a caulking gun to apply the adhesive and sealant. Additionally, you’ll need a sharp utility knife to remove any old or damaged sealant from the windshield seal. It’s important to have a clean and dry surface before applying the adhesive and sealant, so you may need some rubbing alcohol and a clean cloth to remove any dirt or debris.
Finally, if the windshield seal has any small cracks or holes, you may need a patch kit to cover them before applying the adhesive and sealant. With these tools and materials on hand, you’ll be well-equipped to repair your windshield seal.
List of necessary tools
In order to successfully complete any DIY project, it is important to have the right tools and materials on hand. These tools will not only make the job easier, but they will also ensure that the project is done correctly. Here is a list of some essential tools and materials that every DIY enthusiast should have in their toolbox:
Screwdriver Set: A good set of screwdrivers is a must-have for any DIYer. Whether you are assembling furniture, installing light fixtures, or repairing appliances, a screwdriver set will come in handy.
Hammer: Another essential tool is a hammer. This versatile tool can be used for a variety of tasks, from hanging pictures to building furniture. Make sure to choose a hammer that is comfortable to hold and has a good weight.
Pliers: Pliers are a must-have tool for any DIYer. They can be used for gripping, twisting, and cutting wires.
There are different types of pliers available, such as needle-nose pliers, lineman’s pliers, and slip-joint pliers. Measuring Tape: Accurate measurements are crucial in any DIY project.
A measuring tape allows you to measure lengths, widths, and heights accurately. Look for a measuring tape that is at least 25 feet long and has both metric and imperial units.
Recommended materials
In order to successfully complete a DIY project, it’s important to have the right tools and materials on hand. Here are some recommended materials that you should consider for your next project. Firstly, you’ll need a good set of basic tools such as a hammer, screwdriver, pliers, and tape measure.
These tools will come in handy for a wide range of tasks. Additionally, having a set of power tools can be extremely useful. A cordless drill, circular saw, and jigsaw are just a few examples of power tools that can make your DIY projects much easier.
Another important aspect of any DIY project is having the right materials. This can include things like lumber, nails, screws, and paint. Depending on the specific project you’re working on, you may also need things like plumbing supplies or electrical wiring.
It’s always a good idea to plan ahead and make a list of all the materials you’ll need before getting started on your project. By having the right tools and materials, you’ll be well-equipped to tackle any DIY project that comes your way.
Step-by-step guide on repairing a windshield seal
If you’ve noticed that your windshield seal is cracked or damaged, it’s important to repair it as soon as possible to prevent any further damage. Luckily, fixing a windshield seal is a relatively simple process that you can tackle on your own. First, you’ll need to clean the area around the seal to ensure that it’s free of dirt and debris.
Next, you’ll want to apply a sealant, such as silicone adhesive, to the damaged area. Be sure to apply a generous amount and spread it evenly. Once the sealant has dried, you can check for any imperfections and make any necessary touch-ups.
Finally, it’s crucial to give the sealant ample time to cure before exposing it to any moisture or extreme temperatures. By following these steps, you’ll be able to repair your windshield seal and ensure that your car is protected from any water or air leaks. So, why put off repairing your windshield seal when you can easily fix it yourself?
Step 1: Prepare the windshield
windshield seal repair. Before starting the process of repairing a windshield seal, it is important to ensure that it is properly prepared. This involves a few simple steps that will help to ensure the best results.
Firstly, gather all the necessary tools and materials for the repair, including a sealant, a scraper or razor blade, rubbing alcohol or a glass cleaner, and clean towels or cloths. Next, thoroughly clean the area around the seal, removing any dirt, debris, or old sealant. This can be done by using the scraper or razor blade to gently scrape away any loose material, and then using the rubbing alcohol or glass cleaner and a clean towel to wipe down the area.
Once the area is clean and dry, it is ready for the next step in the process.
Step 2: Remove the damaged seal
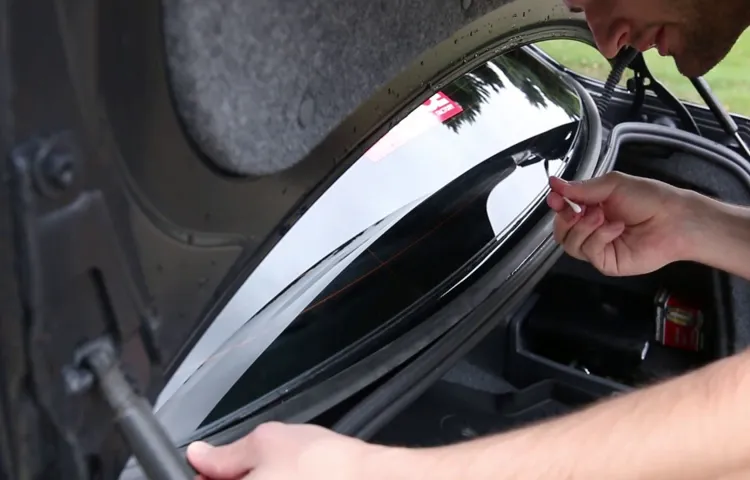
In the second step of repairing a windshield seal, it is important to remove the damaged seal completely before proceeding with the repair process. This step is crucial to ensure that the new seal adheres properly and provides a tight seal for your windshield. To remove the damaged seal, start by carefully prying it away from the windshield using a plastic trim removal tool or a flathead screwdriver wrapped in a soft cloth.
Be gentle during this process to avoid any further damage to the windshield or surrounding trim. Once the damaged seal has been loosened, continue to gently peel it away from the windshield, taking care to remove any adhesive residue left behind. Use an adhesive remover and a clean cloth to wipe away any remaining adhesive.
After removing the damaged seal and cleaning the area, it is important to inspect the windshield for any cracks or chips. If any damage is found, it is recommended to address it before proceeding with installing the new seal. By following these steps and removing the damaged seal, you are one step closer to repairing your windshield and ensuring a proper and secure seal.
Step 3: Clean the area
windshield seal repair, clean the area, step-by-step guide, windshield seal, repair, cleaning process, sealant, dirt, dust, debris, scraper tool, cleaning solution, alcohol-based product, microfiber cloth, smooth surface, adhesive, apply, bonding, rubber seal, reattach, windshield
Step 4: Apply the new seal
The final step in repairing a windshield seal is to apply the new seal. This is a crucial step as it ensures that the seal is properly installed and will provide a secure and watertight bond. To begin, it is important to clean the windshield surface where the seal will be applied.
This can be done with a mild detergent and water solution, ensuring that any dirt or residue is removed. Once the surface is clean and dry, the new seal can be applied. It is important to carefully align the seal with the windshield, ensuring that it is centered and level.
Starting from one end, gently press the seal onto the windshield, working your way along the entire length. Take your time to ensure that the seal is securely in place and that there are no gaps or bubbles. Once the seal is applied, it is important to give it time to set and bond properly.
This may require leaving the vehicle undisturbed for a period of time, as specified by the manufacturer. Once the seal is fully set, it is important to check for any gaps or loose areas and make any necessary adjustments. With the new seal in place, the windshield should be secure and watertight, providing you with a clear and safe driving experience.
Tips and precautions for a successful repair
Repairing a windshield seal is a task that can be done by novices, but it requires careful attention and the right tools. To start, determine the extent of the damage by closely inspecting the seal for cracks or gaps. If there is only minor damage, you may be able to fix it with a sealant specifically designed for windshields.
Clean the area thoroughly before applying the sealant, and make sure to follow the instructions on the product carefully. For more significant damage, such as a large crack or a completely broken seal, it is best to seek professional help. Attempting to repair these types of damage yourself may result in further problems or compromised safety.
Remember to always prioritize your safety and the safety of others when working on your windshield seal.
Tip 1: Follow the manufacturer’s instructions
When it comes to repairing appliances, the first tip to keep in mind is to always follow the manufacturer’s instructions. These instructions are specifically designed to guide you through the repair process and ensure that you do it correctly and safely. Ignoring or neglecting them can lead to further damage or even injury.
So, take the time to carefully read the manual and understand the steps involved in the repair. It’s also a good idea to gather all the necessary tools and materials before you start. By following the manufacturer’s instructions, you can increase your chances of successfully fixing the appliance and avoid any unnecessary complications.
Tip 2: Avoid direct sunlight during repair
When it comes to repairing your device, one important tip to keep in mind is to avoid direct sunlight. While it may be tempting to work outside on a sunny day, exposing your device to direct sunlight can actually cause more harm than good. Sunlight can heat up your device, potentially causing damage to the internal components.
Additionally, the brightness of the sun can make it difficult for you to see clearly, increasing the chances of making a mistake during the repair process. It’s best to find a well-lit indoor area to work in, away from any direct sunlight. This will ensure that you can see clearly and that your device remains at a safe temperature throughout the repair.
So, the next time you’re planning on repairing your device, remember to avoid direct sunlight and find a suitable indoor space instead.
Tip 3: Allow sufficient drying time
When it comes to repairing a damaged area, allowing sufficient drying time is crucial. This is especially important if you are working with wet or damp surfaces. Rushing the drying process can result in an ineffective repair and potentially cause further damage.
To ensure a successful repair, make sure to give the area enough time to dry completely before moving on to the next step. Depending on the type of repair and the drying conditions, this could take several hours or even days. Patience is key here, as rushing the process can compromise the final outcome.
By letting the area thoroughly dry, you can ensure that the repair materials properly adhere and that the repaired surface is restored to its original condition. So, take a step back, let nature take its course, and allow sufficient drying time for a successful repair.
Precaution: Wear gloves and eye protection
When it comes to DIY repairs, taking the necessary precautions is crucial to ensure your safety. One of the most important precautions to keep in mind is wearing gloves and eye protection. Whether you’re working with chemicals, sharp objects, or electrical parts, wearing gloves will protect your hands from potential injuries.
Eye protection, such as safety goggles, will shield your eyes from any flying debris or hazardous substances. Safety should always be a priority, so it’s essential to take these simple steps to protect yourself while repairing any items. Whether you’re fixing a leaky faucet or repairing a broken electrical appliance, wearing gloves and eye protection will reduce the risk of accidents and injuries.
So, before you embark on your next repair project, make sure you have these essential safety items on hand. Stay safe, and happy repairing!
Conclusion
So, there you have it – a comprehensive guide on how to repair a windshield seal. With a little bit of time, patience, and elbow grease, you can save yourself from the annoyance and potential danger of a leaking windshield. Remember, a solid seal is crucial for keeping out water, dust, and prying eyes (because who wants strangers peeking into their car?).
Plus, if you’re feeling a bit poetic, you can even say you’re sealing the bond between you and your beloved vehicle. So, grab your tools, put on your DIY hat, and get ready to show that windshield who’s boss. Happy repairing!”
Importance of maintaining a good windshield seal
windshield seal, maintain, repair, tips, precautions, successful repair
Final thoughts
“Final thoughts” So, you’ve successfully completed a repair and are feeling great about it. Congratulations! But before you call it a day, there are a few tips and precautions you should keep in mind to ensure your repair stands the test of time. Firstly, always make sure to use the right tools for the job.
Using improper tools can lead to damage or further issues down the line. It’s worth investing in quality tools to avoid any unnecessary headaches. Secondly, take your time and be patient.
Rushing through a repair can result in mistakes or overlooked steps. Make sure to follow the instructions carefully and double-check your work before moving on. Next, be mindful of safety precautions.
Some repairs may involve working with electricity or harmful chemicals, so it’s important to wear protective gear and follow safety guidelines to avoid accidents or injuries. Additionally, it’s a good idea to keep a record of the repair. Take photos or make notes of the process, including any part numbers or specific details.
This can be helpful for future reference or if you need to double-check your work. Lastly, don’t hesitate to reach out for help if you need it. Sometimes repairs can be more challenging than anticipated, and it’s perfectly okay to ask for assistance.
There are online forums, instructional videos, and professionals who can offer guidance and support. Remember, a successful repair is not only about fixing the problem at hand but also about ensuring that it lasts. By following these tips and precautions, you can feel confident that your repair will stand the test of time and save you from future headaches.
FAQs
Have you ever noticed a crack or chip in your windshield seal? It’s not uncommon for this to happen over time, especially with exposure to extreme temperatures and rough roads. But don’t worry, repairing a windshield seal can be a relatively simple process that you can do yourself with the right tools and materials. First, you’ll need to assess the damage and determine if it can be repaired or if the seal needs to be replaced entirely.
If it’s a small chip or crack, you can try using a windshield repair kit, which typically includes a resin that can fill in the damaged area. Simply follow the instructions on the kit and apply the resin to the crack or chip. Once the resin has hardened, you can use a razor blade or utility knife to remove any excess and make the repair blend in with the rest of the seal.
If the damage is more severe or the seal is completely broken, you may need to purchase a new seal and have it professionally installed. It’s always a good idea to consult with a professional before attempting any repairs on your own, especially if you’re unsure of the extent of the damage or lack experience in windshield repair. So, don’t let a damaged windshield seal ruin your day – with a bit of effort and the right materials, you can have it repaired in no time!
Can I repair the windshield seal myself?
windshield seal, repair, DIY Yes, it is possible to repair the windshield seal yourself, but it can be quite challenging and may not always produce the desired results. The windshield seal is an essential component of your vehicle’s safety, as it helps to keep the windshield in place and prevent water, dust, and noise from entering the cabin. If the seal becomes damaged or starts to deteriorate, it can compromise the integrity of the windshield and reduce its effectiveness.
To repair the windshield seal, you will first need to assess the extent of the damage. If there are only small cracks or gaps, you may be able to use a sealant to fill them in. However, if the seal is severely damaged or has come completely loose, it may need to be replaced entirely.
Repairing or replacing the windshield seal requires specific tools and materials, and it can be a time-consuming and intricate process. It involves removing the old seal, cleaning and preparing the surface, applying the new seal, and ensuring that it is properly aligned and sealed. While it may be tempting to tackle this job yourself to save money, it’s important to consider your skill level and experience with automotive repairs.
If you’re not confident in your abilities or don’t have the right tools, it may be best to leave the job to a professional. They will have the expertise and equipment needed to ensure a proper and long-lasting repair. In conclusion, repairing the windshield seal yourself is possible, but it can be challenging and may not always produce satisfactory results.
It’s important to assess the extent of the damage and consider your skill level before attempting any DIY repairs. If you’re unsure or don’t have the necessary tools, it’s best to consult a professional to ensure a safe and effective repair.
How long does a windshield seal repair last?
“windshield seal repair” One common question that many people have when it comes to windshield seal repair is how long the repair will last. The answer to this question can vary depending on a few different factors. In general, a properly done windshield seal repair can last a significant amount of time.
Many professionals are able to repair a windshield seal so that it is as good as new, and the repair can last for several years. However, it’s important to note that the longevity of a windshield seal repair can also depend on how well you take care of your vehicle and the conditions it is exposed to. If you regularly clean and maintain your windshield, and if you avoid extreme temperature changes and harsh weather conditions, the repair is likely to last longer.
It’s always a good idea to consult with a professional technician who can assess the severity of the damage and provide an accurate estimate of how long a repair will last in your specific case. Taking these steps can ensure that your windshield looks great and remains secure for as long as possible.
Is it necessary to replace the entire windshield if the seal is damaged?
windshield replacement, damaged seal, entire windshield replacement
FAQs
How long does it take to repair a windshield seal?
The time it takes to repair a windshield seal can vary depending on the severity of the damage and the type of repair needed. In general, it can take anywhere from 30 minutes to a few hours.
Can a windshield seal be repaired or does it need to be replaced?
In many cases, a windshield seal can be repaired rather than replaced. However, this depends on the extent of the damage. If the seal is only slightly damaged or has a small crack, it may be possible to repair it. If the damage is more extensive, a replacement may be necessary.
What are the signs of a damaged windshield seal?
Some common signs of a damaged windshield seal include water leaks, wind noise while driving, and a loose or detached seal. If you notice any of these signs, it’s important to have the seal inspected and repaired as soon as possible to prevent further damage.
Can I repair a windshield seal myself or should I seek professional help?
While some small cracks or damage to a windshield seal can be repaired by a DIY enthusiast, it’s generally recommended to seek professional help for more significant damage. A professional will have the necessary tools and expertise to properly repair or replace the seal.
How much does it cost to repair a windshield seal?
The cost of repairing a windshield seal can vary depending on factors such as the extent of the damage, the type of vehicle, and the location. On average, repairs can range from $100 to $300. It’s best to get a quote from a professional repair service for an accurate estimate.
Can a damaged windshield seal affect the safety of my vehicle?
Yes, a damaged windshield seal can affect the safety of your vehicle. A proper seal is essential for keeping the windshield securely in place and maintaining the integrity of the vehicle’s structure. If the seal is compromised, it can lead to windshield leaks, reduced visibility, and potential safety hazards.
How often should I check my windshield seal for damage?
It’s a good idea to regularly inspect your windshield seal for any signs of damage. This can be done during routine maintenance or whenever you notice any issues such as water leaks or wind noise. Catching and repairing small damage early can help prevent more extensive issues in the future.