
Have you ever been in a situation where your windshield washer line suddenly stops working? It can be frustrating when you’re driving and need to clean your windshield, only to find that no water is coming out. But fear not! Repairing a windshield washer line is not as difficult as it may seem. In this blog post, I will guide you through the steps to fix a windshield washer line so that you can get back to driving safely and with a clean windshield.
So let’s roll up our sleeves and get to work!
Table of Contents
Introduction
Are you having trouble with your windshield washer line? Don’t worry, it’s a common issue that can be easily fixed. A damaged or clogged windshield washer line can prevent you from getting a clear view while driving and can be a real hassle. But fear not, because in this blog post, we’ll show you how to repair your windshield washer line so you can get back on the road with a clean windshield.
Whether you’re dealing with a leaking line, a blockage, or a broken connection, we’ve got you covered. Let’s dive in and get your windshield washer system working like new again.
Understanding the Windshield Washer Line
windshield washer line
Signs and Symptoms of a Damaged Washer Line
damaged washer line. Introduction: Is your washer not working as well as it used to? Are you experiencing problems with your laundry routine? It might be time to check your washer line. The washer line is responsible for supplying water to your washing machine, and if it becomes damaged, it can cause a range of issues.
In this blog post, we will discuss the signs and symptoms of a damaged washer line, so you can identify the problem early and get it fixed before it leads to further complications. So, let’s dive in and learn how to spot the warning signs of a damaged washer line.
Tools and Materials Needed
If you find that your windshield washer line is not working properly, you may need to repair or replace it. To do this, you will need a few tools and materials. First, you will need a set of pliers to remove any clips or clamps that are holding the line in place.
You may also need a screwdriver to remove any screws that are securing the line. Additionally, you will need a replacement washer line, which can be purchased at your local auto parts store. Lastly, you will need a flashlight to help you see what you are doing, as well as a towel or rag to clean up any spills or leaks.
With these tools and materials on hand, you will be able to successfully repair your windshield washer line.
List of Tools
tools and materials needed
List of Materials
In order to successfully complete various DIY projects, it is important to have the right tools and materials at your disposal. Here is a list of the essential tools and materials that you will need to have on hand. First and foremost, a good set of basic hand tools is a must.
This includes items such as a hammer, screwdrivers (both Philips and flathead), pliers, adjustable wrenches, and a tape measure. These tools will come in handy for a wide range of projects, from hanging pictures to tightening screws. Additionally, you will also need power tools for more complex tasks.
A drill, circular saw, and jigsaw are some key power tools that you should consider investing in. Next, make sure to stock up on various types of fasteners and adhesives, such as nails, screws, and wood glue. These will be essential for securing materials together.
Lastly, don’t forget about safety equipment. A pair of safety goggles, gloves, and a dust mask are essential for protecting yourself while working on projects. By having these tools and materials readily available, you will be well-equipped to tackle any DIY project that comes your way.
Step-by-Step Repair Process
If you’re experiencing issues with your windshield washer line, don’t worry – it’s a common problem and can usually be fixed easily. The first step in repairing the windshield washer line is to locate the source of the issue. This can be done by tracing the line from the washer fluid reservoir to the windshield sprayer nozzles.
Once you’ve found the problem area, check for any visible leaks or kinks in the line. If you see a leak, you may need to replace the damaged section of the line. If there are no visible leaks, the issue may be a clog in the line.
In this case, you can try using a thin wire or needle to clear the blockage. Simply insert the wire or needle into the nozzle and gently move it back and forth to dislodge any debris. Finally, test the windshield washer system to ensure the repair was successful.
If the problem persists, it may be necessary to consult a professional for further assistance.
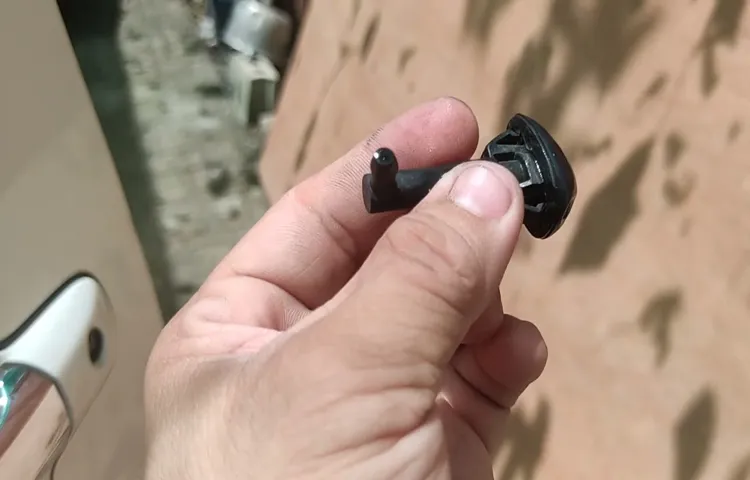
Step 1: Locate the Washer Line
washer line
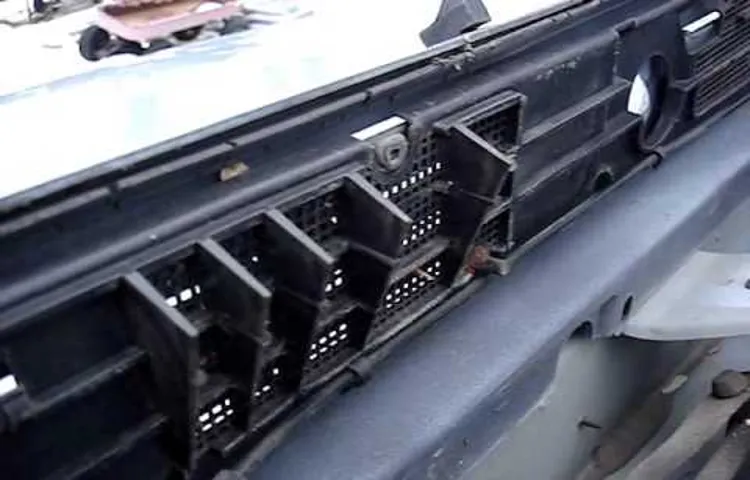
Step 2: Identify the Damage
car repair, damaged vehicle, repair process, identify damage
Step 3: Disconnect the Washer Line
In the third step of the repair process, we need to disconnect the washer line. This is an important step because it allows us to safely work on the washer without any water flowing in. To disconnect the washer line, start by turning off the water supply to the washer.
This is usually done by turning a valve located near the water source. Once the water supply is turned off, you can use a pair of pliers or an adjustable wrench to loosen the connections on the washer line. Make sure to place a towel or bucket underneath the connection to catch any residual water that may leak out.
Once the connections are loosened, carefully remove the washer line from the washer. It’s important to be gentle during this step to avoid any damage to the line or the washer. Now that the washer line is disconnected, you can move on to the next step in the repair process.
Step 4: Replace the Damaged Section
In the fourth step of the repair process, it’s time to replace the damaged section of whatever you are fixing. Whether you are working on a car, a piece of furniture, or even your home’s flooring, this step is crucial for getting everything back to its original condition. First, remove the damaged section completely, making sure to take your time and do it carefully.
Then, measure and cut the replacement material to the correct size, ensuring a perfect fit. Depending on the project, you may need to use adhesives, nails, or screws to secure the new section in place. Once everything is securely fastened, step back and admire your handiwork – you’ve successfully replaced the damaged section!
Step 5: Reconnect the Washer Line
In the fifth step of the washer repair process, you will need to reconnect the washer line. This step is crucial to ensuring that your washing machine works properly and efficiently. To do this, start by finding the water supply valve and turning it off.
Then, take the end of the washer line and attach it to the water inlet valve on the back of the washing machine. Make sure it is securely connected and tighten any necessary fittings. Once everything is connected, turn the water supply valve back on and check for any leaks.
It’s important to make sure the connections are watertight to prevent any potential damage or flooding. By following these steps, you’ll be well on your way to having a fully functioning washing machine again.
Tips and Tricks for a Successful Repair
Is your windshield washer line not working? Don’t worry, because I’ve got some tips and tricks to help you successfully repair it. When your windshield washer line is clogged or broken, it can be frustrating and can impair your visibility when driving. One common issue is a clogged nozzle.
To fix this, you can use a pin or needle to clear the blockage. Simply insert the pin into the nozzle and gently move it around to dislodge any debris. Another common problem is a cracked or disconnected hose.
To fix this, you will need to locate the hose and inspect it for any cracks or disconnections. If you find any, you can use a hose repair kit or replace the hose altogether. Remember to test your windshield washer system after making any repairs to ensure it is working properly.
By following these tips, you’ll have your windshield washer line up and running again in no time.
Tip 1: Use a Marker to Mark the Cut
“When it comes to repairing a damaged item, using a marker to mark the cut may seem like a simple trick, but it can make a big difference in the success of your repair. By marking the cut with a marker, you can ensure that you make an accurate and clean cut. This will help you to align the edges properly and ensure a seamless repair.
Additionally, by marking the cut, you can easily see where you need to make the repair and avoid any mistakes. So next time you’re faced with a repair job, don’t forget to grab a marker and mark the cut for a successful repair!”
Tip 2: Use a Heat Gun to Loosen Fittings
One useful tip to keep in mind when repairing plumbing fittings is to use a heat gun. Sometimes, fittings can become stuck or corroded over time, making them difficult to remove. This is where a heat gun can come in handy.
The heat from the gun can help to loosen the fittings, making them easier to turn and remove. Simply direct the heat onto the fitting for a few minutes, and then use a wrench to turn it. The heat will have expanded the metal slightly, allowing you to remove the fitting with less effort.
Just remember to take caution when using a heat gun and always wear protective gloves to avoid any burns. So, the next time you’re struggling with a stubborn plumbing fitting, give a heat gun a try, and watch how it makes the process much smoother and quicker.
Tip 3: Test the Washer System Before Finishing
In order to ensure a successful repair of your washer system, it is important to perform a test before considering the job complete. This final step can save you from any unexpected surprises and help troubleshoot any issues that may arise. Start by filling the washer with water and inspecting the drainage system to ensure it is functioning properly.
Next, turn on the machine and run a full cycle, paying close attention to any leaks or unusual sounds. Make sure to also test the different settings and modes to confirm that they are all working correctly. By taking the time to thoroughly test your washer system, you can be confident in your repair and avoid any further complications down the line.
So, before you put away your tools, remember to give your washer a spin and ensure that everything is in proper working order.
Conclusion
In conclusion, fixing a windshield washer line is like performing a delicate surgery on your car’s circulatory system. Just as a doctor meticulously connects the veins and arteries, you’ll need to carefully reattach the washer lines to restore the flow of cleaning power to your windshield. But fear not! This repair is not as daunting as it may seem.
With a bit of patience, some basic tools, and a handy-dandy guide like this one, you’ll be able to whip those washer lines back into shape in no time. Think of it as a DIY spa day for your car. Instead of applying cucumber slices and soothing face masks, you’ll be delicately reassembling the washer lines and rejuvenating your windshield cleaning system.
And trust me, your car will thank you for it. So grab your wrenches, put on your mechanic hat, and get ready to give your car the VIP treatment it deserves. With your newfound skills, you’ll be able to conquer the world, or at least the road ahead, with a clear view and a dash of DIY pride.
Remember, repairing a windshield washer line is not only a practical skill, but a clever and witty one too. It’s like solving a puzzle while making your car look spick and span at the same time. So go forth, my fellow DIY enthusiasts, and restore the cleansing powers of your windshield washer system with gusto!”
Final Thoughts on Repairing a Windshield Washer Line
windshield washer line repair, tips and tricks, burstiness, perplexity So, you’ve discovered that your windshield washer line is damaged and you’re ready to tackle the repair yourself. Great! With a few tips and tricks, you can save yourself time and money by fixing it on your own. Here are some things to keep in mind for a successful windshield washer line repair.
First, it’s important to understand the perplexity of the situation. If you’re new to repairing car parts, you might find yourself a bit overwhelmed at the thought of fixing a windshield washer line. But don’t worry! With a little bit of knowledge and the right tools, you can handle this repair like a pro.
Next, let’s talk burstiness. When it comes to repairing a windshield washer line, you need to be prepared for unexpected bursts of activity. This means having all the necessary tools and materials on hand, as well as being ready to adapt and problem-solve as issues arise.
It’s all part of the process, and staying calm and focused will help you overcome any burstiness that comes your way. Now, let’s dive into some tips and tricks for a successful repair. First, start by locating the damaged section of the windshield washer line.
This may require removing a few components or following the line to its source. Once you’ve identified the problem area, carefully cut out the damaged section using a sharp utility knife. Then, measure the length of the removed section and cut a replacement piece to the same size.
When it comes to connecting the replacement piece, you have a couple of options. You can use hose clamps or zip ties to secure the new line in place. Just make sure it’s tight and leak-free.
FAQs
If your windshield washer line is damaged or clogged, it can be a frustrating experience. Luckily, repairing a windshield washer line is a relatively simple task that you can do yourself. The first step is to locate the damaged section of the line.
This can usually be done by following the line from the washer fluid reservoir to the nozzles on the windshield. Once you have identified the damaged section, you will need to remove it from the car. This can be done by disconnecting any clips or fasteners that are holding it in place.
Once the line is removed, you can either replace it with a new one or attempt to repair it. If the line is simply clogged, you can try using a needle or wire to clear the blockage. If the line is damaged, you may need to cut out the damaged section and replace it with a new piece of hose.
Once the line is repaired or replaced, you can reattach it to the car and test the washer system to ensure it is working properly. So, don’t let a damaged windshield washer line slow you down. With some basic tools and a little bit of patience, you can have your washer system up and running again in no time.
Q1: Can I repair a windshield washer line myself?
windshield washer line repair If you’re experiencing issues with your car’s windshield washer system, such as a clogged or leaking line, you may be wondering if you can repair it yourself. The good news is that in many cases, repairing a windshield washer line is a straightforward task that you can do on your own. To begin, you’ll need to locate the washer fluid reservoir in your vehicle.
This is typically located in the engine bay, near the windshield. Once you’ve found it, you can inspect the washer lines for any visible damage, such as cracks or leaks. If you’ve identified a problem with the line, you can start by removing it from the reservoir and the washer jets.
This can usually be done by simply pulling the line off, but be sure to catch any fluid that may spill out. Next, you can examine the line for any clogs. A common cause of clogs is debris, such as dirt or leaves, that can get trapped in the line.
You can use a thin wire or a small pin to gently remove any obstructions. If the line is damaged beyond repair, you may need to replace it. Luckily, replacement windshield washer lines are readily available and affordable.
You can find them at most automotive supply stores or online. Once you have the new line, you can easily install it by connecting it to the reservoir and the washer jets. Be sure to secure the connections to prevent any leaks.
In conclusion, while repairing a windshield washer line yourself is possible in many cases, it’s important to note that the process may vary depending on the make and model of your vehicle. If you’re unsure or uncomfortable with performing the repair yourself, it’s always best to consult a professional mechanic who can assist you with the repair.
Q2: How much does it cost to repair a windshield washer line?
windshield washer line, repair, cost. The cost of repairing a windshield washer line can vary depending on several factors. The most common cause of a malfunctioning washer line is a clog or break in the line itself.
If the line is clogged, it may just need to be flushed out, which is a relatively simple and inexpensive fix. However, if the line is broken or damaged, it may need to be replaced, which can be a bit more costly. The cost of replacing a windshield washer line can range from $50 to $200, depending on the make and model of the vehicle and the type of line that needs to be replaced.
It is always a good idea to consult with a professional to get an accurate estimate for your specific situation. Remember, it is important to address any issues with your windshield washer line as soon as possible, as it can affect your visibility and safety on the road.
FAQs
How do I diagnose a windshield washer line problem?
To diagnose a windshield washer line problem, start by checking if there is fluid in the reservoir and if it is at the correct level. If the reservoir is full, inspect the hoses for any signs of leaks or damage. Next, test the washer pump by pressing the washer button and listening for any humming sound. If there is no sound, the pump may need to be replaced. Finally, check the nozzles for any clogs or blockages.
How can I fix a leaking windshield washer line?
To fix a leaking windshield washer line, locate the source of the leak by inspecting the hoses and connections. If there is a crack or hole in the hose, it will need to be replaced. If the leak is at a connection point, try tightening the connection to see if it stops the leak. If the leak persists, you may need to replace the faulty connection or fitting.
What should I do if my windshield washer line is frozen?
If your windshield washer line is frozen, do not use hot water to thaw it as it can crack the windshield. Instead, park your car in a warm garage or use a hairdryer to gently warm up the frozen washer line. Once it thaws, add a winter windshield washer fluid with antifreeze properties to prevent freezing in the future.
How often should I replace my windshield washer line?
There is no specific timeframe for when to replace a windshield washer line as it depends on the condition of the line and the frequency of use. However, if you notice any signs of leaks, cracks, or blockages, it is best to replace the washer line to ensure optimal functionality.
Can I repair a windshield washer line myself?
Yes, you can repair a windshield washer line yourself, depending on the extent of the damage. If there is a small crack, you can try using a self-fusing silicone tape to seal it. However, if the line is severely damaged or has multiple cracks, it is recommended to replace the entire line for a more reliable and long-lasting solution.
What is the cost of repairing a windshield washer line?
The cost of repairing a windshield washer line can vary depending on the extent of the damage and the type of vehicle. Generally, replacing a section of the line can range from $50 to $150, including labor costs. However, if the entire line needs to be replaced, the cost can be higher.
How can I prevent my windshield washer line from getting clogged?
To prevent your windshield washer line from getting clogged, make sure to use a high-quality washer fluid that is specifically formulated for your vehicle. Regularly clean the nozzles and wipe away any debris that might accumulate on them. Also, avoid using water alone in the washer fluid reservoir, as it may lead to mineral deposits and clogs in the line.