
Are you looking to replace the awning on your RV, but not sure where to start? You’ve come to the right place! In this blog post, we will guide you through the process of replacing an awning on your RV, step by step. Whether your old awning is damaged and in need of replacement, or you’re simply looking to upgrade to a new and improved one, we’ve got you covered. Replacing an awning on an RV may seem like a daunting task, but with the right tools and a little bit of know-how, it can be a relatively simple and straightforward process.
Think of it as giving your RV a facelift, or perhaps even a wardrobe change. Just like swapping out an old pair of shoes for a brand new pair, replacing an awning can breathe new life into your RV and give it a refreshed and updated look. But why would you even need to replace your awning in the first place? Well, awnings can take quite a beating from the elements over time.
From harsh sunlight and intense heat to strong winds and heavy rain, your awning is constantly exposed to the elements. Over time, this exposure can lead to wear and tear, causing your awning to become damaged, torn, or otherwise in need of replacement. So, how do you go about replacing an awning on your RV? Stay tuned as we take you through each step of the process, from removing the old awning to installing the new one.
We’ll cover everything you need to know, including the tools required, the measurements you’ll need to take, and the best practices for ensuring a smooth and successful installation. By the end of this blog post, you’ll be armed with all the knowledge and confidence you need to tackle the task of replacing your RV awning. So grab your toolbox and let’s get started on giving your RV a fresh new look!
Table of Contents
Introduction
If you’re wondering how to replace the awning on your RV, you’ve come to the right place. Replacing an awning may seem daunting at first, but with some basic tools and a little bit of patience, you can easily tackle this project on your own. First, you’ll want to gather all the necessary materials, including a new awning, a ladder, a drill, and a helper if needed.
Next, you’ll need to remove the old awning by unscrewing it from the RV and carefully detaching any fasteners. Once the old awning is removed, you can install the new one by following the manufacturer’s instructions. Make sure to properly align the awning and secure it tightly to prevent any future issues.
With the right tools and a little bit of know-how, you’ll have your RV looking as good as new in no time.
Why Replacement May be Necessary
Replacement is sometimes necessary in life. Whether it’s a worn-out tire on a car or a broken appliance in the home, there are times when we have to say goodbye to the old and welcome the new. The same goes for technology.
While we may become attached to our gadgets and devices, there comes a point when they simply aren’t able to keep up with our changing needs. That’s when replacement becomes necessary. But why? Why can’t we just keep using the same old device? The answer lies in the fact that technology is constantly evolving.
Newer models are faster, more efficient, and offer more features. By upgrading to a new device, we can take advantage of these advancements and ensure that we have a device that meets our needs now and in the future. So as much as it may be difficult to say goodbye to our trusty old gadgets, sometimes replacement is necessary for us to stay up-to-date in our fast-paced world.
Choosing the Right Awning
awning, choosing the right awning, outdoor living space, aesthetic appeal, functionality, weather protection, personal preferences, awning materials, retractable awnings, fixed awnings, motorized awnings, manual awnings, cost considerations, durability, maintenance requirements, professional installation, benefits of awnings, enhance outdoor experience. Introduction: So, you’ve decided to spruce up your outdoor living space and create a cozy spot to relax and entertain. One essential item to consider is an awning, which not only adds aesthetic appeal to your outdoor space but also provides functional benefits.
Whether you want to protect your patio furniture from the elements or create shade on a sunny day, choosing the right awning is crucial. But with so many options available, how do you know which one is right for you? In this blog post, we will explore the different types of awnings, the considerations to keep in mind, and the benefits they offer. So, grab a seat, and let’s dive in!
Preparing for the Replacement
Replacing an awning on an RV can seem like a daunting task, but with a little preparation, it can be a relatively simple process. The first step is to gather all the necessary tools and materials, including a replacement awning, screwdriver, drill, and tape measure. It’s also important to make sure you have a sturdy ladder or step stool to reach the awning.
Once you have everything you need, start by carefully removing the old awning. This may involve unscrewing it from the RV or cutting away any attached straps or cords. Once the old awning is removed, take the time to clean the area thoroughly and make any necessary repairs.
Then, measure the area where the new awning will be installed to ensure a proper fit. Position the new awning and secure it in place using the appropriate screws or other fasteners. Finally, give the awning a test run to make sure it opens and closes smoothly before hitting the road.
With a bit of patience and the right tools, replacing an awning on your RV can be a rewarding and satisfying project.
Gathering the Necessary Tools and Materials
“Preparing for the Replacement: Gathering the Necessary Tools and Materials” When it comes to replacing something, it’s always important to gather the necessary tools and materials before diving into the task. This not only ensures that you have everything you need to complete the replacement, but it also saves you time and frustration in the long run. So, what tools and materials should you gather? Well, it depends on what you’re replacing.
If you’re replacing a light fixture, for example, you’ll need tools such as a screwdriver, wire cutters, and electrical tape. You may also need additional materials such as wire connectors and a new light bulb. On the other hand, if you’re replacing a sink faucet, you’ll need tools such as an adjustable wrench, pliers, and a pipe wrench.
You may also need materials such as plumber’s tape and a new faucet. By taking the time to gather all the necessary tools and materials beforehand, you can ensure that you’re fully prepared for the replacement and avoid any unnecessary trips to the store. So, before you start any replacement project, take a moment to gather everything you’ll need.
Your future self will thank you!
Measuring the Size of the Awning
measuring the size of the awning
Removing the Old Awning
awning replacement
Installing the New Awning
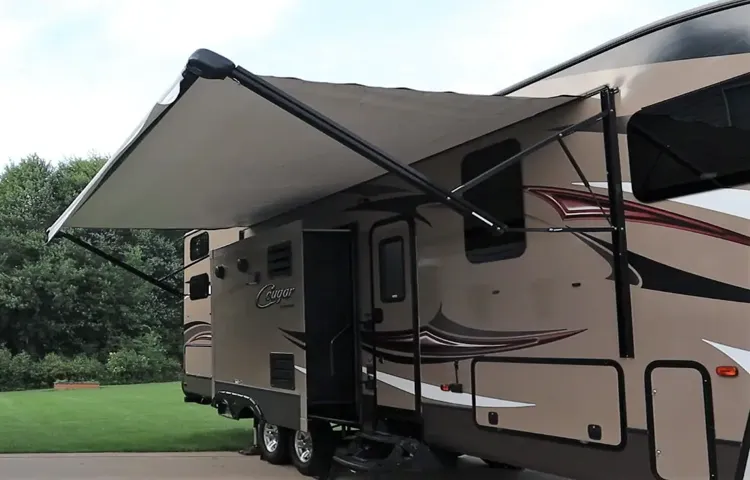
If you’re looking to upgrade the awning on your RV, you’re in the right place. Installing a new awning can make a big difference in the look and functionality of your RV, not to mention the added shade and protection it provides. So, how do you go about replacing an awning on an RV? Well, the first step is to measure your existing awning to ensure you order the correct size.
Once you have the replacement awning, start by removing the old one. This typically involves taking off the end caps and loosening the screws that hold the awning in place. Once the old awning is removed, it’s time to install the new one.
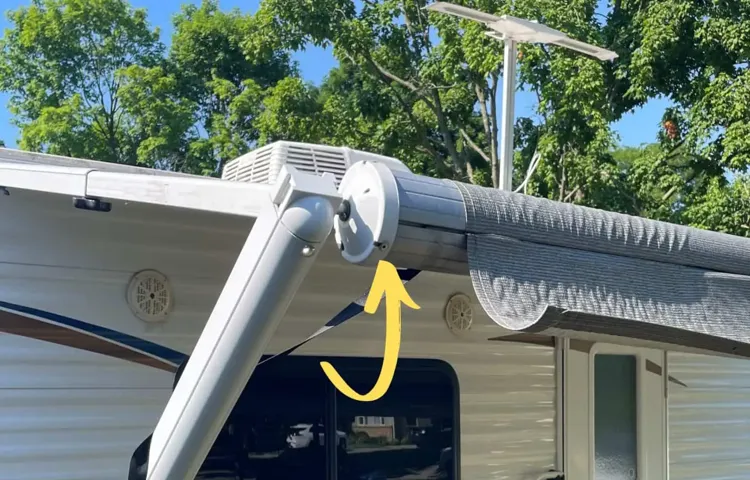
Begin by attaching the new awning fabric to the roller tube, making sure it is centered and straight. Then, carefully slide the roller tube back onto the RV, ensuring it lines up with the awning rails. Next, secure the awning to the RV using the screws and end caps.
Finally, extend and retract the awning a few times to make sure it operates smoothly. With a little patience and some basic tools, you’ll have a brand new awning installed on your RV in no time. So, why wait? Get started on that upgrade today and enjoy all the benefits of a new awning on your RV.
Attaching the Awning Fabric to the Roller Tube
“awning fabric installation”
Mounting the Awning Arms to the RV
Installing the New Awning Installing a new awning on your RV is a great way to maximize your outdoor space and create a shaded area for relaxation and entertaining. One of the first steps in this process is mounting the awning arms to the RV. This is an important step because it ensures that the awning is securely attached and can withstand wind and other weather conditions.
To begin, you’ll want to gather all the necessary tools and materials for the installation. This may include a drill, screws, a level, and a silicone caulk. It’s important to have everything you need before you start to avoid any delays or interruptions.
Next, you’ll need to determine the best location for the awning arms on your RV. This will depend on the size and design of your RV, as well as your personal preferences. It’s a good idea to consult the owner’s manual for your specific RV model for guidance on where to mount the awning arms.
Once you’ve determined the location, use the level to ensure that the awning arms will be installed straight and level. This will help to prevent any issues with the operation of the awning once it’s installed. Now it’s time to actually mount the awning arms to the RV.
Start by drilling pilot holes at the predetermined locations. This will make it easier to screw in the screws and prevent any damage to the RV. After the pilot holes are drilled, attach the awning arms to the RV using the screws.
Make sure to tighten them securely so that the awning arms are held firmly in place. Finally, use silicone caulk to seal around the screw heads. This will help to prevent any water from getting inside the RV and causing damage.
Securing the Awning in Place
When it comes to installing a new awning, one crucial step is securing it in place properly. This ensures that your awning stays securely attached, even in strong winds or heavy rainfall. To do this, you’ll need to use the correct hardware, such as screws or bolts, depending on the type of awning you have and the surface you’re attaching it to.
Make sure to carefully measure and mark the exact placement for the screws or bolts, taking into account any pre-drilled holes provided by the manufacturer. It’s essential to use a level to ensure that your awning is straight before securing it in place. Once everything is lined up correctly, tighten the screws or bolts firmly, without over-tightening, to avoid damaging the awning or the surface it’s attached to.
By taking the time to properly secure your new awning, you can enjoy worry-free shade and protection for many years to come.
Conclusion
After diligently following these steps, you should have successfully replaced the awning on your RV. Congratulations! You are now officially a master of RV awning rejuvenation. Just think, with your newly acquired skills, you could start your own traveling circus and be the star of the greatest “Awning Extravaganza” the world has ever seen.
So grab your top hat and get ready to dazzle audiences with your awe-inspiring awning abilities. Remember, the show must go on, and with your newly repaired RV awning, it’s sure to be a crowd-pleasing spectacle wherever you roam. Happy travels, oh great awning maestro!”
FAQs
How often should I replace the awning on my RV?
The lifespan of an RV awning can vary depending on factors such as usage and weather conditions. However, a general rule of thumb is to replace the awning every 5-7 years to ensure optimal performance and to prevent potential damage from wear and tear.
Can I replace the awning on my RV myself, or do I need professional help?
While it is possible to replace the awning on your RV yourself, it is recommended to seek professional help, especially if you are not familiar with the process. Replacing an awning requires proper measurements, tools, and installation techniques to ensure it is done correctly and safely.
What are the signs that indicate I need to replace my RV awning?
Some common signs that indicate the need for awning replacement include tears, holes, or extensive fabric and frame damage. Additionally, if your awning is no longer retracting or extending properly, it may be time for a replacement.
How much does it cost to replace an awning on an RV?
The cost of replacing an awning on an RV can vary depending on factors such as the type of awning, its size, and the labor cost for installation. On average, you can expect to spend anywhere from $500 to $1500 for a new awning and installation.
Can I upgrade my RV awning to a more durable or weather-resistant material?
Yes, it is possible to upgrade your RV awning to a more durable or weather-resistant material. There are various options available such as vinyl, acrylic, or polyester fabrics, each with its own benefits. Consulting with a professional can help you choose the best material for your specific needs.
Are there any maintenance tips to extend the lifespan of my RV awning?
Yes, there are several maintenance tips to help extend the lifespan of your RV awning. Regularly cleaning the fabric, storing it properly when not in use, and avoiding harsh weather conditions can all contribute to preserving the awning’s longevity.
Can I replace just the fabric of my RV awning instead of the entire unit?
In some cases, it is possible to replace just the fabric of your RV awning instead of the entire unit. This can be a more cost-effective option if the frame and other components are still in good condition. However, it is important to ensure that the fabric is compatible with the existing hardware.