
Have you noticed your car’s temperature gauge showing higher than normal readings? Or maybe your engine is overheating? If so, it could be due to a faulty coolant temperature sensor. Don’t worry, replacing a coolant temperature sensor is not as complicated as it sounds. In fact, with a few simple tools and some basic knowledge, you can easily replace it yourself and save some bucks on mechanic fees.
The coolant temperature sensor plays a crucial role in your car’s engine system. It measures the temperature of the coolant and sends the information to the engine control unit (ECU). Based on this data, the ECU adjusts the fuel mixture and determines if the engine needs to be cooled down or warmed up.
So, when this sensor fails, it can disrupt the engine’s performance and potentially cause serious damage if not addressed promptly. To replace the coolant temperature sensor, you’ll need a few tools such as a wrench or socket set, a container to catch any coolant spills, and a new sensor specific to your car’s make and model. The first step is to locate the sensor, which is usually located near the thermostat housing or on the cylinder head.
Refer to your car’s manual if you’re unsure where it is. Once you’ve located the sensor, make sure your engine is cool before proceeding. Then, disconnect the negative battery terminal to prevent any electrical shocks.
Using the appropriate tool, carefully disconnect the electrical connector attached to the sensor. Be gentle to avoid damaging the connector or wires. Next, use a wrench or socket set to loosen and remove the old sensor from its housing.
Be cautious as some coolant may leak during this process. Place a container underneath to catch any spills and minimize mess. Once the old sensor is removed, clean the housing and apply a small amount of thread sealant to the threads of the new sensor.
Table of Contents
Introduction
If you’ve noticed your car’s temperature gauge running hot or your check engine light coming on, it could be due to a faulty coolant temperature sensor. This small yet crucial part monitors the temperature of your engine and sends that information to the engine control unit (ECU) to help regulate the fuel mixture and ignition timing. When the coolant temperature sensor goes bad, it can cause all sorts of problems, from reduced fuel efficiency to engine overheating.
Thankfully, replacing a coolant temperature sensor is a relatively simple task that can be done in just a few steps. In this blog post, we’ll guide you through the process of replacing a coolant temperature sensor and getting your car back on the road in no time. So grab your tools and let’s get started!
What is a Coolant Temperature Sensor?
coolant temperature sensor
Why Do You Need to Replace It?
replacement parts, replace it
Tools and Materials Needed
If your vehicle is experiencing issues with its coolant temperature, such as overheating or erratic gauge readings, it may be time to replace the coolant temperature sensor. Replacing this sensor is a relatively simple task that can be done by most DIYers. To complete this task, you will need a few tools and materials.
Firstly, you will need a wrench or socket set to remove any components that are blocking access to the sensor. Additionally, you will need a new coolant temperature sensor, which can be purchased from a local auto parts store or online. It’s also a good idea to have a container to catch any coolant that may leak out during the process.
Lastly, you will need a funnel to refill the coolant once the sensor has been replaced. By gathering these tools and materials before you start, you can ensure a smooth and efficient replacement process.
List of Tools
“List of Tools for Home Improvement Projects” When it comes to tackling home improvement projects, it’s important to have the right tools and materials on hand. Whether you’re painting a room, hanging shelves, or fixing a leaky faucet, having the proper tools can make all the difference in getting the job done efficiently and effectively. Here is a list of essential tools and materials that every homeowner should have in their toolkit.
Screwdriver Set: A good set of screwdrivers is a must-have for any home improvement project. From tightening loose screws to assembling furniture, a screwdriver set with various sizes and types of screwdrivers will come in handy.
Hammer: A hammer is a versatile tool that can be used for a variety of tasks, such as driving nails, removing nails, and tapping things into place. Look for a hammer with a comfortable grip and a weighted head for better control and accuracy.
Level: Whether you’re hanging pictures or installing shelves, a level is essential for ensuring that everything is straight and even. A small torpedo level is great for small projects, while a larger bubble level is useful for larger tasks.
Tape Measure: Accurate measurements are crucial for any home improvement project. A tape measure allows you to measure and mark distances, ensuring that everything fits and aligns properly.
Look for a tape measure with both metric and imperial measurements for versatility. Utility Knife: A utility knife is a handy tool for cutting various materials, such as carpet, vinyl, and cardboard.
List of Materials
tools and materials list
Step-by-Step Guide
Are you experiencing issues with your car’s engine temperature? It could be that your coolant temperature sensor needs to be replaced. This small but vital component is responsible for monitoring the temperature of your coolant and sending the information to your car’s computer. If the sensor is faulty or not working correctly, it can cause your engine to overheat, leading to potentially costly repairs.
But don’t worry, replacing a coolant temperature sensor is a relatively simple process that can be done at home with a few basic tools. In this step-by-step guide, we’ll walk you through the process so you can get your car back on the road in no time.
Step 1: Prepare the Vehicle
vehicle preparation, step-by-step guide
Step 2: Locate the Coolant Temperature Sensor
coolant temperature sensor, locate coolant temperature sensor, step-by-step guide. So, you’ve decided to take on the task of replacing your coolant temperature sensor. Great! But the first step is actually finding the darn thing.
Don’t worry, though, because I’m here to guide you through the process. In this step-by-step guide, I’ll show you how to locate the coolant temperature sensor in your vehicle. The coolant temperature sensor is a vital component of your car’s engine.
It measures the temperature of the engine coolant and sends the information to the engine control unit (ECU). This helps the ECU make decisions about fuel mixture and ignition timing, ensuring optimal engine performance. To locate the coolant temperature sensor, you’ll first need to find the engine.
Once you’ve located the engine, look for the metal housing where the coolant hoses enter and exit. This housing is usually located near the front of the engine bay. Now, take a closer look at the housing.
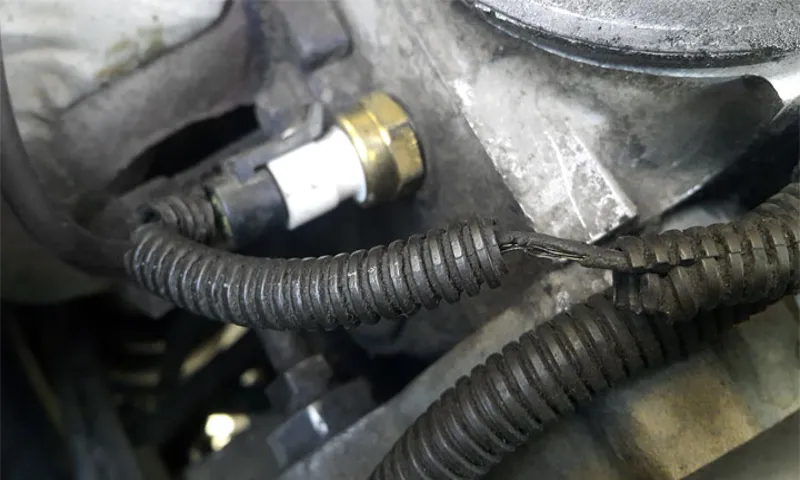
You may see a couple of electrical connectors attached to it. These connectors are usually connected to various sensors, one of which is the coolant temperature sensor. The coolant temperature sensor is typically a small, cylindrical component with an electrical connector on one end.
If you’re still having trouble locating the coolant temperature sensor, consult your vehicle’s owner’s manual. It should have a diagram or description that will help you find the sensor. Additionally, you can also search for online resources specific to your vehicle make and model.
Step 3: Disconnect the Electrical Connector
In this step-by-step guide to disconnecting an electrical connector, the third step is crucial for ensuring a safe and successful disconnection. Before we dive into this step, let’s briefly recap the previous steps. First, we located the electrical connector we wanted to disconnect.
Then, we carefully removed any retaining clips or screws that were holding the connector in place. Now, it’s time to disconnect the electrical connector itself. To do this, we need to understand how the connector is designed and how it works.
Electrical connectors typically consist of a male and female component that securely connect to establish an electrical connection. They may also have additional features such as locking tabs or release mechanisms. Once we have a good understanding of how the connector is designed, it’s time to actually disconnect it.
In most cases, this can be done by simply pressing the release mechanism or unlocking the locking tab. However, the exact method of disconnecting the electrical connector will depend on its design. It’s important to use the proper technique to avoid damaging the connector or any surrounding components.
Before disconnecting the electrical connector, it’s a good idea to take a moment to assess any potential risks or hazards. Make sure the power source is disconnected or turned off to prevent any accidental shocks or electrical arcing. If necessary, use protective gloves or tools to ensure your safety.
Once you’re confident that it’s safe to proceed, carefully manipulate the connector according to its design. Apply gentle pressure on the release mechanism or locking tab and pull the connector apart. Be sure to use steady and even force to avoid any sudden movements or jerks that could damage the connector or any wires attached to it.
Step 4: Remove the Sensor
In this step-by-step guide, we will walk you through the process of removing the sensor from your device. When it comes to removing the sensor, it is important to proceed with caution and follow these steps carefully to avoid any damage. Start by powering off your device and disconnecting any cables.
Then, locate the sensor on your device. It may be attached with screws or adhesive, so use a screwdriver or pry tool to gently loosen it. Once the sensor is loose, carefully lift it out of its housing.
Be sure to handle it with care to avoid any damage. Congratulations, you have successfully removed the sensor from your device! Now you are ready to move on to the next step in the repair process.
Step 5: Install the New Sensor
After removing the old sensor, it’s time to install the new one. Installing a new sensor is a relatively straightforward process, but it’s important to follow the instructions provided with your specific sensor. Begin by locating the sensor’s installation point.
This is usually on the outside of your vehicle, near the wheel well or underneath the bumper. Ensure that the area is clean and free from any debris or dirt. Next, carefully insert the new sensor into the installation point.
Make sure it is aligned properly and fits securely. Depending on the sensor, there may be a specific orientation or position it needs to be installed in. Take your time and double-check that it is in the correct position before proceeding.
Once the sensor is in place, use the necessary tools to tighten any screws or bolts that secure it. Be cautious to avoid overtightening, as this could damage the sensor or surrounding components. After the new sensor is securely installed, it’s essential to test it to ensure proper functioning.
This can usually be done by turning on your vehicle and checking for any error codes or warning lights related to the sensor. If there are no issues, take your vehicle for a short test drive to confirm that the sensor is working correctly. Pay attention to any unusual noises or behavior that may indicate a problem.
By following these step-by-step instructions, you should successfully install your new sensor and have it functioning properly in no time. Remember, if you are unsure about any part of the installation process, it’s always best to consult a professional or refer to the manufacturer’s instructions for guidance. Keyword: install the new sensor.
Step 6: Reconnect the Electrical Connector
electrical connector, reconnect, step-by-step guide Now that you have removed the electrical connector, it’s time to reconnect it. This step is vital in ensuring that everything is properly connected and functioning. Follow this step-by-step guide to easily reconnect the electrical connector.
First, locate the electrical connector that you previously removed. It should be near the area where you were working. Take a moment to examine the connector and make sure there are no damages to the pins or wires.
Next, carefully align the connector with the corresponding socket. Pay close attention to the shape and size of the connector to ensure a proper fit. Once aligned, gently push the connector into the socket.
You may need to apply a bit of pressure, but be careful not to force it. Listen and feel for a click or a slight resistance, which indicates that the connector is securely in place. Double-check by gently tugging on the connector to make sure it doesn’t come loose easily.
If it feels loose, you may need to realign and reconnect it. After reconnecting the electrical connector, it’s a good idea to do a final check to make sure everything is secure. Look for any loose wires or cables and make sure they are neatly tucked away.
It’s important to ensure that there are no exposed wires that could potentially cause a short circuit or other electrical issues. Once you are satisfied that everything is properly connected, you can move on to the next steps in your project. Whether you are repairing a household appliance or working on a car, correctly reconnecting the electrical connector is crucial for a successful outcome.
Step 7: Test the New Sensor
testing the new sensor Now that you have installed the new sensor, the next step is to test it to ensure it is working properly. Testing the new sensor will help you determine if it is accurately measuring the desired parameters and if it is providing reliable data. To start the testing process, you will need to have a testing protocol in place.
This protocol should outline the steps you will take to test the sensor, including what parameters you will be measuring and what equipment you will be using. It is important to follow this protocol closely to ensure consistent and reliable results. Once you have your protocol in place, you can begin the testing process.
This involves connecting the sensor to the appropriate equipment and setting it up to measure the desired parameters. You will then need to collect data over a period of time to determine if the sensor is consistently providing accurate readings. During the testing process, it is important to monitor the sensor closely and to make note of any unexpected or incorrect readings.
This will help you identify any potential issues or faults with the sensor and allow you to address them before relying on the data it produces. After collecting the data, you will need to analyze it to determine if the sensor is working properly. This may involve comparing the sensor’s readings to known values or conducting statistical analysis to assess the accuracy and reliability of the sensor.
If the test results indicate that the sensor is not working properly, you may need to troubleshoot the issue or consider replacing the sensor with a different model. It is important to address any issues or faults with the sensor before relying on its data for any critical applications. Overall, testing the new sensor is a crucial step in the installation process.
It allows you to ensure the sensor is accurately measuring the desired parameters and providing reliable data. By following a testing protocol and closely monitoring the sensor during the testing process, you can have confidence in the sensor’s performance and rely on its data for your applications.
Tips and Tricks
If your car is experiencing issues such as overheating or fluctuating temperature readings, the culprit could be a faulty coolant temperature sensor. Fortunately, replacing this sensor is a relatively simple process that you can do yourself with a few tools and a little patience. First, you’ll need to locate the sensor, which is usually found near the thermostat housing or on the engine block.
Once you’ve found it, you’ll need to disconnect the electrical connector and unscrew the sensor using a wrench or socket. Be careful not to damage the surrounding parts as you remove the old sensor. Before installing the new sensor, make sure to apply a small amount of thread sealant to prevent any leaks.
Screw in the new sensor using your wrench or socket, and then reconnect the electrical connector. Finally, start your car and check for any warning lights or abnormal temperature readings. If everything looks good, congratulations! You’ve successfully replaced your coolant temperature sensor.
Final Thoughts
Replacing a coolant temperature sensor is a relatively simple task that you can do yourself, even if you don’t have much experience with car repairs. The coolant temperature sensor is responsible for measuring the temperature of the engine coolant and sending that information to the engine control unit (ECU). This data is then used by the ECU to make adjustments to the engine’s performance, such as adjusting the air/fuel mixture.
If the coolant temperature sensor is faulty or not working properly, it can cause various issues with the engine, such as poor fuel economy, rough idle, or even engine overheating. To replace the coolant temperature sensor, you will need a few basic tools and about 30 minutes of your time. First, locate the coolant temperature sensor, which is usually located near the thermostat housing or on the engine block.
Then, disconnect the electrical connector from the sensor. Next, use a wrench or socket to remove the old sensor from its mounting location. Finally, install the new sensor and reconnect the electrical connector.
It’s important to note that when replacing the coolant temperature sensor, you should also replace the O-ring or gasket that seals the sensor to the engine. This will ensure a proper seal and prevent any coolant leaks. Once you have finished replacing the sensor, start your engine and check for any leaks, and make sure that the engine is running smoothly.
Conclusion
And there you have it – the foolproof guide to replacing a coolant temperature sensor. Armed with a few tools and a little bit of patience, you can handle this task like a pro. So, whether you’re a DIY enthusiast or just trying to impress your friends with your car knowledge, now you can confidently tackle this job and keep your engine running smoothly.
Just remember to wait for the engine to cool down, because as we all know, hot engines and cold hands just don’t mix – unless you’re trying to win a game of extreme hand dexterity. So, go forth and conquer the realm of coolant temperature sensors, and remember, if at first you don’t succeed, just blame it on gremlins in the electrical system – everyone will believe you.”
FAQs
What is a coolant temperature sensor and what does it do?
A coolant temperature sensor is a device that measures the temperature of the engine coolant. It sends this information to the engine control unit (ECU) to help regulate fuel injection, ignition timing, and other engine functions.
Why is it important to replace a faulty coolant temperature sensor?
A faulty coolant temperature sensor can lead to inaccurate temperature readings, which can affect the engine’s performance and fuel efficiency. It can also cause overheating or difficulty in starting the engine.
How do I know if my coolant temperature sensor is faulty?
Some common signs of a faulty coolant temperature sensor include fluctuating temperature gauge readings, engine overheating, poor fuel efficiency, and a check engine light.
Can I replace the coolant temperature sensor myself?
Yes, replacing the coolant temperature sensor is typically a straightforward task. However, it is important to consult your vehicle’s service manual or seek professional advice to ensure proper installation.
What tools do I need to replace a coolant temperature sensor?
The tools needed to replace a coolant temperature sensor usually include a wrench or socket set, pliers, and a container to catch any coolant that may leak out during the process.
How often should I replace my coolant temperature sensor?
There is no specific interval for replacing a coolant temperature sensor. However, if you notice any signs of a faulty sensor or experience engine-related issues, it is a good idea to have it inspected and replaced if necessary.
Are there any precautions I should take when replacing a coolant temperature sensor?
It is important to ensure the engine is cool before replacing the sensor to avoid burns. Additionally, be cautious when draining coolant and dispose of it properly as it is toxic to the environment.