Are you tired of a worn-out, torn, or faded power awning fabric on your RV? Don’t worry, we’ve got you covered! In this step-by-step guide, we will walk you through the process of replacing your Dometic power awning fabric, so you can enjoy a fresh, new look on your outdoor adventures. Whether you’re a seasoned DIY-er or a beginner, this guide will provide you with all the information you need to successfully complete this project. So, let’s dive in and discover how easy it is to give your RV’s power awning a much-needed makeover!
Table of Contents
Introduction
If the fabric on your Dometic power awning is looking worn out or damaged, it’s time to replace it. Luckily, replacing the fabric on a Dometic power awning is a relatively simple process that can be done by most DIY enthusiasts. First, you’ll need to measure the size of your existing fabric so you can order a replacement that fits properly.
Once you have your new fabric, you’ll need to remove the old fabric from the roller tube and the awning rail. This can usually be done by simply sliding the fabric out of the awning rail. Next, you’ll need to attach the new fabric to the roller tube and the awning rail.
This can be done using the same method as removing the old fabric – by sliding it into place. Finally, you’ll need to secure the new fabric in place using the included clamps or screws. And that’s it! With a little bit of time and effort, you can have your Dometic power awning looking as good as new.
Why should you replace your Dometic power awning fabric?
Dometic power awnings are a popular choice for RV owners, offering convenience and protection from the elements. However, over time, the fabric on these awnings can become worn or damaged, leading to a less-than-optimal camping experience. But why should you replace your Dometic power awning fabric? Well, let me tell you.
Replacing the fabric on your power awning can help restore its functionality and extend its lifespan. Not only will a new fabric provide better protection from sun and rain, but it will also give your RV a fresh, updated look. So, if you want to make the most of your outdoor living space and ensure that your power awning stands the test of time, it’s time to consider replacing the fabric.
Trust me, you won’t regret it.
What tools will you need?
Introduction When it comes to tackling any project, having the right tools can make all the difference. Whether you’re a professional or a DIY enthusiast, having the right tools can help you work more efficiently and produce better results. In the world of blogging, the same principle applies.
Whether you’re just starting out or looking to up your game, there are a few essential tools that can help you streamline your process, optimize your content, and connect with your audience. In this blog section, we will explore the tools you will need to set yourself up for success in the world of blogging.
Step 1: Prepare the area
When it comes to replacing a Dometic power awning fabric, the first step is to prepare the area. This involves ensuring a clean and clear workspace to work with. Start by retracting the awning fabric fully and removing any debris or dirt that may have accumulated on it.
Next, locate the fabric rail and remove any screws or fasteners that are holding it in place. Carefully detach the old fabric from the rail, making sure not to damage it in the process. Once the old fabric is removed, inspect the rail for any signs of wear or damage.
If necessary, clean or replace the rail before continuing with the installation of the new fabric. By taking the time to properly prepare the area, you can ensure a smooth and efficient replacement process.
Extend the awning fully
extend the awning fully, prepare the area, awning installation Awning installation can greatly enhance the functionality and aesthetics of your outdoor space. To ensure a successful installation, it is important to properly prepare the area before extending the awning fully. This will not only help you avoid any potential damage to the awning but also ensure that it functions optimally.
So, what are the steps you need to take to prepare the area? First, clear any obstacles in the area where the awning will be installed. This includes removing any furniture, plants, or other items that may obstruct the awning’s movement. Next, check the ground for any unevenness or debris and make sure it is clean and level.
This will provide a solid foundation for the awning and prevent any tripping hazards. Additionally, consider the direction of the sun and wind in the area to determine the ideal position for the awning. Taking these steps to prepare the area will make the installation process smoother and ensure that you can fully enjoy the benefits of your new awning.
Clean the awning fabric
Cleaning the fabric on your awning is an important part of maintaining its appearance and prolonging its lifespan. However, before you can start cleaning, it’s essential to prepare the area properly. First, clear any furniture or items that may be in the way of the awning.
This will make it easier to access and clean the fabric. Next, lay down a tarp or plastic sheet underneath the awning to catch any dirt or debris that may fall during the cleaning process. This will help to protect your flooring or outdoor space from getting dirty or stained.
Taking these simple steps to prepare the area will ensure that you have a clean and clear space to work in, making the cleaning process much more efficient and effective.
Disconnect the awning from power source
Do you love spending time outdoors on your patio, enjoying the fresh air and sunshine? If so, you probably have an awning to provide shade and protection from the elements. But what do you do when it’s time to disconnect the awning from its power source? Don’t worry, it’s not as complicated as it may seem. The first step is to prepare the area.
Make sure there is plenty of space around the awning for you to work safely. Remove any furniture or other obstacles that may be in the way. Once you have cleared the area, you can move on to the next step.
It’s always best to take safety precautions, so make sure to turn off the power source before disconnecting the awning. This will prevent any accidents or damage to the awning or electrical system. Now that you’ve prepared the area and turned off the power, you’re ready to move on to the next step.
Step 2: Remove the old fabric
Once you’ve gathered all the necessary tools and materials, you’re ready to begin replacing the fabric on your Dometic power awning. The first step in this process is to remove the old fabric. Start by extending the awning fully to provide you with adequate working space.
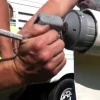
Locate the screws or bolts that secure the fabric to the roller tube, and carefully remove them using a suitable tool, such as a screwdriver or wrench. Once the screws or bolts are removed, gently detach the fabric from the roller tube, starting from one end and working your way to the other. Take your time, being mindful not to damage the fabric or the roller tube during this process.
Once the fabric is fully removed, set it aside for disposal or repair, depending on its condition. With the old fabric removed, you’re now ready to move on to the next step of installing the new fabric.
Access the awning tube and roller
When it comes to replacing the fabric on your awning, the first step is to access the awning tube and roller. This is where the fabric is stored and rolled up when not in use. To remove the old fabric, you’ll need to unroll it completely and locate the ends that are attached to the roller.
Depending on the type of awning you have, there may be screws or bolts holding the fabric in place. Use a screwdriver or wrench to loosen these fasteners and carefully detach the fabric from the roller. Once the fabric is free, you can begin the process of installing the new fabric.
Keep in mind that every awning is different, so be sure to consult the manufacturer’s instructions for specific guidance on removing the old fabric.
Detach the fabric from the roller
“detach fabric from roller,” “step 2: remove old fabric.” When it comes to changing the fabric on your roller blinds, the second step is to remove the old fabric. Once you have gathered all the necessary tools, such as a screwdriver and pliers, it’s time to get started.
Begin by detaching the fabric from the roller. This can usually be done by locating the end of the fabric and gently pulling it away from the roller with your hands. If the fabric is securely fastened, you may need to use a screwdriver to loosen any screws or brackets holding it in place.
Once the fabric is free from the roller, set it aside for disposal or recycling. By detaching the old fabric, you are one step closer to giving your roller blinds a fresh new look.
Disconnect the fabric from the arms
When it comes to giving your tired old chair a new lease on life, one of the first steps is removing the old fabric. This might seem like a daunting task, but with a little know-how and the right tools, it can be done easily. Step two in the process involves disconnecting the fabric from the arms of the chair.
Start by flipping the chair upside down and locating the screws or bolts that attach the arms to the rest of the chair. Use a screwdriver or wrench to loosen and remove these fasteners, being careful not to damage the chair in the process. Once the arms are disconnected, you’ll be able to easily remove the old fabric and move on to the next step of the chair makeover process.
Remove the fabric completely
When it comes to giving your furniture a fresh new look, one of the most important steps is to remove the old fabric. This might seem like a daunting task, but with a little bit of time and effort, you can easily remove the fabric from your furniture. Start by examining the piece of furniture and locating any staples or tacks that are holding the fabric in place.
Use a flathead screwdriver or a staple remover to carefully pry these out. Once all of the staples or tacks have been removed, you can begin pulling the fabric away from the furniture. Take care not to rip the fabric as you go.
If the fabric is stuck on stubbornly, you may need to use a pair of pliers to help remove it. Remember to work slowly and be patient, as rushing this step could result in damage to the furniture. Once all of the fabric has been removed, you can move on to the next step of the reupholstering process.
Step 3: Install the new fabric
Now that you have removed the old fabric from your Dometic power awning, it’s time to move on to the next step: installing the new fabric. This may sound like a daunting task, but with a little patience and the right tools, you’ll have your awning looking brand new in no time. First, lay out the new fabric on a clean surface and make sure it is free of any wrinkles or creases.
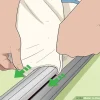
Next, locate the awning rail on your RV and slide one end of the fabric into it, making sure it is aligned properly. Once the fabric is in the rail, carefully unroll it along the length of the awning, making sure it is centered and straight. You may need a second set of hands to help you with this step.
As you unroll the fabric, be sure to keep it taut and smooth out any wrinkles or folds. It’s important to take your time with this step to ensure that the fabric is properly installed and will operate smoothly. Once the fabric is fully unrolled, secure the other end into the opposite awning rail, again ensuring that it is aligned and centered.
Now that the fabric is installed, it’s time to test the operation of the awning. Extend the awning fully and then retract it, making sure it moves smoothly and without any issues. If everything looks and functions properly, you’re all set! You have successfully replaced the fabric on your Dometic power awning.
Now you can sit back, relax, and enjoy the shade and protection that your awning provides.
Place the new fabric on a flat surface
“install new fabric.” Installing new fabric on furniture can give it a fresh, updated look and bring new life to your space. Once you have chosen the perfect fabric, it’s time to start the installation process.
The third step in this process is to place the new fabric on a flat surface. This will allow you to easily work with the fabric and ensure a smooth installation. Lay the fabric out on a clean, flat surface, making sure there are no wrinkles or creases.
Smooth it out with your hands to make sure it lays flat and is ready for the next steps. Taking this step will ensure that your new fabric is ready to be measured and cut to size for your furniture.”
Attach the fabric to the roller
When it comes to installing new fabric on your roller shades, attaching the fabric securely to the roller is a crucial step. To do this, start by positioning the roller shade so that the fabric is facing down. Next, unroll the fabric so that it covers the entire length of the roller.
You can use weights or clips to hold the fabric in place temporarily. Then, take the end of the fabric and insert it into the groove on the roller, ensuring that it is inserted evenly and securely. Once the fabric is inserted, use a staple gun or adhesive to secure the fabric to the roller.
Make sure to distribute the staples or adhesive evenly along the width of the fabric to ensure it is securely attached. Finally, test the roller shade by rolling it up and down to ensure that the fabric rolls smoothly and evenly. By following these steps, you can successfully install new fabric on your roller shades and give them a fresh, updated look.
Connect the fabric to the arms
“Replacing the fabric on your chair’s arms can give it a fresh new look and make it more comfortable to sit in. In this step, we’ll guide you through installing the new fabric. To begin, lay out the fabric and measure it against the chair arm, making sure to leave a few inches of excess on each side for a snug fit.
Next, you’ll need to attach the fabric to the chair arm. This can be done using a staple gun or fabric glue. If using a staple gun, carefully position the fabric and press the staples through the fabric and into the chair arm.
Make sure to space the staples evenly to ensure a secure hold. If using fabric glue, apply it to the chair arm and press the fabric onto it, smoothing out any wrinkles or bubbles. Allow the glue to dry completely before moving on to the next step.
By connecting the fabric to the arms, you’ll be one step closer to transforming your chair into a stylish and comfortable seating option.”
Roll up the fabric
Now that you have removed the old fabric from your furniture, it’s time to move on to the next step: installing the new fabric. This is where the fun begins! Start by rolling up the fabric tightly so that it is easier to work with. This will make it easier to maneuver and prevent it from getting in the way as you are trying to attach it to the furniture.
Plus, rolling it up will give you a clear view of the fabric and ensure that it is not wrinkled or stretched out before installation. Think of it as rolling out a fresh roll of carpet – you want it to be smooth and taut before you start stapling it down. So take your time and make sure the fabric is rolled up neatly and tightly.
Once you have it rolled up, you are ready to move on to the next step of installing the new fabric on your furniture.
Step 4: Test the awning
Once you have installed the new Dometic power awning fabric, it’s important to test it out before calling it a done deal. Testing the awning will ensure that it is functioning properly and that all of your hard work has paid off. To test the awning, start by extending it out fully.
This will allow you to see if the fabric is lined up correctly and if it is being pulled out smoothly. Next, retract the awning back in to make sure it is coming in evenly and without any hitches. While testing the awning, be sure to listen for any unusual sounds or vibrations that could indicate a problem.
Additionally, check the fabric for any signs of tension or sagging. If everything looks and sounds good, congratulations! You have successfully replaced your Dometic power awning fabric.
Reconnect the power source
reconnect the power source. Now that you have successfully reinstalled the awning and aligned it properly, it’s time to test if it’s working correctly. The next step, step 4, involves reconnecting the power source.
This ensures that the awning can be operated using its motor or remote control. To reconnect the power source, you will need to locate the power supply for the awning. This is usually found near the motor or control box.
Once you have located it, you will need to connect the power cables from the awning to the power supply. Make sure to double-check that the cables are securely connected and that there are no loose connections. Once you are confident that everything is properly connected, it’s time for the moment of truth – testing the awning.
Use the remote control or the switch on the control box to extend and retract the awning. Listen for any unusual noises or vibrations during the operation. The awning should extend and retract smoothly without any issues.
If you encounter any problems, such as the motor not working or the awning getting stuck, double-check the connections and make sure they are secure. You may also need to consult the manufacturer’s manual or seek professional assistance if the issue persists. Testing the awning is an important step to ensure that it is functioning properly and is ready to be used.
It’s always better to test it before the actual need arises, such as during a sudden rainstorm or scorching heat. By following these steps and reconnecting the power source, you will have peace of mind knowing that your awning is in proper working condition.
Extend and retract the awning
“Extend and retract the awning” Once you have successfully installed the awning on your outdoor space, it’s time to put it to the test! Before you start enjoying the shade and protection it provides, you need to make sure it extends and retracts smoothly. Testing the functionality of your awning is an important step to ensure that it is working correctly and will serve its purpose effectively. To do this, simply extend the awning by turning the hand crank or pushing a button if it is a motorized awning.
Watch closely as the awning extends and check for any signs of resistance or uneven movement. If you notice anything unusual, it’s best to consult the manufacturer or a professional to address the issue before continued use. Once you are satisfied with the extension, retract the awning back into its housing using the same method.
Make sure it goes back smoothly without any difficulties. Testing the extension and retraction of your awning will give you peace of mind knowing that it functions properly and will provide you with the comfort and protection you desire.
Check for any issues or adjustments needed
“awning” Once you’ve installed your awning, it’s important to test it to ensure it’s functioning properly and to check for any issues that may need adjusting. The first step in testing your awning is to extend it fully. Make sure it opens smoothly and fully extends without any snags or hiccups.
Next, test the retracting mechanism by closing the awning. It should also retract smoothly and without any resistance. While testing the awning, take note of any unusual sounds or movements.
If you hear any grinding or squeaking noises, it may indicate that the awning mechanism needs lubrication. Similarly, if the awning shakes or wobbles excessively, it may need to be adjusted or tightened. Another important aspect to check is the fabric of the awning.
Look for any rips, tears, or fraying. These should be repaired as soon as possible to prevent further damage. Additionally, check the seams and stitching to ensure they are secure and in good condition.
It’s also a good idea to test the awning in different weather conditions. Open it on a windy day to see how it handles gusts of wind. Similarly, test it on a rainy day to ensure that the water drains properly and doesn’t pool on the fabric.
By thoroughly testing your awning, you can identify any issues or adjustments that may be needed. It’s better to address these problems sooner rather than later to prevent further damage and ensure the longevity of your awning. Taking the time to test your awning will help you enjoy its benefits for years to come.
Conclusion
So now you’re armed with the knowledge and skills to tackle the task of replacing your Dometic power awning fabric. With a little patience and attention to detail, you can have your awning looking brand new in no time. Remember, like any DIY project, it’s important to approach this with a sense of adventure and a willing spirit.
And if all else fails, just remember that duct tape can fix anything (well, almost anything). So go forth, fellow awning enthusiasts, and may your fabric replacement be smooth, your awning be sturdy, and your campsite be the envy of all the other campers. Happy camping!”
Enjoy your new Dometic power awning fabric
Enjoying your newly installed Dometic power awning fabric is as simple as taking it for a test run. After installing the fabric, it’s important to make sure everything is working properly before you can fully enjoy the benefits of your new awning. Testing the awning allows you to ensure that it operates smoothly and efficiently, providing you with the shade and protection you desire.
By testing the awning, you can also make any necessary adjustments or repairs to ensure its longevity and optimal performance. So, why wait? Let’s put your new Dometic power awning fabric to the test and start enjoying all that it has to offer.
FAQs
How often should I replace my Dometic power awning fabric?
It is recommended to replace the Dometic power awning fabric every 5-7 years, or sooner if you notice any signs of wear or damage.
Can I replace the Dometic power awning fabric myself?
Yes, it is possible to replace the Dometic power awning fabric yourself. However, it requires some level of DIY skills and tools. It is recommended to refer to the manufacturer’s instructions or consult a professional if you are unsure.
What tools do I need to replace the Dometic power awning fabric?
To replace the Dometic power awning fabric, you will typically need a ladder, screwdriver, awning rail puller, needle-nose pliers, utility knife, and a new fabric roll. Additional tools may be required depending on your specific awning model.
How long does it take to replace the Dometic power awning fabric?
The time it takes to replace the Dometic power awning fabric can vary depending on your level of experience and the awning model. On average, it can take anywhere from 1-3 hours.
Can I reuse the awning fabric if it is still in good condition?
Yes, if the Dometic power awning fabric is still in good condition, you can reuse it. However, it is important to inspect it carefully for any signs of wear or damage before deciding to reuse it.
Are there different fabric options available for Dometic power awnings?
Yes, there are different fabric options available for Dometic power awnings, including different colors and patterns. You may also have the option to choose between vinyl and acrylic fabric, each with its own benefits and drawbacks.
What are the signs that indicate the need to replace the Dometic power awning fabric?
Signs that indicate the need to replace the Dometic power awning fabric include visible tears or holes, excessive fading or discoloration, fraying edges, and difficulty in retracting or extending the awning.