
Have you ever experienced a sudden power outage in your home and wondered how to bring back electricity as quickly as possible? One solution is to replace a power inverter. A power inverter is an essential component that converts DC (direct current) power from your car or battery into AC (alternating current) power that can be used to run household appliances. Whether you’re a DIY enthusiast or just someone looking to save on repair costs, learning how to replace a power inverter yourself can be a valuable skill.
In this blog post, we’ll walk you through the step-by-step process of replacing a power inverter, so you can be prepared for any unexpected power emergencies. So let’s get started and bring back the power in no time!
Introduction
If you’re experiencing issues with your power inverter and need to replace it, have no fear! With a few simple steps, you can have your new power inverter up and running in no time. First, make sure you have the correct replacement inverter for your specific needs. Next, disconnect your old inverter from the power source and carefully remove it from its mounting location.
Take note of any wires or connections that are attached to the old inverter, as you’ll need to reconnect them to the new one. Once your old inverter is removed, simply attach the new inverter to the mounting location and reconnect any wires or connections. Finally, double-check that everything is secure and properly connected before turning on the power.
By following these steps, you’ll be able to replace your power inverter quickly and effectively, ensuring that your electrical devices continue to receive the power they need.
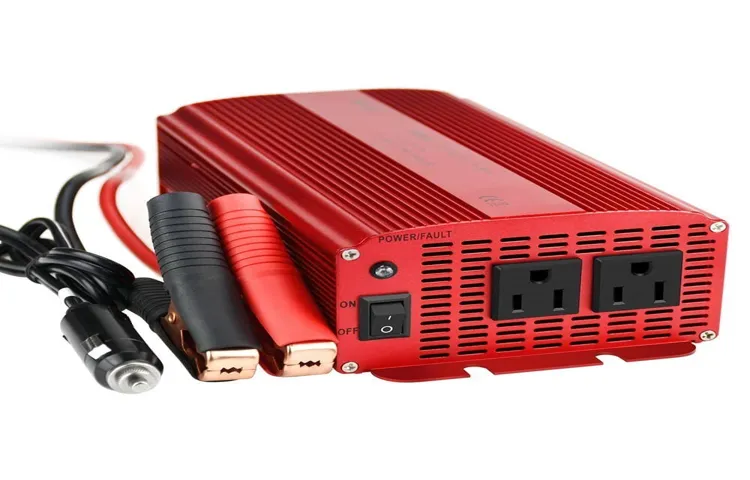
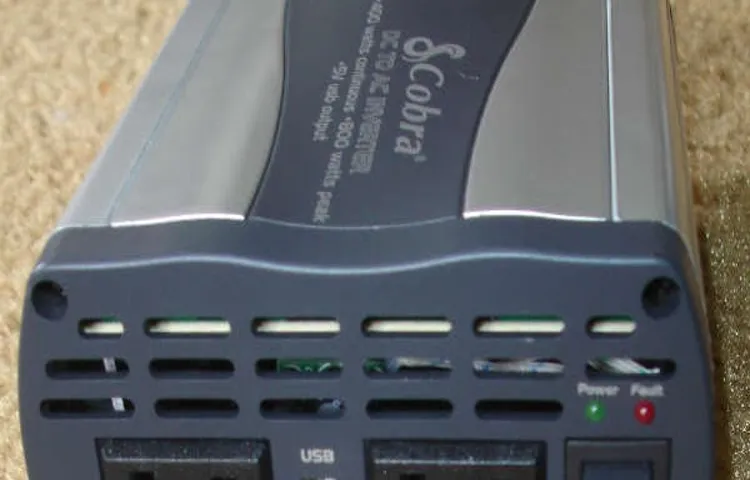
What is a Power Inverter?
power inverter, inverters
Why Do You Need to Replace a Power Inverter?
power inverter, replace a power inverter, why replace a power inverter
Step-by-Step Guide
So, you’ve got a faulty power inverter and you need to replace it. Don’t worry, I’ve got you covered! Replacing a power inverter may seem daunting at first, but with a few simple steps, you’ll have it done in no time. First, you’ll need to gather the necessary tools, such as a screwdriver, pliers, and maybe even a multimeter to test the voltage.
Next, you’ll want to disconnect the power source and remove any surrounding components that may be in the way. Once you have access to the power inverter, carefully disconnect the wires and take note of their placement. Then, using your screwdriver, remove the screws holding the inverter in place and gently lift it out.
Now, it’s time to install the new inverter. Simply reverse the steps you took to remove the old one, being careful to connect the wires in the correct order. Finally, double-check that everything is secure and tighten any loose screws.
And just like that, your power inverter has been successfully replaced!
Step 1: Turn Off Power Supply
Step 1 in the process of shutting off power supply is to turn off the power source. This may seem like common sense, but it’s essential to always start with this step to ensure your safety. To turn off the power, you’ll need to locate the main power switch or breaker panel in your home.
This switch or panel is usually found in a utility room, basement, or on the side of your house. Once you’ve located the main power switch or breaker panel, simply flip the switch or turn off the breaker labeled “main” or “power supply.” This will cut off the electricity flow to your entire home, ensuring that you can safely proceed with any maintenance or repairs.
Remember, always exercise caution when working with electricity and never hesitate to ask for professional help if you’re unsure. By following this step-by-step guide, you’ll be able to safely navigate the process of turning off the power supply in your home.
Step 2: Disconnect Inverter From Power Source
To safely disconnect an inverter from its power source, follow these step-by-step instructions. Step 2 involves disconnecting the inverter from the power source. This is an important step to ensure your safety and the proper functioning of the inverter.
To start, locate the power switch or circuit breaker that controls the power supply to the inverter. Depending on the type of inverter and its installation, this switch may be located on the inverter itself, in a nearby electrical panel, or even outside the building. Once you have located the power switch or circuit breaker, switch it off or set it to the “off” position.
This will cut off the power supply to the inverter and prevent any accidents or damage when working on it. Always double-check to ensure that you have successfully disconnected the inverter from the power source before proceeding with any maintenance or repairs.
Step 3: Remove Old Inverter
“In this step-by-step guide, we will walk you through the process of removing an old inverter. Before you begin, make sure you have turned off the power to the inverter and have all the necessary tools on hand. Start by removing any covers or panels that are protecting the inverter.
Use a screwdriver or wrench to loosen and remove any screws or bolts that are holding the inverter in place. Once the inverter is loose, carefully disconnect any wires or cables that are connected to it. It is important to note the placement of each wire or cable so that you can easily reconnect them later.
Once all the wires are disconnected, you can safely remove the old inverter from its mounting brackets. Use caution as it may be heavy or awkward to handle. Set the old inverter aside for disposal or recycling.
Congratulations, you have successfully removed the old inverter!”
Step 4: Install New Inverter
“install new inverter” In this step-by-step guide, we’ll walk you through how to install a new inverter for your solar power system. The inverter is an essential component as it converts the direct current (DC) electricity produced by your solar panels into alternating current (AC) electricity that can be used to power your home or business. Installing a new inverter can be a bit daunting, but with the right tools and a little patience, you can do it yourself.
So let’s get started! First, make sure to turn off the main power switch for your solar power system. This will ensure that you can work safely without any risk of electrical shock. Next, locate your old inverter and disconnect any cables or wires that are connected to it.
Take note of how they are connected so you can easily reconnect them later. Now it’s time to remove the old inverter from its mounting bracket. This may require removing screws or bolts, so be sure to have the necessary tools on hand.
Once the old inverter is removed, carefully place the new inverter into the mounting bracket and secure it in place using the appropriate hardware. Next, it’s time to reconnect the cables and wires to the new inverter. This is where your notes from earlier will come in handy.
Carefully connect each cable or wire to the corresponding terminal on the new inverter. Double-check your connections to make sure everything is securely attached. Once all the cables and wires are connected, it’s time to turn the main power switch back on.
This will power up your new inverter and allow it to start converting the DC electricity from your solar panels into usable AC electricity. Take a moment to ensure that everything is working properly and that there are no error messages or malfunctions. Congratulations! You have successfully installed a new inverter for your solar power system.
Step 5: Connect Inverter to Power Source
connecting inverter to power source, step-by-step guide, how to connect inverter to power source, connecting power source to inverter
Additional Tips
If you find yourself in a situation where you need to replace a power inverter, there are a few additional tips to keep in mind. Firstly, it is important to ensure that you have the correct replacement inverter for your specific needs. This means checking the specifications of your old inverter and finding a new one that matches the same voltage, wattage, and input/output requirements.
Secondly, it is advisable to disconnect any electrical connections and switches before attempting to replace the inverter. This will help prevent any accidental electrical shocks or damage to the new inverter. Additionally, it is essential to carefully follow the manufacturer’s instructions for installation and wiring.
This will ensure that the new inverter is installed correctly and functions properly. Finally, it is a good idea to test the new inverter before fully installing it. This can be done by connecting just a few appliances or devices to the inverter and checking that they receive power as expected.
Following these additional tips will help ensure a successful replacement of your power inverter.
Check Inverter Specifications
When it comes to choosing the right inverter for your solar power system, checking the inverter specifications is crucial. The specifications provide essential information about the inverter’s capabilities and compatibility with your specific system. One important specification to pay attention to is the inverter’s power output capacity, which indicates the maximum amount of power it can convert and supply to your electrical appliances.
It’s also important to consider the inverter’s efficiency rating, as a higher efficiency rating means less energy loss during the conversion process. Another specification to check is the inverter’s voltage range, which should match the voltage of your solar panels. Additionally, make sure to look for any additional features or certifications that may be important for your specific needs, such as the inverter’s ability to integrate with smart home systems or its compliance with regional safety standards.
By carefully reviewing the inverter specifications, you can ensure that your solar power system is optimized for maximum efficiency and performance.
Use Proper Tools and Equipment
Using the proper tools and equipment is essential in any task or project, and it’s no different when it comes to DIY home improvement. Having the right tools can make a world of difference in the outcome of your project and can also make the process much smoother and more efficient. So, what kind of tools and equipment should you have in your DIY arsenal? Well, it depends on the project you’re taking on, but there are a few essentials that every DIYer should have.
A good quality set of screwdrivers, a hammer, pliers, a tape measure, and a level are all must-haves. Additionally, a power drill, a set of wrenches, a utility knife, and a stud finder are all helpful tools to have on hand. Investing in high-quality tools is worth it in the long run, as they will last longer and provide better results.
So, before you tackle your next DIY project, make sure you have the right tools for the job.
Seek Professional Help If Needed
“professional help,” “seek professional help if needed,” “additional tips” In situations where you feel overwhelmed or stuck, it’s important to remember that seeking professional help is always an option. Whether you’re struggling with mental health issues, relationship problems, or simply feeling lost in life, there are professionals out there who can provide you with the guidance and support you need. It’s important to reach out to therapists, counselors, or coaches who specialize in the specific areas you’re struggling with.
These professionals have the knowledge and experience to help you navigate through your challenges and come out stronger on the other side. Don’t hesitate to ask for help when you need it – it’s a sign of strength, not weakness. Remember, you don’t have to face your problems alone.
Conclusion
And there you have it, folks! You are now equipped with the knowledge to replace a power inverter like a seasoned pro. Whether you’re an aspiring handyman or just someone looking to save a few dollars, this DIY task is attainable for anyone with a bit of patience and determination. So next time your power inverter decides to bail on you, don’t fret – just follow these steps and you’ll be back to powering all of your electric gadgets in no time.
And remember, if all else fails, just give it a good old “Fonzie-style” tap – because sometimes even technology needs a little nudge to get back on track!”
FAQs
How do I replace a power inverter in my car?
To replace a power inverter in your car, start by disconnecting the negative terminal of the car battery. Then, locate the old power inverter and remove the mounting screws or brackets. Disconnect the electrical connectors and remove the old inverter. Install the new inverter by connecting the electrical connectors and securing it with mounting screws or brackets. Finally, reconnect the negative terminal of the car battery.
What are the signs that my power inverter needs to be replaced?
Some signs that indicate your power inverter needs to be replaced include a loss of power, overheating, abnormal sounds, and burning smells. If your devices are not receiving adequate power, the inverter may be faulty. Additionally, if the inverter feels excessively hot to the touch or emits strange noises or smells, it’s a good indication that it needs to be replaced.
Can I replace a power inverter myself or do I need professional help?
While it is possible to replace a power inverter yourself, it is recommended to seek professional help if you are unsure or uncomfortable with handling electrical components. Working with power inverters involves dealing with electrical connections, which can be dangerous if not properly handled. It is always better to prioritize your safety and well-being and consult a professional if you have any doubts.
What tools do I need to replace a power inverter?
The tools you may need to replace a power inverter include a wrench or socket set to disconnect the battery terminal, a screwdriver or drill with appropriate bits for removing mounting screws or brackets, and wire crimpers or pliers for handling electrical connectors. Additionally, you may need wire strippers if you need to strip the insulation off the wire ends for proper electrical connections.
Are power inverters interchangeable, or do I need to find an exact replacement model?
Power inverters are not always interchangeable, and it is generally recommended to find an exact replacement model to ensure compatibility and proper functioning. Power inverters come in different wattages, voltages, and types (sine wave or modified sine wave), so it is essential to match the specifications of your old inverter with the new one for optimal performance and safety.
Can a power inverter be repaired instead of replaced?
In some cases, a power inverter can be repaired instead of entirely replaced. Simple issues such as loose connections, blown fuses, or faulty wiring can often be fixed. However, if the inverter has major internal component failures or damage, it is usually more cost-effective and safer to replace the inverter rather than attempting repairs.
Can I use a power inverter without connecting it directly to a battery?
Most power inverters require a direct connection to a battery to function properly. The battery serves as a power source for the inverter, and connecting it directly ensures a constant and stable power supply. While some small inverters may have built-in batteries, larger ones typically need to be connected to an external car or deep-cycle battery for operation.