
We’ve all been there, driving down the road and suddenly hear that dreadful sound of a flat tire. It’s an inconvenience at best, but if you’re not prepared, it can quickly become a nightmare. Luckily, replacing a tire on a rim is something anyone can do, with a little know-how and some elbow grease.
Whether you’re a seasoned pro or a novice when it comes to car repairs, this guide will walk you through the steps of removing the flat tire and mounting a new one on the rim. So, grab your jack, your lug wrench, and let’s get to work!
Table of Contents
Prepare Your Equipment
If you’re wondering how to replace a tire on a rim, the first step is to prepare your equipment. Make sure you have all the necessary tools within reach, including a jack, lug wrench, tire iron, and replacement tire. To prevent any accidents, find a flat surface to work on and turn on your hazard lights.
Before you start the process, make sure the car is in park and the emergency brake is engaged. Then, use the lug wrench to loosen the lug nuts on the flat tire, but don’t remove them just yet. Next, use the jack to lift the car off the ground, and place it securely.
Finally, remove the lug nuts and the flat tire, and replace it with the new one, tightening the lug nuts in a star pattern to ensure an even fit. With these steps in mind, you’ll be able to replace your tire on a rim with ease.
Gather Required Tools
When it comes to starting a project, having the necessary tools readily available can make all the difference. The first step in any undertaking is to gather the required equipment. This process involves taking inventory of what you currently have and identifying what items are still needed.
Depending on the task at hand, the essential tools might include a hammer, screwdriver, level, measuring tape, saw, and drill. It’s crucial to have the right tools for the job; using the wrong equipment can lead to frustration, and in some cases, even injury. Once you have identified what tools you need, take some time to organize and prepare them for use.
Maintaining your equipment properly can extend its lifespan and keep it in good working order for future endeavors. Remember, having the right tools can make any project easier and more enjoyable.
Park Your Vehicle on a Flat Surface
To properly prepare your equipment for a successful vehicle parking experience, start by finding a flat surface. This can prevent any unnecessary movement of the vehicle while you are trying to maneuver it into its parking spot. Uneven surfaces can make it difficult to steer or brake, which may result in damage to your vehicle or surrounding objects.
Ensure that your vehicle is parked in a safe area away from other cars and any potential hazards. It’s also a good idea to check your surroundings for any low hanging tree branches or anything else that might get in the way of your vehicle. By setting yourself up for success in the beginning, you can avoid any unnecessary mishaps or inconveniences later on.
Remove the Flat Tire
When you find yourself in need of learning how to replace a tire on a rim, it can be a daunting task. However, with the right tools and technique, it can be accomplished by anyone. First, remove the flat tire by loosening the lug nuts and jacking up the vehicle.
Be sure to place the jack on a stable and level surface before lifting the car. Once the tire is off, inspect the rim and ensure there is no damage or corrosion that could cause issues down the road. Next, place the new tire onto the rim, making sure it is properly aligned before inserting the valve stem.
Use a tire iron to push the tire onto the rim, being careful not to damage the tire or rim in the process. Finally, inflate the tire to the recommended pressure and tighten the lug nuts. Once complete, safely lower the car and test drive to ensure everything feels right.
Replacing a tire on a rim may seem overwhelming at first, but with practice, it will become second nature.
Loosen the Lug Nuts
When you find yourself in the unfortunate situation of having a flat tire, it’s essential to know how to change it safely and efficiently. The first step is to find a safe place to park your car, away from traffic. Once you’ve secured your vehicle, you need to loosen the lug nuts on the flat tire.
These are the bolts that attach the tire to the wheel hub. Using a lug wrench, turn each nut counterclockwise to loosen them. Be sure not to remove them completely yet, just enough so that you can turn them by hand.
If you’re unsure which direction to turn the lug nuts, remember the phrase “righty tighty, lefty loosey.” Once you’ve loosened all the nuts, it’s time to jack up your car and remove the flat tire. By loosening the lug nuts beforehand, you’ll be able to take off the tire more easily without risking injury or damaging your vehicle.
Jack Up the Vehicle
Jack Up the Vehicle Now that you have found a safe spot to change your flat tire, it’s time to jack up the vehicle. But wait, before you begin, make sure the parking brake is on and the car is in park or first gear (if manual). This will prevent the car from rolling or moving while you work on changing the tire.
Once you have done this, grab your jack and locate the jacking points. These are usually located behind or in front of the tire. Look for the metal body frame of the car and use the jack there, avoiding any plastic or painted parts.
Place the jack on the ground and insert the handle into the jack crank. Turn the jack handle to start lifting the car. Once the car is high enough, remove the flat tire and replace it with the spare one.
Take care to tighten the lug nuts in a star pattern to ensure the spare tire is secured. Finally, lower the car back down and double-check that all the lug nuts are tightened correctly. Voila! You have successfully changed your flat tire.
Remove the Lug Nuts Completely
Removing a flat tire can be a bit of a hassle, but it’s important to know how to do it correctly in order to stay safe while on the road. The first step is to remove the lug nuts completely so that you can take off the flat tire. Before you start, make sure you have all the necessary tools, such as a jack and a lug wrench.
You’ll want to loosen the lug nuts while the car is still on the ground, but don’t take them off completely just yet. Once you’ve raised the car with the jack, you can then remove the lug nuts one by one. It’s important to keep a good grip on the tire while you do this, to prevent it from falling off or rolling away.
Once all the lug nuts are removed, you can safely take off the flat tire and replace it with your spare. Make sure to tighten the lug nuts again once the new tire is in place, and then lower the car back down to the ground. By following these steps, you’ll be back on the road in no time.
Remove the Flat Tire from the Rim
Removing the flat tire from the rim can be a daunting task for many. But with the right tools and a little patience, it can be done quickly and efficiently. First, locate the valve stem and remove the cap.
Using a tire gauge or similar tool, release the air pressure from the tire. Then, remove the wheel lug nuts using a wrench and lift the tire off the ground. Avoid using excessive force or jerking motions as this can damage the tire or rim.
Once the tire is off, carefully inspect the rim for damage before proceeding. With a tire iron or similar lever, pry the tire off the rim, working your way around until the tire is completely removed. Take care not to damage the rim in the process.
Once the tire is off, it’s time to prep the rim for a new replacement tire. So, be cautious and gentle while removing the flat tire to avoid any damage to the rim.
Mount the New Tire onto the Rim
Replacing a tire on a rim may seem like a daunting task, but it can be done with a little bit of patience and know-how. The first step is to mount the new tire onto the rim. Begin by lubricating the rim with a small amount of tire lubricant to make the process easier.
Next, line up the tire valve with the hole on the rim, and push the tire onto the rim using your hands. Make sure the tire is sitting evenly on the rim and that the beads are seated properly. Once the tire is in place, use a tire iron to tighten the nuts on the rim.
It’s important to tighten each nut a little bit at a time to ensure the tire is properly seated and won’t pop off the rim when driving. Finally, use a tire pressure gauge to check and adjust the air pressure to the manufacturer’s recommendation. With the new tire mounted and properly inflated, you can hit the road with confidence knowing your vehicle will handle smoothly and safely.
Position the New Tire on the Rim
When it comes to changing a tire, the process of mounting the new tire onto the rim may seem like a daunting task, but with a bit of patience and attention to detail, it can be done with ease. First, position the new tire onto the rim, making sure that the valve stem is located in the proper spot. This will ensure that the tire will be properly balanced.
Next, use the tire machine to press the tire onto the rim, being careful not to damage the tire or the rim in the process. One key to success is making sure to lubricate the bead of the tire with soapy water or tire lubricant before attempting to mount it onto the rim. This will allow the tire to slide over the rim smoothly and reduce the risk of damage or punctures to the tire.
With the new tire in place on the rim, you can then move on to the next step in the tire-changing process. By taking the time to properly mount the new tire onto the rim, you’ll ensure a safe and stable ride on the road ahead.
Use a Tire Iron to Tighten the Bead
After ensuring that your tire is correctly aligned and that the valve stem is in the correct position, it’s time to mount the new tire onto the rim. Firstly, make sure the tire is facing the right way by checking the directional arrows on the sidewall. To get the most traction on asphalt roads, position the tire so that the arrows point towards the front of your vehicle.
Once that step is completed, proceed to place the tire onto the rim bed. After that, you can begin to inflate the tire, and, as it fills up, use a tire iron to tighten the bead. This action helps ensure the tire is firmly pressed against the rim, preventing any air leaks during the inflation process.
Remember, you should take your time with this process to avoid damaging the tire. Spending too much time in the sun can also affect the rubber elasticity, which could, in turn, damage the tire. Following these steps should deliver you a successful tire mounting experience, and you can have peace of mind over your safety out on the road.
Reattach the Rim onto Your Vehicle
So you’ve successfully removed the old tire from your rim and now it’s time to reattach the new one. Here’s how to replace a tire on a rim and make sure it’s securely fastened onto your vehicle. First, clean the surface of the rim to ensure there is no debris or dirt that could interfere with the tire’s placement.
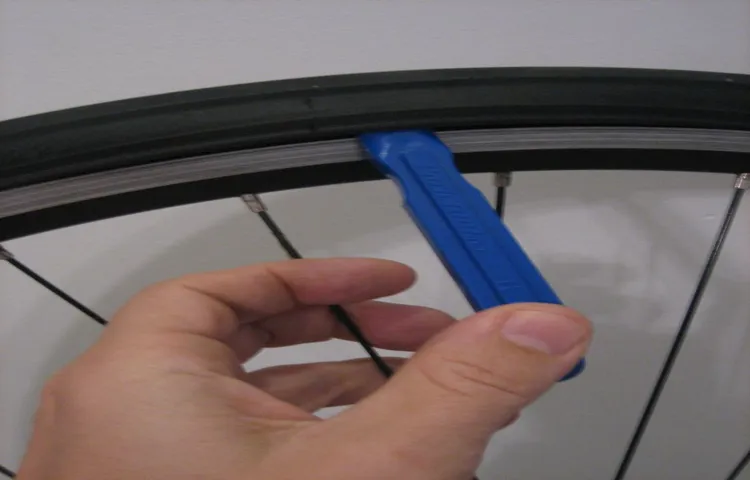
Next, align the tire on the rim, making sure the valve stem is centered. Begin by pushing one side of the tire onto the rim and work your way around, using tire levers if needed to help stretch the tire over the rim. Once the tire is mounted completely on the rim, inflate it to the recommended pressure level and check for any leaks.
Finally, bolt the rim onto your vehicle, tightening each lug nut in a star pattern to ensure equal pressure and prevent warping. By following these steps, you can replace a tire on a rim with ease and get back on the road in no time.
Fit the Rim Back Onto the Car’s Axle
When it comes to reattaching the rim onto your vehicle’s axle, the process is relatively straightforward. First, ensure that the rim is clean and free of any debris or dirt. Then, carefully align the holes in the rim with the bolts on the axle.
Once the holes are aligned, insert the bolts and hand-tighten them. It’s important to tighten the bolts in a crisscross pattern to ensure the rim is balanced. Using a torque wrench, tighten the bolts to the manufacturer’s recommended torque settings.
This will prevent the rim from coming loose while driving and ensure your safety on the road. Remember to double-check that the rim is securely attached before hitting the road. With these simple steps, you can confidently fit the rim back onto your car’s axle and get back on the road in no time.
Hand Tighten the Lug Nuts
When reattaching the rim onto your vehicle after changing a tire, it’s important to hand tighten the lug nuts. This step is crucial because it ensures that the rim is securely attached to the wheel hub and prevents it from coming loose while driving. Hand tightening the lug nuts involves using your hands to tighten them as much as you can without the use of a tool.
This will ensure that the lug nuts are snug enough to keep the rim in place, but not so tight that you risk damaging the threads. When hand tightening, it’s important to use the correct torque, which can be determined by the manufacturer’s specifications for your particular vehicle. Just remember, taking the time to hand tighten the lug nuts can save you from a potentially dangerous situation down the road.
Lower the Vehicle Onto the Ground
After successfully replacing your car’s tire, it’s time to reattach the rim onto your vehicle. But before doing so, make sure to lower the vehicle onto the ground. This will help ensure that the tire fits snugly onto the wheel hub, preventing any wobbling or imbalance while driving.
Lowering the car also makes it easier to tighten the lug nuts with a torque wrench, which should be done in a star pattern for maximum security. But don’t overtighten the nuts either, as this can damage the rim or even cause the wheel to come loose while driving. Just like finding the right balance in life, it’s important to find the right balance in your car’s tire maintenance too.
By following these steps, you can be on your way to safe and smooth driving.
Tighten the Lug Nuts Completely
When it comes to reattaching the rim onto your vehicle, it’s important to tighten the lug nuts completely. This essential step ensures that the rim is securely attached, preventing it from coming loose while you’re driving. Before tightening the lug nuts, make sure that they’re all clean and free of debris.
Then, use a torque wrench to tighten each lug nut in a criss-cross pattern. This will ensure that the pressure is distributed evenly across the rim and prevent it from warping. After tightening each lug nut, go back around and give them an extra tightening to make sure that they’re completely secure.
Remember, tight lug nuts are crucial for your safety on the road, and it’s always better to take a little extra time to make sure they’re tightened correctly.
Check the Tire Pressure and Tightness
Replacing a tire on a rim can be a daunting task, but with a bit of patience and the right tools, it can be accomplished easily. Before beginning the process, it’s important to check the tire pressure and tightness to ensure that the tire is safe to use. Low tire pressure can result in poor handling and reduced fuel efficiency, while overinflated tires are more prone to blowouts.
Checking the tightness of the lug nuts is also important to prevent the tire from coming loose while driving. Once you have verified that the tire pressure and tightness are correct, it is time to begin the replacement process. Loosen the lug nuts with a lug wrench, lift the car with a jack, remove the tire, align the new tire with the rim, and tighten the lug nuts.
Remember to double-check the tightness of the lug nuts after lowering the car to ensure a safe and smooth ride. With these steps, you’ll be able to replace a tire on a rim like a pro!
Inflate the New Tire to the Recommended Pressure
Checking your tire pressure regularly is essential for maintaining your vehicle’s safety and performance. Before inflating the new tire, make sure to check the tire pressure and tightness of the existing tires first. Use a tire pressure gauge to measure the current pressure of each tire and compare it with the recommended pressure stated in the owner’s manual or on the driver’s side door jamb.
If the existing tires are underinflated, fill them up to the recommended pressure, as this can greatly affect how your vehicle handles on the road. Additionally, check the tightness of the lug nuts on each wheel to ensure they are secure and not loose. Once all the tires are properly inflated and tightened, you can inflate the new tire to the recommended pressure.
Remember, maintaining the correct tire pressure is not only safer but can also save you money in the long run by improving fuel efficiency and extending the life of your tires.
Check the Tightness of the Lug Nuts with a Torque Wrench
When it comes to maintaining your vehicle, checking the tire pressure and lug nut tightness should be high on your priority list. Proper tire pressure not only extends the life of your tires, but it also improves gas mileage and ensures better handling. Most tires require between 30 to 35 psi of pressure, but refer to your vehicle owner’s manual for the recommended specifications.
Don’t forget to check the tire pressure when the tires are cold, as heat can cause the pressure to increase and give you an inaccurate reading. As for the lug nuts, make sure they are properly tightened with a torque wrench. Finger-tightening may not be enough, and over-tightening can warp brake rotors.
Check the owner’s manual for the recommended torque specifications and use a torque wrench to tighten the nuts in a star pattern. By maintaining proper tire pressure and tightness, your vehicle will run smoother and safer on the road.
Conclusion
In short, replacing a tire on a rim may seem like a daunting task, but with a little know-how and patience, it’s a breeze. Just remember to prepare your tools and equipment, jack up your car safely, remove the old tire, mount the new tire, and finally, tighten the lug nuts securely. And if all else fails, don’t be afraid to call for backup or a spa day to relieve your stress.
Remember, getting a flat tire is an inconvenience, but replacing it can be an empowering experience. Happy swapping, friends!”
FAQs
What tools do I need to replace a tire on a rim?
You will need a lug wrench, jack, and spare tire, at minimum.
How do I know when it’s time to replace a tire on a rim?
Look for signs of wear, such as bald or unevenly worn tread, cracks or bulges in the sidewalls, or low tire pressure. Also, if you experience a puncture or blowout, it’s usually best to replace the tire.
Can I replace just one tire on a rim, or do I need to replace all four at once?
If your tires are all the same brand, model, and size, it’s generally recommended to replace all four at once for optimal performance and safety. However, if your other tires are still relatively new and in good condition, you may be able to replace just one.
How do I remove a flat tire from a rim?
Use a lug wrench to loosen and remove the lug nuts, then lift the tire and wheel off the hub. You may need to use a pry bar or rubber mallet to help loosen the tire from the rim.
Can I replace a tire on a rim myself, or do I need to take it to a mechanic?
It is possible to replace a tire on a rim yourself if you have the necessary tools and experience. However, if you are unsure or uncomfortable doing it yourself, it’s always best to seek professional help.
How do I properly inflate a new tire on a rim?
Check the manufacturer’s recommended tire pressure, which is located on a sticker inside the driver’s side door jamb or in the owner’s manual. Use an accurate tire gauge to fill the tire to the recommended pressure, and be sure to check the pressure regularly to maintain optimal performance and safety.
What should I do with my old tire after replacing it on a rim?
Many tire shops and auto repair facilities offer tire recycling services, which is the environmentally-friendly way to dispose of your old tire. Alternatively, you can check with your local sanitation or recycling center for instructions on how to properly dispose of it.