Looking to replace the fabric on your power awning but not sure where to start? Don’t worry, we’ve got you covered! Whether your awning fabric is damaged, faded, or simply in need of an upgrade, replacing it is easier than you might think. In this blog post, we’ll walk you through the step-by-step process of replacing the fabric on your power awning, so you can enjoy a fresh and stylish look in no time. So grab your tools and let’s get started!
Table of Contents
Introduction
Are you looking to replace the fabric on your power awning? Don’t worry, it’s not as difficult as it may seem. With a few simple tools and a bit of time, you can have your awning looking as good as new. First, you’ll need to remove the old fabric from the awning frame.
This can be done by loosening the bolts or screws that hold the fabric in place and carefully pulling it off. Once the old fabric is removed, you’ll be able to see how the new fabric should be attached. Lay the new fabric over the frame and line up the holes on the fabric with the holes on the frame.
Use a screwdriver or a wrench to tighten the bolts or screws and secure the new fabric in place. Finally, make sure the fabric is stretched taut and smooth out any wrinkles. Now you can sit back and enjoy your refreshed power awning!
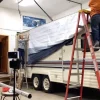
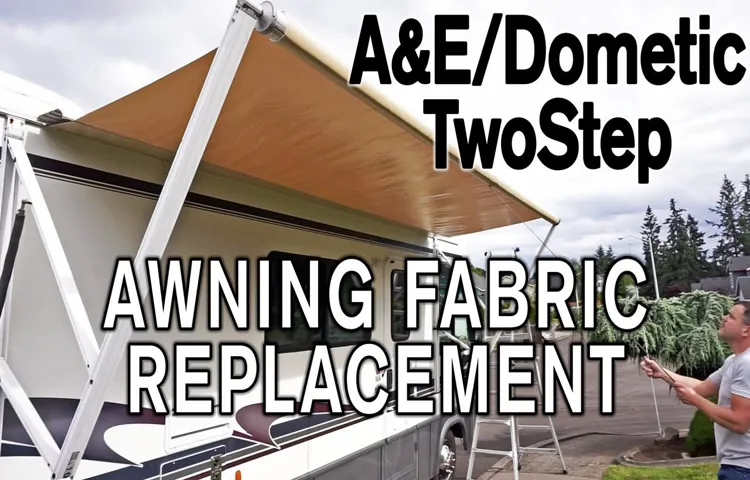
What is a Power Awning?
power awning
Why Replace the Awning Fabric?
As the sun starts to shine brighter and the days get warmer, many people turn to their outdoor spaces to enjoy the fresh air and soak up some rays. But what happens when you notice that your awning fabric is looking a little worse for wear? It might be time to consider replacing it. Replacing your awning fabric can have multiple benefits, from improving the aesthetic of your outdoor space to increasing the functionality and lifespan of your awning.
In this blog post, we will explore why it might be a good idea to replace your awning fabric and all the advantages that can come along with it. So, let’s dive in and discover how a simple fabric replacement can transform your outdoor experience.
Materials Needed
To replace the fabric on a power awning, there are a few materials you will need. First, you will need the new awning fabric, which you can purchase from a local RV store or online. Make sure to measure your awning to ensure you get the correct size.
You will also need a ladder to access the awning and tools such as a screwdriver and pliers to remove the old fabric. Additionally, it is helpful to have a second person to assist you with the process, especially when removing and installing the new fabric. Finally, you may want to have some cleaning supplies on hand to clean the awning frame and any other areas that may need it during the replacement process.
With these materials and a little bit of time and effort, you can easily replace the fabric on your power awning and have it looking brand new again.
New Awning Fabric
awning fabric, material, new fabric, durability, water resistance, UV protection, maintenance, color options, style options, outdoor furniture, shade, protection, custom-made, aesthetics, cost-effective
Screwdriver
screwdriver, materials needed.
Awning Rail Lubricant
awning rail lubricant
Measuring Tape
measuring tape, materials needed When it comes to measuring tape, there are a few essential materials that you will need. First and foremost, you will obviously need a measuring tape. This is the tool that will allow you to accurately measure distances and lengths.
There are many different types of measuring tape available, but the most common ones are made of flexible material, such as cloth or metal. The tape itself is usually marked with measurements in both inches and centimeters, so you can choose the units that are most convenient for you. In addition to the measuring tape itself, you may also need a pencil or pen to mark your measurements.
This will help ensure accuracy and allow you to easily reference your measurements later on. Finally, having a flat surface to measure on is also important. This could be a table, a wall, or any other stable surface that will allow you to lay out the tape and take accurate measurements.
So, before you start any measuring projects, make sure you have these essential materials on hand.
Scissors
scissors, materials needed When it comes to getting creative and crafty, having a good pair of scissors is essential. Whether you’re working on a DIY project, sewing a new garment, or simply cutting some paper for a school assignment, scissors are a versatile tool that can come in handy in many different situations. So, what materials do you need to make a pair of scissors? Well, the answer may seem obvious – you need two blades and a handle to hold them.
But let’s dive deeper into the materials that make up a great pair of scissors. First, let’s talk about the blades. They are typically made from stainless steel, which is a durable and sharp material.
Stainless steel is resistant to rust and corrosion, making it perfect for scissors that may come into contact with moisture. The blades are usually forged or stamped, depending on the manufacturing process. Forged blades are created by heating and shaping the steel, resulting in a stronger and more precise cutting edge.
Stamped blades, on the other hand, are cut out from a sheet of steel and then sharpened. While not as strong as forged blades, they are still very effective for most cutting tasks. Next, we have the handles.
Handles can be made from various materials, including plastic, rubber, or metal. The choice of handle material depends on personal preference and the type of task you’ll be using the scissors for. Plastic handles are lightweight and comfortable to hold, making them ideal for everyday cutting tasks.
Rubber handles provide a secure and non-slip grip, perfect for tasks that require more control and precision. Metal handles are usually found on professional scissors and are known for their durability and strength. Finally, let’s not forget about the pivot.
Step-by-Step Guide
So you’ve noticed some wear and tear on your power awning fabric and it’s time for a replacement. Don’t worry, with a little know-how and some basic tools, you can easily replace the fabric on your power awning yourself. Here’s a step-by-step guide on how to do it.
First, start by retracting your awning completely. This will allow you to access the fabric more easily. Next, locate the roller tube at the top of the awning.
This is where the fabric is attached. You’ll need to remove the end caps and slide them off the roller tube. Once the end caps are removed, you can begin removing the existing fabric from the roller tube.
Start by removing any screws or brackets that are holding the fabric in place. Then, carefully slide the fabric out from the roller tube. Be sure to take note of how the fabric is attached so that you can easily reattach the new fabric.
With the old fabric removed, it’s time to measure and cut your new fabric. Lay the old fabric out flat and use it as a template to cut the new fabric to size. Be sure to leave a little extra length on each end to allow for a snug fit.
Now it’s time to attach the new fabric to the roller tube. Slide the new fabric into the roller tube, making sure it is centered and straight. Reattach any screws or brackets that were removed in the previous step to secure the fabric in place.
Step 1: Prepare the Area
“Prepare the Area” Before you start any painting project, it’s crucial to properly prepare the area. This step is often overlooked, but it can make a huge difference in the final result. First, remove any furniture or objects that could get in the way.
It’s much easier to work in a clear and open space. If there are any items that cannot be moved, cover them with plastic sheets or drop cloths to protect them from paint splatters. Next, it’s time to clean the walls.
Dust, dirt, and grease can affect the adhesion of the paint, so it’s important to make sure the surface is as clean as possible. Use a mild detergent and water solution to wash the walls, and then rinse them thoroughly with clean water. After the walls have dried, inspect them for any damage.
Fill any holes or cracks with spackle and use sandpaper to smooth out the surface. This will ensure that the paint goes on evenly and hides any imperfections. Finally, if you’re painting over a dark or bold color, it’s a good idea to apply a primer.
This will help the new paint adhere better and create a more even finish. Primer also helps to seal any stains or odors that might be present on the wall. Taking the time to prepare the area before painting will make the process much smoother and result in a professional-looking finish.
So don’t skip this important step and get ready to transform your space with a fresh coat of paint.
Step 2: Remove the Old Awning Fabric
In order to replace your old awning fabric, the first step is to remove the existing material. This can be a bit tricky, but with the right approach, you’ll have it off in no time. Start by carefully examining the awning to locate any fasteners or screws that are holding the fabric in place.
Once you’ve identified these, use a screwdriver or wrench to remove them. Be sure to keep track of all the screws and fasteners so you can easily reattach the new fabric later. Once the fasteners are removed, gently pull the fabric away from the frame.
It may be helpful to have a partner assist you with this step to ensure the fabric doesn’t get caught or damaged. As you remove the fabric, take note of any tears or areas of damage that may need to be repaired before installing the new fabric. With the old fabric removed, you’re now ready to move on to the next step in replacing your awning.
Step 3: Measure and Cut the New Awning Fabric
awning fabric, measure, cut, Step-by-Step Guide, DIY, DIY awning, awning replacement, outdoor shade, patio improvement So, you’ve decided to take on the task of replacing your awning fabric. Good for you! Now comes the fun part – measuring and cutting the new fabric. This step is crucial to ensure that your new awning fits perfectly and functions correctly.
To get started, you’ll need a few tools: a tape measure, a straight edge, and a good pair of fabric scissors. Begin by removing the old fabric from the frame of your awning. Lay it out flat and measure its dimensions.
This will serve as a template for your new fabric. Next, lay out your new fabric and mark the measurements you took from the old fabric. Use the straight edge to create precise lines for cutting.
Take your time with this step, as accuracy is key. Once you have your lines marked, it’s time to cut. Make sure to use sharp fabric scissors to ensure clean cuts.
Follow your marked lines and cut out the fabric pieces for your awning. Remember to double-check your measurements and make any adjustments as needed. With the new fabric cut, you are one step closer to enjoying a fresh and functional awning.
Step 4: Attach the New Awning Fabric to the Awning Rail
In this fourth step of replacing your awning fabric, we will focus on attaching the new fabric to the awning rail. This is a crucial step that will ensure your awning is secure and properly installed. First, you will need to lay out the new fabric next to the awning rail, making sure it is aligned correctly.
Once aligned, you can begin attaching the fabric to the rail. This process may vary depending on the type of awning you have, so refer to the manufacturer’s instructions for specific guidance. Typically, you will need to insert the fabric into the awning rail channel and use a special tool called an awning cord to help guide it through.
Once the fabric is fully inserted, make sure it is evenly spread out and taut along the rail. This will help prevent sagging and ensure a nice, smooth finish. Take your time during this step to ensure the fabric is securely attached and properly aligned.
Step 5: Secure the Awning Fabric to the Awning Arms
In this step-by-step guide, we will show you how to secure the awning fabric to the awning arms. This is an essential part of installing an awning and ensuring that the fabric stays in place even in windy conditions. To secure the awning fabric, begin by opening the awning fully so that the arms are fully extended.
Take the ends of the fabric and place them over the hook or peg located near the end of the awning arm. This will hold the fabric in place and prevent it from blowing away. Next, you will need to secure the fabric to the opposite arm.
This can be done by sliding the fabric into the groove or track located on the arm. Make sure the fabric is pulled tight and securely in place. Once both ends of the fabric are securely attached to the awning arms, you can adjust the tension of the fabric by using the tension adjustment knob or mechanism located near the center of the awning.
This will allow you to tighten or loosen the fabric as needed. It is important to ensure that the fabric is evenly tensioned and not too loose or too tight. Too much tension can put strain on the fabric and potentially cause it to tear or rip, while too little tension can cause the fabric to sag and not provide adequate coverage.
By following these steps and properly securing the awning fabric to the awning arms, you can ensure that your awning will stay in place and provide the desired shade and protection for years to come. So go ahead and enjoy your outdoor space with the peace of mind that your awning is securely installed.
Tips and Recommendations
Replacing the fabric on a power awning may seem daunting at first, but with a few simple steps, you can do it yourself. The first thing you’ll need to do is remove the old fabric. Start by retracting the awning fully and disconnecting it from its power source.
Then, carefully remove any screws or fasteners holding the fabric in place. Once the fabric is free, you can take it off the roller and replace it with the new fabric. Align the fabric properly and secure it with the screws or fasteners.
Finally, reconnect the power source and extend the awning to test that it’s working correctly. By following these steps, you can easily replace the fabric on your power awning and give it a fresh new look.
Take Care When Removing the Old Awning Fabric
When it comes time to replace the fabric on your old awning, it’s important to proceed with caution. Removing the old fabric can be a delicate process, and if you’re not careful, you could end up damaging the frame or other components of your awning. Here are some tips and recommendations to help you safely remove the old awning fabric.
First, make sure you have all the necessary tools on hand before you start. This might include a ladder, a pair of pliers, a utility knife, and a screwdriver. Once you’re equipped with the right tools, begin by carefully inspecting the awning frame for any screws or bolts that need to be removed.
Next, take note of how the old fabric is attached to the frame. It’s common for the fabric to be secured with tension rods, clips, or screws. Use your pliers or screwdriver to carefully remove these attachments, being mindful not to strip any screws or break any clips.
As you remove the old fabric, it’s a good idea to have someone assist you. They can help support the weight of the fabric as you work to detach it from the frame. Be sure to work slowly and deliberately, taking your time to ensure that each attachment is properly removed.
Once the old fabric is completely detached, carefully lower it to the ground or a work surface. Be mindful of any wind or gusts that could catch the fabric and cause it to whip around. Once the old fabric is removed, take a moment to inspect the frame for any signs of damage or wear.
This is a good time to make any necessary repairs before installing the new fabric. Finally, dispose of the old fabric properly. If it is still in good condition, you might be able to recycle or repurpose it.
Double-check Your Measurements
When it comes to home improvement projects, accuracy is everything. That’s why it’s essential to double-check your measurements before making any cuts or purchases. One small mistake can lead to a lot of frustration and wasted time and money.
So, here are a few tips and recommendations to ensure that you get it right the first time. First, invest in a good quality tape measure. Cheap and flimsy ones can easily give you inaccurate readings, and that’s the last thing you want.
Make sure to measure twice, and even thrice if necessary, to be absolutely certain. It may seem tedious, but trust me, it’s worth it in the long run. Another helpful tip is to ask someone for assistance.
Having a second pair of eyes can help catch any mistakes or inconsistencies in your measurements. Additionally, consider the dimensions of the space you’re working with and how your project will fit into it. Is there enough clearance for the furniture you’re planning to buy? Will the shelves you’re installing be too high or too low? These are all important factors to consider before finalizing your measurements.
Remember, it’s always better to be safe than sorry. So take your time, double-check your measurements, and enjoy a successful and hassle-free home improvement project.
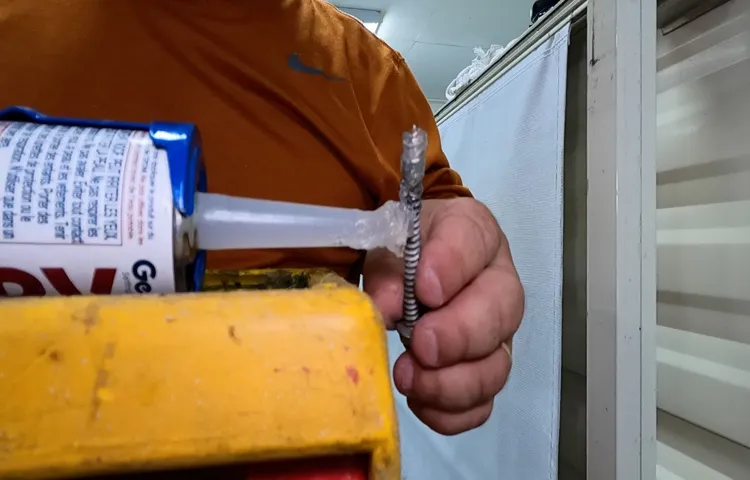
Apply Awning Rail Lubricant Regularly
awning rail lubricant, apply regularly
Seek Professional Help if Needed
Seeking professional help when needed is crucial for our mental and emotional well-being. Sometimes, we may find ourselves in situations where we feel overwhelmed or stuck, and it is important to recognize when it is time to reach out for support. Seeking professional help does not mean that we are weak or incapable of handling our own problems; in fact, it takes great strength and self-awareness to acknowledge that we need assistance.
Whether it is therapy, counseling, or consulting with a specialist in a specific field, professional help can provide us with the tools, guidance, and support necessary to navigate through difficult times. Professionals can offer valuable insights and strategies to help us overcome challenges, improve our mental health, and enhance our overall quality of life. By seeking professional help, we are actively taking steps towards our own personal growth and well-being.
Remember, it is okay to ask for help, and there are professionals out there who are dedicated to supporting us on our journey.
Conclusion
And there you have it, my friends! A step-by-step guide on how to replace the fabric on your power awning. Now, I know what you’re thinking – why go through all this trouble when you can just hire a professional to do it? Well, let me tell you why. First, replacing the awning fabric yourself not only saves you money, but it also gives you a sense of accomplishment and pride.
Who doesn’t love that feeling of triumph when you successfully complete a DIY project? Second, it’s a great way to show off your handy skills to your friends and family. They’ll be amazed at your ability to transform your awning from drab to fab in just a few simple steps. Plus, you’ll have a great story to tell at your next backyard BBQ – “Oh, you like our new awning? Let me tell you, I replaced the fabric myself!” Third, it’s a fantastic opportunity to get some fresh air and enjoy the outdoors.
Picture this – a beautiful sunny day, your favorite music playing in the background, and you, basking in the glory of your newfound awning-replacing prowess. It’s like a mini spa day for your soul. And finally, think about the satisfaction of knowing that you can handle any unexpected issues that may arise with your awning in the future.
No need to panic or scramble for a professional – with your newfound knowledge, you’re the hero your awning deserves. So, my dear DIY enthusiasts, I hope this guide has inspired you to take on the challenge of replacing your power awning fabric. Remember, with a little patience and a whole lot of determination, you can conquer any home improvement task.
Now go forth, and may your awning shine brighter than the sun itself!”
FAQs
How often should I replace the fabric on my power awning?
It is recommended to replace the fabric on your power awning every 5-7 years, or if you notice any tears, discoloration, or significant wear and tear.
Can I replace the fabric on my power awning myself, or do I need professional help?
You can replace the fabric on your power awning yourself, but it does require some DIY skills and tools. If you are not comfortable or confident in doing it yourself, it is best to hire a professional.
What tools do I need to replace the fabric on my power awning?
The tools you will need to replace the fabric on your power awning include a ladder, screwdriver or drill, pliers, a staple gun, and a utility knife.
Can I replace just a part of the fabric on my power awning, or do I need to replace the entire fabric?
It is possible to replace just a part of the fabric on your power awning if only certain sections are damaged or worn out. However, it is often more cost-effective and efficient to replace the entire fabric.
How long does it take to replace the fabric on a power awning?
The time it takes to replace the fabric on a power awning can vary depending on your skills and experience. On average, it can take a few hours to complete the replacement.
What type of fabric is best for a power awning replacement?
The best type of fabric for a power awning replacement is usually a high-quality, durable, and UV-resistant material such as acrylic or vinyl-coated polyester. These fabrics are designed to withstand the outdoor elements and provide long-lasting protection.
Can I choose a different color or pattern for the replacement fabric on my power awning?
Yes, you can choose a different color or pattern for the replacement fabric on your power awning. Many manufacturers offer a wide range of fabric options to match your personal style and preferences.