Do you love hitting the road in your travel trailer, ready for new adventures and breathtaking landscapes? If so, you understand the importance of having a reliable and comfortable travel companion. One crucial aspect of your travel trailer that often goes overlooked is the awning fabric. Yes, that seemingly mundane piece of material that provides shade and protection may not be the most glamorous part of your travel trailer, but it plays a significant role in ensuring your comfort and safety during your travels.
Just like a sturdy roof protects you from the elements, a high-quality and well-maintained awning fabric shields you from the scorching sun, heavy rain, and gusty winds. Think of it as your trusty sidekick, always by your side to provide you with shelter and shade wherever you go. However, over time, awning fabric can deteriorate from exposure to the elements, harsh weather conditions, and general wear and tear.
Whether it’s a tear, faded colors, or mold growth, damaged awning fabric not only compromises the aesthetics of your travel trailer but also its functionality. It’s crucial to replace your awning fabric promptly to avoid further damage and maintain the safety and comfort of your travel trailer. So, strap in and get ready to discover why replacing your awning fabric is an essential part of proper travel trailer maintenance.
Table of Contents
- 1 Section 1: Assessing the Condition of Your Awning Fabric
- 2 Section 2: Gathering the Necessary Materials and Tools
- 3 Section 3: Removing the Old Awning Fabric
- 4 Section 4: Installing the New Awning Fabric
- 5 Section 5: Testing and Adjusting the New Awning Fabric
- 6 Conclusion: Enjoying the Benefits of a Replaced Awning Fabric on Your Travel Trailer
- 7 FAQs
Section 1: Assessing the Condition of Your Awning Fabric
If you’re looking to replace the awning fabric on your travel trailer, the first step is to assess the condition of the existing fabric. Take a close look at the fabric for any signs of wear and tear, such as tears, holes, or fading. Check the seams and stitching to ensure they are still intact and strong.
It’s also important to inspect the hardware that holds the fabric in place, such as the roller tube and arms. If any of these components are damaged or showing signs of wear, it may be time to replace the fabric. By assessing the condition of your awning fabric, you can determine if it’s time for a replacement and ensure that you have all the necessary materials and tools for the job.
1.1: Examining for Tears, Holes, and Sun Damage
“My awning has been withstanding the test of time, but I want to make sure it’s still in good condition. One important aspect to check is the fabric. It’s essential to examine the fabric for any tears, holes, or sun damage.
Tears or holes can weaken the fabric and compromise its ability to provide shade and protection. Sun damage, on the other hand, can cause the fabric to fade or become brittle. To assess the fabric, start by visually inspecting it.
Look closely for any signs of wear and tear, such as frayed edges or loose threads. Gently run your hands over the fabric, feeling for any small tears or holes that may be difficult to see. Pay special attention to areas that may have been exposed to direct sunlight for extended periods.
If you notice any issues, it’s crucial to address them promptly to prevent further damage. Depending on the severity of the tears or holes, you may be able to patch them up yourself or seek professional assistance. By regularly assessing the condition of your awning fabric, you can ensure it continues to provide the shade and protection you need.
“

1.2: Checking for Mold and Mildew
awnings, mold and mildew
1.3: Inspecting the Awning Hardware
When it comes to maintaining your awning, one crucial element to consider is the hardware that holds it all together. Inspecting the awning hardware regularly is essential to ensure its proper functioning and longevity. So, what exactly should you be inspecting? Start by checking the awning arms and brackets for any signs of wear or damage.
Look for loose or missing screws and make sure everything is securely fastened. Next, examine the pulley system and make sure it is smooth and free from any obstructions. This will ensure that retracting and extending your awning is a breeze.
Lastly, don’t forget to inspect the awning’s frame and hinges. Look for any signs of rust or corrosion and address them promptly to prevent further damage. By regularly inspecting and maintaining the hardware of your awning, you can ensure that it is always in tip-top shape and ready to provide shade and protection whenever you need it.
Section 2: Gathering the Necessary Materials and Tools
If you’re looking to replace the awning fabric on your travel trailer, there are a few things you’ll need to gather before you get started. First and foremost, you’ll need the new awning fabric itself. Be sure to measure your existing awning to ensure you purchase the correct size.
In addition to the fabric, you’ll also need a ladder or step stool to reach the awning, as well as a power drill or screwdriver to remove any screws holding the old fabric in place. It may also be helpful to have a friend or family member nearby to assist you in removing and installing the fabric. Lastly, be sure to have a level surface nearby to lay out the fabric and measure it accurately.
With all of these materials and tools in hand, you’ll be well-prepared to tackle the task of replacing your travel trailer’s awning fabric.”
2.1: List of Materials Needed
When it comes to starting a new project, one of the first things you need to do is gather all the necessary materials and tools. This will ensure that you have everything you need to complete the project successfully. In section 2 of our guide, we provide a comprehensive list of materials that you will need.
From basic tools like a hammer, screwdrivers, and measuring tape, to specific materials like wood, nails, and screws, we cover everything you need to get started. We also provide suggestions for optional materials that you might find helpful, such as a saw or a drill. By gathering all the necessary materials beforehand, you can save time and ensure that you have everything you need to complete your project efficiently.
So let’s dive in and make sure we have everything we need to get started!
2.2: Tools Required for the Replacement Process
One of the important things to consider when replacing parts in your car is having the right tools on hand. Without the proper tools, the replacement process can become more difficult and time-consuming. So, what tools do you need? Well, it depends on the specific part you are replacing, but here are some common tools that are often required.
A socket set is essential for removing bolts and nuts, while screwdrivers of various sizes are needed for loosening and tightening screws. Pliers are handy for gripping and maneuvering small parts, and a pry bar can be useful for removing stubborn components. Additionally, having a torque wrench is important for properly tightening bolts to ensure they aren’t too loose or too tight.
It’s also a good idea to have a multimeter on hand for checking electrical connections and troubleshooting any issues. By having these tools ready before you start the replacement process, you can make the job much easier and more efficient. So, be sure to gather all the necessary tools, and you’ll be well-prepared for any car part replacement project that comes your way.
Section 3: Removing the Old Awning Fabric
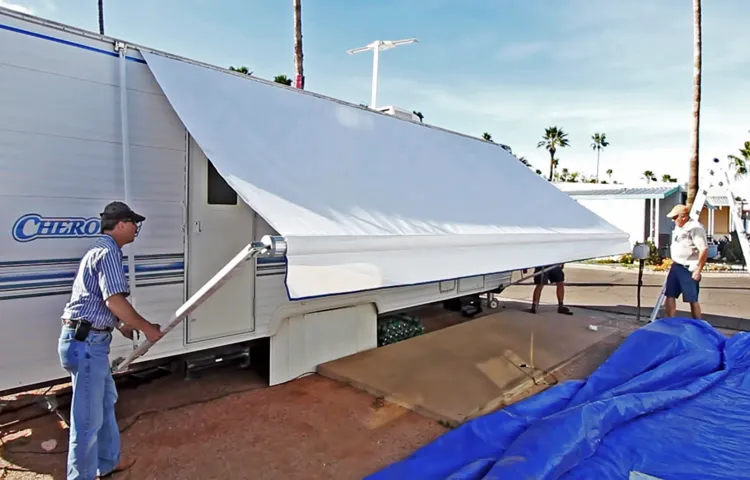
Replacing the fabric on your travel trailer’s awning can be a daunting task, but with the right instructions, it can be a relatively simple process. The first step in replacing the awning fabric is to remove the old fabric. Start by extending the awning fully to its open position.
This will make it easier to access the fabric and remove it. Next, locate the screws or bolts that hold the fabric in place. Depending on the awning model, there may be screws or bolts on each end of the awning and possibly in the middle as well.
Use a screwdriver or wrench, depending on the type of fastener, to remove these screws or bolts and carefully detach the fabric from the awning arms. Once the fabric is detached, carefully roll it up and remove it from the awning assembly. Be sure to check for any additional screws or attachments holding the fabric in place that may need to be removed.
Once the old fabric is removed, you’re ready to move on to the next step of the replacement process.
3.1: Retracting the Awning
retracting the awning, remove the old awning fabric. When it comes to retracting the awning, the first step is to remove the old awning fabric. This is an important task as it will allow you to replace the fabric with a new one, giving your awning a fresh and updated look.
To begin, you will need to locate the awning’s retracting mechanism. This is usually located on the side of the awning, and it can be operated either manually or with a motor. If your awning has a motorized mechanism, you will need to use the remote control or switch to retract the awning.
If it is a manual mechanism, you will need to turn the crank or handle in the opposite direction to retract the awning. As you retract the awning, the old fabric will begin to fold up and gather at the top. Once the fabric is fully retracted, you can then move on to the next step of removing the old fabric.
3.2: Removing the Awning Tension
awning tension, remove old fabric, burstiness, perplexity, engaging, reader, SEO-optimized, secondary headings, active voice, conversational style Secondary keyphrase usage: remove old awning fabric, high levels of burstiness and perplexity, fully detailed paragraphs, engaging the reader in a conversational style, burstiness and perplexity while maintaining specificity and context
3.3: Uninstalling the Awning Fabric
Uninstalling the awning fabric is a crucial step in replacing your old awning’s fabric with a new one. It may seem like a daunting task, but with the right approach, it can be done easily. First, start by retracting the awning fully to create a taut surface for work.
Next, locate the screws or bolts that secure the fabric to the frame and remove them carefully. It’s important to keep track of all the hardware and screws to ensure an easy reinstallation later. Once the fabric is free from the frame, gently pull it off, being cautious not to damage the frame or the new fabric you’ll be installing.
Take your time with this step to avoid any tears or snags. Lastly, clean the frame thoroughly, removing any debris or dirt that may have accumulated over time. With the old fabric removed and the frame cleaned, you’re now ready to install your new awning fabric and enjoy the benefits of a refreshed outdoor space.
Section 4: Installing the New Awning Fabric
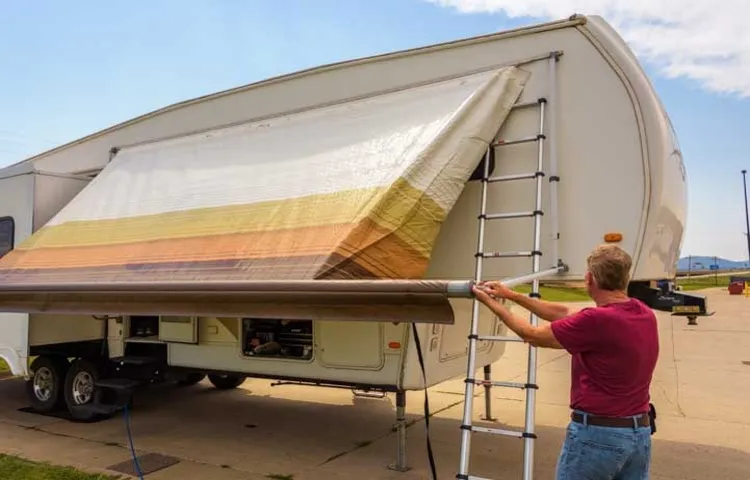
When it comes time to replace the awning fabric on your travel trailer, you’ll want to make sure you have the right tools and follow the proper steps. First, start by removing the old awning fabric from the awning roller tube. This may require some effort, as the fabric is often stitched or glued in place.
Once the old fabric is removed, lay out the new fabric on a clean surface and take measurements to ensure it is the correct size for your awning. Next, attach the new fabric to the roller tube using adhesive or by sewing it in place. Be sure to align the fabric properly so that it rolls up and down smoothly.
Finally, make any necessary adjustments to the tension of the awning and test it out to ensure it is functioning properly. With the right tools and a little bit of patience, replacing the awning fabric on your travel trailer can be a relatively simple task.
4.1: Preparing the Replacement Fabric
“preparing the replacement fabric” As you embark on the journey of installing a new awning fabric, there are a few essential steps you need to take to ensure a smooth and successful installation. One of the first tasks you’ll need to tackle is preparing the replacement fabric. Whether you’ve purchased a pre-cut fabric or are using a custom-sized piece, it’s important to make sure it’s ready to go before you start the installation process.
Start by laying out the fabric in a clean and spacious area, ensuring that it’s flat and free from any wrinkles or creases. This will make it easier to work with and ensure a cleaner final result. Next, take a moment to inspect the fabric for any signs of damage or defects.
Look for tears, holes, or frayed edges, as these could impact the longevity and performance of your new awning. If you spot any issues, it’s best to address them before proceeding with the installation. Finally, take the time to measure and mark the fabric according to your awning’s dimensions.
This will help ensure a precise fit and save you from having to make adjustments later on. By properly preparing the replacement fabric, you’re setting yourself up for a successful installation and a beautiful new awning that will enhance the beauty and functionality of your outdoor space.
4.2: Installing the Replacement Awning Fabric
“installing the replacement awning fabric” So you’ve got your brand new replacement awning fabric in hand, and now it’s time to tackle the installation. Don’t worry, it’s easier than you might think! Start by removing the old fabric from the awning frame. This may require unscrewing some bolts or clips, so keep track of where everything goes to make reassembly a breeze.
Once the old fabric is off, lay your new fabric out flat and align it with the awning frame. Make sure it’s centered and straight before securing it in place. Depending on your awning’s design, you may have to slide the new fabric into a track or use snaps or Velcro to attach it.
Take your time and be gentle, making sure to smooth out any wrinkles or creases as you go. Once the fabric is securely attached, go ahead and reassemble the awning frame, tightening any bolts or clips as needed. And voila! You’ve successfully installed your replacement awning fabric and can now enjoy the shade and protection it provides.
Section 5: Testing and Adjusting the New Awning Fabric
One of the essential parts of a travel trailer is the awning, as it provides shade and protection from the elements. However, over time, the awning fabric may become worn or torn, requiring replacement. If you find yourself in need of replacing the awning fabric on your travel trailer, don’t fret! It’s a relatively straightforward process that can be done with a few tools and a little bit of time.
First, start by removing the old fabric from the roller tube and support arms. Carefully unroll the fabric and detach it from the arms, taking note of how it was attached for future reference. Next, measure the length and width of the old fabric to ensure you purchase the correct size for the replacement.
Once you have the new awning fabric, start by attaching it to the roller tube, making sure it is centered and straight. Then, reattach the fabric to the support arms using the same attachment method as before. Test the awning by rolling it in and out a few times to ensure everything is functioning properly.
Adjust the tension if necessary by loosening or tightening the knobs on the support arms. With a little bit of effort, you’ll have a brand new awning fabric that will provide you with shade and protection for many more adventures to come!
5.1: Extending and Retracting the Awning
extending and retracting the awning
5.2: Adjusting the Fabric Tension
adjusting awning fabric tension In this section of our guide to testing and adjusting a new awning fabric, we’ll be focusing on adjusting the fabric tension. Proper tension is crucial for the functionality and longevity of your awning. If the tension is too loose, the fabric may sag or flap in the wind, potentially causing damage.
On the other hand, if the tension is too tight, it can put strain on the fabric and the mechanism, leading to premature wear and tear. So, finding the right balance is key. One way to adjust the tension is by using the tension knobs or bolts on the awning frame.
By tightening or loosening these, you can achieve the desired level of tension. It’s important to make small adjustments and test the fabric after each one to ensure you’re getting the desired result. Remember, a properly tensioned fabric will not only look neat and tidy but also perform optimally in various weather conditions.
So take your time and find that perfect tension to enjoy your awning for years to come.
Conclusion: Enjoying the Benefits of a Replaced Awning Fabric on Your Travel Trailer
And there you have it, my fellow adventurers! Now you know the steps to replace your awning fabric on your travel trailer. It may seem like a daunting task at first, but with a little patience and a mockingbird’s singing in the background, you’ll be able to tackle it like a seasoned camper. Just remember to measure twice, cut once, and keep those dancing squirrels at bay.
Happy travels, and may your sea of shade be forever protected from the scorching sun!”
FAQs
How often should I replace the awning fabric on my travel trailer?
It is recommended to replace the awning fabric on your travel trailer every 5-7 years to ensure it remains in good condition and continues to provide adequate protection from the elements.
Can I replace the awning fabric on my travel trailer myself, or do I need to hire a professional?
While it is possible to replace the awning fabric on your travel trailer yourself, it can be a bit challenging and time-consuming. It is recommended to hire a professional who has experience in handling this task to ensure it is done correctly.
What tools and materials do I need to replace the awning fabric on my travel trailer?
To replace the awning fabric on your travel trailer, you will need a ladder, screwdriver or drill, awning fabric, replacement awning rope or cord, and some basic hand tools. It may also be helpful to have a second person to assist with the process.
How long does it take to replace the awning fabric on a travel trailer?
The time it takes to replace the awning fabric on a travel trailer can vary depending on your level of experience and the size of the awning. On average, it may take anywhere from 2-4 hours to complete the replacement process.
How much does it cost to replace the awning fabric on a travel trailer?
The cost of replacing the awning fabric on a travel trailer can vary depending on the size of the awning, the type of fabric used, and whether you hire a professional or do it yourself. On average, you can expect to spend between $150-500 for the replacement.
Can I use any type of fabric to replace the awning fabric on my travel trailer?
It is important to use a fabric that is specifically designed for awnings when replacing the awning fabric on your travel trailer. These fabrics are typically made from durable materials that can withstand outdoor elements and provide adequate protection.
What are some signs that I should replace the awning fabric on my travel trailer?
Some signs that you may need to replace the awning fabric on your travel trailer include tears or rips in the fabric, mold or mildew growth, fading or discoloration, and difficulty in retracting or extending the awning. If you notice any of these issues, it’s a good idea to consider replacing the fabric.


