
Have you ever been in a situation where you need to replace a car door handle, but you have no idea where to start? Don’t worry; it’s common to feel overwhelmed by the thought of having to repair your car. However, replacing a car door handle is not as complicated as it may seem. It’s a simple process that can save you a lot of money in the long term if you’re willing to take on the challenge yourself.
In this article, we will provide you with a step-by-step guide on how to replace a car door handle. So, put on your DIY hat, grab your tools, and let’s get started!
Table of Contents
Tools You’ll Need
If you’re wondering how to replace a car door handle, the process may seem daunting at first. However, with the right tools and a bit of patience, you can easily tackle this DIY project. First and foremost, you will need a replacement handle that matches your existing one.
You’ll also need a set of screwdrivers, a socket wrench, and possibly a trim removal tool. It’s important to make sure you have all of these tools on hand before you start. Once you have your replacement handle and tools, you can get started on the actual replacement process.
Remember to take your time and be careful not to damage any surrounding panels or mechanisms as you work to remove and replace the old handle. With a little effort, you’ll have a functioning door handle in no time!
Screwdriver
When it comes to working on DIY projects or fixing things around the house, a screwdriver is an essential tool to have. But not all screwdrivers are created equal, and you’ll want to make sure you have the right ones for the job. There are two main types of screwdrivers: flathead and Phillips head.
Flathead screwdrivers have a single blade that fits into a slot on the screw, while Phillips head screwdrivers have a cross-shaped tip that fits into a corresponding recess on the screw. It’s important to have both types in various sizes to accommodate different screw sizes. Additionally, you’ll want to consider the handle of the screwdriver, as a comfortable grip can make all the difference during long or complicated projects.
Overall, having a quality set of screwdrivers in your toolkit will ensure that you can tackle any screw-related job with ease and efficiency.

Pliers
Pliers are one of the essential tools that you’ll need in any toolbox. They are versatile and come in different shapes and sizes for various purposes. Depending on the task at hand, you can choose from different types of pliers such as slip-joint pliers, needle-nose pliers, cutting pliers, and locking pliers.
Slip-joint pliers are commonly used for gripping and holding objects while cutting pliers are for cutting and snipping wires. Needle-nose pliers, on the other hand, are ideal for detailed work when precision is necessary. Locking pliers are powerful and are excellent for holding heavy and large objects.
The type of pliers you choose will depend on the task at hand. A good set of pliers can last for years, so it’s wise to invest in high-quality ones. Remember to wear gloves when using pliers to protect your hands from any potential harm.
With the right set of pliers, you can tackle any job with ease and precision.
Socket Wrench Set
When it comes to fixing or maintaining your vehicle or home, having a good set of tools can make all the difference. One of the most essential tools you’ll need is a socket wrench set. This type of tool allows you to tighten or loosen nuts and bolts securely.
With a socket wrench set, you get a variety of socket sizes that you can attach to a handle or ratchet, and it offers more torque than an average wrench. It is essential to understand the different types of socket wrench sets available and their uses. The most common types include the standard socket set, deep socket set, shallow socket set, spark plug socket set, and impact socket set.
These socket sets come in various drive sizes, including 1/4 inch, 3/8 inch, 1/2 inch, and 3/4 inch, and each has its specific use. The correct socket size will fit a nut or bolt as precisely as possible, minimizing the risk of stripping the fastener. Overall, investing in a good quality socket wrench set can help you complete your projects with ease and accuracy, making it a worthwhile investment for DIY enthusiasts and professionals alike.
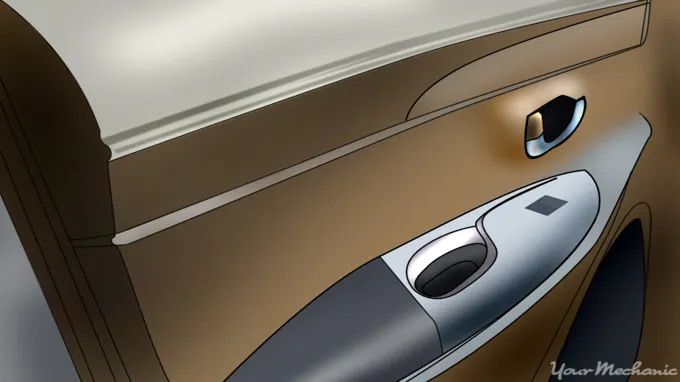
Removing the Old Door Handle
If you’re wondering how to replace a car door handle, the first step is to remove the old one. This can be a bit tricky, but with a few tools and some patience, it’s definitely doable. Start by locating the screws or bolts that attach the handle to the door.
These are typically located on the inside of the door, so you’ll need to open it up to access them. Once you’ve found the screws or bolts, use a screwdriver or wrench to loosen them and remove the handle. Be sure to keep track of any small parts or screws that might fall out during the process.
With the old handle removed, you’re ready to install the new one. Whether you’re doing it yourself or taking it to a mechanic, replacing a door handle is a relatively simple task that can make a big difference in the appearance and functionality of your car.
Remove Door Panel
Removing the old door handle can seem like a daunting task, but with a few simple steps, it can be done easily. The first step is to remove the door panel. To remove the panel, you’ll need to disconnect any wires or cables that are connected to the handle.
Make sure to keep track of which wire is connected to which prong so you can reconnect them later. Next, locate the screws that hold the panel in place and remove them. Gently pry the panel away from the door frame, being careful not to break any clips.
Once the panel is off, you should have easy access to the backside of the door handle. From there, you can remove any screws or bolts that are holding the handle in place. With the old handle removed, you can now install the new one following the reverse process.
By following these easy steps, you’ll be able to remove and replace your door handle in no time!
Locate and Disconnect Rods and Cables
When it comes to removing an old door handle, one of the first steps is to locate and disconnect rods and cables. These connecting elements are what allow the handle to operate the latch that keeps the door closed. Begin by examining the interior handle to locate any screws or bolts that secure it to the door.
Once you’ve taken these out, gently pull the handle away from the door to reveal the mechanisms underneath. You should be able to see the rods and cables at this point. Depending on the type of handle you’re dealing with, these may be secured in place with a clip or some other kind of fastener.
Simply undo these attachments and carefully remove the rods and cables from the handle. With this step completed, you’re ready to move on to the next stage of replacing your door handle. By taking the time to carefully disconnect these connecting elements, you’ll be able to prevent any damage to your door and ensure that you can easily install the new handle without any issues.
Remove the Fasteners/Bolts
Removing the old door handle can be a bit tricky, but with the right tools and techniques, it can be done in no time. The first step is to remove the fasteners or bolts that are holding the handle in place. These are typically located on the inside of the door, and can be removed with a screwdriver or wrench depending on the type of fastener used.
It’s important to be careful not to damage the fasteners or the door itself when removing them. Once the fasteners are loose, the handle should come off easily, but be sure to keep a hold on it so it doesn’t fall and cause any damage. By following these steps, you’ll be able to remove your old door handle without any trouble, and be ready to install the new one.
Remove the Old Handle
When it comes to replacing a door handle, the first step is removing the old one. To do this, you’ll want to start by removing any screws or bolts that are holding it in place. Depending on the type of door handle you have, you may need a Phillips or flathead screwdriver, or possibly an Allen wrench.
Once you’ve removed the screws, you should be able to pull the handle away from the door. Sometimes the handle will be attached to a spindle, which is a long metal rod that runs through the latch mechanism that keeps the door closed. If this is the case, you’ll need to unscrew or pull out the spindle as well.
Once the old handle is removed, you’re ready to start installing the new one. By removing the old door handle properly, you’ll set yourself up for an easy and successful replacement.
Installing the New Door Handle
Replacing a car door handle might seem like a daunting task, but it’s actually quite simple! The first step is to gather all the necessary tools, which will typically include a screwdriver, pliers, and possibly a socket set. Next, you’ll need to locate the screws that hold the old door handle in place. These are usually found on the inside of the door panel, near the handle itself.
Once the screws are removed, you can gently pull the old handle out of the door and disconnect any wires or rods that might be attached to it. From there, it’s simply a matter of attaching the new handle and reassembling everything in the reverse order. With a little patience and a steady hand, you can easily replace your car door handle and have it looking as good as new in no time!
Attach the New Handle
When it comes to installing a new door handle, attaching the new handle to the door is the final step in the process. Firstly, check that the screws provided with the handle are the correct size for the door and fit snugly into the holes. If not, you may need to purchase new screws of the right size.
Next, carefully align the screw holes on the door with those on the backplate of the handle. Holding the handle in place with one hand, use the other hand to insert the screws and tighten them until the handle is secure. It is essential not to overtighten the screws, as this can cause damage to the door or the handle.
Once the handle is securely attached, test it to ensure that it works correctly and opens and closes the door smoothly. Overall, attaching the new handle to the door is a relatively simple process with the right tools and attention to detail.
Reconnect Rods and Cables
If you want to install a new door handle, you’ll have to reconnect the rods and cables that are essential for the door’s proper functioning. This is a relatively simple, yet crucial, step in the process. Start by checking the alignment of the rods and cables to ensure that they are in their correct positions.
You may need to adjust them slightly if they have shifted out of place. Then, take your new door handle and attach it to the existing rods and cables. Be sure to secure everything tightly to prevent the handle from coming loose or malfunctioning.
With the proper installation of your new door handle, you’ll be able to effortlessly open and close your door while keeping your home secure.
Reattach the Door Panel
Now that the new door handle is in place, it’s time to reattach the door panel. Before you start, double-check that all the screws and bolts are tightened on the handle. Begin by lining up the clips on the door panel with the slots on the door frame.
Push the panel in firmly to snap them into place. Don’t forget to connect any wiring or cables. Finally, secure the door panel with the screws and bolts, being careful not to overtighten them.
Remember, it’s important to make sure the door handle is fully functional before reattaching the door panel permanently. With the handle properly installed and the door panel back in place, your vehicle is ready to hit the road again!
Test the New Door Handle
When it comes to installing a new door handle, there are a few steps you’ll need to follow to ensure it’s done correctly. Once you’ve removed the old handle and properly aligned the new one, it’s time to test it out. Give the handle a few tries and make sure it’s turning smoothly and latching securely.
Don’t forget to test the lock, if your handle includes one. It’s better to make sure everything is working properly now rather than getting stuck with a faulty handle later. Overall, installing a new door handle may seem daunting, but with a little patience and attention to detail, you’ll have a fully functioning handle that adds security and aesthetic value to your door.
Tips and Tricks for Replacing a Car Door Handle
If you’re experiencing difficulties opening or closing your car door, it’s possible that your car door handle may need to be replaced. Replacing a car door handle may seem like a daunting task, but it can be done with just a few basic tools and some patience. First, remove any screws or clips holding the door panel in place so you can easily access the inside of the door.
Once you’ve removed the panel, you’ll need to locate the handle assembly and remove it from the door. This can be done by loosening any bolts or screws holding it in place. Next, disconnect the rods and cables from the handle assembly and remove the old handle.
Reverse the process to install the new handle, making sure to reconnect all rods and cables. Finally, reattach the door panel and test the new handle to ensure it’s functioning properly. With these tips and some patience, you’ll have a new car door handle in no time!
Don’t Force Anything
When it comes to replacing a car door handle, it’s important to remember not to force anything. It may seem tempting to try and yank off a stubborn handle, but doing so can cause serious damage to both the handle and the door itself. Instead, take the time to carefully examine the handle and determine what needs to be done to remove it properly.
This may involve unscrewing bolts or disengaging clips, but with a little patience and care, you can successfully replace your car door handle without causing any additional damage. By taking your time and following the necessary steps, you can ensure that your new handle fits seamlessly and functions properly, allowing you to get back on the road with ease. So, take a deep breath and approach the job calmly, and you’ll be enjoying your newly-replaced car door handle in no time.
Double Check Connections Before Testing
When it comes to replacing a car door handle, there are a few things to keep in mind to ensure a successful replacement. One important tip is to double-check the connections before testing. It may seem like a no-brainer, but it’s easy to get caught up in the excitement of successfully installing the new handle and forget to make sure all the wires and connections are securely in place.
Double-checking the connections before testing can prevent any electrical mishaps or damage to the door panel. It’s always better to be safe than sorry, so take a few extra minutes to make sure everything is connected properly before turning on the ignition. By doing so, you can avoid potentially costly errors and enjoy your newly replaced car door handle with peace of mind.
Check for Compatibility with Your Car Model
Replacing a car door handle can be a tricky task, especially if you are unfamiliar with the process. Before you start, it’s important to make sure that the new handle is compatible with your car model. Check your owner’s manual or do some research online to ensure that you purchase the right part for your specific make and model.
One helpful tip is to take a photo of your current door handle and compare it with the replacement part to make sure they match. This can save you time and frustration in the long run. Another useful trick is to watch some online tutorials or read through step-by-step instructions before you begin the process.
This can help you get a better understanding of the tools and techniques you’ll need to use, as well as any potential difficulties you may encounter. By doing a bit of research and preparation beforehand, you can ensure a smoother and more successful replacement process for your car door handle.
Conclusion
When it comes to replacing a car door handle, don’t let the task intimidate you. With a few basic tools, some patience, and a willingness to get your hands dirty, you can successfully swap out a broken or malfunctioning handle. Just remember that sometimes it’s the simple things that can make all the difference, whether it’s turning a screwdriver or giving your vehicle a fresh new look.
So go ahead and tackle that door handle replacement – your car (and your wallet) will thank you for it!”
FAQs
What tools will I need to replace a car door handle?
You will need a screwdriver, pliers, and a pry tool to replace a car door handle.
How do I remove the old door handle from my car?
To remove the old door handle, you will need to unscrew it from the door using a screwdriver and then gently pry it away from the door with a pry tool.
Is it difficult to replace a car door handle?
It can be challenging to replace a car door handle if you do not have any experience with car repairs. However, with the right tools and instructions, it is a manageable task.
Can I replace a car door handle myself or should I take it to a mechanic?
If you have experience with car repairs and the right tools, you can replace a car door handle yourself. However, if you are not confident in your abilities, it may be best to take it to a mechanic.
How much does it cost to replace a car door handle?
The cost of replacing a car door handle can vary depending on the make and model of your car and whether you do it yourself or take it to a mechanic. Typically, it can cost between $100 and $200.
How long does it take to replace a car door handle?
The time it takes to replace a car door handle can vary depending on your level of experience and the tools that you have. On average, it can take anywhere between one and three hours to complete.
Can I use a different type of door handle on my car?
No, it is not recommended to use a different type of door handle on your car as it may not fit properly and could be a safety hazard. It is best to use the recommended door handle for your specific make and model.