
Hey there car enthusiasts! If you’ve noticed a leak or crack in your coolant reservoir tank, it’s important to take care of it as soon as possible to prevent potential damage to your engine. But don’t worry, replacing the coolant reservoir tank is a fairly straightforward task that you can do yourself with just a few tools and a little know-how. In this blog post, we’ll guide you through the steps of replacing the coolant reservoir tank in your vehicle, so you can get back on the road in no time.
So, grab your wrenches and let’s get started!
Table of Contents
Introduction
If you find yourself in a situation where you need to replace the coolant reservoir tank in your vehicle, don’t worry! It’s actually a relatively simple task that you can do yourself with just a few tools and some basic knowledge. The coolant reservoir tank is an essential component of your vehicle’s cooling system, as it stores excess coolant and helps to maintain the proper levels of coolant in the system. Over time, the reservoir tank can become damaged or worn out, leading to leaks and potential engine damage.
Replacing the coolant reservoir tank is an important maintenance task that should be done as soon as possible to ensure the proper functioning of your vehicle. In this blog post, I’ll walk you through the step-by-step process of replacing the coolant reservoir tank so that you can get back on the road in no time. So, let’s get started!
Why replace the coolant reservoir tank
coolant reservoir tank replacement. Introduction: If you’re wondering why you should replace your coolant reservoir tank, you’ve come to the right place. The coolant reservoir tank is an important component of your vehicle’s cooling system, and it plays a crucial role in keeping your engine running at the optimal temperature.
Over time, however, the reservoir tank can become worn or damaged, which can lead to coolant leaks and other issues. In this blog post, we’ll explore the reasons why replacing the coolant reservoir tank is necessary and how it can help maintain the performance and longevity of your vehicle. So, let’s dive in and learn more about this essential part of your car’s cooling system.
Signs of a faulty coolant reservoir tank
coolant reservoir tank, faulty, signs
Safety precautions
safety precautions, protecting yourself, preventing accidents, safety measures, precautionary steps Safety is a top priority in any aspect of our lives. Whether it’s in the workplace, at home, or even when engaging in recreational activities, taking precautionary steps is essential to protect ourselves and prevent accidents. Safety precautions are not meant to restrict us or make our lives more difficult; they are designed to ensure our well-being and give us peace of mind.
By following safety guidelines and implementing safety measures, we can mitigate risks and create a safer environment for ourselves and those around us. So, let’s dive into the world of safety precautions and explore the various ways we can protect ourselves from potential dangers.
Tools and materials needed
If you notice your coolant reservoir tank is leaking or cracked, it’s important to replace it promptly to prevent further damage to your vehicle’s cooling system. To replace the coolant reservoir tank, you’ll need a few tools and materials. First, you’ll need a new coolant reservoir tank that is compatible with your vehicle’s make and model.
You’ll also need a socket wrench or pliers to remove the old tank and secure the new one in place. Additionally, you’ll need a drain pan to catch any coolant that may leak out during the replacement process. It’s also a good idea to have a funnel on hand to make adding new coolant easier.
Finally, make sure you have the correct type and amount of coolant for your vehicle. By having these tools and materials ready, you’ll be well-prepared to replace your coolant reservoir tank and keep your vehicle running smoothly.
List of tools
To successfully complete any project, it’s essential to have the right tools and materials on hand. Whether you’re embarking on a DIY home improvement project or starting a new hobby, having the proper equipment can make all the difference in the outcome. When it comes to construction or repair jobs, some of the essential tools include a hammer, screwdriver set, tape measure, level, and pliers.
These versatile tools will help you tackle a wide range of tasks with ease. Additionally, having the right materials is equally important. This may include items like nails, screws, glue, and sandpaper.
Without them, even the best tools are useless. So before you start your next project, take the time to gather all the necessary tools and materials. It will save you time, frustration, and ensure a successful outcome.
List of materials
The tools and materials needed for a specific project can vary depending on the task at hand. However, there are some common tools that are often needed for various projects. These may include basic hand tools such as a hammer, screwdrivers, pliers, and wrenches.
Additionally, power tools such as a drill, circular saw, and a sander may be necessary for certain projects. Other tools that may be required include measuring tape, a level, and a utility knife. In terms of materials, it really depends on the project.
For example, if you’re working on a woodworking project, you may need various types of wood, screws, and nails. If you’re doing a painting project, you may need paint, brushes, and drop cloths. It’s important to research and plan ahead to ensure you have all the necessary tools and materials for your specific project.
Step-by-step instructions
Replacing the coolant reservoir tank in your car is a fairly simple and straightforward process that can be done by most car owners. To begin, you’ll first need to locate the coolant reservoir tank, which is typically located near the radiator. Once you’ve found the tank, you’ll need to drain the coolant from it.
This can be done by removing the drain plug or by using a siphon pump. Next, you can remove the bolts or clamps that are holding the old reservoir tank in place. Once the old tank is removed, you can then install the new coolant reservoir tank by reversing the steps you took to remove the old one.
Finally, you’ll need to refill the tank with the appropriate coolant for your car and check for any leaks before closing the hood and taking your car for a test drive. By following these step-by-step instructions, you can easily replace the coolant reservoir tank in your car and ensure that your engine stays cool and running smoothly.
Step 1: Prep the vehicle
In order to properly prep your vehicle for whatever lies ahead, it’s important to follow a few key steps. First and foremost, you’ll want to gather all the necessary supplies. This includes things like a hose, soap, sponges, and a bucket.
Once you have everything you need, it’s time to get started. Begin by giving your vehicle a thorough rinse with the hose. This will help to remove any loose dirt or debris that may be on the surface.
Next, mix up a solution of soap and water in your bucket, and use a sponge or wash mitt to gently scrub the exterior of your vehicle. Be sure to pay special attention to areas that may be particularly dirty or greasy, such as the wheels and the front grille. Once you’ve thoroughly washed your vehicle, give it another rinse to remove any soap residue.
Finally, dry your vehicle with a clean microfiber cloth or towel to prevent water spots. By following these steps, you’ll be well on your way to a sparkling clean vehicle. So, grab your supplies and get started today!
Step 2: Drain the coolant
“drain the coolant” Step 2 in the process of flushing your coolant system is to drain the coolant. This is an important step because it allows you to remove the old coolant from your vehicle and replace it with fresh coolant. To drain the coolant, you’ll need to locate the drain plug on the radiator.
This plug is typically located at the bottom of the radiator and can be opened using a wrench or pliers. Before opening the drain plug, it’s important to place a drain pan underneath to catch the coolant. Once the drain pan is in place, carefully loosen the drain plug and allow the coolant to fully drain out.
Be sure to take your time and avoid any spills or splashes. Once all the coolant has drained, you can close the drain plug and move on to the next step in the process.
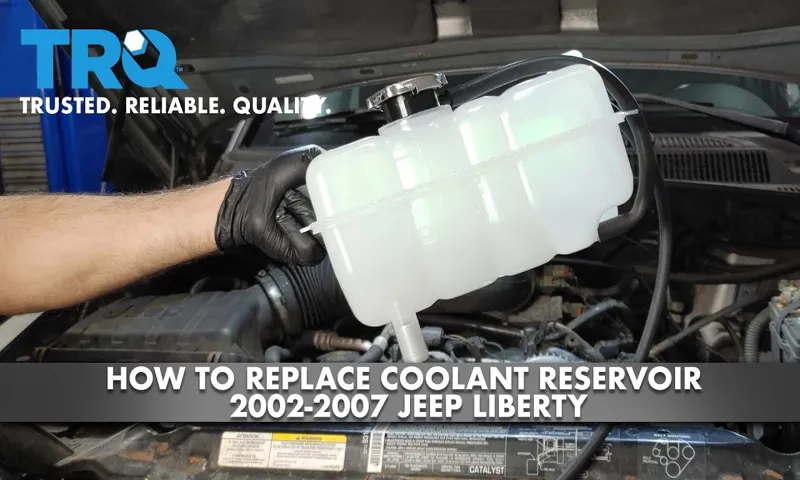
Step 3: Remove the old coolant reservoir tank
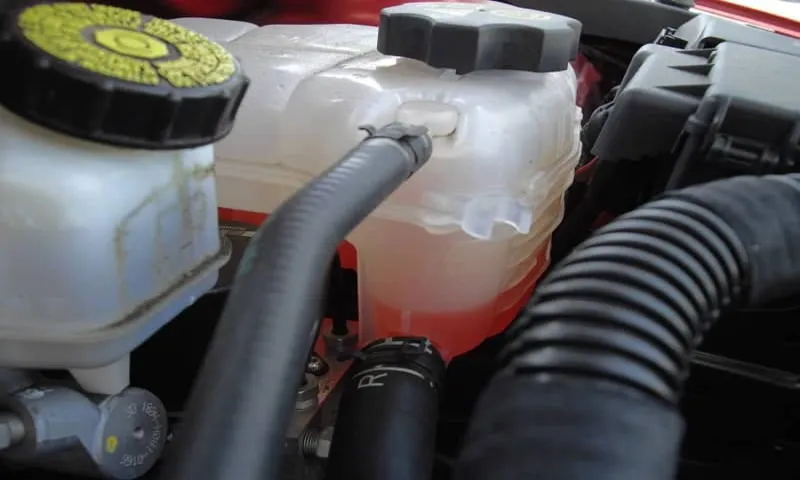
Removing the old coolant reservoir tank is a simple yet important step in maintaining your vehicle’s cooling system. To begin, make sure your engine is completely cool before attempting any work. Start by locating the coolant reservoir tank.
This is usually a translucent plastic container with a cap labeled “coolant” or “antifreeze.” Once you’ve found it, carefully inspect the tank and surrounding area for any signs of leaks or cracks. If everything looks good, prepare a drain pan and place it beneath the tank to catch any coolant that may spill out.
Next, locate the hose attached to the bottom of the tank and use a pair of pliers to loosen the clamp securing it. Slowly and carefully remove the hose, allowing any remaining coolant to drain into the pan. Once the hose is detached, you can proceed to remove the bolts or screws holding the tank in place.
Make sure to keep track of these fasteners, as you will need them to install the replacement tank later. Once the tank is fully detached, set it aside and dispose of the old coolant properly. At this point, your old coolant reservoir tank has been successfully removed, and you can now move on to installing the new one.
Step 4: Install the new coolant reservoir tank
In this step, we will guide you through installing the new coolant reservoir tank. This is an important part of the process, as the coolant reservoir plays a vital role in the coolant system of your vehicle. It helps to regulate and maintain the proper level of coolant, ensuring that your engine stays cool and runs smoothly.
To begin, make sure you have the new coolant reservoir tank ready, along with any necessary tools. First, locate the old coolant reservoir tank, which is usually located near the radiator. Carefully disconnect any hoses or connections attached to the old tank, making sure to catch any coolant that may spill out.
Once the old tank is removed, clean the area thoroughly to ensure a proper seal for the new tank. Now, take the new coolant reservoir tank and place it in the same position as the old one. Reattach the hoses or connections, making sure they are secure and tight.
Finally, refill the coolant system with the appropriate coolant mixture, following the manufacturer’s recommendations. And that’s it! You have successfully installed the new coolant reservoir tank. Your vehicle’s coolant system is now ready to keep your engine cool and running efficiently.
Step 5: Refill the coolant
BMW 3 series coolant refill When it comes to the maintenance of your BMW 3 series, it’s important to keep an eye on the coolant levels. If your coolant is running low, it can lead to overheating and engine damage. Therefore, it’s essential to know how to properly refill the coolant.
Here are step-by-step instructions to help you through the process. First, ensure that your engine is cool before attempting to open the coolant reservoir. Opening the reservoir when the engine is hot can release scalding steam and cause injury.
Once it’s cool, locate the coolant reservoir in your BMW 3 series. It is usually a transparent plastic container with high and low markings on the side. Next, remove the cap by turning it counterclockwise.
Set the cap aside in a safe place where it won’t get contaminated. Then, take your coolant and pour it into the reservoir until it reaches the maximum level indicated on the side. Make sure not to overfill the reservoir as this can lead to leakage or other issues.
After refilling the coolant, secure the cap back onto the reservoir by turning it clockwise until it is tight. Ensure that it is securely fastened to prevent any coolant from leaking out. Once the cap is in place, you can close the hood of your BMW 3 series and start the engine.
Allow the engine to run for a few minutes, and then check the coolant level again. This allows any air pockets in the system to be released. If the level has dropped, add more coolant as needed to reach the maximum level.
Step 6: Check for leaks
After completing step 5 of installing your dishwasher, it’s time to move on to step 6: checking for leaks. This step is crucial in ensuring that the installation was done correctly and that your dishwasher is not leaking water. To begin, inspect the water supply connections for any signs of water leakage.
Make sure the connections are tight and secure. Additionally, examine the drain hose and make sure it is properly attached and not damaged. Once these initial checks are done, it’s time to put your dishwasher to the test.
Run a cycle with a small load of dishes and pay close attention to the area around the dishwasher. Look for any signs of water pooling, dripping, or leaking. Pay attention to the floor around the dishwasher as well.
If you notice any leaks, turn off the dishwasher and double-check all connections and the drain hose. Correct any issues and then run another cycle to ensure the problem has been resolved. Checking for leaks is an essential step in installing a dishwasher, as it ensures that your appliance is functioning properly and protects your home from potential water damage.
Conclusion
In conclusion, replacing a coolant reservoir tank is like giving your vehicle a refreshing, coolant-infused beauty treatment. Just as a spa day rejuvenates the body, a new reservoir tank revitalizes your engine’s cooling system. Firstly, gather the necessary tools and materials as if you were preparing for a DIY day at the mechanic’s salon.
Then, follow the step-by-step instructions as if you were applying a perfectly blended coolant mask to your vehicle’s face – gently and with precision. Remember, this procedure is all about pampering your car and flushing out any old, tired coolant trapped in the old tank. It’s like treating your engine to a hydrating facial, ensuring it stays cool, calm, and collected under pressure.
Lastly, when the transformation is complete, take a moment to admire your handiwork and revel in the satisfaction of a job well done, just as you would after a professional makeover. Your car will thank you, and you’ll have the knowledge and power to face any coolant mishap with grace and cool confidence. So, whether you’re a DIY enthusiast or a mechanic-in-training, replacing a coolant reservoir tank is the equivalent of giving your car a spa day.
Trust me, your vehicle will be refreshed, renewed, and ready to hit the road with a radiant glow. Now that’s what I call automotive self-care!”
Benefits of replacing the coolant reservoir tank
One of the crucial components in a vehicle’s cooling system is the coolant reservoir tank. This tank holds the excess coolant and provides a buffer for any fluctuations in temperature. Over time, the reservoir tank can become cracked or degraded, leading to coolant leaks and potential engine damage.
By replacing the coolant reservoir tank, you can ensure proper coolant levels and protect your engine from overheating. Here are step-by-step instructions on how to replace the coolant reservoir tank. First, locate the reservoir tank, as it is typically located near the radiator.
Next, drain the coolant from the system by removing the drain plug from the bottom of the radiator. Once the coolant is drained, remove any hoses or bolts connecting the old reservoir tank to the cooling system. Carefully remove the old tank and replace it with the new one, making sure all connections are secure.
Finally, refill the cooling system with the recommended coolant and check for any leaks. Replacing the coolant reservoir tank can help maintain your vehicle’s cooling system and prevent costly engine repairs.
Follow-up maintenance
Follow-up maintenance is essential to keep your systems running smoothly after any repairs or upgrades. Without proper maintenance, you run the risk of experiencing a decline in performance or even more significant issues down the line. In this step-by-step guide, I will walk you through the key tasks to perform during follow-up maintenance, ensuring your systems remain in optimal condition.
First, it’s essential to check all connections and cables to ensure they are secure and haven’t been disrupted during the repair process. This includes checking power cords, ethernet cables, and any other connections specific to your system. Next, it’s crucial to update any software or firmware that may have been affected or outdated during the repairs.
This will ensure that you have the latest security patches and performance updates for your system. Additionally, it’s a good idea to perform a thorough system test to ensure everything is functioning correctly after the repairs or upgrades. This can include running diagnostic checks, stress tests, and performance benchmarks to identify any potential issues.
Lastly, don’t forget to document the maintenance tasks you have performed, including any changes or updates made during the process. This will help you keep track of the overall health of your systems and provide valuable information for future maintenance or troubleshooting. By following these step-by-step instructions for follow-up maintenance, you can ensure that your systems continue to operate at their best, minimizing downtime and maximizing performance.
FAQs
What is a coolant reservoir tank?
A coolant reservoir tank, also known as an overflow tank or expansion tank, is a container that holds excess coolant fluid for a vehicle’s engine.
How often should a coolant reservoir tank be replaced?
The coolant reservoir tank does not have a specific time frame for replacement. It should be inspected regularly for any signs of damage or leaks, and replaced if necessary.
Can a cracked coolant reservoir tank be repaired?
In some cases, a cracked coolant reservoir tank can be repaired using specialized plastic welding techniques. However, it is generally recommended to replace the tank to ensure proper functioning and prevent future issues.
What are the signs of a faulty coolant reservoir tank?
Signs of a faulty coolant reservoir tank include coolant leaks, cracked or damaged tank, coolant levels dropping significantly, and overheating of the engine.
How can I prevent coolant reservoir tank issues?
Regular maintenance and inspection of the coolant reservoir tank can help prevent issues. It is important to check for leaks, cracks, and proper fluid levels, and to replace the tank if any problems are detected.
Is it necessary to drain coolant when replacing the reservoir tank?
It is generally recommended to drain the coolant before replacing the reservoir tank. This can be done by opening the radiator drain valve and allowing the coolant to drain into a container.
Can I replace the coolant reservoir tank myself?
Replacing the coolant reservoir tank can be a relatively simple task for those familiar with basic car maintenance. However, it is recommended to consult the vehicle’s manual or seek professional assistance if unsure.