Hey there! Have you ever wondered why introductions are so important? Well, buckle up because I’m about to take you on a journey into the world of introductions and why they matter. Think of introductions as the doorways to the rest of your content. Just like a first impression, they have the power to captivate your audience from the very beginning.
Whether it’s a blog post, a book, or even a conversation, the introduction sets the tone and piques the curiosity of your readers. Imagine walking into a party without a proper introduction. You’d feel lost, right? The same goes for your audience.
They need that initial handshake to establish a connection and gain a sense of direction. A compelling introduction grabs their attention and keeps them hooked, ensuring they stick around for the main course of your content. But what makes a great introduction? Well, like a master storyteller, an effective introduction knows how to create intrigue and anticipation.
It entices the reader by posing thought-provoking questions, presenting shocking statistics, or using captivating analogies and metaphors that leave a lasting impact. An introduction also serves as a roadmap, guiding your audience through the rest of your content. It outlines the main points you’ll be covering, giving readers a sense of what to expect.
By doing so, you’re setting clear expectations and motivating your audience to keep reading, eager to discover the valuable insights you have to offer. Now, you might be thinking, why all this fuss over an introduction? Can’t I just dive straight into the content? While that may seem tempting, a strong introduction can make all the difference between a casual reader and an engaged one. By investing time and effort into crafting a compelling introduction, you’re building a solid foundation that increases the chances of your readers sticking around for the long haul.
So, next time you sit down to write, remember the power of a well-crafted introduction. Embrace the opportunity to captivate your audience from the get-go, leaving them hungry for more. After all, the right introduction can be the key that opens the door to a truly remarkable reading experience.
Table of Contents
Understanding the Dometic RV Awning
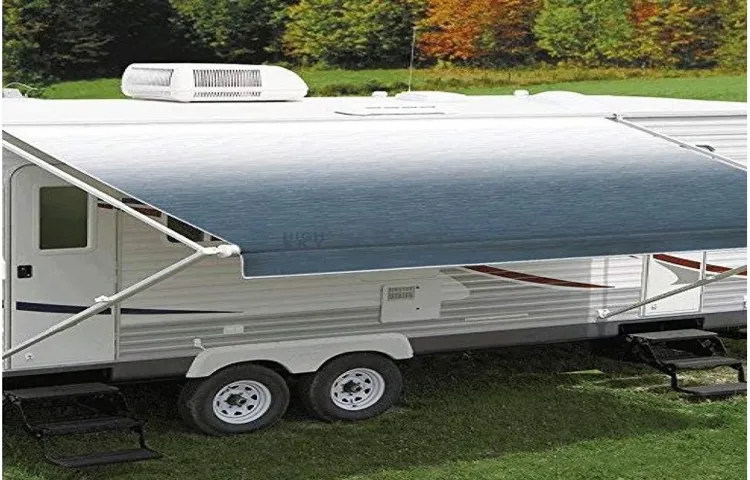
If you’re an RV owner, you know that the awning is an essential part of your outdoor living space. It provides shade and protection from the elements, allowing you to enjoy the great outdoors in comfort. But what happens when your awning fabric starts to show signs of wear and tear? Do you have to replace the entire awning? Not necessarily.
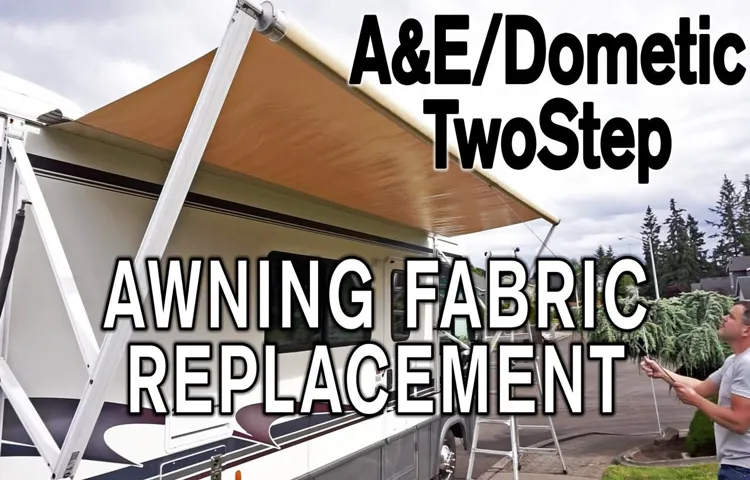
With a little bit of know-how and some basic tools, you can replace just the fabric and have your awning looking brand new again. In this blog post, we’ll walk you through the process of replacing the fabric on a Dometic RV awning, so you can get back to enjoying your outdoor adventures.
What is a Dometic RV Awning
“Dometic RV awnings are an essential accessory for any RV owner. They provide much-needed shade and protection from the elements while adding style and functionality to your outdoor space. These awnings are designed specifically for RVs, with durable materials and easy installation.
They can be manually operated or motorized, allowing for quick setup and convenient use. Whether you’re looking to relax outside in the shade or entertain guests, a Dometic RV awning is the perfect addition to your mobile home. So, why not upgrade your outdoor living experience with a Dometic RV awning?”
Why you might need to replace the awning fabric
“Dometic RV awnings are a popular choice among outdoor enthusiasts looking to enhance their camping experience. These awnings provide much-needed shade and protection from the elements, allowing campers to relax and enjoy the great outdoors. However, over time, the awning fabric may begin to show signs of wear and tear.
This can be due to exposure to the sun’s harsh UV rays, weather conditions such as rain or wind, or general wear from frequent use. When the fabric starts to deteriorate, it is important to consider replacing it to ensure the awning continues to provide adequate coverage and functionality. A new awning fabric will not only improve the overall appearance of your RV, but it will also provide enhanced protection against the elements, giving you peace of mind during your outdoor adventures.
So, if you notice any rips, tears, or fading in your Dometic RV awning fabric, it may be time to consider a replacement.”
Preparing for the Replacement
If you’re facing the task of replacing your Dometic RV awning fabric, don’t worry! It may seem intimidating at first, but with a few simple steps, you’ll have your awning looking brand new in no time. Firstly, gather all the necessary tools and materials, including a ladder, a wrench, new fabric, and any additional hardware that may be needed. Next, take measurements of your existing fabric, making note of the length and width.
Once you have your measurements, carefully remove the old fabric from the awning roller tube. To do this, you’ll need to loosen the tension on the awning and unscrew the mounting brackets. After the old fabric has been removed, unroll your new fabric and attach it to the roller tube.
Be sure to follow the specific instructions provided by the manufacturer to ensure proper installation. Finally, reattach the mounting brackets and tighten the tension on the awning. With a little bit of patience and careful attention to detail, you’ll have your RV awning looking as good as new!
Gathering the necessary tools and materials
One of the first steps in preparing for a replacement project is gathering all the necessary tools and materials. This ensures that you have everything you need before you begin the project, saving you time and frustration later on. Depending on the specific replacement you are planning, the tools and materials required may vary.
For example, if you are replacing a light fixture, you will need a screwdriver, wire cutters, and a new fixture. On the other hand, if you are replacing a faucet, you will need a wrench, plumber’s tape, and a new faucet. It is important to carefully read through the instructions or watch tutorials to determine what tools and materials are needed for your particular project.
Additionally, make sure to check if any special tools or supplies are required that you may not have on hand. This could save you a trip to the store in the middle of your project. By taking the time to gather all the necessary tools and materials beforehand, you can ensure a smooth and successful replacement.
Measuring the awning fabric
If you find yourself needing to replace your awning fabric, it’s important to measure it correctly to ensure you get the right size for the replacement. Measuring the awning fabric may seem like a daunting task, but with a few simple steps, it can be done easily. First, make sure the awning is fully extended so you can accurately measure the length and width.
Using a measuring tape, start at one end and measure all the way to the other end for the length. For the width, measure from one side to the other. Make sure to measure both the width and length in multiple places to ensure accuracy, as awnings can sometimes stretch or shrink over time.
Once you have the measurements, you can confidently order the replacement fabric and get your awning back in tip-top shape.
Removing the Old Awning Fabric
So you want to know how to replace the fabric on your Dometic RV awning? Well, you’ve come to the right place! The first step in this process is removing the old awning fabric. Now, this may seem like a daunting task, but I promise it’s not as difficult as it may seem. First, you’ll want to extend your awning to its full length and make sure it is secure.
Then, locate the screws or rivets that hold the fabric in place on the roller tube. Carefully remove these screws or rivets, making sure to keep track of them so you don’t lose them. Once the screws or rivets are removed, you should be able to slide the fabric out of the groove on the roller tube.
It may be a bit tight, so don’t be afraid to use a bit of force. Once the fabric is removed, you can then move on to installing the new fabric. But that’s a topic for another blog post!
Steps to safely remove the fabric
Removing the old awning fabric may seem like a daunting task, but with the right steps, it can be a straightforward process. Before beginning, it’s important to gather the necessary tools, such as a ladder, pliers, and a drill. Start by carefully removing any screws or fasteners that are holding the fabric in place.
Once these are removed, gently pull the fabric away from the frame, being careful not to damage it. If the fabric is stuck or difficult to remove, you may need to use a little bit of force, but be careful not to tear or rip it. Once the fabric is removed, you can then proceed with installing the new awning fabric.
By following these steps, you can safely remove the old awning fabric and prepare for a fresh new look.
Inspecting the awning hardware
The first step in replacing your awning fabric is to inspect the awning hardware. This is important because you want to make sure that the hardware is in good condition and will be able to support the new fabric. Start by checking the brackets, arms, and pivot points for any signs of damage or wear.
Look for any loose screws or bolts that may need to be tightened. It’s also a good idea to check the springs and rollers to ensure they are functioning properly. If you notice any issues with the hardware, it’s best to address them before moving on to the next step.
By inspecting the awning hardware, you can ensure that your new fabric will be properly supported and will last for years to come.
Choosing the Right Replacement Fabric
Replacing the fabric on your Dometic RV awning can seem like a daunting task, but with the right approach, it can be a relatively simple process. The first thing you’ll need to do is choose the right replacement fabric for your awning. There are a few factors to consider when making this decision.
Firstly, you’ll want to take into account the dimensions of your awning to ensure that you purchase the correct size fabric. Additionally, you’ll want to consider the material and color of the fabric. Dometic offers a range of fabrics, including vinyl and acrylic options, and various colors to choose from.
It’s important to select a fabric that is durable and weather-resistant, as it will be exposed to the elements. Lastly, you’ll want to consider your budget and any specific preferences you have for the fabric. By taking these factors into consideration, you can ensure that you choose the right replacement fabric for your Dometic RV awning.
Considering the different fabric options
Choosing the right replacement fabric for your furniture is an important decision that can greatly impact its overall appearance and durability. With so many different options available, it can be quite overwhelming to determine which fabric will best suit your needs. However, by taking a few factors into consideration, you can make an informed decision that will not only enhance the look of your furniture but also ensure its longevity.
One of the first things to consider is the lifestyle of your household. If you have pets or young children, you will want to choose a fabric that is easy to clean and resistant to stains. Fabrics such as microfiber or leather are excellent choices for these situations, as they are durable and can be easily wiped clean.
Additionally, if your furniture is likely to be exposed to direct sunlight, you will want to choose a fabric that is resistant to fading. Fabrics such as polyester or acrylic blend well in this case, as they are known for their colorfastness. Finally, consider the overall style and aesthetic of your home.
If you have a more formal living space, you may want to choose a fabric such as velvet or silk, which exude elegance and sophistication. On the other hand, if you have a more casual and relaxed environment, you may be better suited with a fabric such as cotton or linen, which offer comfort and a laid-back appeal. By considering these factors and taking the time to explore the different fabric options available, you can ensure that you choose the right replacement fabric for your furniture that will not only meet your practical needs but also enhance the overall look and feel of your space.
Selecting the proper size and color
When it comes to choosing the right replacement fabric, it’s important to consider the size and color that will work best for your needs. The size of the fabric is crucial in ensuring a proper fit for your project. Before making a purchase, measure the dimensions of the area you need to cover to ensure you select a fabric that will provide enough material to complete the job.
Additionally, considering the color of the fabric is essential in achieving the desired aesthetic for your project. Take into account the existing color scheme or the atmosphere you want to create, and choose a color that complements or enhances the overall look. By carefully selecting the proper size and color, you can ensure that your replacement fabric not only fits perfectly but also adds a beautiful touch to your project.
Installing the New Awning Fabric
Are you looking to replace the fabric on your Dometic RV awning? Don’t worry, it’s not as daunting of a task as it might seem. With a few simple steps, you can have your awning looking brand new in no time. First, start by measuring the length of your awning fabric to determine how much you will need to purchase.
Once you have your new fabric, unzip the awning and remove the old fabric by sliding it off of the roller tube. Next, lay out your new fabric and slide the roller tube through the casing. Make sure the fabric is evenly aligned and then secure it with the awning rail.
Finally, use the awning wand to roll the fabric onto the roller tube, making sure it is straight and taut. And just like that, you have successfully replaced your Dometic RV awning fabric! It’s a simple project that can make a huge difference in the appearance of your RV.
Attaching the fabric to the roller tube
When it comes to installing the new awning fabric, one of the most important steps is attaching it to the roller tube. The roller tube is the central component of the awning that allows it to roll up and retract when not in use. To attach the fabric, you will first need to unroll it completely and lay it out flat.
Next, align one edge of the fabric with the roller tube and hold it firmly in place. Then, start rolling the tube slowly and evenly, making sure that the fabric is rolling up neatly and evenly as well. As you roll, apply gentle pressure to ensure that the fabric is securely attached to the tube.
Once the fabric is completely rolled up, you can continue with the rest of the installation process. It’s important to take your time and be careful when attaching the fabric to the roller tube to ensure a proper and secure installation. With the fabric securely attached, you can now move on to attaching the other end of the fabric to the awning frame and completing the installation.
So, let’s get started and transform your outdoor space with a new awning fabric!
Securing the fabric to the awning arms
When it comes to installing the new fabric on your awning, securing it to the awning arms is a crucial step. To do this, start by unrolling the fabric and ensuring that it is positioned correctly. Make sure the fabric is taut and free from any wrinkles or folds.
Once you have it in the right position, use zip ties or harness straps to secure the fabric to the awning arms. These will provide a strong and secure attachment, ensuring that the fabric stays in place even in strong winds. By taking the time to properly secure the fabric to the awning arms, you can ensure that your awning will not only look great but also provide you with much-needed shade and protection from the elements.
So don’t overlook this step and take the necessary time to make sure your awning fabric is securely attached.
Final Steps and Maintenance
If you’ve decided to replace the fabric on your Dometic RV awning, you’re in luck! It’s a relatively straightforward process that you can do yourself with just a few basic tools. First, you’ll need to measure the size of your awning fabric and order a replacement that matches those dimensions. Once you have the new fabric, start by extending the awning fully and locking it into place.
Then, remove the screws holding the old fabric in place and carefully slide it out of the awning’s roller tube. Next, align the new fabric with the roller tube and slide it in, making sure it is centered and taut. Finally, reattach the screws and test the awning to ensure it opens and closes smoothly with the new fabric.
To maintain your Dometic RV awning, regularly inspect and clean it to remove any dirt or debris that may accumulate. Additionally, consider using a fabric protectant spray to help prolong the life of the fabric and keep it looking like new. With a little maintenance, your Dometic RV awning will provide shade and comfort for many camping trips to come!
Testing the functionality of the awning
awning functionality, final steps, awning maintenance Now that you’ve installed your awning, it’s time to test its functionality and make sure everything is working properly. Start by extending the awning and retracting it a few times to ensure that it opens and closes smoothly. Check for any obstructions or unusual noises during this process.
It’s also a good idea to test the awning in different weather conditions, such as on a sunny day or during a light rain shower, to see how it performs. Does it provide enough shade or protection from the elements? Is it easy to adjust and reposition as needed? These are important factors to consider when evaluating the functionality of your awning. If you notice any issues or concerns, make sure to address them promptly to avoid any further damage or inconvenience.
Once you’re satisfied with the functionality of your awning, it’s time to move on to the final steps of the installation process. Start by cleaning the awning thoroughly using mild soap and water. This will help remove any dirt, debris, or stains that may have accumulated during the installation process.
Be sure to rinse it thoroughly and allow it to dry completely before moving on to the next step. Next, inspect the awning for any signs of wear and tear, such as loose or frayed fabric, damaged or bent hardware, or fading color. If you spot any issues, it’s important to address them as soon as possible.
Replace any worn or damaged parts and consider applying a protective coating to help extend the life of your awning. Finally, establish a regular maintenance routine to keep your awning in optimal condition. This may include periodic cleaning, lubricating any moving parts, tightening screws and bolts, and inspecting the fabric for any signs of damage or wear.
By taking these steps, you can ensure that your awning continues to function properly and looks great for years to come. Remember, proper maintenance is key to preserving the longevity and functionality of your awning. By testing its functionality, completing the final installation steps, and establishing a maintenance routine, you can enjoy the benefits of your awning for many seasons to come.
Cleaning and maintaining the new fabric
cleaning and maintaining the new fabric Once you have finished cleaning your new fabric, there are a few final steps you can take to ensure it stays fresh and in good condition. First, make sure the fabric is completely dry before using or storing it. Moisture can lead to mildew or other damage, so allow it to air dry or use a fan to speed up the process.
Next, consider applying a fabric protectant spray to help repel stains and spills. This will provide an extra barrier of protection against everyday wear and tear. Additionally, it is important to regularly vacuum or brush the fabric to remove any dirt, debris, or pet hair.
This will help prevent these particles from becoming embedded in the fabric fibers over time. Finally, be mindful of any special care instructions provided by the manufacturer and follow them accordingly. This may include avoiding certain cleaning agents or methods that could damage the fabric.
By following these final steps and maintaining your new fabric, you can enjoy its beauty and comfort for years to come.
Conclusion
And there you have it! Your step-by-step guide on how to replace Dometic RV awning fabric. With just a little bit of time and effort, you can give your RV a fresh new look and ensure your awning remains in pristine condition for years to come. So grab your tools, put on your handyman hat, and get to work! Who knew awning fabric replacement could be such a breeze? And just think, when your fellow campers ask how you managed to tackle such a daunting task, you can simply reply with a knowing smile and say, ‘Oh, it was nothing.
Just another day in the life of an RV enthusiast!’ Happy camping!”
FAQs
How do I replace the fabric on my Dometic RV awning?
To replace the fabric on your Dometic RV awning, first extend the awning fully. Then, locate the screws or rivets that hold the old fabric in place and remove them. Carefully remove the old fabric from the roller tube and replace it with the new fabric. Secure the new fabric in place using the screws or rivets, and make sure it is evenly tensioned. Finally, retract the awning and test that it operates smoothly.
Can I replace the fabric on my Dometic RV awning myself?
Yes, you can replace the fabric on your Dometic RV awning yourself. It may require some basic tools and mechanical skills, but with proper instructions and guidance, it is a doable DIY project. However, if you are not confident in your abilities, it is always recommended to seek professional help.
How often should I replace the fabric on my Dometic RV awning?
The frequency of replacing the fabric on your Dometic RV awning depends on various factors such as usage, weather conditions, and overall maintenance. On average, RV awning fabric may need replacement every 5-7 years. However, if you notice signs of wear and tear, such as fading, tearing, or loss of elasticity, it is advisable to replace it sooner.
What materials are used for Dometic RV awning fabric?
Dometic RV awning fabric is typically made of high-quality materials such as vinyl or acrylic. These materials are chosen for their durability, water resistance, and resistance to UV rays. Vinyl fabric is more affordable but may not be as breathable as acrylic fabric, which is known for its superior weather resistance and longevity.
Can I choose a different color for the replacement fabric on my Dometic RV awning?
Yes, you can choose a different color for the replacement fabric on your Dometic RV awning. Many RV awning manufacturers offer a variety of color options to suit different preferences and styles. When selecting a new fabric color, consider factors such as sunlight reflection, aesthetics, and how well it matches your RV’s exterior.
Are there any maintenance tips for prolonging the lifespan of Dometic RV awning fabric?
Yes, there are several maintenance tips to prolong the lifespan of your Dometic RV awning fabric. Regularly clean the fabric using mild soap and water, avoiding harsh chemicals or excessive scrubbing. Keep the awning fabric dry when not in use to prevent mold or mildew growth. Additionally, retract the awning during heavy rainstorms or strong winds to avoid damage.
Can I retrofit an automatic retractable feature to my existing Dometic RV awning?
It is not recommended to retrofit an automatic retractable feature to an existing Dometic RV awning. The automatic retractable feature is typically integrated into the awning mechanism during the manufacturing process. Retrofitting such a feature would require significant modifications and may not be feasible or cost-effective. It is best to consult with a professional RV awning manufacturer or technician for any modification inquiries.