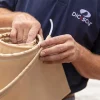
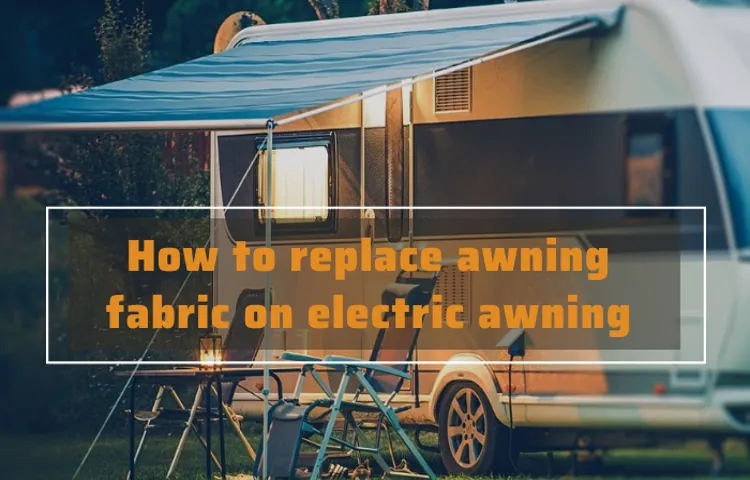
Are you tired of your old, worn-out electric awning fabric? Does it no longer provide the shade and protection that it used to? Well, you’re in luck! Replacing your electric awning fabric is easier than you might think, and it will give your outdoor space a fresh new look. Think of your electric awning fabric like the outfit for your patio. Just like clothes, awning fabric can become faded, torn, and outdated over time.
But, instead of going out and buying a whole new wardrobe, you can simply replace the fabric on your electric awning to achieve a brand-new look. Not only will replacing your electric awning fabric give your patio a much-needed facelift, but it will also provide practical benefits. New fabric can provide better protection from the sun’s harmful rays, giving you a more comfortable and enjoyable outdoor living space.
It can also help to keep your patio furniture and other belongings safe from the elements, extending their lifespan. So, how do you go about replacing your electric awning fabric? First, you’ll need to measure your awning to ensure you order the correct size fabric. Once you have the measurements, you can choose from a wide variety of fabric options, including different colors, patterns, and materials.
When it comes time to install the new fabric, be sure to follow the manufacturer’s instructions carefully. This may involve removing the old fabric, attaching the new fabric to the framework, and adjusting the tension to ensure a snug fit. If you’re not comfortable tackling this project on your own, it may be worth hiring a professional to do the job for you.
In conclusion, replacing your electric awning fabric is a simple and affordable way to give your outdoor space a fresh new look. Not only will it improve the aesthetics of your patio, but it will also provide practical benefits such as increased shade and protection. So, why wait? Start shopping for your new electric awning fabric today and get ready to enjoy your outdoor space in style!
Table of Contents
- 1 Section 1: Assessing the Condition of Your Awning Fabric
- 2 Section 2: Gathering the Necessary Tools and Materials
- 3 Section 3: Removing the Old Awning Fabric
- 4 Section 4: Installing the New Awning Fabric
- 5 Section 5: Testing and Adjusting the Awning
- 6 Conclusion: Enjoy Your New Awning Fabric
- 7 FAQs: Common Questions About Replacing Electric Awning Fabric
- 8 Additional Resources: Helpful Guides and Videos
- 9 FAQs
Section 1: Assessing the Condition of Your Awning Fabric
If you have an electric awning and notice that the fabric is looking worn or torn, it may be time to replace it. Assessing the condition of your awning fabric is the first step in this process. Take a close look at the fabric, checking for any signs of damage or excessive wear.
Look for frayed edges, holes, or discoloration. It’s also important to check the operation of the awning. Is it retracting smoothly, or is it getting caught on the fabric? These are all indications that the fabric may need to be replaced.
Taking the time to thoroughly assess the condition of your awning fabric will help you determine if it’s time for a replacement.
1.1 Inspecting for Tears, Stains, or Damage
awning fabric, inspecting tears, stains, and damage. When it comes to maintaining the condition of your awning fabric, it’s important to regularly inspect it for tears, stains, or any other signs of damage. Taking the time to assess the condition of your awning fabric can help identify any issues early on and prevent them from getting worse.
Begin by carefully examining the fabric for any visible tears or rips. Look closely at the seams as these areas are more prone to wear and tear. If you do spot any tears, consider patching them up or contacting a professional for repairs.
Next, check for any stains or discoloration on the fabric. These can be caused by various factors such as mildew, dirt, or exposure to elements. Treating these stains promptly can help maintain the appearance of your awning fabric.
Lastly, inspect the fabric for any signs of general wear and tear. This could include faded colors, frayed edges, or loose threads. These issues might seem minor, but they can escalate quickly if not addressed.
By regularly inspecting your awning fabric, you can ensure that it stays in good condition for years to come and avoid costly repairs or replacements.
1.2 Checking Motor and Mechanical Functions
To ensure that your awning is in good working condition, it’s important to check the motor and mechanical functions. This is especially crucial if you haven’t used your awning in a while or if you notice any issues when retracting or extending it. Start by inspecting the motor and checking for any signs of damage or wear.
Look for any loose or frayed wires, and make sure all the connections are secure. It’s also a good idea to lubricate any moving parts to ensure smooth operation. Next, test the motor by retracting and extending the awning a few times.
Listen for any unusual noises or vibrations, as these can be signs of a problem. If the motor is slow to respond or if the awning doesn’t move smoothly, it may be time to consider repairing or replacing the motor. In addition to the motor, it’s important to check the mechanical functions of your awning.
Inspect the springs and arms for any signs of damage or wear. Look for any rust or corrosion, as this can affect the overall functionality of the awning. Make sure the arms move freely and lock into place securely.
By thoroughly checking the motor and mechanical functions of your awning, you can ensure that it is in good working condition and that it will provide you with shade and protection for years to come. It’s always a good idea to address any issues promptly to avoid further damage and costly repairs in the future.
1.3 Measuring the Size of Your Awning Fabric
awning fabric, size, measure When it comes to assessing the condition of your awning fabric, one important factor to consider is its size. You want to make sure that you have the proper measurements before making any repairs or replacements. Measuring the size of your awning fabric is a relatively straightforward process that you can do yourself.
All you need is a measuring tape and a flat surface to spread out the fabric. Start by laying out the fabric flat and smooth, making sure there are no wrinkles or folds. Then, start at one edge and measure across the width of the fabric.
This will give you the width measurement. Next, measure from the top to the bottom of the fabric to get the height measurement. Once you have these measurements, you will be able to accurately assess the size of your awning fabric and determine if any repairs or replacements are necessary.
Remember to measure the fabric accurately and double-check your measurements to ensure a proper fit.
Section 2: Gathering the Necessary Tools and Materials
In this section, we’ll walk you through the process of gathering all the necessary tools and materials you’ll need to replace the fabric on your electric awning. Before you get started, it’s important to make sure you have everything you need to complete the job successfully. First, you’ll need a few basic tools.
A ladder or a sturdy step stool will be necessary to reach the awning. You may also need a drill or screwdriver, depending on how the fabric is attached to the awning frame. Additionally, you’ll want to have a tape measure on hand to ensure you cut the new fabric to the appropriate size.
Next, you’ll need to purchase the replacement fabric. This can usually be found at a home improvement store or online. Before making your purchase, measure your existing fabric to determine the correct size.
It’s important to choose a fabric that is durable and weather-resistant to ensure it will hold up over time. In some cases, you may also need additional materials such as screws or brackets to reattach the fabric to the awning frame. These can typically be found at the same store where you purchase the fabric.
Once you have all the necessary tools and materials, you’ll be ready to move on to the next step of replacing the fabric on your electric awning. Stay tuned for the next section, where we’ll walk you through the process of removing the old fabric.
2.1 List of Tools Required
When it comes to gathering the necessary tools and materials for a project, it’s important to have everything you need on hand before you get started. In the case of this particular project, there are a few key tools that you’ll need to ensure successful completion. First and foremost, you’ll need a good quality drill.
This will be essential for drilling holes and securing screws in various materials. It’s also a good idea to have a set of screwdrivers in different sizes and types. These will come in handy for assembling and disassembling furniture and other items.
Additionally, having a tape measure, level, and hammer will be essential for ensuring accurate measurements and straight lines. A set of pliers will also be useful for gripping and bending wire, while a utility knife will come in handy for cutting materials such as fabric or carpet. Finally, don’t forget about safety equipment, such as goggles and gloves, to protect yourself while working on your project.
By having these essential tools on hand, you’ll be well-equipped to tackle any DIY project that comes your way. So gather up your tools and get ready to start creating!
2.2 List of Materials Required
Tool Kit for Home Maintenance. When it comes to home maintenance, having the right tools is essential. These tools will help you tackle various repairs and projects around the house, saving you time and money.
Here is a list of some essential tools you should have in your tool kit for home maintenance. Firstly, a good set of screwdrivers is a must-have. You will need both flathead and Phillips head screwdrivers as they are commonly used for a variety of tasks, from tightening loose screws to assembling furniture.
Secondly, a hammer is an essential tool for any homeowner. Whether you need to hang a picture frame or fix a loose nail, a hammer will always come in handy. Next, a tape measure is crucial for measuring distances accurately.
This tool is essential when it comes to resizing curtains or determining the dimensions of a new piece of furniture. A utility knife is another essential tool for home maintenance. Whether you need to open packages, cut through materials, or trim carpet, a utility knife will always prove useful.
Having a set of pliers is also essential for any homeowner. These versatile tools can be used for gripping, twisting, and cutting, making them ideal for a variety of tasks. Finally, a cordless drill is a game-changer for any DIY enthusiast.
Whether you need to hang shelves, assemble furniture, or even drill holes, a cordless drill will make your life much easier. By having these essential tools in your toolkit, you will be well-equipped to tackle any home maintenance project that comes your way. Remember, investing in good quality tools will pay off in the long run, saving you time, effort, and money in the future.
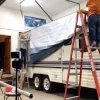
Section 3: Removing the Old Awning Fabric
Now that we’ve gathered all the necessary tools, it’s time to remove the old awning fabric and get started on the replacement process. Removing the old fabric can be a bit tricky, but with some patience and careful maneuvering, you’ll have it off in no time. It’s important to first disconnect the power source to ensure your safety.
Next, locate the screws or bolts that are holding the fabric in place. Carefully unscrew or unbolt them, being mindful not to damage the surrounding hardware. Once the screws or bolts are removed, gently pull the fabric out of the awning rail.
Take note of any clips or fasteners that may need to be removed as well. With a bit of finesse, the old fabric should come off smoothly. Now that you have cleared the way, it’s time to move on to the next step: measuring and cutting the new fabric!
3.1 Disconnecting the Motor or Power Source
disconnecting the motor or power source, removing the old awning fabric. In order to remove the old awning fabric, one of the first steps you’ll need to take is disconnecting the motor or power source. This is an important safety measure to ensure that no one gets hurt while you’re working on the fabric.
Depending on the type of awning you have, disconnecting the motor or power source may involve simply turning off the power at the breaker box, or it may require more complex steps. For example, if your awning is motorized, you may need to locate the power switch on the motor and turn it off. If you can’t find a power switch on the motor, you may need to use the awning’s control panel to power down the motor.
It’s always a good idea to consult the manufacturer’s instructions for your specific awning model to ensure you’re disconnecting the power properly. Once you’ve safely disconnected the motor or power source, you can move on to the next step of removing the old fabric.
3.2 Unrolling and Unfastening the Awning
awning fabric replacement, unrolling and unfastening the awning, removing the old awning fabric In this section of the awning fabric replacement process, we’ll be focusing on unrolling and unfastening the awning. Once you’ve safely climbed up the ladder and secured yourself, it’s time to carefully unroll the awning fabric. This can be a bit tricky, as the fabric may be tightly wound or caught on the roller.
Gently tug at the fabric, making sure not to pull too hard or forcefully, as this could cause damage to the awning or surrounding structure. Take your time and be patient, using your hands to guide the fabric as it unfurls. Once the fabric is fully unrolled, you can move on to unfastening it from the awning frame.
Depending on the type of awning you have, this may involve removing screws, clips, or other fasteners. Be sure to keep track of any hardware you remove, as you’ll need it when attaching the new fabric. Take note of any special instructions provided by the manufacturer and follow them closely to avoid any unnecessary complications.
With each fastener removed, the old awning fabric will slowly become free from the frame, ready to be replaced with a fresh new fabric.
3.3 Removing the Fabric from the Awning Frame
In this section, we will go over the steps for removing the old fabric from the awning frame. This can be a bit tricky, but with the right tools and a little patience, it can be done. First, make sure the awning is fully extended and secure.
This will give you better access to the fabric and make it easier to remove. Start by locating the screws or fasteners that hold the fabric in place. These are usually located on the sides or top of the frame.
Use a screwdriver or wrench to loosen and remove them. Once the fasteners are removed, carefully slide the fabric out of the groove in the frame. Be gentle to avoid tearing the fabric or damaging the frame.
Once the fabric is removed, you can take a closer look at its condition. If it’s still in good shape, you may be able to reuse it. However, if it’s worn or damaged, it’s best to replace it with a new one.
Removing the old fabric is an important step in the awning replacement process, so take your time and be careful.
Section 4: Installing the New Awning Fabric
Installing the new awning fabric on your electric awning is a straightforward process that can be done by following a few simple steps. First, you’ll want to gather all the necessary tools and materials, including a screwdriver, a ladder, and the new fabric for your awning. Next, you’ll need to extend the awning fully and locate the screws that hold the old fabric in place.
Remove these screws using a screwdriver, being careful not to drop them or lose them. Once the old fabric is removed, you can then attach the new fabric by aligning it with the awning and securing it with the screws. Make sure the fabric is taut and evenly stretched across the frame.
Finally, test the awning to ensure that it is working properly and adjust the fabric if necessary. With a little bit of time and effort, you can easily replace the fabric on your electric awning and give it a fresh new look.
4.1 Preparing the New Awning Fabric
awning fabric installation, prepare new awning fabric, installing awning fabric When it comes to installing a new awning fabric, preparation is key. Before you even begin the installation process, it’s essential to properly prepare the fabric. First, start by laying the new fabric out on a clean, flat surface.
Make sure there are no wrinkles or creases, as these can affect the overall appearance and functionality of your awning. Next, check for any defects or imperfections in the fabric. Look for tears, rips, or loose stitching that could compromise the durability of your awning.
If you come across any issues, it’s best to address them before proceeding with the installation. Once you’ve inspected the fabric, you can then measure and cut it to the appropriate size for your awning. Remember to leave a little bit of excess fabric on each side to ensure a snug fit.
By taking the time to properly prepare your new awning fabric, you can ensure a smooth and successful installation process.
4.2 Attaching the New Awning Fabric to the Frame
attaching awning fabric to frame, installing new awning fabric, replacing awning fabric, attaching fabric to awning frame Once you have removed the old, worn-out fabric from your awning frame (as explained in the previous section), it is time to attach the new fabric. This step is crucial in ensuring that your awning functions properly and looks great. First, lay out the new awning fabric on a flat surface.
Make sure it is oriented correctly, with the pattern or design facing up if applicable. Next, position the frame above the fabric, ensuring that it lines up correctly. Take note of any special markings or features on the fabric that should align with specific parts of the frame.
Now it’s time to secure the fabric to the frame. Starting from one end, use a staple gun or other appropriate fasteners to attach the fabric to the frame. Begin by attaching the corners first, making sure they are firmly in place.
Then, work your way along each side, spacing the fasteners evenly. As you attach the fabric, be careful to keep it taut and smooth. Smooth out any wrinkles or creases as you go, to ensure a neat and professional-looking finish.
Take your time with this step, as a well-attached fabric will guarantee the longevity and functionality of your awning. Once the fabric is securely attached to the frame, double-check all the fasteners to ensure they are properly in place. Give the fabric a gentle tug to ensure it is secure and won’t come loose easily.
Finally, trim off any excess fabric if necessary, being careful not to cut too close to the fasteners. Congratulations! You have successfully attached the new awning fabric to your frame. With a little bit of time and effort, you have transformed your old awning into a fresh and stylish feature that will enhance your outdoor space.
4.3 Rolling Up and Fastening the New Awning
To install the new awning fabric, the next step is to roll up and fasten the awning. This may seem simple enough, but it’s important to do it correctly to ensure a secure and sturdy installation. Start by rolling up the new fabric tightly and evenly, making sure there are no wrinkles or folds.
Once it’s rolled up, secure it in place using the straps or buckles provided with your awning. These straps should be tightened snugly to hold the fabric in place. Double-check the tightness to ensure it won’t come undone while in use.
By following these steps, you can ensure a smooth and successful installation of your new awning fabric.
Section 5: Testing and Adjusting the Awning
One crucial step in replacing the fabric of an electric awning is testing and adjusting it once the installation is complete. After all, you want to make sure that everything is functioning properly before you fully enjoy your new awning. To start, double-check that the fabric is securely attached to the frame and aligned correctly.
This will prevent any unnecessary wear and tear on the fabric. Next, you’ll want to test the motor and electronics by extending and retracting the awning a few times. This will help you identify if there are any issues with the motor or if the fabric is catching on anything.
Make sure to also check the angle and pitch of the awning to ensure it provides optimal shade and protection. If necessary, adjust the arm tension or the length of the awning to achieve the desired position. By thoroughly testing and adjusting your electric awning, you can be confident that it will provide you with years of reliable use and enhance the functionality of your outdoor space.
5.1 Reconnecting the Motor or Power Source
reconnecting the motor, power source, testing, adjusting, awning
5.2 Operating the Awning to Test Motor Function
operating the awning, test motor function, adjusting the awning. In this section, we will discuss how to test the motor function of your awning. Once you have installed the awning and made any necessary adjustments, it’s important to ensure that the motor is working properly.
To begin, make sure that the awning is fully retracted before testing the motor function. This will prevent any accidents or damage to the awning. Next, locate the switch or remote control that operates the motor.
Depending on the type of awning you have, this could be a physical switch on the wall or a remote control device. Once you have located the switch, turn it on and observe the awning. It should begin to extend smoothly and without any issues.
Pay attention to any strange sounds or jerky movements, as these could indicate a problem with the motor. If the awning extends properly, allow it to fully extend before retracting it. Again, pay attention to any issues such as slow movement or unusual sounds.
If you notice any problems during the operation of the awning, you may need to adjust the motor. Refer to the manufacturer’s instructions for specific information on adjusting the motor. It’s important to follow these instructions carefully to avoid damaging the awning or motor.
Testing and adjusting the motor of your awning is an essential step in ensuring its proper functioning. By taking the time to perform these tests, you can identify any issues early on and address them before they become bigger problems. This will help prolong the lifespan of your awning and keep it working smoothly for years to come.
5.3 Adjusting the Awning Tension and Alignment
Awning tension and alignment are crucial aspects of ensuring that your awning operates smoothly and effectively. When your awning is properly tensioned, it will be taut and free from wrinkles or sagging, allowing it to provide maximum shade and protection. To adjust the tension, start by locating the tension adjustment bolts on both ends of the awning roller.
Using an awning rod or a socket wrench, you can turn these bolts clockwise to increase the tension or counterclockwise to decrease it. It’s essential to make small adjustments and test the tension after each turn to avoid over-tightening. As for the alignment, you need to ensure that the awning fabric is parallel to the ground when fully extended.
If it’s not aligned correctly, you can adjust its side arms by loosening the mounting bolts and sliding them slightly to the left or right. Once adjusted, tighten the bolts again to secure the arms in place. By regularly testing and adjusting the tension and alignment of your awning, you can extend its lifespan and enjoy its benefits for years to come.
Conclusion: Enjoy Your New Awning Fabric
So there you have it, a step-by-step guide on how to replace electric awning fabric. Not only will this save you money, but it will also give you a sense of accomplishment and bragging rights. With a little bit of time and effort, you can transform your old, worn-out fabric into a fresh and stylish awning that will make your neighbors green with envy.
So go ahead, grab your tools and get to work – your new and improved electric awning fabric awaits!”
FAQs: Common Questions About Replacing Electric Awning Fabric
Looking to replace the fabric on your electric awning? You’re not alone! Many people have questions about how to go about this process. Fortunately, replacing electric awning fabric is a fairly straightforward task that can be done without the need for professional assistance. First, start by measuring the length and width of your awning to ensure you purchase the correct size fabric.
Next, remove the existing fabric by carefully disconnecting it from the awning frame. This may involve removing screws or clips. Once the old fabric is removed, lay out the new fabric on a clean surface and align it with the awning frame.
Secure the fabric in place by reattaching the screws or clips. Finally, test the awning to ensure it opens and closes smoothly. With a little bit of effort, you can have your electric awning looking brand new in no time.
So go ahead and enjoy the shade and protection your awning provides with fresh, updated fabric!
Additional Resources: Helpful Guides and Videos
If you’re looking to replace the fabric on your electric awning, it’s important to have the right resources to guide you through the process. Fortunately, there are several helpful guides and videos available to assist you. These resources provide step-by-step instructions on how to replace electric awning fabric, ensuring that you can complete the task successfully.
From measuring and ordering the new fabric to removing the old fabric and installing the new one, these guides cover it all. Additionally, many videos provide visual demonstrations, making it easier to understand the process and follow along. So whether you’re a seasoned DIYer or a beginner, these additional resources can be invaluable in helping you replace the fabric on your electric awning.
FAQs
How do I replace electric awning fabric?
To replace the electric awning fabric, first, make sure the awning is in the closed position. Then, locate the screws or bolts that attach the fabric to the awning frame and carefully remove them. Once the old fabric is removed, unroll the new fabric and align it with the awning frame. Secure the fabric in place using the screws or bolts, making sure it is evenly tensioned. Finally, test the awning to ensure it opens and closes smoothly.
Can I replace the electric awning fabric myself or do I need professional help?
Yes, you can replace the electric awning fabric yourself if you have some basic DIY skills. However, if you are not comfortable working with tools or if the awning is large and requires more complex installation, it might be best to hire a professional for the job.
How often should I replace the electric awning fabric?
The lifespan of electric awning fabric depends on various factors such as the quality of the fabric, the climate it is exposed to, and regular maintenance. On average, electric awning fabric can last anywhere from 5 to 15 years. However, if you notice signs of wear and tear such as fading, ripping, or loss of functionality, it’s a good indication that it’s time to replace the fabric.
Where can I purchase replacement electric awning fabric?
Replacement electric awning fabric can be purchased from various sources. You can check with the manufacturer or authorized dealers to see if they provide replacement parts. Online retailers and home improvement stores also offer a wide range of options. Make sure to measure your awning carefully and choose a fabric that is compatible with your specific model.
Are there different fabric options available for electric awnings?
Yes, there are different fabric options available for electric awnings. You can choose from materials such as acrylic, vinyl, or polyester, each with its own advantages and drawbacks. Acrylic fabrics are known for their durability and resistance to fading, while vinyl fabrics are waterproof and easy to clean. Polyester fabrics are lightweight and come in a range of colors and patterns. Consider your specific needs and preferences when choosing the fabric for your electric awning.
What are some tips for maintaining the electric awning fabric?
To prolong the lifespan of your electric awning fabric, perform regular maintenance. Clean the fabric periodically using mild soap and water, and avoid using harsh chemicals or abrasive scrubbers. Remove any debris or leaves that may accumulate on the awning to prevent damage. During the winter months or when not in use, retract the awning to protect it from harsh weather conditions. Regularly inspect the fabric for signs of wear and tear and address any issues promptly.
Can I retrofit a manual awning to become electric?
Yes, it is possible to retrofit a manual awning to become electric. However, this process usually requires professional assistance to ensure proper installation and wiring. The manual awning will need to be modified to accommodate the motor and control mechanism. Consulting with a professional can help determine the feasibility of retrofitting your specific awning model.