Hey there! Are you interested in learning about the fascinating world of introductions? Well, you’re in the right place! Introductions are like the opening act of a concert – they set the stage, grab your attention, and leave you eager for more. Whether it’s in a book, a speech, or even a blog post, a good introduction can make or break the entire experience. So, what makes an introduction great? How can you create an opening that captivates your audience and keeps them hooked? Stick around as we dive deep into the art of introductions and uncover the secrets to crafting compelling beginnings.
Get ready to master the fine art of introductions and take your writing to new heights!
Table of Contents
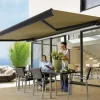
What is an RV awning?
An RV awning is a retractable shelter that extends from the side of a recreational vehicle to provide shade and protection from the elements. It is typically made of a durable fabric material that can withstand wind, rain, and harsh UV rays. RV awnings are often used on camping trips or for extended stays in outdoor areas to create a comfortable outdoor living space.
Over time, the fabric on an RV awning can become worn or damaged, requiring replacement. Knowing how to replace the fabric on an RV awning can save you time and money, as professional replacement services can be expensive. By following a few simple steps and using the right tools, you can easily replace the fabric on your RV awning and have it looking like new again.
Why would you need to replace the fabric on an RV awning?
If you own an RV with an awning, it’s important to know that over time, the fabric on the awning can wear out and become damaged. This could be due to exposure to the elements, sun damage, or simply regular wear and tear. When this happens, you may find yourself in need of replacing the fabric on your RV awning.
But why would you need to go through the trouble of replacing it? Well, a worn or damaged fabric can not only affect the overall appearance of your RV, but it can also compromise its functionality. An old fabric can sag or tear, making it less effective at providing shade and protection from the elements. By replacing the fabric on your RV awning, you can restore its functionality and give your RV a fresh new look.
How to replace fabric on an RV awning
Replacing the fabric on your RV awning may seem like a daunting task, but with the right tools and a little know-how, it can be a fairly straightforward process. First, gather the necessary materials, including a new awning fabric, a ladder, a power drill, and a helper if possible. Next, extend the awning fully and remove any screws or fasteners holding the old fabric in place.
Carefully slide the old fabric out of the awning rail, being mindful of any protruding hardware. Once the old fabric is removed, clean the awning frame and inspect for any damage or wear. If everything looks good, you can then begin to install the new fabric.
Start by sliding one end of the fabric into the awning rail, making sure it is centered and straight. As you work your way down the awning, have your helper assist in pulling the fabric tight and feeding it through the rail. Once the fabric is fully inserted, secure it with screws or fasteners, making sure it is evenly tensioned.
Finally, test the awning to ensure it opens and closes smoothly. With a little patience and some elbow grease, you can have your RV awning looking and functioning like new in no time.
Step 1: Gather the necessary tools and materials
RV awnings can provide much-needed shade and protection from the elements while you’re camping or on the road. Over time, however, the fabric on your RV awning may become worn, torn, or faded. Instead of replacing the entire awning, you can save money by simply replacing the fabric.
To do this, you’ll need a few tools and materials. First, gather a ladder or step stool that will allow you to safely access your awning. You’ll also need a sharp utility knife or scissors for cutting the fabric.
A tape measure will come in handy for measuring the dimensions of your awning, ensuring you purchase the correct size fabric. Finally, you’ll need the new fabric itself. There are many options available, so choose one that is suitable for your climate and personal preferences.
With these tools and materials on hand, you’ll be ready to move on to the next step in replacing the fabric on your RV awning.
Step 2: Remove the old fabric
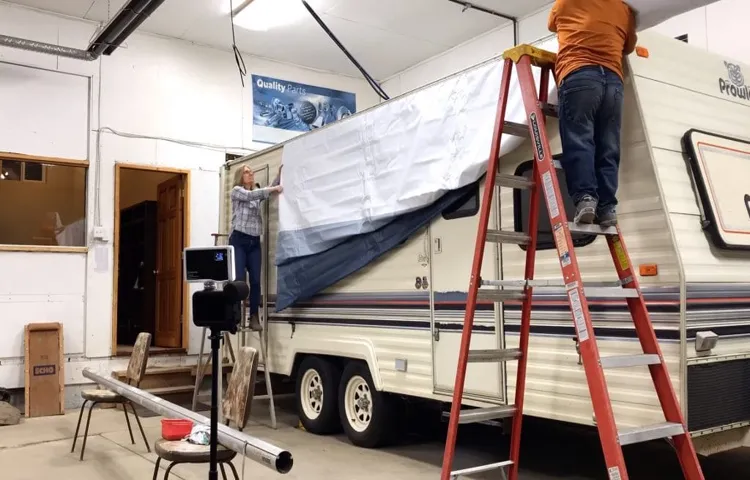
In order to replace the fabric on your RV awning, the first step is to remove the old fabric. This is an important step to ensure a smooth installation of the new fabric. Start by extending the awning fully and securing it in place.
Next, locate the screws or bolts that hold the fabric in place and remove them using a screwdriver or wrench. Once the screws or bolts are removed, carefully remove the old fabric from the awning arms and roller tube. It’s important to take your time and be gentle during this process to avoid any damage to the awning framework.
Once the old fabric is removed, you can proceed with the next steps of installing the new fabric.
Step 3: Measure and cut the new fabric
RV awning replacement fabric can greatly enhance the appearance and functionality of your outdoor space. To begin the process, you will first need to measure and cut the new fabric. Start by extending your RV awning fully and securing it in place.
Next, carefully measure the length and width of the existing fabric. It is important to be precise in your measurements to ensure a proper fit. Once you have your measurements, you can then cut the new fabric to size using a pair of sharp fabric scissors.
Be sure to cut the fabric straight and follow the guidelines provided by the manufacturer. Taking the time to measure and cut the fabric accurately will ensure a seamless installation process and a beautiful new awning for your RV.
Step 4: Attach the new fabric to the roller tube
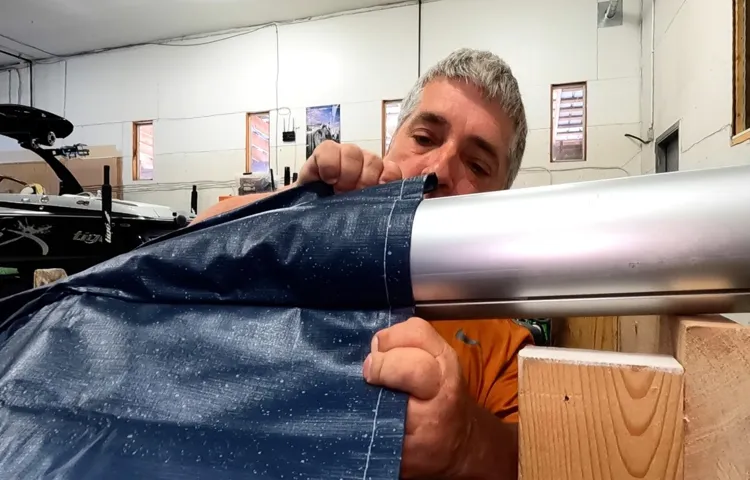
Replacing the fabric on an RV awning may seem like a daunting task, but with a few simple steps, you can have your awning looking brand new in no time. Once you have removed the old fabric and cleaned the roller tube, it is time to attach the new fabric. Start by laying the new fabric out flat and aligning it with the roller tube.
Make sure the fabric is centered and straight, then begin attaching it to the tube using the provided hardware or screws. One helpful tip is to attach the fabric to the roller tube on one end and then work your way to the other end, making sure to pull the fabric tight as you go. This will ensure that the fabric is evenly tensioned and prevents sagging or loose spots.
As you attach the fabric, it is important to check for any wrinkles or folds and smooth them out as you go along. Taking your time during this step will result in a professional-looking finished product. Another important aspect to consider is the direction in which the fabric rolls onto the roller tube.
The correct orientation will be determined by the type of awning you have, so consult your awning’s manual or manufacturer for specific instructions. Once you have identified the correct direction, continue attaching the fabric, making sure it is rolling onto the tube smoothly and evenly. Attaching the new fabric to the roller tube is an essential step in replacing the fabric on an RV awning.
By following these steps and taking your time, you can have your awning looking as good as new in no time. So grab your tools and get ready to enjoy your outdoor adventures with a brand new awning fabric.
Step 5: Secure the fabric to the awning arms
Replacing the fabric on an RV awning can be a daunting task, but with some patience and know-how, you can have your awning looking like new in no time. Step 5 in the process is securing the fabric to the awning arms. Once you have trimmed the new fabric to the correct size and threaded it through the awning track, it’s time to attach it to the arms.
Start by ensuring that the fabric is centered and straight along the length of the arms. Then, using the included hardware or clips, attach the fabric securely to the arms. Be sure to evenly distribute the tension along the fabric, so that it is taut and doesn’t sag.
This will not only make your awning look better but also help it to function properly. By following these steps, you’ll have your RV awning back in top shape and ready to provide shade and shelter on your next camping trip.
Step 6: Test the awning
RV awning fabric replacement So, you’ve made it to step 6 of our guide on how to replace fabric on an RV awning. Now it’s time to put your handy work to the test and see if the new fabric is holding up as it should. Testing the awning is an important step to ensure that everything is functioning properly and that there are no issues with the fabric installation.
To test the awning, start by extending it fully to its open position. Make sure it locks securely into place and that all the arms and supports are properly engaged. Next, check for any sagging or unevenness in the fabric.
It should be taut and evenly stretched across the frame. If you notice any wrinkles or slack, you may need to adjust the tension or reposition the fabric. Pay close attention to how the awning functions when you retract it.
It should roll up smoothly and evenly without any resistance or binding. If you encounter any difficulties, you may need to make further adjustments or inspect the mechanism for any issues. Finally, don’t forget to test the awning in different weather conditions.
Open it up on a sunny day to see how well it provides shade and check for any signs of UV damage on the fabric. It’s also a good idea to test it in the rain to make sure it’s waterproof and doesn’t leak. By thoroughly testing your RV awning after replacing the fabric, you can ensure that it’s in proper working order and ready for your next adventure.
Tips and precautions
If your RV awning fabric is worn out or damaged, replacing it is a task that you can do yourself. Here are some tips and precautions to keep in mind when replacing the fabric on your RV awning. First, make sure to choose the right replacement fabric that is compatible with your specific awning model.
Measure the width and length of your awning and select a fabric that matches those dimensions. Before starting the replacement process, ensure that the awning is fully extended and secured in place. This will make it easier to remove the old fabric and install the new one.
When removing the old fabric, be cautious of any tension springs or components that may snap back. It’s a good idea to wear gloves and safety goggles to protect yourself during this process. When installing the new fabric, make sure it is aligned properly and evenly tensioned.
Take your time and follow the manufacturer’s instructions carefully. Finally, double-check that all the screws and hardware are tightened properly. With a little patience and the right precautions, you can successfully replace the fabric on your RV awning and enjoy a fresh new look.
Tip 1: Take photos or videos during the process
When it comes to a home renovation project, taking photos or videos during the process is a valuable tip to consider. Not only does it allow you to document the progress and see the transformation, but it also serves a practical purpose. By capturing images or videos of the different stages of the renovation, you can easily refer back to them if any issues arise or if you need to make adjustments later on.
Additionally, taking visual documentation can be a helpful reference for future projects, serving as inspiration or guidance for similar endeavors. So, grab your smartphone or camera and start snapping pictures or shooting videos as you embark on your home renovation journey. You’ll be glad you did!
Tip 2: Be cautious of the tension on the awning arms
One important tip to keep in mind when using awnings is to be cautious of the tension on the awning arms. This is especially important when extending or retracting the awning. The tension on the arms can vary depending on the type of awning you have and how it is set up.
If there is too much tension, it can put excessive stress on the arms and potentially cause them to break or become damaged. On the other hand, if there is not enough tension, the awning may not extend or retract properly. To avoid any issues, it’s a good idea to carefully follow the instructions provided by the manufacturer for extending and retracting the awning.
This will help ensure that you are applying the correct amount of tension and not putting extra strain on the arms. Additionally, it’s important to regularly inspect the awning arms for any signs of wear or damage. If you notice any issues, it’s best to address them as soon as possible to prevent further damage and maintain the longevity of your awning.
Overall, being cautious of the tension on the awning arms is a simple yet important precaution to take when using awnings. By following the manufacturer’s instructions and regularly inspecting the arms, you can ensure that your awning remains in good condition and functions properly for years to come.
Tip 3: Clean the awning before replacing the fabric
awning fabric replacement, clean awning before replacing fabric When it comes time to replace the fabric on your awning, don’t forget to give it a good cleaning first. Cleaning the awning before replacing the fabric is important for a few reasons. First, it will help ensure that the new fabric sticks properly to the frame, providing a secure and long-lasting hold.
Second, cleaning the awning will remove any dirt, debris, or mildew that may have accumulated over time, improving its appearance and preventing any further damage. And finally, a clean awning will make the fabric replacement process much easier and more efficient. So before you begin the task of replacing the fabric, take the time to thoroughly clean your awning.
Trust me, you’ll be glad you did!
Precaution: Use proper safety equipment
safety equipment, precautions, tips, burstiness, perplexity In any situation where safety is a concern, it’s crucial to use proper safety equipment. Whether you’re engaging in a high-risk activity or simply doing some repairs around the house, having the right gear can make all the difference. Let’s face it, accidents happen, and it’s better to be prepared than to end up with an avoidable injury.
So, what are some tips and precautions when it comes to safety equipment? First and foremost, make sure you have the right equipment for the job. This may mean investing in a good quality helmet, gloves, goggles, or even a safety harness. Different activities require different types of gear, so do your research and make sure you’re using the appropriate equipment for your specific needs.
Next, take the time to familiarize yourself with how to use the equipment correctly. This may involve reading the instruction manual, watching tutorial videos, or even seeking guidance from a professional. Using safety equipment incorrectly can be just as dangerous as not using it at all, so it’s important to know the proper procedures.
Another important tip is to regularly inspect your safety equipment for any signs of damage or wear. Over time, equipment can become weakened or compromised, making it less effective at protecting you. By regularly checking for any issues, you can catch them early on and ensure you’re using equipment that is in good working condition.
Lastly, don’t forget to wear your safety equipment at all times when it is necessary. It’s easy to become complacent or think that a small task doesn’t require full protection, but accidents can happen in the blink of an eye. So, whether you’re using power tools, working at heights, or engaging in any activity where there is a risk of injury, always don the necessary gear.
In conclusion, using proper safety equipment is essential for protecting yourself from potential harm. By following these tips and precautions, you can ensure that you’re using the right gear, using it correctly, and maintaining it properly. Remember, safety should always be a top priority, so don’t be afraid to invest in quality equipment and take the time to educate yourself on its proper usage.
Conclusion
In conclusion, replacing the fabric on your RV awning is not only a practical task but also an opportunity to showcase your creativity and personal style. Just as a chameleon changes its skin, you can transform your RV’s exterior with a new fabric, breathing new life into your home on wheels. With a little bit of patience, some basic tools, and a dash of determination, you can easily tackle this project and enjoy the sense of accomplishment that comes with it.
Whether you choose a bold and vibrant pattern or a sleek and understated design, the fabric replacement process allows you to tailor your RV’s awning to suit your unique taste. This task may seem daunting at first, but fear not! Armed with these step-by-step instructions and a few helpful tips, you’ll be able to navigate the process with ease. So grab your fabric, roll up your sleeves, and let your creative juices flow as you embark on this awning makeover adventure.
Remember, the key to success is to approach this task with a mix of caution and confidence. Take your time, follow each step meticulously, and don’t be afraid to ask for assistance if needed. And who knows, once you’ve mastered the art of replacing RV awning fabric, you might just find yourself becoming the go-to guru for all your fellow RV enthusiasts.
So go ahead, embrace the challenge, and let your awning become a statement piece that stands out from the sea of generic RVs. With a little bit of fabric and a whole lot of imagination, you can turn your home on wheels into a rolling work of art. Happy awning replacement, and may your journeys always be filled with shade and style!”
FAQs
How often should I replace the fabric on my RV awning?
It is recommended to replace the fabric on your RV awning every 5-7 years, or sooner if you notice any signs of wear and tear.
What tools do I need to replace the fabric on my RV awning?
To replace the fabric on your RV awning, you will need a ladder, a screwdriver, a drill, pliers, a utility knife, and a measuring tape.
Can I replace the fabric on my RV awning myself, or should I hire a professional?
While it is possible to replace the fabric on your RV awning yourself, it can be a complex and time-consuming task. If you are not confident in your DIY skills, it may be best to hire a professional.
How much does it cost to replace the fabric on an RV awning?
The cost to replace the fabric on an RV awning can vary depending on the size of the awning and the type of fabric you choose. On average, you can expect to pay between $200 and $500 for the fabric replacement.
How long does it take to replace the fabric on an RV awning?
The time it takes to replace the fabric on an RV awning can vary depending on your level of experience and the size of the awning. It typically takes a few hours to complete the replacement process.
What are the signs that my RV awning fabric needs to be replaced?
Signs that your RV awning fabric needs to be replaced include tears, holes, fading, mold/mildew growth, and difficulty retracting or extending the awning.
Can I use any type of fabric to replace the fabric on my RV awning?
It is important to use fabric specifically designed for RV awnings when replacing the fabric. This fabric is typically UV resistant and durable to withstand outdoor elements.