Have you noticed that the LED lights on your RV awning have started to fade or flicker? It can be frustrating when these lights don’t work properly, especially when you’re trying to create a warm and inviting atmosphere in your outdoor living space. But fear not, because replacing LED lights on your RV awning is actually a lot simpler than you might think. In this blog post, we’ll walk you through the step-by-step process of replacing these lights, so you can get back to enjoying your outdoor space in no time.
So, let’s dive in and shed some light on this topic.
Table of Contents
Introduction
Looking to add some ambiance to your RV awning? Replacing the LED lights on your awning is easier than you might think. Whether you’re looking for a bright and colorful display or a more subtle and relaxing glow, upgrading your RV awning lights can completely transform your outdoor camping experience. In this guide, we will take you through the step-by-step process of replacing the LED lights on your RV awning, so you can enjoy the perfect lighting setup for your next adventure.
So, let’s dive in and get started on giving your RV awning a little extra sparkle!
Why Do You Need to Replace Your LED Lights on RV Awning?
RV LED lights are a popular choice for many RV owners because of their energy efficiency and long lifespan. However, just like any other lighting system, they will eventually need to be replaced. In this blog post, we will explore why it is important to replace your LED lights on the RV awning and the benefits of doing so.
So, let’s dive in and find out why you should consider replacing your RV awning LED lights.
Types of LED Lights for RV Awning
RV awnings provide shade, protection, and extend the living space outside of your recreational vehicle. Adding LED lights to your RV awning can enhance the ambiance and functionality of your outdoor area. With so many options available, it’s important to understand the different types of LED lights that are suitable for RV awnings.
From string lights to spotlight fixtures, each type offers its own unique benefits and features. In this blog section, we will explore the various types of LED lights for RV awnings and help you choose the perfect option for your needs.
Tools and Materials Needed
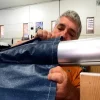
When it comes to replacing LED lights on your RV awning, there are a few tools and materials you’ll need to get the job done. First and foremost, you’ll need a new set of LED lights that are specifically designed for outdoor use. These lights are weatherproof and can withstand the elements, making them perfect for your RV awning.
In addition to the lights, you’ll also need a ladder or step stool to reach the awning, as well as a screwdriver or drill to remove the old lights and install the new ones. It’s also a good idea to have some extra screws or clips on hand, just in case any are lost or damaged during the process. Lastly, having a friend or family member to assist you can be helpful, as they can hold the ladder steady while you work.
With these tools and materials in hand, you’ll be able to easily replace the LED lights on your RV awning and enjoy a beautifully lit outdoor space.
List of Tools
List of Tools When it comes to getting started on a new project, having the right tools and materials is essential. Whether you’re a seasoned DIYer or just starting out, having the necessary tools can make all the difference in the success of your project. So, what exactly do you need? Here’s a list of tools and materials that are commonly used in various DIY projects.
First and foremost, a good set of basic hand tools is a must. This includes a hammer, screwdrivers (both flathead and Phillips), pliers, a utility knife, and a tape measure. These tools will come in handy for a wide range of tasks, from hanging pictures to assembling furniture.
Next, you’ll want to have some power tools on hand. A cordless drill is an absolute necessity and will be your go-to tool for drilling holes and driving screws. Other power tools you might consider include a circular saw for cutting lumber, a jigsaw for more intricate cuts, and a sander for smoothing surfaces.
In addition to hand and power tools, there are also a few other materials you’ll need. A good assortment of screws, nails, and other fasteners will be essential for securing materials together. Adhesive and caulk are also handy to have on hand for bonding and sealing.
Of course, the specific tools and materials you’ll need will depend on the project at hand. For example, if you’re planning to tackle a plumbing project, you’ll need specialty tools like pipe wrenches and a pipe cutter. If you’re working with electrical wiring, you’ll need tools like wire strippers and a voltage tester.
Overall, having the right tools and materials can make your DIY projects much easier and more enjoyable. By investing in a good set of basic hand tools and a few essential power tools, you’ll be well-equipped for a wide range of projects. So, take inventory of what you have and make a list of what you need.
List of Materials
tools and materials needed.
Step-by-Step Guide
If you’re looking to add a little extra sparkle to your RV awning, replacing the LED lights is a simple and fun DIY project. Here’s a step-by-step guide on how to replace LED lights on your RV awning. First, gather your supplies: new LED lights that are compatible with your awning, a ladder or step stool, and a screwdriver.
Start by turning off the power to your RV and disconnecting any existing LED lights. Next, remove the old lights by unscrewing them from the awning frame. Take note of the placement and wiring of the old lights, as you’ll need to replicate this with the new lights.
Once the old lights are removed, carefully attach the new lights to the awning frame using the screwdriver. Ensure that the wires are properly connected and secured. Finally, test the lights to make sure they are working before turning the power back on and enjoying your newly illuminated RV awning.
Follow these steps, and you’ll have a beautifully lit awning in no time!
Step 1: Safety Precautions
When it comes to handling and using power tools, safety should always be the number one priority. Before you begin any project, it’s essential to take some safety precautions to protect yourself and others around you. First, make sure you’re wearing the appropriate protective gear, such as safety goggles, ear protection, and gloves.
It’s also crucial to read the instruction manual for the power tool you’ll be using and familiarize yourself with its proper operation. Before starting any work, inspect the tool for any damages or defects, as using a faulty tool can be dangerous. Additionally, ensure that the work area is clear of any obstacles, and if necessary, use clamps or a vice to secure the material you’ll be working on.
By taking these safety measures, you can significantly reduce the risk of accidents and injuries while using power tools.
Step 2: Turn off the Power
turn off the power
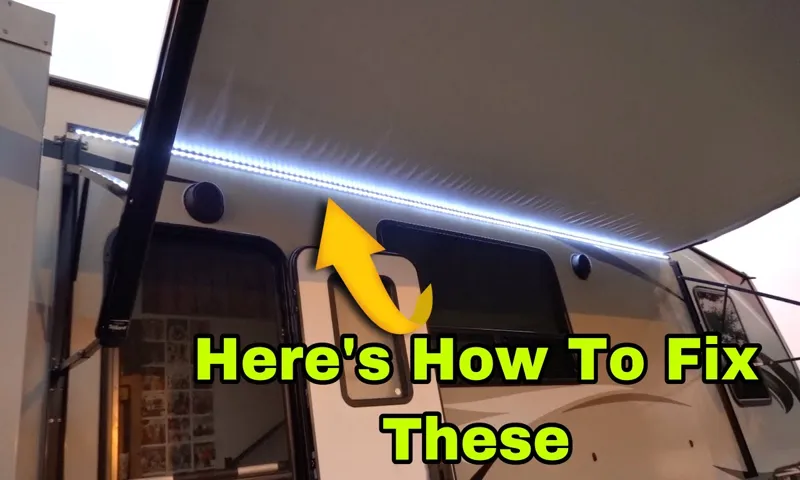
Step 3: Remove the Old LED Lights
led lights, remove old led lights, step-by-step guide, replace led lights
Step 4: Install the New LED Lights
led lights installation
Step 5: Test the LED Lights
LED lights, step-by-step guide, test, install, wiring, electrical connections, brightness, functionality, safety, precautions, DIY project. Now that you have successfully installed the LED lights, the next crucial step is to test them to ensure everything is working as it should. Testing the lights will help you determine if you have correctly installed and wired them, and also check their brightness and functionality.
To test the LED lights, the first thing you need to do is turn on the power supply. Make sure all the electrical connections are secure and properly connected. Check for any loose wires or faulty connections, as this can affect the functioning of the lights.
Once you have checked the connections, turn on the switch and see if the lights come on. Pay close attention to the brightness of the LED lights. If the lights are dim, it could indicate a problem with the power supply or the wiring.
In this case, you will need to double-check your connections and ensure that the power supply can handle the load of the lights. Another important aspect to consider when testing the LED lights is their functionality. Are all the lights working? Do they turn on and off as expected? If any of the lights are not working or are not functioning properly, you may need to troubleshoot the issue further.
This could involve checking the individual LEDs or the circuitry of the lights. When testing the LED lights, it is important to prioritize safety. Make sure to follow all manufacturer instructions and precautions.
If you are unsure about any step or encounter any electrical problems, it is always best to consult with a professional electrician. Remember, working with electricity can be dangerous, so always proceed with caution. By testing the LED lights, you can ensure that your DIY project is a success.
Tips for Replacing LED Lights on RV Awning
If you’re looking to replace the LED lights on your RV awning, you’re in luck! It’s a relatively straightforward process that you can easily do yourself. Here are a few tips to help you along the way. First, make sure you have the right replacement lights for your RV awning.
LED lights come in various sizes and colors, so be sure to choose ones that match your existing lights. Next, locate the access point to the wiring for the lights. This is typically located near the awning roller.
Once you have access to the wiring, carefully disconnect the old lights and remove them from the awning. Finally, connect the new lights, making sure to match the positive and negative terminals correctly. Test the lights before securing them in place, and then reattach everything to the awning.
With a little patience and attention to detail, you’ll have your new LED lights shining brightly on your RV awning in no time!
Tip 1: Check the Voltage Compatibility
Replacing LED lights on an RV awning can be a simple and cost-effective way to enhance the appearance and functionality of your outdoor space. However, before you go out and buy new LED lights, there are a few important considerations to keep in mind. One of the most important tips for replacing LED lights on an RV awning is to check the voltage compatibility.
LED lights come in a variety of voltages, so it’s important to make sure the lights you purchase are compatible with your RV’s electrical system. Using LED lights with the wrong voltage can not only damage the lights themselves but also pose a safety hazard. To ensure compatibility, check your RV’s owner’s manual or consult with a professional before making a purchase.
By taking the time to check the voltage compatibility, you can avoid potential issues and find the perfect LED lights for your RV awning.
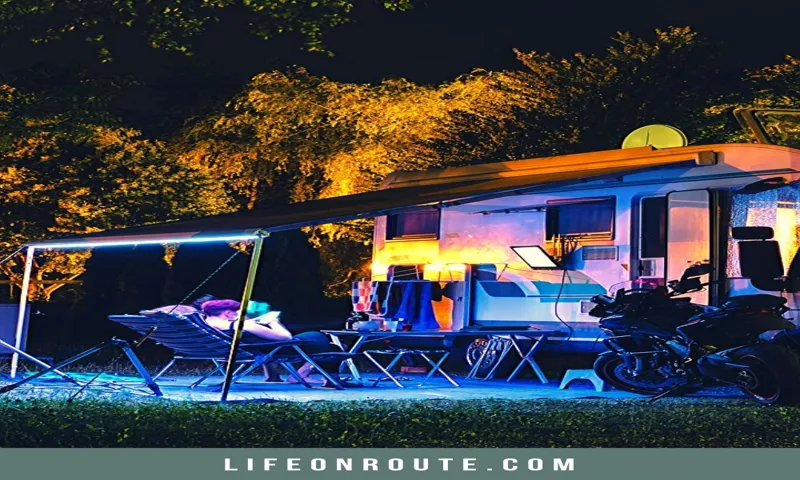
Tip 2: Use Waterproof LED Lights
RV awnings are a great addition to any recreational vehicle, providing shade and protection from the elements. However, over time, the LED lights on the awning may start to fade or become damaged. When it comes time to replace these lights, one important tip to keep in mind is to use waterproof LED lights.
Waterproof LED lights are specifically designed to withstand outdoor conditions, including rain, snow, and humidity. This is especially important for RV awnings, as they are exposed to the elements on a regular basis. By using waterproof LED lights, you can ensure that your awning lights will stay bright and functional for years to come.
These type of LED lights are not only resistant to water, but also to dust and corrosion, making them a durable option for outdoor use. They are typically encased in a waterproof housing, which protects the internal components from moisture and other environmental factors. In addition to their durability, waterproof LED lights also offer a wide range of lighting options.
You can choose from different colors and brightness levels to create the perfect ambiance for your outdoor space. Whether you want to create a relaxing atmosphere or a vibrant party setting, there are waterproof LED lights available to suit your needs. Replacing the LED lights on your RV awning may seem like a daunting task, but with the right tools and a little bit of patience, it can be a straightforward process.
Just make sure to choose waterproof LED lights that are specifically designed for outdoor use. This way, you can enjoy bright, reliable, and long-lasting lighting for your RV awning.
Tip 3: Secure the Wiring
LED lights are a popular choice for RV awnings due to their energy efficiency and long lifespan. However, over time, these lights may need to be replaced. When replacing LED lights on an RV awning, it’s important to secure the wiring to ensure they stay in place and continue to function properly.
Loose or exposed wiring can lead to damaged lights and potential electrical issues. To secure the wiring, start by inspecting the existing wiring for any signs of wear or damage. Replace any frayed or damaged wires before installing the new lights.
When attaching the new lights, use zip ties or adhesive clips to secure the wiring to the awning. This will help prevent the wires from getting tangled or damaged while the RV is in motion. Additionally, make sure to tuck any excess wiring away and out of sight to maintain a clean appearance.
By securing the wiring, you can ensure that your new LED lights will stay in place and continue to provide a bright and welcoming ambiance to your RV awning.
Conclusion
In conclusion, replacing LED lights on an RV awning is not only a bright idea, but also a shining opportunity to flex your handyman skills. By following these simple steps, which are easier than untangling a string of Christmas lights, you can turn any ordinary camping experience into a luminous spectacle that would make even Clark Griswold proud. Whether you’re an experienced electrician or a newbie with a spark of curiosity, now is the time to shed some light on your outdoor adventures.
So ditch the candles and flashlights, and let your RV awning glow with the radiance of a thousand stars – all thanks to your electrifying expertise. Happy camping and may the illumination be with you!”
FAQs
How do I replace the LED lights on my RV awning?
To replace the LED lights on your RV awning, first, make sure to turn off the power supply. Then, carefully remove the old light strip by loosening the screws or clips that hold it in place. Next, disconnect the wires and remove the old light strip. Finally, connect the wires of the new LED light strip and securely install it onto the awning using screws or clips.
What tools do I need to replace the LED lights on my RV awning?
To replace the LED lights on your RV awning, you will need a screwdriver, wire cutters or strippers, electrical tape, possibly a voltmeter or multimeter to test the wires, and the replacement LED light strip.
Can I replace the LED lights on my RV awning myself or do I need a professional?
While it is possible to replace the LED lights on your RV awning yourself, it is recommended to have some basic knowledge of electrical work. If you are uncomfortable or unsure about working with electricity, it is best to hire a professional to ensure the replacement is done correctly and safely.
How often should I replace the LED lights on my RV awning?
The lifespan of LED lights can vary depending on their quality and usage. Generally, LED lights have a long lifespan, and you may not need to replace them often. However, if you notice any flickering or dimming of the lights, it may be a sign that they need to be replaced.
Can I upgrade the LED lights on my RV awning to a different color or style?
Yes, you can upgrade the LED lights on your RV awning to a different color or style. There are various options available in terms of color, brightness, and effects. Just make sure to choose LED lights that are specifically designed for outdoor use and compatible with your RV’s electrical system.
Are there any safety precautions I should take when replacing the LED lights on my RV awning?
Yes, there are a few safety precautions to keep in mind. Always turn off the power supply before starting any electrical work. Make sure to wear protective gloves and eyewear. If you are unsure about any step, refer to the manufacturer’s instructions or consult with a professional.
How do I troubleshoot if the new LED lights on my RV awning are not working?
If the new LED lights on your RV awning are not working, first check if the power supply is turned on. Then, inspect the wiring connections to ensure they are securely connected. You can also use a voltmeter or multimeter to test the voltage at different points of the circuit. If you are still unable to troubleshoot the issue, it is best to consult with a professional.