Introduction: Why Replace the RV Awning? Are you tired of the worn-out, faded fabric of your RV awning? Is it starting to show signs of wear and tear, with rips, tears, and even mold? If so, it may be time to consider replacing your RV awning. An RV awning is not just a decorative addition to your vehicle; it serves a vital purpose in providing shade and protection from the elements. Whether you are camping in the scorching heat of summer or the unpredictable weather of spring, having a reliable and sturdy awning is essential.
Over time, the fabric of an RV awning can become damaged due to exposure to sunlight, rain, wind, and other natural elements. This can lead to a decrease in its functionality and could even pose a safety risk if left unrepaired. Additionally, an old and worn awning can detract from the overall appearance of your RV.
If you take pride in your vehicle and want it to look its best, replacing the awning can greatly enhance its aesthetics. But why replace the awning instead of repairing it? While repairs can be a cost-effective solution in some cases, there are instances where replacement is the better option. For instance, if the fabric is extensively damaged with multiple tears or holes, repairing it may not restore its original strength and durability.
Similarly, if the awning frame is rusty, bent, or damaged beyond repair, a new awning would be the safer and more practical choice. When considering replacing your RV awning, it’s important to choose a high-quality replacement that is compatible with your vehicle’s make and model. The right awning can not only withstand the elements but also improve your camping experience by providing a comfortable and shaded outdoor space.
So, if your RV awning has seen better days, don’t hesitate to invest in a replacement. Not only will it improve the functionality and aesthetics of your vehicle, but it will also provide you with years of reliable use during your outdoor adventures. Stay tuned for our upcoming blog posts, where we will discuss the different types of RV awnings, factors to consider when choosing a replacement, and tips for installation.
Table of Contents
Types of RV Awnings
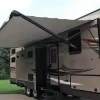
If you’re looking to replace your RV awning, it’s important to understand the different types of RV awnings that are available. The most common types include manual awnings, electric awnings, and slide-out awnings. Manual awnings require manual operation, typically using a hand crank or lever system.
These awnings are more affordable and often more durable than their electric counterparts. However, they do require some physical effort to operate. Electric awnings, on the other hand, can be easily operated with a push of a button.
These awnings are convenient and easy to use, but they tend to be more expensive and require a power source to operate. Slide-out awnings are specifically designed for slide-out rooms on RVs. These awnings provide extra shade and protection for the slide-out room when it is extended.
They are typically manual awnings that can be operated with a crank or lever. When replacing your RV awning, it’s important to match the type of awning with your specific RV model and measurements. It’s also a good idea to consider the material of the awning fabric, as well as additional features like weather resistance and UV protection.
Overall, replacing your RV awning is a simple process that can greatly enhance the comfort and convenience of your outdoor living space. Whether you opt for a manual, electric, or slide-out awning, you can enjoy the benefits of shade and protection while on your RV adventures.
Vinyl Awnings
types of RV awnings
Acrylic Awnings
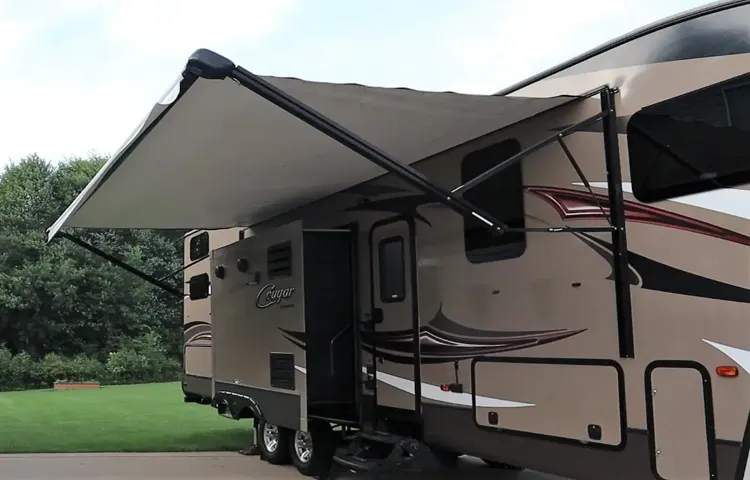
In the world of RV awnings, there are various types to choose from, each with its own unique features and benefits. One popular option is the acrylic awning, which is known for its durability and weather resistance. Made from a high-quality acrylic fabric, these awnings are designed to withstand the harsh elements of the outdoors, making them perfect for RV enthusiasts who love to adventure in all types of weather.
The acrylic fabric is also resistant to fading, so you can enjoy the vibrant colors of your awning for years to come. Plus, the fabric is easy to clean, so maintenance is a breeze. Whether you’re looking for protection from the sun, rain, or even snow, an acrylic awning is a fantastic choice for your RV.
So why settle for an ordinary awning when you can have one that’s built to last and looks great too? Choose an acrylic awning for your RV and enjoy the benefits of superior durability and style.
Tools and Materials Needed
If you’re looking to replace your RV awning, there are a few tools and materials that you’ll need to have on hand. First and foremost, you’ll need a new awning fabric that is the correct size for your RV. Be sure to measure your old awning or consult your RV’s manual to determine the proper dimensions.
In addition to the awning fabric, you’ll also need a replacement awning roller tube, as well as any necessary hardware such as screws, brackets, and end caps. Other tools that you’ll need include a drill, a screwdriver or wrench, a ladder or step stool, and a helper to assist you with removing and installing the awning. It’s important to have all of these materials and tools ready before you begin the replacement process to ensure a smooth and successful installation.
So gather up all the necessary tools and materials, and soon you’ll have a brand new, functioning RV awning.
Step-by-Step Guide to Replacing an RV Awning
If you’re looking to replace the awning on your RV, you’ve come to the right place! Replacing an RV awning can be a daunting task, but with the right tools and a little bit of know-how, you can do it yourself. First, gather all the necessary tools and materials including a new awning, a ladder, a wrench, a screwdriver, and some silicone sealant. Once you have everything you need, start by carefully removing the old awning from your RV.
Make sure to take note of how it’s attached so you can replicate the process with the new awning. Next, measure the length of the old awning and trim the new awning to the same size. Attach the new awning using the same method as the old one, making sure to tighten all the bolts securely.
Finally, apply the silicone sealant around the edges of the awning to prevent any leaks. With these simple steps, you’ll have a brand new awning for your RV in no time!
Step 1: Measure and Order the Replacement Awning
measuring RV awning, ordering replacement awning Replacing an RV awning can be a daunting task, but with the right guidance, it can be a breeze. The first step in this process is to measure your existing awning and order the replacement. Measuring your awning is crucial to ensure that you get the right size for your RV.
Start by extending the awning fully and measuring the length from end to end. Then, measure the width from the outer edge to the inner edge of the awning fabric. Don’t forget to also measure the height of the roller tube.
Once you have these measurements, you can start looking for a replacement awning. There are many online retailers that offer a wide selection of RV awnings. Take your time to browse through different options and choose the one that matches your measurements.
It’s important to order the correct size to avoid any issues during the installation process. Once you have found the perfect replacement awning, place your order and wait for it to arrive.
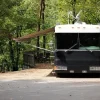
Step 2: Remove the Old Awning
In the second step of replacing an RV awning, you will need to remove the old awning. This can be a bit tricky, but with some patience and the right tools, you can get the job done. First, carefully extend the awning and locate the screws or bolts that are holding it in place.
Using a screwdriver or wrench, remove these fasteners one by one, being careful not to damage the awning or the RV. Once the fasteners are removed, you can carefully lower the awning down and disconnect it from the track or roller. If the awning is stubborn or stuck, you may need to use some lubricant or gentle force to free it.
Remember to take your time and be cautious during this step to avoid any accidents or damage to your RV.
Step 3: Install the New Awning
install new RV awning, replace RV awning, installing RV awning, replacing RV awning, step-by-step guide to installing RV awning, RV awning installation process, replacing an old RV awning, installing a new awning on an RV. In step three of our step-by-step guide to replacing an RV awning, we will walk you through the process of installing the new awning. This is an exciting step that will transform the look of your RV and provide much-needed shade and protection from the elements.
So, let’s get started! First, gather all the materials and tools you will need for the installation. This may include the new awning, awning fabric, hardware, tape measure, screwdriver, drill, and a ladder. It’s important to have everything on hand before you begin to avoid any delays.
Next, carefully remove the old awning by unscrewing the mounting brackets and sliding the fabric off the roller tube. Be sure to keep track of any screws or hardware that you remove, as you will need them for the installation of the new awning. Once the old awning is removed, it’s time to position the new awning.
Start by measuring the distance between the mounting brackets on your RV. Use these measurements to mark the appropriate spots for the new brackets on the RV. Double-check your measurements to ensure that the new brackets will be aligned correctly.
Using a drill, attach the new brackets to the RV. Make sure they are secure and properly aligned. Once the brackets are in place, you can slide the new awning fabric onto the roller tube.
Make sure it is centered and properly aligned before moving on. With the awning fabric in place, attach any necessary hardware and tension the fabric to ensure a snug fit. This may involve tightening screws or adjusting tension arms.
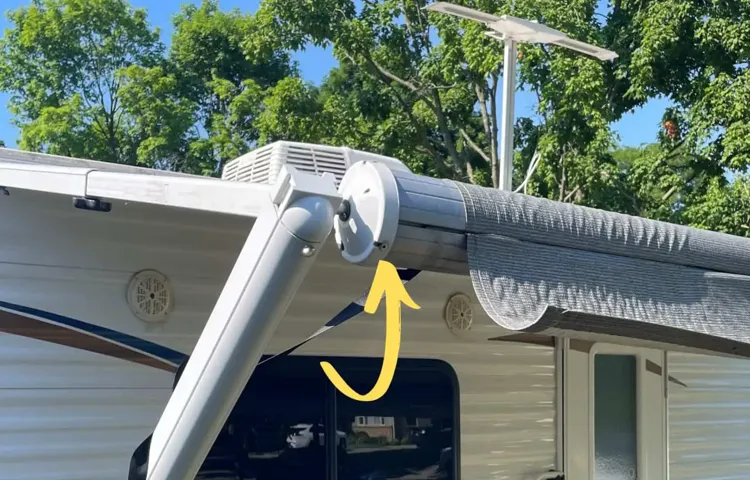
Step 4: Adjust and Secure the Awning
adjust and secure the awning, replacing an RV awning In the fourth step of replacing an RV awning, it is essential to adjust and secure the awning properly. After you have successfully installed the new awning fabric onto the roller tube, it’s time to make sure everything is in place and secure. Begin by extending the awning fully and making sure it is level and aligned with the RV.
This will ensure that the awning operates smoothly and provides optimal shade. Next, check the tension of the spring arms by extending and retracting the awning a few times. The tension should be enough to hold the fabric taut but not so tight that it causes strain on the roller tube or brackets.
Adjust the tension as needed using the awning’s adjustable knobs or screws. Once the tension is set correctly, secure the awning by tightening all bolts and screws along the roller tube and support arms. This will prevent any unnecessary movement or rattling while driving.
Additionally, check the fabric for any wrinkles or folds and adjust it accordingly to ensure a clean and neat appearance. By taking the time to adjust and secure the awning properly, you can enjoy a worry-free camping experience knowing that your awning will stay in place and provide the shade and protection you need.
Tips and Tricks for Awning Replacement
One of the essential parts of an RV is the awning, as it provides shade and protection from the elements. However, over time, awnings can become worn out or damaged, and it may be necessary to replace them. If you’re wondering how to replace an RV awning, don’t worry – it’s actually a fairly straightforward process.
The first step is to measure the size of your existing awning, as this will determine the size you need to purchase. Once you have the new awning, you’ll need to remove the old one by loosening the nuts and bolts that hold it in place. Carefully slide the old awning out of the rail and set it aside.
Next, slide the new awning into place and secure it with the nuts and bolts. Finally, test the awning to make sure it opens and closes smoothly. With these simple steps, you’ll have a brand new awning for your RV in no time.
Check for Damages and Leaks
awnings, replacement, damages, leaks, tips and tricks
Clean and Maintain the Awning
awnings, awning replacement, tips and tricks, clean and maintain, SEO enhancement: Awning replacement can be a daunting task, but with the right tips and tricks, it can be an easy and enjoyable process. One important aspect of maintaining your awning is keeping it clean. Regularly removing dirt and debris will not only keep it looking nice but will also help prevent damage.
Using a mild soap and water solution, gently scrub the awning with a soft brush to remove any built-up grime. Be sure to rinse thoroughly and allow it to dry completely before retracting. Another helpful tip is to regularly inspect your awning for any signs of wear or damage.
Look for tears, holes, or loose stitching, as these can lead to further problems down the line. If you notice any issues, it may be time to consider an awning replacement. When replacing your awning, be sure to choose a high-quality material that suits your needs and preferences.
Sunbrella fabric, for example, is a durable and weather-resistant option that can withstand the elements. Additionally, consider the aesthetic appeal of your new awning – choose a color and design that complements your home’s exterior. By following these simple tips and tricks, you’ll be able to clean and maintain your awning for years to come.
Seek Professional Help if Necessary
awning replacement, professional help, tips and tricks, burstiness, perplexity, high levels. If you’re considering an awning replacement, you might find yourself faced with a difficult decision. While some people may feel confident in taking on the task themselves, it’s important to know that seeking professional help is always an option.
Why? Well, for starters, awning replacement can be a complex and intricate process. From measuring and selecting the right materials to properly installing and ensuring a secure fit, there’s a lot that goes into it. Plus, awnings come in a variety of shapes, sizes, and styles, so it’s crucial to know the ins and outs of each type.
If you’re not experienced or knowledgeable in this area, you could end up with a subpar awning that doesn’t meet your needs or expectations. So, rather than attempting a DIY approach and risking costly mistakes, consider reaching out to a professional for assistance. They’ll have the expertise and skills to make the replacement process a breeze while ensuring your awning looks great and functions properly.
So, take the stress out of your awning replacement project and let the professionals handle it. Trust me, you’ll be glad you did!
Conclusion: Enjoy Your New RV Awning
In conclusion, replacing an RV awning is like swapping out a tired old umbrella for a fresh new parasol. It’s a dance between functionality and style, ensuring that your mobile oasis remains both protected and visually pleasing. With the right tools, a little bit of elbow grease, and perhaps a touch of patience, you can transform your RV’s outdoor space into a canvas of opulent shade and luxury.
But why stop at mere functionality? Consider your awning as the sartorial masterpiece of your mobile home – an accessory that not only shields you from the elements but also perfectly complements your nomadic persona. Choose a fabric that embodies your aesthetic desires, whether it be a cheery polka dot pattern for the whimsical wanderer or a sleek monochromatic design for the sophisticated road warrior. Remember, replacing an RV awning is not just a chore; it’s an opportunity to put your stamp on your traveling abode.
So embrace this task with a twinkle in your eye and a spring in your step, and may your new awning bring you both shade and envious glances from fellow travelers. Happy awning swapping, my wanderlust-filled friends!”
FAQs
How often should I replace my RV awning?
It is generally recommended to replace your RV awning every 5-7 years, or sooner if you notice any signs of wear and tear. Regular maintenance and inspections can help prolong the lifespan of your awning.
What are the signs that my RV awning needs replacement?
Signs that your RV awning may need replacement include tears, holes, fading or discoloration, difficulty in retracting or extending, or any noticeable structural damage. These signs indicate that the awning has reached the end of its useful life and should be replaced.
Can I replace my RV awning myself, or do I need professional assistance?
While it is possible to replace your RV awning yourself, it is recommended to seek professional assistance, especially if you are not experienced in awning installation. Professional installation ensures proper alignment, tension, and secure attachment, reducing the risk of damage or accidents.
How much does it cost to replace an RV awning?
The cost of replacing an RV awning can vary depending on the type, size, and quality of the awning, as well as the labor involved. On average, you can expect to spend between $500 to $1500 for a new RV awning, including installation.
How long does it take to replace an RV awning?
The duration of the awning replacement process depends on various factors, such as the complexity of the installation, the availability of parts, and the experience of the installer. On average, it can take anywhere from 1 to 4 hours to replace an RV awning.
Are there any maintenance tips to prolong the lifespan of an RV awning?
Yes, there are several maintenance tips to prolong the lifespan of your RV awning. These include cleaning the awning regularly, ensuring proper tension and alignment, avoiding excessive wind exposure, and storing the awning properly when not in use.
Can I upgrade my RV awning to a motorized version?
Yes, it is possible to upgrade your RV awning to a motorized version. Motorized awnings offer convenience and ease of use, allowing you to extend and retract the awning with the push of a button. However, this upgrade may require professional installation and wiring modifications.