Hey there! Are you curious about the world of blogging and want to learn more about how to write captivating blog intros? Well, you’ve come to the right place! In this blog intro, we’ll be diving into the art of crafting an engaging and SEO-optimized introduction that will leave your readers hooked from the get-go. Think of a blog intro as the front door to your content. It’s the first impression you make on your readers, and just like a well-decorated entrance, it should entice them to step inside and explore further.
But how do you create an intro that captivates your audience and compels them to keep reading? Well, my friend, it’s all about striking the right balance between intrigue and clarity. You want to pique their curiosity while also providing them with a clear idea of what they can expect from your blog post. Burstiness is key here – you want to create a sense of excitement and anticipation, leaving your readers hungry for more.
Now, when it comes to SEO optimization, your intro plays a crucial role. It needs to incorporate relevant keywords that highlight the topic of your blog post. But here’s the catch – you want to seamlessly integrate those keywords in a way that feels natural and doesn’t disrupt the flow of your writing.
Trust me, Google will appreciate it, and so will your readers. To achieve this, consider incorporating rhetorical questions that tap into the curiosity of your readers. Analogies and metaphors can also be incredibly effective in painting a vivid picture and making complex concepts more relatable.
So, let your creativity shine! Remember, brevity is key. Your intro should be concise and to the point, capturing the essence of your blog post without giving away too much. This will make your readers curious to explore further and eager to discover what lies ahead.
So, whether you’re a seasoned blogger looking to up your intro game or a beginner eager to make a splash in the blogosphere, this blog will equip you with the tools and knowledge to write captivating blog intros. Get ready to unleash the power of your words and captivate your readers from the very first sentence. Let’s dive in!
Table of Contents
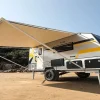
Benefits of Replacing RV Awning Fabric
If your RV awning fabric is starting to show signs of wear and tear, it may be time to consider replacing it. While this task may seem daunting, it is actually something you can do yourself with a few basic tools and some patience. By replacing your RV awning fabric, you can enjoy a number of benefits.
First and foremost, a new awning fabric will provide better protection from the sun and other elements. This means you can enjoy your outdoor living space without worrying about sunburn or rain showers. Additionally, replacing your awning fabric can enhance the overall appearance of your RV.
A fresh, clean awning can make your RV look newer and more inviting. Finally, replacing your awning fabric can also save you money in the long run. By doing it yourself, you can avoid expensive repair costs and potentially extend the lifespan of your awning.
So why not take on this DIY project and reap the benefits of a new RV awning fabric?
Enhanced Durability
RV awnings are an important feature of any recreational vehicle, providing shade and protection from the elements. Over time, however, the fabric on these awnings can become worn, torn, and faded. This not only affects the appearance of the RV, but it also diminishes the functionality and durability of the awning.
That’s why it’s important to consider replacing the RV awning fabric. One of the major benefits of doing so is enhanced durability. New awning fabric is made with advanced materials that are designed to withstand harsh weather conditions, UV rays, and general wear and tear.
This means that not only will the new fabric look better and function better, but it will also last longer, saving you money in the long run. So, if you’re tired of dealing with a worn-out and unreliable RV awning, consider replacing the fabric to enjoy the benefits of enhanced durability.

Improved Appearance
Replacing the fabric on your RV awning can do wonders for improving the overall appearance of your RV. Over time, the fabric on your awning can become faded, torn, or stained, making your RV look worn and outdated. By replacing the fabric, you can give your RV a fresh new look and make it stand out from the crowd.
Not only will a new awning fabric make your RV look better, but it can also increase its value if you ever decide to sell. Plus, with so many different fabric options available, you can customize your awning to match your personal style and make a statement wherever you go. So why settle for a worn-out awning when you can easily replace it and give your RV a much-needed facelift?
Cost Savings
rv awning fabric replacement
Tools and Materials Needed
When it comes to replacing the fabric on your RV awning, it’s definitely a DIY job that you can tackle on your own. All you need are a few tools and materials to get started. First and foremost, you’ll need a replacement fabric that is specifically designed for your RV awning.
This can be found at most RV supply stores or online. Additionally, you’ll need a ladder to reach the top of your RV and a screwdriver to remove any screws or attachments holding the old fabric in place. It’s also helpful to have a friend or family member assist you with the process, as it can be a bit cumbersome to handle the fabric on your own.
Lastly, it’s important to have a clean and clear workspace, as well as some patience and determination. With the right tools and materials, you’ll be able to replace your RV awning fabric in no time.
RV awning fabric
RV awning fabric
Replacement hardware kit
“replacement hardware kit” Tools and materials are the backbone of any project, and when it comes to replacing hardware, having the right tools can make all the difference. Whether you’re a seasoned DIYer or just starting out, there are a few essential items you’ll want to have on hand when tackling a replacement hardware project. First and foremost, a good set of screwdrivers is a must.
Having both flathead and Phillips head screwdrivers in various sizes will ensure you have the right tool for any type of screw you encounter. Additionally, having a pair of pliers can come in handy for removing stubborn or stripped screws. A small adjustable wrench can be useful for loosening and tightening nuts and bolts, while a tape measure will help ensure accurate measurements for replacement hardware.
Finally, a clear workspace, a pencil for marking measurements, and a box or container for organizing and storing your replacement hardware will make the process much smoother. With these tools and materials in hand, you’ll be well-prepared to tackle any replacement hardware project with confidence.
Measuring tape
measuring tape, tools and materials needed When it comes to measuring, having a reliable measuring tape is essential. Whether you’re a professional carpenter or just someone who likes to do a DIY project every now and then, a measuring tape is a must-have tool. But what exactly do you need to have on hand to use a measuring tape effectively? Well, the answer is quite simple.
All you really need is the measuring tape itself and something to measure. You don’t need any fancy equipment or complicated materials. Just a good quality measuring tape and a solid surface to measure on.
The measuring tape is designed to be flexible and lightweight, making it easy to use and carry around. So, whether you’re measuring a piece of wood for a new shelf or taking your own measurements for a sewing project, having a measuring tape in your toolbox is a no-brainer.
Utility knife
utility knife, tools and materials needed
Screwdriver
screwdriver, tools and materials needed, DIY projects, home repairs, tightening screws. If you’re planning to tackle some DIY projects or take care of home repairs, then one tool you absolutely need to have is a screwdriver. A screwdriver is a versatile and handy tool that allows you to tighten screws and fasten or loosen various types of hardware.
To use a screwdriver effectively, there are a few key tools and materials you’ll need. First, make sure you have a good selection of screwdrivers. There are different types and sizes of screws, so having a variety of screwdrivers will ensure you have the right tool for the job.
Look for screwdriver sets that include both flathead and Phillips head screwdrivers, as these are the most commonly used types. Next, consider getting a magnetic screwdriver. This type of screwdriver has a magnetic tip that can hold screws in place while you’re working.
This can be especially useful when working in tight spaces or when using small screws. With a magnetic screwdriver, you won’t have to worry about dropping and losing screws. In addition to screwdrivers, having a set of precision screwdrivers can also come in handy.
These are smaller screwdrivers that are specifically designed for delicate work, such as repairing electronics or removing tiny screws from eyeglasses. Having a set of precision screwdrivers will ensure you have the right tool for any small or intricate task. Lastly, make sure you have a good set of bits for your screwdrivers.
Bits are interchangeable tips that can be placed in the screwdriver’s handle. Having a variety of bits will allow you to tackle different types of screws, including hex, Torx, and star screws. By having a selection of screwdrivers, including a magnetic screwdriver, precision screwdrivers, and a set of bits, you’ll be well-equipped to handle a wide range of DIY projects and home repairs.
Needle and thread (or sewing machine)
When it comes to sewing, one of the most essential tools you’ll need is a needle and thread, or a sewing machine if you prefer. These tools are the very foundation of any sewing project and allow you to bring your creative vision to life. Whether you’re mending a tear in your favorite shirt or creating a brand new garment from scratch, having the right tools at hand is crucial.
A needle and thread are versatile and can be used for various tasks such as hand sewing buttons, hemming garments, or creating intricate embroidery designs. On the other hand, a sewing machine can speed up the sewing process and make it easier to handle larger projects. With the help of a machine, you can achieve precise and professional-looking stitches without the need for a lot of manual effort.
So, whether you prefer the traditional approach of using a needle and thread or the convenience of a sewing machine, make sure you have these tools in your sewing arsenal. They will undoubtedly be your best friends throughout your sewing journey.
Preparing for the Replacement
Replacing the fabric on your RV awning can be a daunting task, but with a little know-how and some basic tools, you can save yourself some money and do it yourself. First, you’ll want to measure your existing awning fabric to ensure you purchase the correct replacement size. Next, remove any screws or bolts holding the awning fabric in place and carefully remove the old fabric.
Once the old fabric is removed, lay out the new fabric and align it with the roller tube. Use a screwdriver to secure the new fabric in place, making sure to tighten the screws or bolts securely. Finally, extend the awning and make any necessary adjustments to ensure it is evenly tensioned.
With a little patience and some basic DIY skills, you can have your RV awning looking as good as new in no time.
Removing the Old Fabric
Preparing for the Replacement – Removing the Old Fabric So, you’ve decided it’s time to give your furniture a fresh look by replacing the old fabric. Congratulations! You’re about to embark on a fun and rewarding project that will breathe new life into your favorite pieces. But before you can start with the exciting part of selecting the new fabric, you need to remove the old one.
Removing the old fabric is an essential step in preparing your furniture for the replacement. It’s like clearing the canvas before you can start creating your masterpiece. Not only does it give you a clean slate to work with, but it also ensures that the new fabric will fit smoothly and look its best.
Now, you might be wondering how to remove the old fabric without damaging your furniture. The good news is that it’s easier than you may think. Start by carefully inspecting the piece to figure out how the fabric is attached.
Typically, you’ll find staples, nails, or even glue holding it in place. Once you’ve identified the methods used to secure the fabric, you can begin the removal process. Using a pair of pliers or a staple remover, gently loosen and remove the staples or nails.
Take your time and be patient – it’s important not to rush this step to avoid tearing or scratching the furniture. As you take off the old fabric, make note of any padding or foam that may need to be replaced or repaired. This is also an excellent opportunity to inspect the frame for any signs of wear or damage that may need attention.
Once you’ve removed all the fabric, staples, and nails, give your furniture a thorough cleaning. Use a vacuum cleaner or a brush to remove any dust or debris that may have accumulated over time. This will ensure a clean surface for attaching the new fabric.
Cleaning the Awning Frame
cleaning the awning frame
Measuring and Cutting the New Fabric
Replacing the fabric on your RV awning may seem like a daunting task, but with a little know-how, you can do it yourself. One important step in the process is measuring and cutting the new fabric. Before you begin, make sure you have the appropriate tools on hand, such as a tape measure, fabric scissors, and a straight edge.
Start by extending the awning fully and measuring the length and width of the fabric. Be sure to measure from the inside edge of one arm to the inside edge of the other arm. Once you have your measurements, add an additional 6 inches to each side for hemming and cutting allowances.
Next, lay the new fabric flat on a clean surface and use your straight edge to guide your fabric scissors as you cut along the marked measurements. Take your time with this step to ensure precise and clean cuts. Once the new fabric is cut to size, you can proceed with attaching it to your RV awning.
Determining the Size
When it comes to replacing the fabric on your furniture, one of the first steps is determining the size of the fabric you’ll need. To do this, you’ll want to measure the various dimensions of the furniture piece. Start by measuring the length and width of the seat cushions, as well as the backrest.
Write down these dimensions so you have them handy when it’s time to purchase the fabric. Next, measure the length and width of the arms, if applicable. Don’t forget to account for any curves or angles in the furniture piece, as this will affect the size of the fabric you’ll need.
Once you have all the measurements, it’s time to cut the fabric. Lay your new fabric out on a clean, flat surface and use your measurements to mark out the pieces you’ll need to cut. Make sure to leave some extra fabric on each side for seam allowances.
Then, carefully cut along your markings, using sharp fabric scissors. Taking the time to measure and cut your fabric accurately will ensure a snug and professional-looking fit for your furniture piece.
Cutting the Fabric
When it comes to giving your old furniture a makeover, measuring and cutting the new fabric is a crucial step. To ensure a perfect fit, you’ll need to take accurate measurements of the areas you plan to cover. Start by measuring the length and width of the seat, backrest, and armrests.
Don’t forget to account for any curves or angles in the furniture’s design. Once you have your measurements, it’s time to cut the fabric. Lay the fabric on a flat surface and use a ruler or measuring tape to mark the dimensions you need.
Then, carefully cut along the marked lines. Remember to leave a little extra fabric to account for any mistakes or adjustments you might need to make. With the fabric cut to the right size, you’re one step closer to transforming your furniture into something new and beautiful.
So grab your measuring tools and get ready to bring your vision to life!
Attaching the New Fabric
Now that you have removed the old fabric from your RV awning, it’s time to attach the new fabric. Don’t worry, you can easily replace RV awning fabric by yourself! Start by double-checking that you have the correct size and type of fabric for your specific awning. Lay the new fabric on a clean and flat surface, making sure it is evenly spread out.
Next, locate the groove or track where the fabric will be inserted. Starting at one end, carefully begin sliding the fabric into the groove. Use gentle pressure to ensure it goes in smoothly without any wrinkles or bunching.
As you progress, keep applying pressure and make sure the fabric is aligned properly with the awning frame. Once the fabric is fully inserted, give it a final inspection to ensure it is taut and evenly stretched. Congratulations, you have successfully attached the new fabric to your RV awning!
Inserting the Fabric into the Awning Rail
Awning rail, attaching, fabric Attaching the new fabric to the awning rail is a crucial step in replacing your old, worn-out awning. It might seem like a daunting task, but with the right technique, it can be a relatively straightforward process. The first step is to prepare the new fabric by laying it out flat and ensuring that it is the correct size for your awning.
Once you have confirmed the dimensions, you can begin inserting the fabric into the awning rail. To start, locate the awning rail on your RV or camper. This is the track that runs along the top edge of the awning and is where the fabric will be inserted.
Begin by inserting one end of the fabric into the end of the awning rail. It may be helpful to enlist the assistance of a second person to hold the other end of the fabric while you work. As you insert the fabric into the awning rail, it’s important to ensure that it is straight and evenly threaded.
Take your time and gently guide the fabric into the rail, making sure it doesn’t get caught or tangled along the way. You may need to use a small amount of force to push it in, but be careful not to stretch or damage the fabric in the process. Once the fabric is fully inserted into the awning rail, it’s time to secure it in place.
Depending on the type of awning you have, there may be additional clips or fasteners that need to be attached. Follow the manufacturer’s instructions for your specific awning to ensure a secure fit. Attaching the new fabric to the awning rail is an essential step in the replacement process.
By taking your time and following the correct technique, you can ensure that your new awning fabric is securely in place and ready to provide shade and protection for years to come.
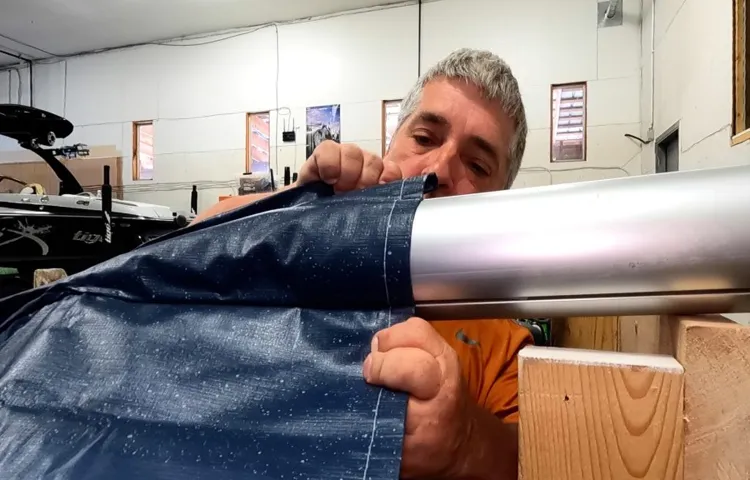
Securing the Fabric to the Roller Tube
attaching new fabric, securing fabric, roller tube When it comes to replacing the fabric on your roller shades, securing it to the roller tube is a crucial step. After all, you want to make sure that the fabric is properly attached so that it doesn’t come loose or unravel over time. The good news is that attaching the new fabric is actually easier than it may seem.
To begin, you’ll need to unroll the fabric and line it up with the roller tube. Once the fabric is in the correct position, you can start attaching it by using a combination of adhesive and screws. The adhesive will provide a strong bond between the fabric and the roller tube, while the screws will help to secure it in place.
It’s important to use a strong adhesive that is specifically designed for this purpose, as it will ensure a long-lasting and secure attachment. Additionally, make sure to use screws that are the appropriate size and type for your roller tube. By following these steps, you can rest assured that your new fabric will be properly attached to the roller tube, providing you with beautiful and functional roller shades for years to come.
Installing the Tension Rafter
“To attach the new fabric to the tension rafter, you’ll need a few tools and a little bit of patience. Start by laying the fabric out underneath the rafter, making sure it is centered and straight. Then, begin attaching the fabric to the rafter using a staple gun or another type of fastener.
Make sure to space the staples evenly and secure the fabric tightly to the rafter. This will help ensure that it is secure and won’t come loose. Once you have attached the fabric all the way across the rafter, trim any excess fabric using a pair of scissors.
This will give the tension rafter a clean and professional look. With the new fabric securely attached, you can now enjoy a shaded and comfortable outdoor space.”
Finishing Touches
If you’re looking to spruce up your RV and save some money at the same time, replacing the awning fabric yourself is a great DIY project. Not only will it give your RV a fresh new look, but it will also protect you from the sun and give you some much-needed shade on those hot summer days. So how do you go about replacing the awning fabric yourself? First, gather all the necessary tools and materials, including a ladder, a wrench, a screwdriver, and the new awning fabric.
Start by carefully removing the existing fabric, making sure to save any screws or hardware that may need to be reused. Next, measure the width and length of the awning frame to determine how much new fabric you’ll need. Once you have the measurements, cut the new fabric to the appropriate size, leaving a little extra on each side for a snug fit.
Now it’s time to attach the new fabric to the frame. Start with one end and work your way across, using the screws and hardware you saved earlier. Make sure to pull the fabric tight as you go to prevent sagging.
Once the fabric is securely attached, give it a test run by retracting and extending the awning a few times to make sure everything is functioning properly. And just like that, you’ve replaced your RV awning fabric all by yourself!
Testing the Operation of the Awning
“Awning operation testing and the finishing touches are crucial steps in ensuring the successful installation of an awning system. Once the awning is securely attached to the structure, it’s time to put it to the test. This involves retracting and extending the awning to check for smooth and seamless operation.
Does it extend fully without any sticking or jamming? Does it retract smoothly into its closed position? These are important questions to consider. Additionally, checking the alignment of the awning fabric and making any necessary adjustments is essential for a polished final result. This ensures that the awning hangs evenly and neatly, enhancing both its appearance and functionality.
The finishing touches also include tidying up any loose threads or extra fabric, as well as ensuring all components are securely fastened. By paying attention to these details, you can have confidence in the performance and longevity of your awning system. It’s time to step back and admire the completed project, knowing that it will provide shade, shelter, and style for many years to come.
“
Making Any Necessary Adjustments
making necessary adjustments, finishing touches In the final stages of any project or task, it’s important to take the time to make any necessary adjustments and add those finishing touches. These small but crucial steps can truly make a difference in the overall outcome. Think of it like putting the cherry on top of a sundae – it’s that final touch that brings everything together and completes the picture.
Whether you’re working on a creative project, a report, or even just organizing your workspace, taking the time to make these adjustments ensures that everything is in its rightful place and that you’re presenting your best work possible. It’s easy to overlook these details, especially when you’re anxious to finish or move on to the next thing, but resisting that urge and giving it that extra attention will pay off in the long run. So, before you consider your task complete, take that extra step and make those necessary adjustments.
Remember, it’s those finishing touches that can make all the difference.
Conclusion
So there you have it, a step-by-step guide on how to replace your RV awning fabric all by yourself. By following these simple instructions, you can save yourself the hassle and expense of hiring a professional. Plus, you’ll have the satisfaction of knowing that you accomplished this task on your own.
Now, some might say that replacing RV awning fabric is no easy feat, but with a little elbow grease and determination, you’ll be able to tackle this DIY project like a pro. And who knows, maybe you’ll even impress your camping buddies with your newfound skills. But remember, this is not a job for the faint of heart.
It requires patience, precision, and a good amount of problem-solving skills. So strap on your tool belt, grab a cold drink, and get ready to tackle this challenge head-on. But don’t let the idea of replacing your awning fabric scare you off from enjoying the great outdoors.
Once you’ve completed this project, you’ll be able to relax under your new and improved awning, sipping a cold beverage, and basking in the glory of your DIY triumph. So go ahead, take the plunge and replace your RV awning fabric by yourself. You’ll be glad you did, and your awning will thank you for it.
Now, go out there and enjoy your next camping adventure in style!”
Enjoy Your New RV Awning Fabric
“rv awning fabric” So you’ve just installed your brand new RV awning fabric – congratulations! Now it’s time to add those finishing touches that will make your RV awning truly stand out and enhance your outdoor living space. One of the easiest ways to add some flair is by using decorative accents such as lights or hanging plants. These can provide a warm and welcoming feel, especially in the evenings when the sun has set.
Another option is to add some personalization with a custom-made awning cover, featuring your RV’s name or a favorite design. This not only adds a touch of personality but also protects your new awning fabric from sun damage and wear. Finally, don’t forget to keep your new awning fabric clean and well-maintained with regular washing and proper storage.
Taking these steps will ensure that your RV awning fabric remains in top condition for years to come, allowing you to enjoy the great outdoors in style and comfort.
FAQs
How long does it take to replace RV awning fabric?
The time it takes to replace RV awning fabric can vary depending on your experience level and the specific awning system. It can take anywhere from a couple of hours to half a day.
Do I need any special tools to replace RV awning fabric?
Yes, you will need some basic tools such as a ladder, screwdriver, pliers, and a utility knife. Additionally, you may need a cordless drill or wrench if your awning system has fasteners that require it.
Can I replace the awning fabric myself or should I hire a professional?
You can replace the RV awning fabric yourself if you are comfortable working with tools and following instructions. However, if you are unsure or not confident in your abilities, it may be best to hire a professional to ensure it is done correctly.
How much does it cost to replace RV awning fabric?
The cost of replacing RV awning fabric can vary depending on the size of your awning, the type of fabric you choose, and if you do it yourself or hire a professional. On average, it can cost anywhere from $200 to $500.
Can I use any fabric to replace my RV awning fabric?
It is recommended to use fabric specifically designed for RV awnings to ensure the best fit and durability. These fabrics are typically UV-resistant and have the necessary reinforcements for the awning system.
Can I replace just a section of the RV awning fabric?
In most cases, it is not possible to replace just a section of the RV awning fabric. The fabric is usually one continuous piece that is attached to the roller tube. If a section is damaged, it is best to replace the entire fabric.
Are there any maintenance tips to extend the lifespan of my RV awning fabric?
Yes, there are a few maintenance tips to help extend the lifespan of your RV awning fabric. Regularly inspect and clean the fabric, avoid using harsh cleaning chemicals or scrub brushes, retract the awning during severe weather or when not in use, and periodically lubricate any moving parts of the awning system.