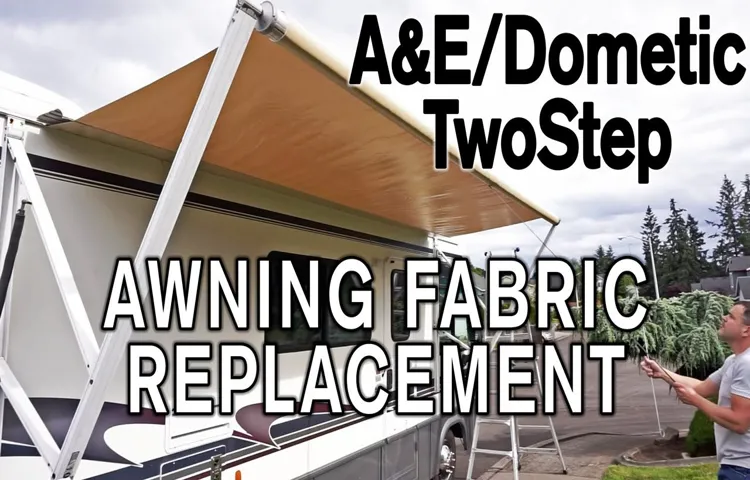
Are you tired of your old RV awning fabric looking faded and worn out? Well, why not consider replacing it with a brand new one? Replacing the fabric on an electric awning can give your RV a fresh, updated look and also improve its functionality. Plus, it’s a relatively straightforward process that you can easily do yourself, saving you time and money. When it comes to replacing RV awning fabric on an electric awning, there are a few things you need to consider.
Firstly, you’ll need to measure your awning to ensure you purchase the correct size fabric. Secondly, you’ll need to choose the right type of fabric for your needs. There are various options available, including vinyl, acrylic, and polyester.
Each has its own benefits and drawbacks, so it’s important to choose one that suits your preferences and budget. Once you have the fabric and measurements sorted, the actual process of replacing the awning fabric is fairly simple. You’ll need a few basic tools, such as a ladder, a screwdriver, and some adhesive.
Start by retracting the awning fully and removing any screws that are holding the old fabric in place. Then, carefully remove the old fabric by sliding it out of the awning rail. Once the old fabric is removed, you can then slide the new fabric into place and secure it using the adhesive and screws.
Replacing the awning fabric on an electric awning is not only a practical task but also an opportunity to add some personal style and flair to your RV. With a wide range of colors and patterns available, you can choose a fabric that complements the overall aesthetic of your RV and reflects your individual taste. Whether you prefer bold and vibrant colors or a more muted and neutral palette, there’s a fabric option out there for you.
In conclusion, replacing RV awning fabric on an electric awning is a simple and rewarding task that can breathe new life into your RV. By following a few basic steps and choosing the right fabric, you can transform the look of your RV while also improving its functionality. So why wait? Start shopping for your new awning fabric today and get ready to enjoy all the benefits of a fresh and stylish RV awning.
Table of Contents
Section 1: Tools and Materials Needed
Replacing the fabric on an electric RV awning may seem like a daunting task, but with the right tools and materials, it can be a relatively simple process. To begin, you will need a few key items. First, you will need the replacement fabric specifically designed for your awning.
It’s important to ensure that you have the correct size and style to fit your awning properly. You will also need a ladder or step stool to reach the awning, as well as a socket wrench or drill with the appropriate bit to loosen and tighten any screws or bolts. Additionally, having a helper can make the process go much smoother, as they can assist with holding the awning in place while you remove and replace the fabric.
Finally, having a clean work area and some basic hand tools such as pliers and a utility knife will also be helpful. With these tools and materials, you will be well on your way to replacing the fabric on your electric RV awning.
Awning Fabric Replacement Kit
In order to successfully replace the fabric on your awning, you’ll need to have a few essential tools and materials on hand. First and foremost, you’ll need a sturdy ladder or scaffolding to safely access the awning. It’s important to prioritize safety during this process, so make sure your ladder is stable and secure before climbing up.
Additionally, you’ll need a set of basic hand tools, such as a screwdriver and pliers, to remove any screws or fasteners that are holding the old fabric in place. A good fabric adhesive or double-sided tape will also be necessary to attach the new fabric to the awning frame. And of course, you’ll need the replacement fabric itself.
Make sure to measure the dimensions of your awning before purchasing new fabric to ensure a proper fit. Once you have all the necessary tools and materials, you’ll be ready to tackle the awning fabric replacement project with confidence.
Safety Equipment
safety equipment Section 1: Tools and Materials Needed When it comes to working safely, having the right tools and equipment is essential. Whether you’re a professional or a DIY enthusiast, there are a few key items you should always have on hand to ensure your safety. One of the most important pieces of safety equipment is a pair of protective gloves.
These will not only protect your hands from cuts and scrapes, but also from chemical spills and burns. Another crucial tool is a pair of safety glasses or goggles. These will shield your eyes from flying debris, sparks, and harmful chemicals.
Additionally, a well-fitting dust mask is necessary when working in dusty environments to protect your lungs. And for those working with power tools, ear protection is a must to guard against hearing damage. Finally, a good first aid kit should always be nearby, just in case of any accidents or injuries.
It’s important to remember that safety should always be a top priority, and having the right tools and equipment is a key part of ensuring a safe working environment.
Step Ladder
When it comes to tackling tasks around the house, having the right tools and materials is essential. And if you’re working at heights, a step ladder is a must-have. A step ladder is a versatile tool that allows you to safely reach high places without any hassle.
Whether you’re changing a lightbulb, reaching for something on a high shelf, or painting a wall, a step ladder will make your job much easier. To ensure your safety, choose a ladder that is sturdy and stable. Look for one with non-slip feet and a weight capacity that suits your needs.
Additionally, make sure the ladder is the correct height for the task at hand. With a high-quality step ladder, you can tackle any job with confidence and ease.
Screwdriver
screwdriver If you’re planning on doing some DIY projects or fixing things around the house, having a screwdriver is an essential tool. It’s something that you’ll find yourself reaching for time and time again. But what exactly is a screwdriver and what do you need to have in order to use one? Well, it’s a simple hand tool that is used for turning screws.
It has a handle that you hold and a shaft that is used to twist the screw. There are different types of screwdrivers, depending on the type of screw you’re working with. The most common ones are the flathead and Phillips head screwdrivers.
The flathead screwdriver has a flat, slotted tip and is used for screws with a single vertical line. The Phillips head screwdriver has a four-star shape and is used for screws with a cross-shaped indentation. To use a screwdriver, you also need to have the right size bit.
The bit is the part that actually fits into the screw head and allows you to turn it. Having a variety of screwdrivers and bits in different sizes can ensure that you have the right tool for any job. So, make sure you have a screwdriver in your toolbox because you never know when you’ll need to tighten a loose screw or replace one.
Pliers
pliers When it comes to DIY projects or fixing things around the house, having the right tools can make all the difference. One tool that is a must-have in any toolbox is a pair of pliers. Pliers are a versatile tool that can be used for a variety of tasks, from gripping and holding objects to cutting wires.
They have a unique design with two handles that are joined together at a pivot point, allowing you to easily apply force and manipulate objects. Pliers come in different shapes and sizes, each designed for a specific purpose. For example, needle-nose pliers have long, thin jaws that are ideal for reaching into tight spaces, while slip-joint pliers have an adjustable pivot point that allows you to use them for a range of tasks.
Investing in a good pair of pliers is essential for any DIY enthusiast or handyman. Whether you’re fixing a leaky faucet, repairing a piece of furniture, or working on electrical wiring, pliers are a tool that you’ll reach for time and time again. So next time you’re taking on a DIY project, make sure to have a trusty pair of pliers by your side.
Tape Measure
Tape measures are an essential tool for any DIY enthusiast or professional craftsman. They allow for precise measurements and accurate cuts, making them indispensable for a wide range of projects. When it comes to choosing the right tape measure, there are a few factors to consider.
First, think about the length of the tape measure. For most projects, a tape measure that is at least 25 feet long is sufficient. However, if you often work on larger projects, you may want to invest in a longer tape measure.
Another important consideration is the durability of the tape measure. Look for one that is made from a strong material, such as steel or fiberglass, and has a sturdy casing to protect it from damage. Additionally, consider the markings on the tape measure.
Look for clear, easy-to-read markings that are labeled in both inches and centimeters. This will make it easier to take accurate measurements. Finally, don’t forget to check the locking mechanism.
A good tape measure should have a reliable locking mechanism that securely holds the tape in place while you take measurements. By considering these factors, you can choose a tape measure that is perfect for your needs and ensures accurate measurements every time.
Section 2: Removing the Old Awning Fabric
When it comes to replacing the fabric on an electric RV awning, you’ll first need to remove the old fabric. This can be done by following a few simple steps. First, make sure the awning is fully extended to expose the fabric.
Next, locate the screws or bolts that hold the fabric in place on the roller tube. Carefully remove these screws or bolts, being sure to keep track of them as you will need them later. Once the screws or bolts are removed, you can gently slide the old fabric off the roller tube.
Be cautious not to tear or damage the fabric as you remove it. Once the old fabric is completely removed, you can move on to installing the new fabric. But that’s a topic for another section!
Step 1: Extend the awning fully
When it comes to giving your backyard a fresh new look, replacing the old awning fabric is a great place to start. In this blog section, we will focus on step one of the process: extending the awning fully. This may sound like a simple task, but it is an essential step that ensures you have enough space to work with when removing the old fabric.
So, how do you go about extending the awning fully? Well, it’s as easy as using the manual or motorized controls to roll out the awning until it reaches its maximum extension. This will provide you with the necessary room to maneuver and access the fabric that needs to be replaced. So don’t skip this step! Take the time to extend the awning fully before moving on to the next stage.
Step 2: Locate the awning arms
In order to replace your old awning fabric, you first need to locate the awning arms. These arms are what hold up the fabric and control its movement. Finding them is usually quite easy, as they are typically located on the sides of the awning.
They are usually attached to the frame and extend outwards when the awning is extended. Once you have located the arms, you can move on to the next step in the process of replacing the fabric.
Step 3: Remove the end caps
In this step, we will be removing the end caps of the old awning fabric. The end caps are the small, plastic pieces that cover the ends of the awning and hold the fabric in place. They can usually be found on both ends of the awning, where it connects to the support arms.
To remove the end caps, you will need a screwdriver or a similar tool. Look for the screws or fasteners that are holding the end caps in place. These may be located on the top or bottom of the end caps, or on the sides.
Carefully loosen and remove the screws, being careful not to damage the surrounding area or the fabric of the awning. Once the screws are removed, you should be able to gently pry off the end caps. If they are stuck, you may need to use a bit more force, but be careful not to break them.
Once both end caps are removed, you can set them aside as you will need to reinstall them later. Removing the end caps is an important step in the process of replacing the awning fabric. It allows you to easily access the fabric and remove it from the support arms.
By following this step, you are one step closer to giving your awning a fresh, new look.
Step 4: Disconnect the awning fabric from the roller tube
To remove the old awning fabric, you’ll need to disconnect it from the roller tube. This is an important step that requires some care and attention to detail. Start by fully extending the awning so that the fabric is taut and easy to work with.
Then, locate the awning rail and carefully remove any screws or fasteners that are holding the fabric in place. Once the fabric is no longer attached to the rail, you can start disconnecting it from the roller tube. This may involve removing a end cap or bracket that is holding the fabric in place.
Take your time and be gentle, as you don’t want to damage the fabric or any other components of the awning. Once the fabric is free from the roller tube, you can move on to the next step of the awning replacement process.
Step 5: Remove the awning fabric from the RV
One of the most crucial steps in replacing an RV awning is removing the old awning fabric. This process requires careful attention to avoid any damage to the rest of the RV or the new fabric. Start by retracting the awning fully, ensuring that the arms are locked in place.
Then, locate the screws or bolts that secure the fabric to the awning arms. Carefully unscrew or unbolt them, making sure to keep track of all the fasteners. Gently pull the fabric off the awning, being cautious not to snag it on any sharp edges.
Once the fabric is removed, inspect it for any tears or damage that may have caused it to need replacement. Overall, removing the old awning fabric is a straightforward process, but it requires patience and attention to detail to ensure a successful replacement.
Section 3: Installing the New Awning Fabric
Replacing the fabric on your electric RV awning may seem like a daunting task, but with a little guidance, it can be a straightforward process. First, gather all the necessary tools and materials you’ll need, such as a ladder, a utility knife, a tape measure, and the new fabric. Start by retracting the awning fully and then disconnecting the power source to ensure safety.
Next, remove the end caps of the awning and carefully slide the old fabric out of the roller tube. Measure the length and width of the old fabric to ensure you get the correct size for the replacement. Once you have the new fabric, slide it into the roller tube and align it properly.
Make sure the awning is fully retracted before reattaching the end caps and reconnecting the power. Lastly, extend the awning to make sure the fabric operates smoothly. With these simple steps, you can easily replace the fabric on your electric RV awning and enjoy a fresh new look for your outdoor space.
Step 1: Measure the new awning fabric
measure new awning fabric
Step 2: Attach the new awning fabric to the RV
Installing the new awning fabric to your RV can seem like a daunting task, but with a few simple steps, you’ll have it looking good as new in no time. The first step is to gather all the necessary tools and materials, including the new awning fabric, a ladder, a cordless drill, and some screws. Once you have everything you need, it’s time to get started.
First, make sure that the awning is fully retracted and locked in place. Then, carefully remove the old awning fabric by unscrewing it from the RV. Take note of how the fabric was attached, as this will help you when it comes time to install the new fabric.
After the old fabric is removed, lay the new fabric out flat and ensure that it is the correct size for your awning. Next, position the fabric over the RV, making sure that it is aligned properly. Use the cordless drill to screw the new fabric into place, following the same pattern as the old fabric.
Take your time and ensure that the fabric is secure and tight, as this will help prevent it from sagging or ripping in the future. Once the fabric is attached, give it a test run by extending and retracting the awning to make sure everything is working properly. With a little bit of patience and some DIY spirit, you’ll have a brand new awning fabric that will provide shade and protection for years to come.
Step 3: Attach the new awning fabric to the roller tube
After removing the old awning fabric, it’s time to attach the new fabric to the roller tube. This step is crucial to ensure a secure and sturdy installation. Start by aligning the hemmed edge of the fabric with the roller tube and make sure it is centered.
Then, use a cord or rope to lace through the fabric’s grommets and the roller tube’s grooves. This will help hold the fabric in place and prevent any sagging or slippage. Take your time and make sure each grommet is securely laced, evenly distributing the fabric along the roller tube.
Once all the grommets are laced, tie a knot at the end of the cord or rope to secure it in place. Give the fabric a gentle tug to ensure it is tightly attached. By following these steps, you will successfully attach the new awning fabric to the roller tube, providing you with a functional and aesthetically pleasing outdoor space.
Section 4: Reassembling the Awning
Replacing the fabric on an electric RV awning may seem like a daunting task, but with a little know-how, it can be easily accomplished. Once you have removed the old fabric and cleaned the awning frame, it’s time to reassemble everything. Begin by preparing the new fabric by attaching the beaded edge to the awning rail.
This can be a little tricky, but with some patience and persistence, it will slide into place. Next, carefully roll out the fabric along the length of the awning, making sure it is centered and straight. Use the roller tube to fold the fabric over the awning, securing it in place with the retainer screws.
Take care not to over tighten the screws, as this can damage the fabric. Finally, test the functionality of the awning by extending and retracting it a few times to ensure everything is working properly. Now you can sit back and enjoy your newly replaced RV awning fabric, ready to provide shade and protection on your next adventure.
Step 1: Extend the awning partially
Step 1: Extend the awning partially Welcome back to our series on assembling your awning! In this section, we’ll be covering the fourth step, which is reassembling the awning. So, let’s get started! The first thing you’ll want to do is extend the awning partially. This will allow you to easily access and work on the various components without the full weight of the awning hanging over you.
To do this, slowly and carefully extend the awning outwards, stopping when you reach a comfortable level. By extending the awning partially, you’ll be able to get a better view of the inner workings and make any necessary adjustments or repairs more easily. It also reduces the risk of injury, as you won’t be straining to reach certain parts or risking a sudden collapse of the awning.
So, take your time and make sure the awning is extended to a safe and manageable level before moving on to the next step. Remember, it’s better to be cautious and take your time to ensure a job well done, rather than rushing and potentially making mistakes. That’s it for this step! In the next section, we’ll be covering how to reattach the arms and secure the awning in place.
Stay tuned for more helpful tips and tricks to successfully reassemble your awning.
Step 2: Reattach the end caps
In the final step of reassembling your awning, it’s time to reattach the end caps. These caps are an essential part of the awning as they provide a finished look and help to secure the fabric in place. To reattach the end caps, start by locating the holes on both ends of the awning.
These holes are where the end caps will be secured. Once you have found the holes, take one of the end caps and line it up with the corresponding hole. It’s important to ensure that the end cap is aligned correctly to prevent any issues with the awning later on.
Once the end cap is lined up, gently push it into place, making sure that it is secure. Repeat this process for the other end of the awning, ensuring that both end caps are securely attached. With the end caps in place, your awning is now fully reassembled and ready to be enjoyed once again.
So go ahead and step back to admire your handy work – you’ve successfully reassembled your awning!
Step 3: Secure the awning arms
reassembly of the awning, securing the awning arms
Conclusion: Enjoying Your New RV Awning Fabric
And there you have it! With these easy-to-follow steps, replacing the fabric on your electric RV awning can be a breeze. No need to stress or struggle with your old worn-out fabric any longer. So go ahead, unleash your inner handyman/woman, and enjoy the satisfaction of a job well done! Don’t forget to strut your stuff at the next RV park, because now you can proudly say, ‘I can change an RV awning fabric like a pro!’ Happy camping and may your adventures always be shady (in the most stylish way, of course)!
FAQs
How do I replace the fabric on my RV awning with an electric awning?
To replace the fabric on your RV awning with an electric awning, you will need to first remove the old fabric by carefully unrolling the awning and removing any screws or fasteners holding it in place. Then, measure the dimensions of the old fabric to ensure you purchase the correct size replacement. Next, attach the new fabric to the awning rail, making sure it is aligned properly. Finally, roll up the awning and secure it in place, testing it to ensure it operates smoothly.
Can I replace the fabric on my electric awning myself?
Yes, you can replace the fabric on your electric awning yourself. While it may require some time and effort, it can save you money compared to hiring a professional. Just make sure to follow the manufacturer’s instructions and take proper safety precautions when working at heights.
How often should I replace the fabric on my electric awning?
The lifespan of the fabric on an electric awning can vary depending on usage, weather conditions, and overall maintenance. However, a general guideline is to replace the fabric every 5-7 years, or sooner if you notice signs of wear and tear such as fading, fraying, or mold/mildew growth.
What tools do I need to replace the fabric on my electric awning?
To replace the fabric on your electric awning, you will typically need a ladder or scaffolding for access, a screwdriver or drill to remove any screws or fasteners, measuring tape to ensure the correct size replacement fabric, and a helper to assist with holding the awning while you work.
Can I choose a different color or pattern for my replacement fabric?
Yes, you can often choose a different color or pattern for your replacement fabric to give your RV a fresh new look. Most manufacturers offer a variety of options to suit different tastes and preferences.
Are there any special considerations for replacing fabric on an electric awning?
When replacing the fabric on an electric awning, it is important to disconnect the power source to ensure safety. Additionally, be cautious of any specific instructions or recommended techniques provided by the manufacturer to ensure proper installation and operation.
Can I hire a professional to replace the fabric on my electric awning?
If you are not comfortable or confident in replacing the fabric on your electric awning yourself, you can certainly hire a professional. They will have the necessary experience and tools to complete the job efficiently and effectively.